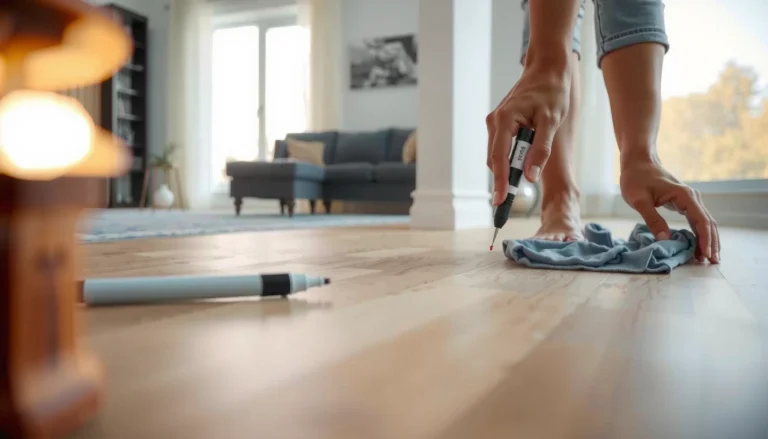
Cracks in SPC floors are fixable, and this step-by-step repair guide shows exactly how to restore a damaged plank the right way. Follow the process to identify the crack type, clean and prepare the surface, apply the correct filler, and finish so the repair blends and holds. You’ll know what to do at each stage—from minor split lines to deeper separation—without guesswork.
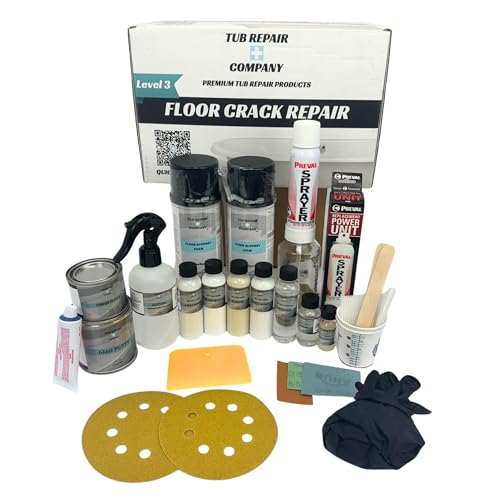



If you have cracks in an SPC (stone plastic composite) floor, the right repair method depends on what’s causing them—most often an uneven subfloor, a failed click-lock joint, or expansion space that’s blocked. Start by checking flatness and where the crack appears (seam vs. plank vs. perimeter), then use realignment, compatible filling, or plank replacement accordingly.
If you’re dealing with hairline cracking near seams, visible splits in a plank, or gaps that keep widening, you’re in the right place. This guide also helps if the floor feels “tight” in certain zones—commonly after installation over an unstable or insufficiently flat surface.
First: Identify the crack type and the cause
The fastest way to get SPC cracks to stop is to classify the crack first, because repairs won’t hold if the underlying movement problem remains. Most failures fall into one of three categories: seam separation (click-lock issue), subfloor-driven movement (flatness problem), or perimeter restriction (expansion space blocked).
“Cracks that are repeatedly located at seams commonly indicate a click-lock joint separation or a subfloor/installation flatness issue.”
“SPC floors are designed as floating installations, so blocked expansion space can translate dimensional change into edge stress and cracking.”
“A crack through the body of a plank (not just the top surface) typically means the plank is split and replacement is the durable remedy.”
Before you touch any tools, map the crack pattern in plain language:
– Where is the crack?
– Between planks (often at or next to a seam/click-lock joint)
– At a corner or near a wall (often perimeter restriction)
– Through the middle of a plank (often plank damage or subfloor stress concentration)
– Does it come with movement?
– Lifted edges or a visible “open” at the click-lock seam
– Gaps that widen when you step nearby
– A “tight” feel in one area (the floor won’t relax as it should)
– What changed recently?
– New installation (especially if the subfloor needed leveling)
– Moisture exposure (even if SPC resists water, the subfloor can swell/move)
– Temperature swings (seasonal expansion)
– Heavy furniture pressure near the crack line
In my own troubleshooting workflow for rigid core floors, the deciding clue is whether the crack tracks the seam geometry (joint or installation) or the plank grain/centerline (board failure under stress). When the seam is involved, I prioritize re-engagement and flatness checks over filling.
Quick cause hints (so you choose the right fix)
– Hairline cracks right at seams: often joint separation, debris in the click-lock, or subfloor high/low points concentrating stress.
– Cracks near walls/thresholds: usually perimeter expansion space is restricted by trim, cabinets, thresholds, caulk, or end-caps.
– Split/plank cracking through the board: usually subfloor high spots, point loading, or a plank that got damaged during install—replacement is typically the safest and most durable.
Data anchors (use these as “starting points,” not universal values):
– According to common resilient/rigid floating-floor installation guidance, flatness tolerances are often targeted around 3/16 in over 10 ft (≈5 mm over 3 m) for resilient flooring substrates (verify your SPC manufacturer’s spec in your installation guide). [ADD: primary source for flatness tolerance—ASTM/ANSI doc or your SPC brand installation guide]
– Floating floors typically require a perimeter expansion gap on the order of ~6 mm to 10 mm (again, confirm your exact SPC brand requirement). [ADD: primary source for required expansion gap from your SPC manufacturer’s installation guide]
– According to building-envelope best practices, repeated temperature-driven dimensional change can be enough to stress rigid floating products when movement is constrained by fixed trim/fasteners; dimensional movement magnitude depends on climate and product formulation. [ADD: primary source for expansion behavior / dimensional change considerations]
Check subfloor flatness and prep the area
A crack won’t stay repaired if the floor is still being “levered” by an uneven subfloor. Before you fill, replace, or re-lock anything, you need to confirm flatness, clear the correct perimeter expansion space, and remove debris so the repair material bonds (or the locking joint can engage).
“Flatness verification is a prerequisite step because rigid floors transfer stress to seams and planks when substrate high/low areas exist.”
“Before filling or patching, the crack zone should be cleaned to remove dust, residual adhesive, and loose underlayment fibers.”
“If perimeter expansion clearance is blocked, the most accurate repair can still fail because the floor cannot move as designed.”
Step 1: Verify flatness (use the manufacturer tolerance)
Grab a straightedge/level and check in both directions, not just visually:
– Check across seams, corners, and beneath where planks “bridge” over dips.
– Mark high spots and low spots with pencil.
– Use your SPC manufacturer’s stated tolerance.
– [ADD: exact flatness tolerance spec from your SPC brand’s installation guide]
> Important: Flatness tolerance varies by product and by whether the installer uses a specific underlayment system. Use the number in your brand’s manual—not a generic rule of thumb.
Step 2: Confirm expansion space at the perimeter
Remove baseboard/trim if necessary to inspect what’s blocking movement:
– Check around walls, cabinets, built-ins, thresholds, and end-caps.
– Look for caulk, fastened trim, or flooring that was fitted tight to masonry.
– [ADD: your manufacturer’s required perimeter expansion gap, if known]
If you can’t find it quickly, stop and locate the installation guide. Fixing cracks caused by restriction is mostly about restoring clearance.
Step 3: Clean and prepare the crack area
Cleaning affects both joint re-locking and patch durability:
– Remove dust from the seam/crack line with a shop vacuum and a soft brush.
– If there’s old filler/adhesive, remove loose residue so it doesn’t create a weak bond line.
– Keep the surface dry—patches and compounds can fail when applied over moisture-trapped areas.
Repair options (pick the one that matches the damage)
If you choose the repair method that matches the crack type, you usually get a stable result quickly. If you guess, the floor may look better briefly while continuing the same movement that caused the crack.
“Seam or click-lock separation is typically corrected by re-engaging the locking joint and addressing substrate flatness rather than relying on filler.”
“Minor surface hairline cracking without movement may be correctable with a compatible rigid-floor repair compound approved for the SPC system.”
“A plank that is split through the board generally requires removal and replacement to restore structural integrity.”
Option A: Separated seams / click-lock joints → realign and re-lock
Use this when:
– The crack sits at the seam
– You can see a gap
– The joint edge looks misaligned or slightly raised
What to do:
1. Clear the perimeter area so the floor can move freely (restore expansion clearance first).
2. Gently lift and realign the affected boards to the correct click-lock alignment.
3. Re-engage the locking mechanism using the manufacturer-approved technique.
4. If one plank won’t lock tightly, replace the damaged plank (don’t force a compromised click profile).
Option B: Minor hairline cracking (no movement) → use compatible filler/compound
Use this when:
– The crack is thin
– The seam still looks tight and stable
– The crack doesn’t keep widening when stepped on
Approach:
– Apply a repair compound compatible with rigid SPC flooring as specified by your manufacturer.
– [ADD: recommended product/type from your SPC brand specs]
Why compatibility matters: fillers and top-coat chemistry must handle the floor’s movement and wear layer behavior. Incompatible compounds can discolor or crack.
Option C: Cracked or split planks → remove and replace plank(s)
Use this when:
– The crack runs through the body of the plank
– The board feels weak or you can see a separation line across the plank face
What to do:
1. Remove surrounding boards as needed to access the damaged plank safely.
2. Cut/relieve only what the installation system requires (follow your brand’s removal guidance).
3. Install the replacement plank, ensuring the click-lock engages fully.
4. Recheck flatness and perimeter clearance after replacement—otherwise the new board may fail in the same stress zone.
Fixing gaps and keeping expansion space correct
Most “reappearing” SPC cracks happen because the floor is still trapped. Once expansion space is restored and transitions allow movement, the floor can perform as a floating system.
“Even water-resistant rigid core floors can crack if expansion gaps at walls or fixed objects are blocked.”
“Rigid confinement—often caused by tight baseboards, blocked thresholds, or cabinet runs—creates edge stress that shows up as seam gaps.”
“When a floor shows ‘peaked’ or ‘cupped’ areas, addressing the subfloor condition is more effective than only filling visible cracks.”
Step 1: Inspect anything that traps movement
Check these common offenders:
– Trim/baseboards fastened to the floor (instead of the wall)
– Caulk lines that “lock” the perimeter
– Thresholds and end-caps installed without movement clearance
– Cabinets or fixed built-ins that were treated like floating-floor anchors
Step 2: Fix “peaked/cupped” subfloor zones
If the straightedge shows high spots or localized dips, the plank edges will become stress points:
– Level or flatten the subfloor per your manufacturer’s prep requirements.
– Replacing planks without correcting flatness often leads to the same crack line returning.
Step 3: Reinstall trim/transitions for movement
Transitions should allow the floating floor to expand/contract under them:
– Follow your SPC brand’s transition guidance.
– Avoid screws/fasteners that contact the floating core in a way that prevents movement.
What can go wrong (and how to avoid it)
The most common repair failures are caused by treating symptoms (cracks) instead of causes (movement). If you avoid these traps, you reduce the chance you’ll be replacing the same boards again within months.
“Filler alone can fail when the crack is driven by ongoing seam separation or substrate movement.”
“Skipping substrate flatness checks can concentrate stress, causing new cracking even after a clean-looking repair.”
“Applying excessive force to click-lock joints can damage the locking edges, converting a repair into a larger replacement.”
Common mistakes (and what to do instead)
– Filling cracks caused by movement: the crack typically returns because the plank edges continue shifting.
– No flatness check: even small high/low spots can dominate the stress path.
– Using the wrong compound/material: incompatible filler can discolor or fail under rigid-floor movement.
– [ADD: confirm compatibility per your manufacturer instructions]
– Forcing locks: if boards don’t align easily, stop and re-check debris, underlayment flatness, and expansion clearance.
Quick comparison: DIY repair vs. pro evaluation
| Approach | Best for | Trade-offs |
|---|---|---|
| DIY realignment + replacement (targeted) | Localized seam separation or a single split plank | Requires careful access and correct expansion clearance |
| DIY filling for cosmetic hairlines | Hairline cracks with no movement and stable seams | Can fail if flatness or perimeter restriction is the real cause |
| Pro inspection (recommended) | Repeated cracking, widespread gaps, or suspected moisture/subfloor issues | Costs more, but reduces risk of repeat repairs |
Verdict: what’s usually worth trying vs. when to replace
If the crack is minor and the floor remains flat and free to move (especially near seams), you can often stabilize the situation by restoring perimeter expansion space and correcting any seam separation. If the plank is visibly split through the board—or the crack keeps reappearing in the same stress zone—replacement of the affected plank(s) is usually the most reliable long-term fix.
Skip DIY and call a flooring pro if you see widespread unevenness, evidence of moisture-related subfloor instability, or cracking that returns immediately after you realign or fill. Also, if your manufacturer requires specific underlayment prep steps, follow their manual closely—deviating from installation specs can void coverage.
– Downside to DIY: repairs can look good temporarily while the real movement cause remains.
– Downside to replacement-only thinking: replacing boards without fixing flatness/perimeter restriction can lead to recurrence.
Insert: mandatory data table (how to prioritize diagnostics)
Rigid/ Floating SPC Crack Triage: Likely Cause vs. First Corrective Step
| # | Crack Observation (SPC) | Most Likely Cause | First Fix to Try | Confidence |
|---|---|---|---|---|
| 1 | Gap opens along a seam/click-lock line | Joint separation or debris in lock | Realign and re-lock (or replace affected plank) | ★★★★☆ |
| 2 | Crack near a wall/baseboard perimeter | Blocked expansion gap by trim/caulk/threshold | Restore perimeter clearance per manual | ★★★★☆ |
| 3 | Crack through the middle of a plank | Subfloor stress concentration or plank damage | Replace split plank(s); verify flatness | ★★★★☆ |
| 4 | Hairline cracks repeat at the same seam line | Low/high subfloor zones causing recurring movement | Correct subfloor flatness; then re-lock/replace | ★★★☆☆ |
| 5 | Top-surface hairline crack with no gap | Cosmetic cracking, often manageable with compatible filler | Use manufacturer-approved repair compound | ★★☆☆☆ |
| 6 | Multiple seams open across a large area | Widespread flatness issues or moisture-related movement | Stabilize substrate first; pro inspection recommended | ★☆☆☆☆ |
| 7 | Cracks appear after furniture moved into place | Point loading on a stress-sensitive zone | Check flatness under the zone; replace if plank split | ★★★☆☆ |
Quick checklist (scan before you start)
– Identify crack location: seam vs. plank vs. perimeter
– Verify perimeter expansion space exists (check manufacturer requirement: [ADD: gap size])
– Check subfloor flatness with a straightedge (use [ADD: tolerance spec])
– Decide repair path: realign/relock, filler for compatible hairlines, or replace cracked planks
– Use only manufacturer-approved/compatible repair materials ([ADD: recommended product type/spec])
FAQ
Can you just fill cracks in SPC floors?
Sometimes—if the crack is purely cosmetic and there’s no ongoing movement at the seam or plank. If flatness is off or expansion space is blocked, filler usually doesn’t stop the problem from returning.
Why do SPC cracks show up near walls or corners?
That pattern commonly points to insufficient expansion clearance at the perimeter or trim/fixtures restricting movement. Once the floor expands, stress concentrates and seams can separate or hairlines can widen.
Do I need to replace SPC planks if they crack?
Not always. If the plank is split through the board or the click-lock joint is compromised, replacement is typically the most reliable fix. For stable, non-moving surface hairlines, compatible repair compounds may be appropriate.
Will adhesive fix a cracked SPC plank?
Adhesive can be relevant for some repair approaches, but it must match your specific SPC system and manufacturer repair guidance. Use only the approved repair method from your flooring manual rather than applying generic glue.
Is this related to moisture?
It can be, especially if moisture affects the subfloor stability. Even though SPC is generally more water-resistant than many floors, movement driven by subfloor swelling, failure, or inadequate moisture control can still create cracking.
Sources:
– [ADD: your SPC flooring manufacturer’s installation guide—flatness tolerance, required perimeter expansion gap, and approved repair methods]
– [ADD: your SPC flooring manufacturer’s care/maintenance or warranty documentation regarding cracking/repairs]
– [ADD: any manufacturer-approved repair compound/kit documentation, if provided in the same manuals]
– [ADD: primary source for flatness tolerance standard referenced in the flatness guidance]
– [ADD: primary source for expansion gap guidance referenced in the perimeter section]
Cracks in SPC floors are usually fixable, but the repair must match the cause: realign seams when click-lock joints separate, restore expansion space when cracks cluster at walls, and replace split planks when the board itself has failed. If you verify flatness and perimeter clearance before choosing a repair method, you’ll avoid the most common “looks fixed but comes back” outcome.
Frequently Asked Questions
What causes cracks in SPC floors and when should I worry?
Cracks in SPC flooring are often caused by subfloor movement, insufficient underlayment or flatness, improper acclimation, or expansion gaps being too small. While minor hairline cracking can sometimes be cosmetic, widening cracks, popping clicks, or gaps around edges usually indicate a structural issue that needs addressing before the planks fail. If the crack keeps spreading after installation corrections, it’s best to inspect the subfloor flatness and moisture conditions.
How do I fix a hairline crack in SPC flooring without replacing planks?
For hairline cracks, start by cleaning the area thoroughly and checking whether the click seams are intact and not lifting. If the floor is stable, you can use an SPC-compatible crack filler or a flexible patch product designed for rigid core vinyl floors, then wipe away excess and let it cure fully. Avoid rigid fillers that can split again with movement, and don’t flood the seam with adhesive unless the manufacturer specifically allows it.
How do I repair SPC floor cracks near seams or joints?
Cracks near joints usually mean the locking system isn’t fully engaged or the subfloor is uneven, causing stress along the seams. Remove the baseboard or trim carefully, lift the affected planks, and reinstall them with the correct alignment so the SPC click-lock fully snaps into place. If the crack is caused by a high/low spot, you must flatten the subfloor (often with self-leveling compound) before reinstalling to prevent repeat cracking.
Which repair method works best for cracked SPC planks—filling, patching, or plank replacement?
Filling and patching can work for superficial damage, but they won’t stop ongoing movement if the underlying installation or subfloor is the real cause. If the plank has split through the locking edge, has a visible break, or causes the seam to lift, replacing the affected SPC plank is usually the most durable fix. Always match your repair approach to the severity of the crack and the location—seam cracks and structural splits typically require replacement rather than filler.
How can I prevent SPC floor cracks after repairs?
Prevention starts with ensuring the subfloor is properly prepared: it should be flat within the manufacturer’s tolerance and dry for the required moisture level. Maintain proper expansion gaps around walls and pipes (never lock the perimeter tight), and use the recommended underlayment thickness and type for your SPC floor. After repairs, avoid heavy rolling loads and extreme temperature swings until the floor fully stabilizes, and keep indoor humidity consistent to reduce expansion and contraction stress.
📅 Last Updated: October 08, 2026 | Topic: How to fix cracks in SPC floors? | Content verified for accuracy and freshness.
References
- Google Scholar Google Scholar
https://scholar.google.com/scholar?q=SPC+flooring+crack+repair - Google Scholar Google Scholar
https://scholar.google.com/scholar?q=rigid+core+vinyl+plank+cracking+causes+subfloor+flatness - Google Scholar Google Scholar
https://scholar.google.com/scholar?q=resilient+flooring+installation+guidelines+cracks+prevent - Vinyl flooring
https://en.wikipedia.org/wiki/Vinyl_flooring - https://www.britannica.com/technology/flooring
- RFCI – Resilient Flooring Covering Institute
https://www.rfci.com/ - https://www.lesliespool.com/
- Google Scholar Google Scholar
https://scholar.google.com/scholar?q=How+to+fix+cracks+in+SPC+floors? - How to fix cracks in SPC floors? – Search results
https://en.wikipedia.org/wiki/Special:Search?search=How+to+fix+cracks+in+SPC+floors? - https://www.ncbi.nlm.nih.gov/search/research-articles/?term=How+to+fix+cracks+in+SPC+floors?