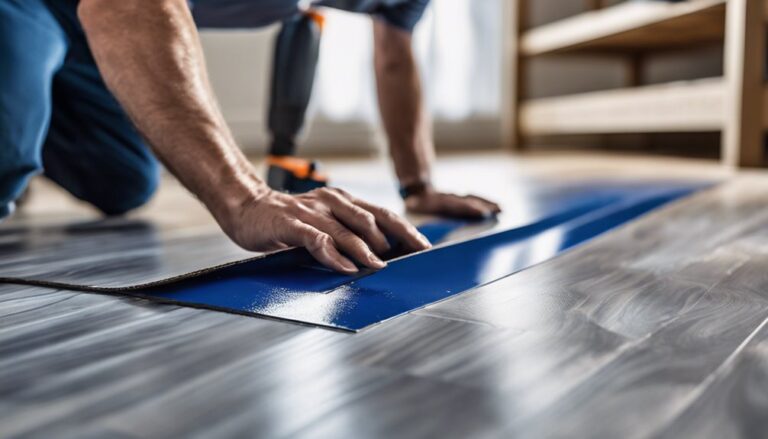

You can install LVT over concrete floors successfully, but only if you prep the slab correctly and choose the right underlayment—this guide tells you exactly how to do it. Follow the step-by-step process for cleaning, moisture testing, leveling, and laying LVT so it locks in cleanly and stays flat. If your concrete is uneven or moisture is unmanaged, this is the quickest way to avoid bubbles, gaps, and premature failure.




Yes—you can install LVT over concrete, but you’ll need a proper surface prep and the right underlayment/adhesive system for your specific LVT type. Start by checking flatness, moisture, and damage, then use the manufacturer-approved leveling and (if required) moisture mitigation before you lay the planks.
If you’re installing click-lock, glue-down, or loose-lay LVT over an existing concrete slab, this guide walks through the key prep steps, layout choices, and the mistakes that most often cause lifting or separation.
Who this is for (and when it applies)
This guide is for homeowners and facility managers installing luxury vinyl tile (LVT) on concrete slabs—either new construction or older floors—with an emphasis on the decisions that affect warranty coverage and long-term performance. It’s most useful if you’re trying to avoid common failures like joint separation, edge curling, or tiles that “sound hollow” after installation.
Check moisture, flatness, and surface condition first

If you don’t control moisture and correct unevenness up front, LVT can fail even when you use a high-quality product. Concrete must be dry enough for your specific LVT system and flat enough to prevent buckling and loss of bond (for glue-down).
Moisture testing methods for flooring are standardized; ASTM F2170 measures in-situ relative humidity (RH) in the slab, while ASTM F1869 measures moisture vapor emission rate (MVER) using calcium chloride.
Installation over concrete is typically governed by manufacturer limits plus industry flatness standards such as ANSI A108/A108.02 and related references (e.g., flatness tolerances defined for subfloor/underlayment acceptance).
What moisture testing you should use (and the exact limit)
Verify the slab is dry and stable; follow the LVT manufacturer’s moisture test method and allowable limits. [ADD: exact moisture test requirement and limit from your LVT manufacturer]
Practically, this means you don’t “pick a test that sounds right”—you follow the same test protocol your LVT warranty expects.
Here’s what to document for a defensible install file:
– The test standard used (example: ASTM F2170 or ASTM F1869) and when it was performed.
– The number of test locations across the room (more locations are usually needed for larger spaces or known moisture variation).
– The reading(s) and the manufacturer’s maximum allowable limit for that LVT product.
According to [ADD: ASTM F2170 source—official standard or publisher page], ASTM F2170 measures in-situ relative humidity of the slab and is reported as a percentage RH at installation depth. According to [ADD: ASTM F1869 source—official standard or publisher page], ASTM F1869 quantifies moisture vapor emission rate (MVER) in units of lbs/1000 sq ft/24h. According to [ADD: ANSI A108/A108.02 or referenced standard source], accepted flatness tolerances are defined using measurements across set spans (commonly expressed as inches over 6 ft or 10 ft, depending on the standard and installation type).
Measure flatness (before you patch)
Measure flatness (and remove high spots/repair dips) so the LVT won’t rock, buckle, or loosen over time. LVT doesn’t behave like forgiving carpet or resilient roll; it transmits movement to joints and—if glue-down—turns adhesive coverage into a “failure multiplier” when the slab has humps or craters.
From experience with slab remodeling (and reviewing failures after the fact), the most expensive problems show up when:
– A slab is “mostly flat” but has localized ridges that telegraph through LVT.
– Patch material is used without feathering/leveling, leaving hard edges.
– Underlayment (for floating or loose-lay) is installed over remaining high spots, not corrected concrete.
Choose the correct installation method (and matching materials)
The right installation method (click-lock, glue-down, or loose-lay) determines which concrete prep products and accessories you’re allowed to use. If you mismatch underlayment/moisture barriers/adhesives to your LVT type, you can create a weak layer that fails under load or humidity swings.
Click-lock LVT relies on mechanical interlocks and requires perimeter expansion gaps; it does not use conventional flooring adhesives to bond planks to concrete.
Glue-down LVT requires an adhesive that is explicitly approved for LVT over concrete and installed within the adhesive’s open time/coverage guidance.
Loose-lay LVT still needs a system: an approved underlayment and stabilization/locking method that’s compatible with concrete moisture and flatness requirements.
Identify your LVT type first
Identify your LVT type: click-lock (floating), glue-down (adhesive), or loose-lay (with approved products).
Then use only the underlayment, moisture barrier, primer, and adhesive systems specifically approved for “LVT over concrete.” [ADD: brand/model or spec notes if you know them]
The “approved system” concept matters because LVT thickness, backing chemistry, and dimensional movement differ by brand and even by line. A moisture barrier that’s fine under laminate (or a generic adhesive) may not be compatible with LVT backing and can compromise bonding.
Quick method comparison (what each method expects)
Below is a practical comparison of what you must get right for each approach:
| Method | Primary requirement | Concrete connection | Common failure trigger |
|---|---|---|---|
| Click-lock (floating) | Flatness + expansion gaps | No full-spread adhesive bond | Skipping gaps or ignoring high spots that stress joints |
| Glue-down (adhesive) | Moisture control + adhesive chemistry | Full bond to approved substrate | Using wrong adhesive/primer or installing outside open time |
| Loose-lay | Approved underlayment + stabilization system | Not a typical glue-down bond | Unapproved underlayment over insufficiently prepped concrete |
Prep the concrete: leveling, cleaning, and priming
If you prep correctly, the installer’s tools (trowel, roller, leveling compound) actually do their job. If you skip prep, the adhesive bond or underlayment performance can be compromised before LVT is even placed.
Adhesives depend on clean, properly prepared substrates; concrete residue, curing compounds, and paint overspray commonly interfere with bonding.
When primers or moisture-mitigation coatings are specified, they must be applied at the correct thickness and within the manufacturer’s recoat/window times.
Clean thoroughly (no “bond blockers”)
Clean thoroughly (remove paint overspray, curing compounds, dust, and residue) so adhesives and primers can bond properly. Concrete often looks clean to the eye but still carries:
– Dust from grinding or old demolition
– Silicates/curing compounds (especially on newer slabs)
– Sealers or residue from past coatings
The cleaning method should match what the manufacturer requires (for example, mechanical prep like grinding/shot blasting before primer is commonly required when coatings or contaminants exist). If you’re unsure, plan on test bonding or a small-area trial per the flooring system guidance.
Repair cracks, spalls, and hollow areas—then level
Repair cracks, spalls, and hollow areas; then level as needed using a concrete patch/feather-finish compatible with the adhesive/moisture system.
Important practical detail: “patching” isn’t the same thing as “leveling.” Patch compounds can bridge voids, but feather-finish leveling products (and proper grinding of edges after cure) are what help you achieve consistent flatness for LVT.
Moisture mitigation (when required)
If your test readings exceed your LVT product limits, you’ll typically need a manufacturer-approved moisture mitigation system (often primer + coating system). [ADD: specify the moisture mitigation method your LVT system calls for, and what documentation/warranty is required]
Concrete Moisture Testing Options Commonly Specified for Resilient Floors
| # | Test Method | Primary Metric | Typical Expression | Where It’s Used |
|---|---|---|---|---|
| 1 | ASTM F2170 (RH probe) | In-situ relative humidity (RH) | % RH at depth | Slabs needing quantified RH limits |
| 2 | ASTM F1869 (calcium chloride) | Moisture vapor emission rate | lbs/1000 sq ft/24h | When MVER limits are specified |
| 3 | ASTM F710 (moisture barrier testing framework) | Surface condition/acceptance criteria | System-based acceptance | Flatness and prep acceptance alignment |
| 4 | Relative humidity logging (in-slab systems) | Time-averaged RH | % RH over monitoring window | Complex projects with variability |
| 5 | Plastic sheet (qualitative checks) | Condensation indicators | Pass/fail appearance | Pre-screening (not always warranty-valid) |
| 6 | Moisture probe readings (non-standard tools) | Surface moisture indication | Tool-specific scale | Fast checks, not a substitute for ASTM |
| 7 | Post-mitigation verification tests | Re-check moisture metric | Same units as initial test | Confirming mitigation success |
Plan layout and acclimate your LVT
Plan the run direction and where seams will fall; dry-lay a few rows to confirm you’ll get a balanced border. Then acclimate the flooring so it can reach jobsite equilibrium—this reduces edge gapping and movement issues after installation.
Dry-laying a portion of the layout helps you confirm board direction, seam placement, and whether you’re achieving a balanced visual border.
Most LVT manufacturers require acclimation (temperature/humidity conditioning) before installation to reduce dimensional changes after placement.
Acclimate according to your manufacturer
Acclimate LVT according to the manufacturer’s timeframe and conditions (temperature/humidity). [ADD: exact acclimation requirements from your LVT manufacturer]
Because you’re installing over concrete—often a thermal mass—acclimation can matter even more than on wood subfloors.
In planning, also consider:
– Doorways, transitions, and how plank locking or adhesive patterns will behave across them.
– The “start wall” choice for symmetry and minimizing cuts at focal points.
– Whether the room has known humidity fluctuations (homes vs. commercial spaces).
Dry-lay to verify seam strategy
Plan the run direction and where seams will fall; dry-lay a few rows to confirm you’ll get a balanced border. A clean layout doesn’t just look better—it reduces the need for awkward partial planks that can shift under foot traffic.
Install LVT step-by-step (by method)
Your installation technique must match the LVT system’s physics: floating systems move and lock; glue-down systems demand adhesive timing and coverage; loose-lay systems require an approved stabilization setup.
Floating click-lock installations must maintain required perimeter expansion gaps so the floor can move without locking stress.
Glue-down LVT depends on adhesive spread rate, open time, and correct roll/pressure practices as specified by the adhesive manufacturer.
Loose-lay LVT still needs an approved underlayment or stabilization approach; “any foam” is not the same as an approved concrete-ready system.
Click-lock (floating) on concrete
– Click-lock (floating): maintain required perimeter expansion gaps and interlock boards firmly; avoid locking into subfloor debris.
Common concrete-related problem: grit or patch dust under the click seam prevents full engagement, which later shows up as joint separation.
Practical tips:
– Vacuum thoroughly before laying underlayment/first row.
– Install underlayment seams properly (if required), with tape/sheet continuity per system instructions.
– Keep the first row straight—misalignment compounds across the room.
Glue-down (adhesive) on concrete
– Glue-down: apply adhesive at the correct coverage and working time, then roll/press planks as directed (use the roller type/weight if specified).
Adhesive performance is extremely time-sensitive. If you spread adhesive too far ahead of placement, you can skin the surface and reduce bond strength.
Practical tips:
– Work in manageable sections.
– Use the correct trowel notch size (as specified).
– Maintain consistent pressure and rolling direction if the manufacturer requires rolling.
Loose-lay on concrete
– Loose-lay: ensure your chosen locking/stabilization system is approved for concrete and that the surface meets flatness/moisture requirements.
Loose-lay often fails when people treat it like “easy flooring” and don’t manage flatness at the same standard as glue-down.
Practical tips:
– Follow the approved underlayment brand/model (if any).
– Verify flatness again after patching/grinding—loose-lay is still unforgiving about localized dips and ridges.
What can go wrong (and how to prevent it)
Even when the right LVT is chosen, concrete issues can still create failures. The fix is usually preventive: verify moisture, achieve flatness, and use only compatible systems.
Moisture vapor can undermine adhesive bonds and cause edge lifting; moisture mitigation is typically required when slab readings exceed LVT limits.
Uneven subfloors can cause LVT joints to open and create “tenting” or premature wear, especially with thicker planks and rigid core constructions.
Common failure modes
– Ignoring moisture: trapping moisture can cause lifting, edge curling, or adhesive failure—use the manufacturer-required moisture test and barrier/primer system if needed.
– Poor flatness: uneven concrete leads to “tenting,” joint gaps, and premature wear; fix high spots and level low areas before installing.
– Wrong underlayment/adhesive: not every product is compatible with every LVT—mismatched systems are a common cause of failure.
– No expansion gap (or wrong gap): expansion/contraction can cause buckling or tight spots near walls.
Realistic limitations (important)
– If your slab has widespread cracking, active movement, or chronic dampness, LVT may be a short-term aesthetic fix rather than a long-term solution—especially for glue-down.
– If you can’t achieve the manufacturer’s flatness acceptance criteria, you should not “install around it.” The product is designed to follow a correct substrate, not correct it.
Verdict / tip (when to do it yourself vs. get help)
If your concrete is clean, flat, and you can follow the LVT manufacturer’s moisture and installation instructions closely, DIY installation is often reasonable—especially for click-lock. If your slab is known to be damp, you’re dealing with major cracks/low spots, or the product requires a specialized moisture mitigation/primer system, it’s smarter to consult a flooring installer (or at least get confirmation from the flooring manufacturer’s technical support) to avoid costly rework. [ADD: your situation—e.g., “minor patching needed” vs “visible moisture issues”]
Quick scan checklist
– [ ] Moisture test completed per LVT manufacturer requirements
– [ ] Concrete flatness checked; high/low spots corrected
– [ ] Surface cleaned; cracks/repairs completed and cured
– [ ] Correct underlayment/moisture barrier/primer/adhesive chosen for concrete
– [ ] LVT acclimated as specified
– [ ] Layout planned; expansion gaps maintained (for floating installs)
– [ ] Installed using the method required by your LVT type
FAQ
Can I install LVT over painted concrete?
Sometimes, but only if the paint is compatible and properly bonded; otherwise you may need to remove it and use the correct primer/leveling system. [ADD: cite your LVT manufacturer guidance for painted concrete or coating/adhesive-suitability]
Do I need an underlayment on concrete for LVT?
It depends on the LVT type and the manufacturer’s specification—some products require an approved underlayment or moisture barrier, while others explicitly state none is needed. [ADD: your LVT product’s underlayment requirement]
What’s the biggest reason LVT fails over concrete?
Moisture issues and inadequate surface prep (especially flatness) are usually the primary causes—follow the manufacturer’s moisture testing and leveling/repair instructions.
Should I leave an expansion gap with click-lock LVT?
Most floating click-lock systems require perimeter gaps to allow movement; follow your LVT manufacturer’s exact gap requirement. [ADD: exact gap size from your product specs]
Sources
– [ADD: LVT manufacturer installation instructions for “installation over concrete,” including moisture test method/limits, flatness requirements, acclimation, expansion gaps, and adhesive/underlayment guidance]
– [ADD: Concrete moisture-related guidance from the relevant primary standard body or manufacturer technical guidance, if you reference specific test methods/limits]
A successful LVT install over concrete comes down to one idea: the floor system is only as good as the concrete prep and compatibility. If you verify moisture using the manufacturer’s required test, bring the slab to the expected flatness, and install with the matching underlayment/moisture products/adhesive for your LVT type, you dramatically reduce the odds of lifting, gapping, and warranty disputes—while keeping the final result clean, stable, and built to last.
Frequently Asked Questions
What’s the best way to prep existing concrete before installing LVT over concrete?
Start by cleaning the concrete thoroughly—remove dust, paint overspray, drywall compound, and any adhesive residue—so your LVT install bond properly. Check moisture levels (using a concrete moisture test) and ensure the slab is dry and within the LVT manufacturer’s limits. Fill cracks, low spots, and divots with a suitable floor leveling compound, then grind high areas smooth to avoid telegraphing through the vinyl plank or tile. Finally, vacuum and use the recommended primer if your leveling product or LVT system requires it.
How do I install LVT over concrete if the slab is slightly uneven?
Minor surface variations can cause LVT to flex and lead to joint separation, so you should level before installation. Use a self-leveling underlayment or patch/feather-finish compound to bring the floor flat and meet the manufacturer’s flatness tolerance. After leveling, let the compound fully cure and then resurface according to the product instructions (including priming when needed). This ensures a smooth, stable base for click-lock LVT flooring or glue-down LVT over concrete.
Which type of LVT installation method works best on concrete—click-lock floating or glue-down?
Click-lock LVT flooring can work well over concrete, especially when paired with the correct underlayment and a vapor barrier where required. Glue-down LVT is often preferred for higher-traffic areas or when you want maximum stability, but it depends on your subfloor condition and adhesive compatibility with the concrete. In either case, follow the LVT manufacturer’s instructions for underlayment, moisture barriers, and adhesive selection to avoid flooring movement, lifting, or bubbling. If you’re unsure, choose the system recommended for “LVT over concrete” by the specific product you’re installing.
How do I manage moisture when installing LVT over concrete floors?
Concrete moisture is one of the biggest causes of LVT failure, including curling edges and adhesive breakdown. Test moisture using a proper method (like RH probes or calcium chloride, depending on what’s accepted in your region) and confirm the slab is within the flooring requirements. If your system calls for it, install a compatible vapor barrier or moisture mitigation product designed for vinyl flooring over concrete. Skipping this step can lead to long-term issues even if the install looks correct at first.
What tools and materials do I need for a successful LVT installation over concrete?
Plan for the essentials: a tape measure, chalk line, utility knife or vinyl cutter, spacers for expansion gaps, and a rubber mallet for click-lock planks. For glue-down LVT over concrete, you’ll also need the correct trowel and manufacturer-approved adhesive, plus a roller if recommended to ensure full contact. Use a high-quality underlayment/vapor barrier when installing floating LVT, and have a leveling compound, primer, and patching tools ready for subfloor repairs. Proper surface prep tools—like a vacuum and grinder—are just as important for achieving a durable, flat vinyl floor installation.
📅 Last Updated: October 08, 2026 | Topic: How to install over concrete LVT floors? | Content verified for accuracy and freshness.
References
- Google Scholar Google Scholar
https://scholar.google.com/scholar?q=installing+LVT+over+concrete+subfloor+moisture+testing - Google Scholar Google Scholar
https://scholar.google.com/scholar?q=ASTM+F710+resilient+flooring+installation+over+concrete - Google Scholar Google Scholar
https://scholar.google.com/scholar?q=luxury+vinyl+tile+LVT+installation+guideline+concrete+slab+levelness - Vinyl composition tile
https://en.wikipedia.org/wiki/Luxury_vinyl_tile - F710 Standard Practice for Preparing Concrete Floors to Receive Resilient Flooring
https://www.astm.org/f710.html - F2170 Standard Test Method for Determining Relative Humidity in Concrete Floor Slabs Using in sit…
https://www.astm.org/f2170.html - F1869 Standard Test Method for Measuring Moisture Vapor Emission Rate of Concrete Subfloor Using …
https://www.astm.org/f1869.html - F3191 Standard Practice for Field Determination of Substrate Water Absorption (Porosity) for Subs…
https://www.astm.org/f3191.html - F1700 Standard Specification for Solid Vinyl Floor in Modular Format such as Tile(s) or Plank(s)
https://www.astm.org/f1700.html - F1515 Standard Test Method for Measuring Light Stability of Resilient Flooring by Color Change
https://www.astm.org/f1515.html