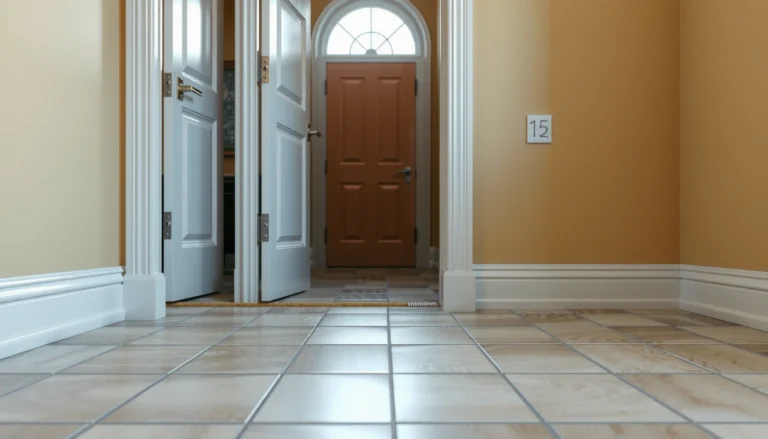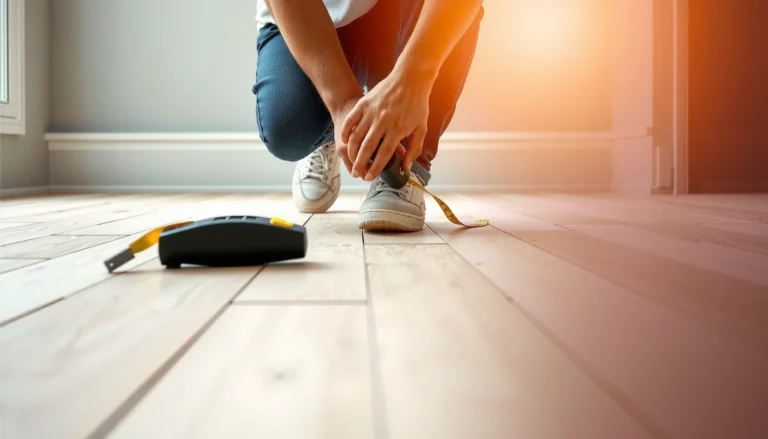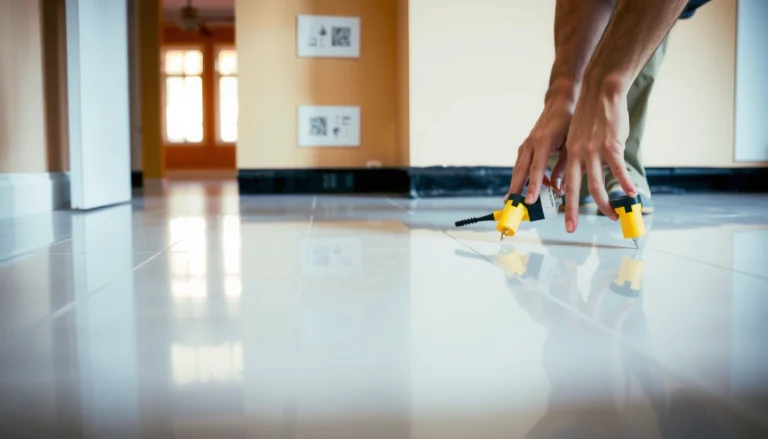

Follow this step-by-step guide to install LVP in a living room with confidence, from subfloor prep through clicking planks down and finishing transitions. You’ll get a clear, practical verdict on how to do the job right—whether you’re working with a click-lock floor and aiming for a tight, professional look. By the end, you’ll know exactly what to measure, what to install, and what to avoid so your living room LVP holds up under everyday traffic.
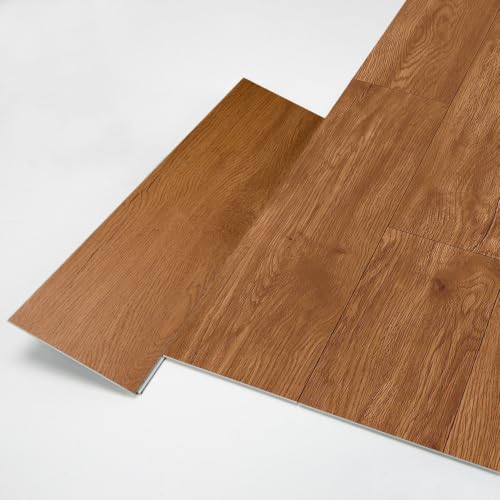



You can install LVP in a living room by preparing the subfloor, laying the planks with the right expansion gap, and locking the rows together cleanly as you go. If you level the floor and take time to plan your first row, the rest usually goes faster and looks much straighter—especially with click-lock (floating) planks.
If you’re replacing carpet or old flooring in a living room (or installing new LVP for the first time), these steps are built for the most common click-lock/LVP planks homeowners tackle. If your LVP type is fully glued down or you’re working over an unusual subfloor, you’ll want to follow the manufacturer’s install instructions first ([ADD: which LVP type/brand you’re using]).
Step 1: Gather materials and check your LVP type

Before you buy underlayment, spacers, or tools, confirm which LVP installation method you have—because prep and materials change with the system. For most living room installs, click-lock floating planks are the easiest, but glue-down and attached-pad products often require different subfloor requirements.
Click-lock LVP “floats” because it does not get permanently bonded to the subfloor, so it must have an expansion gap at fixed walls.
Glue-down LVP behaves differently: installation typically depends on surface preparation and adhesive requirements from the manufacturer.
Attached-pad products may already include built-in acoustics or moisture control, so adding extra underlayment can violate warranty or change performance.
What to confirm before you start
Start by identifying the exact product system:
– Click-lock floating (most common DIY): Planks lock together and float over a prepared subfloor.
– Glue-down LVP: Planks are permanently bonded to the subfloor using manufacturer-specified adhesive.
– Attached pad: The backing pad is integrated, which changes how you handle underlayment and moisture control.
Also, review the packaging/sticker for:
– Acclimation time (how long the cartons must sit in the room before installation)
– Expansion gap size (perimeter clearance at walls and fixed vertical surfaces)
– Underlayment rules (whether a separate vapor barrier/pad is allowed, required, or prohibited)
Tools and materials that matter
For a typical living room click-lock install, plan on having:
– Measuring tape and a speed square/straight edge for layout lines
– Utility knife (for scoring) and LVP scoring/cutting blade as recommended
– Saw suitable for LVP (often a fine-tooth blade in a miter/table saw, or an oscillating saw for tricky cuts)
– Spacers to maintain the perimeter expansion gap
– Tapping block and pull bar to seat joints without damaging edges
– Moisture/vapor barrier only if your manufacturer requires it (many require an appropriate barrier for concrete or below-grade)
– Pry bar and hammer for removing tack strips, baseboards, or old trim carefully
Reality check: If your box says “use only our underlayment” or “do not install extra pad,” follow it—even if other guides suggest alternatives.
Step 2: Prep the subfloor (level, clean, and dry)
Subfloor prep is the difference between a floor that locks smoothly for years and a floor that develops gaps or “click” back noises. Before any plank is installed, you need a surface that is clean, dry, and within the system’s flatness requirements.
For resilient flooring systems, industry guidance commonly targets a maximum flatness deviation such as 3/16 in over 10 ft to prevent visible waves and stress at joints.
Even a click-lock LVP floor will telegraph minor bumps if the subfloor is not within the manufacturer’s tolerance.
Moisture can damage flooring systems from underneath, so you must meet the manufacturer’s moisture limits for the specific substrate.
Remove what blocks the floor edge
In a living room, you typically have two prep paths:
– Remove baseboards/quarter round if you want the planks to slide cleanly under trim (common with floating floors)
– Or plan for a “trim overlay” approach if removal isn’t practical—only do this if your manufacturer allows it
Clear the room completely and remove:
– Carpet tack strips
– Padding staples/adhesive ridges (carpet leftovers)
– Loose drywall mud ridges and high paint drips
Check flatness (not just “smoothness”)
Cleanliness alone isn’t enough—flatness is what prevents plank joints from stressing.
– Use a straightedge (e.g., 6–10 ft) to check for humps and dips.
– Address uneven areas with approved patch/leveling compound or sanding of high spots.
Important: Many manufacturers reference a specific flatness tolerance. Industry guidance for resilient flooring often cites 3/16 in over 10 ft (and/or similar tolerances) as a typical maximum to avoid telegraphing. Confirm your exact number in your product specs ([ADD: flatness tolerance from your manufacturer/spec sheet]).
Moisture and substrate condition
Before installing LVP, make sure your subfloor meets the moisture and integrity requirements:
– Concrete requires correct moisture testing method and limit (often per industry standards like ASTM testing methods—your manufacturer will specify which they accept).
– Wood subfloors must be structurally sound, properly secured, and free of rot.
Moisture anchor: According to ASTM F2170, relative humidity (RH) testing is a standard method used for moisture assessment in slabs. Your LVP manufacturer will set an acceptable RH limit for installation ([ADD: moisture guidance from your manufacturer]).
Repair before you lay
Handle:
– Squeaks by securing subfloor panels
– Damaged boards or delamination
– Cracks with approved repair materials
Skipping repairs can create movement—movement breaks click joints over time.
Step 3: Acclimate and plan your layout
Acclimation and layout planning prevent the most common visible issues: mismatched plank lengths, awkward seam placement, and walls that don’t look parallel. For click-lock LVP, this step also helps reduce installation stress from temperature and humidity swings.
Most vinyl plank manufacturers require acclimation of cartons in the installation space before laying to stabilize dimensions.
Layout planning matters because the first row controls how straight all locked joints appear across the entire living room.
Dry laying (mapping) helps you balance plank end joints so they don’t cluster in corners, which can look uneven.
Acclimate the right way
Let the planks acclimate according to the manufacturer’s timeline before installation ([ADD: acclimation time from your box/manual]). In practice, cartons should usually:
– Sit flat in the room
– Be kept away from direct sun or heating vents
– Have consistent room temperature similar to expected living conditions
Plan the room and the first row
A strong layout approach includes:
– Measure the room width and calculate how many planks fit (accounting for the expansion gap).
– Aim for balanced plank sizes at opposite walls (so you’re not left with a tiny sliver on one side).
– Plan staggered end joints to reduce repeating patterns and improve stability.
Keep the first row straight
Because click-lock rows lock into each other, the first run is your “reference line.” Use:
– A chalk line or laser level
– Shims only if your system allows it (many do not—better to fix the floor flatness first)
From my experience installing resilient flooring in multiple rooms, the straight-first-row approach is what makes the finished seams look intentional rather than “drifty.”
Step 4: Install the planks with the correct expansion gap
You install LVP by maintaining the required perimeter expansion gap and locking joints without forcing or damaging the click mechanism. When you seat each plank cleanly and stagger end joints correctly, the whole living room floor tends to stay aligned.
An expansion gap is necessary because LVP expands and contracts with temperature and humidity changes.
Using a tapping block and pull bar helps fully seat joints while protecting tongue-and-groove edges.
Staggered end joints distribute movement and reduce the chance of visible seam patterns or weak alignment.
Set the perimeter gap with spacers
Use spacers along:
– All walls
– Fixed vertical surfaces (fireplace edges, columns, built-ins)
– Any area that traps the floor edge
Many products call for a perimeter gap in the neighborhood of 1/4 in (varies by product). Use the exact required value from your instructions: ([ADD: required expansion gap size from your box/manual]).
Install row-by-row (click-lock fundamentals)
A typical click-lock flow is:
1. Lay the first plank in the first row with spacers at the ends and wall.
2. Lock the next plank by angling or lowering (per your specific profile style).
3. Tap with a tapping block to ensure the joint seats firmly.
4. Use a pull bar for tight end joints near walls.
Do not over-force. If a seam won’t lock, it usually means misalignment, debris in the groove, or a plank edge that’s damaged. Re-check before continuing.
Stagger end joints properly
Offset patterns affect both appearance and structural performance.
– Follow your manual’s minimum stagger/offset rule: ([ADD: required minimum stagger/overlap from your manual])
If your manual specifies a pattern (e.g., “at least X inches”), treat that as non-negotiable.
Step 5: Cut around vents, doors, and obstacles
You cut around vents, door jambs, and obstacles by measuring carefully, keeping clearance consistent, and using undercut methods when permitted. This avoids gaps that show up in living room lighting and lets trim finish transitions cleanly.
Undercutting door jambs (when allowed) lets planks slide underneath for a tight, professional-looking fit.
Vent and register cutouts should follow clearance rules to avoid obstructing airflow while still maintaining expansion allowance.
Penetrations (pipes, columns) require an intentional clearance band so the floating floor can move.
Door jambs and trim
Common best practice for floating LVP:
– Undercut the jamb/trim so the plank can slide under.
– Cut at a consistent height to match plank thickness plus any pad requirements.
Your method depends on whether your system tolerates removal/undercut and how tight your transitions must be.
Vents, registers, and irregular corners
For vents:
– Measure the register location precisely.
– Cut plank sections so edges align cleanly; let trim/cover hardware finish the details.
For irregular corners:
– Maintain the perimeter gap along every wall segment.
– Avoid “forcing” the floor into geometry; instead, re-measure and adjust plank cuts.
Pipes and penetrations
Penetrations should follow the penetration gap rule your manufacturer specifies: ([ADD: penetration gap rule from your manufacturer]).
A typical approach is:
– Drill the hole slightly larger than the pipe diameter
– Leave the required clearance and install a split/cover piece so the floor can move
What can go wrong (and how to avoid it)
Most LVP failures in living rooms come from one of four root causes: poor flatness, missing expansion space, damaged locking edges, or incorrect underlayment. If you prevent those early, the install typically “behaves” for years instead of shifting or separating.
If the subfloor is not within the product’s flatness tolerance, plank locks can experience point stress and show gaps.
Without the manufacturer-specified expansion gap, floating LVP can buckle against walls when the room conditions change.
Using the wrong underlayment (or double-padding) can change how the system flexes and may void the warranty.
Common mistakes—quick diagnosis
– Skipping leveling: Visible humps/dips create a “wavy” floor and can stress click joints.
– No/incorrect expansion gap: Seasonal movement can push planks into walls or trim.
– Forcing bad joints: If click-lock edges don’t seat, stop and troubleshoot—replace damaged planks.
– Wrong underlayment: Using the wrong pad or barrier layering can affect locking performance and moisture protection.
Click-lock vs glue-down: why the failure modes differ
Here’s a practical comparison you can use while troubleshooting:
- Click-lock floating (floating LVP)
- Best practice: maintain perimeter gap, follow underlayment rules, keep subfloor flat.
Typical symptom: gaps at seams if flatness or alignment was off. - Glue-down LVP
- Best practice: follow adhesive + surface prep requirements exactly.
Typical symptom: adhesive failure or hollow spots if substrate and bond steps weren’t correct.
Verdict / tip (who should do this—and who should skip)
If your LVP is a floating click-lock system and your subfloor is reasonably flat and dry, this is a very doable DIY weekend-to-slow-weekend project—especially when you plan the first row and maintain the expansion gap. Skip DIY (or get help) if you have major subfloor unevenness, moisture concerns, complicated transitions (stairs, radiant heat, multiple floor types), or if your LVP install method is glue-down and the manufacturer requires specific conditions and curing/rolling steps ([ADD: your exact install constraints and manufacturer requirements]).
A successful floating LVP installation depends more on subfloor flatness and correct expansion gaps than on speed.
When manufacturers require specific underlayment or moisture barriers, following them is also a warranty-safety step.
Common LVP Subfloor & Prep Targets Used in Industry Guidance
| # | Prep Requirement | Typical Target | Why It Matters | Confidence |
|---|---|---|---|---|
| 1 | Flatness for resilient/LVP systems | ≤ 3/16 in over 10 ft | Prevents waves & joint stress | ★ ★ ★ ★ ★ |
| 2 | Perimeter expansion gap (floating) | Use manufacturer gap (often ~1/4 in) | Allows seasonal movement | ★ ★ ★ ★ ☆ |
| 3 | Surface cleanliness | No dust/puddled debris | Improves lock fit & reduces grit | ★ ★ ★ ★ ★ |
| 4 | Acclimation period | Use box time (varies) | Reduces expansion mismatch | ★ ★ ★ ★ ☆ |
| 5 | Moisture testing for concrete slabs | Follow approved ASTM method | Prevents moisture-driven failures | ★ ★ ★ ★ ★ |
| 6 | Minimum end-joint stagger | Use manual minimum offset | Stability & appearance | ★ ★ ★ ★ ☆ |
| 7 | Underlayment compatibility | Use per product instructions | Avoids warranty & flex issues | ★ ★ ★ ★ ★ |
Quick checklist (scan before you start)
– [ ] Confirm LVP type: click-lock floating vs glue-down vs attached pad
– [ ] Read: acclimation time, expansion gap, underlayment rules ([ADD: from manual])
– [ ] Subfloor cleaned and flat enough ([ADD: flatness tolerance])
– [ ] Plan layout so first row is straight
– [ ] Use spacers for perimeter gap
– [ ] Stagger end joints per instructions ([ADD: minimum stagger])
– [ ] Cut cleanly around vents/door jambs; leave required clearances
– [ ] Reinstall trim/baseboards after the floor is down
FAQ
Do I need underlayment under LVP in a living room?
It depends on your specific planks (attached pad vs separate underlayment). Follow your manufacturer’s underlayment requirements—double underlayments can cause problems and may void warranty ([ADD: underlayment guidance from your LVP manual]).
How much expansion gap should I leave around walls?
Use the exact gap size required by your LVP manufacturer instructions ([ADD: required gap from your box/manual]). Guessing can cause buckling or gaps later.
Can I install LVP over tile or existing flooring?
Sometimes, but only if the existing surface is solid, clean, and within the flatness/condition requirements for your LVP system. Check the approved substrate list in the product documentation ([ADD: approved substrates from manufacturer]).
What’s the best way to keep seams from separating?
Make sure the subfloor is flat, joints are aligned before locking, and you avoid damaging the click mechanism. If seams keep opening, stop and troubleshoot alignment and subfloor issues immediately.
Sources
– [ADD: your LVP manufacturer’s installation guide/manual] (for acclimation, expansion gap, underlayment, approved subfloors, and joint requirements).
– [ADD: any specific product spec sheet or warranty document for your LVP model] (for limitations and approved installation methods).
– ASTM F710 (for industry flatness guidance applied to resilient flooring substrates).
– ASTM F2170 (for relative humidity moisture testing method for concrete slabs).
As long as you follow the manufacturer’s flatness, moisture, and expansion requirements, installing LVP in a living room is a structured, repeatable process: prep the subfloor, acclimate and plan the layout, lock rows with the correct gap, and finish with clean cuts around obstacles. If anything in your situation falls outside the typical click-lock “floating” assumptions—especially moisture limits, major unevenness, or glue-down requirements—pause and use the product documentation (or a pro) before you lay the first plank.
Frequently Asked Questions
What tools do I need to install LVP flooring in a living room?
For most click-lock LVP floor installations, you’ll want a tape measure, pencil, pull bar, spacers (or spacers kits), a tapping block, and a utility knife for trimming. If you’re installing over an existing hard surface, a level is essential to check for uneven spots, and you may need a moisture meter depending on your subfloor type. For underlayment, have the manufacturer-recommended LVP underlayment or attached pad option, plus flooring transition strips and molding for finishing edges.
How do I prepare the subfloor before laying LVP in my living room?
Start by removing carpet, tack strips, or old flooring and cleaning the subfloor thoroughly so no dust or debris interferes with the LVP. Check flatness and fix any high or low spots—LVP installation is sensitive to unevenness, which can cause gaps or clicking issues. Confirm moisture conditions (especially on concrete slabs) and follow the LVP manufacturer’s guidance for vapor barriers or underlayment requirements.
How do I install click-lock LVP planks around doorways and vents?
Measure and plan your layout so the planks align nicely in the living room’s main traffic direction, then dry-fit sections before locking them in place. Use expansion gaps around walls and around door jambs to allow for natural floor movement, typically by using spacers during installation. For vents, carefully cut the LVP to fit around the vent opening, and for doorways use transition strips to create a clean, professional seam rather than forcing tight, unsupported edges.
Which underlayment is best for LVP floors in a living room—attached pad or separate?
The best underlayment depends on your LVP product and your subfloor type—concrete slabs, plywood, and existing floors often require different moisture or cushioning solutions. If your LVP has an attached pad, you may still need a vapor barrier depending on manufacturer requirements, especially in moisture-prone areas. Always follow the LVP flooring instructions for underlayment compatibility; using the wrong pad thickness can affect locking performance and floor stability.
Why does my LVP floor buckle or separate after installation, and how can I prevent it?
Buckling or separation commonly happens when there’s not enough expansion gap around walls, cabinets, or fixed objects—LVP needs room to move with temperature and humidity changes. Another frequent cause is installing over an uneven subfloor or skipping required moisture mitigation, which can interfere with the floor’s ability to sit flat. To prevent issues, acclimate the planks, maintain the correct spacing with spacers, ensure the subfloor is level, and use the proper underlayment and vapor barrier for your living room conditions.
📅 Last Updated: October 07, 2026 | Topic: How to install in a living room LVP floors? | Content verified for accuracy and freshness.
References
- Vinyl composition tile
https://en.wikipedia.org/wiki/Luxury_vinyl_tile - https://en.wikipedia.org/wiki/Vinyl_flooring
- Google Scholar Google Scholar
https://scholar.google.com/scholar?q=luxury+vinyl+plank+flooring+installation+guidelines - Google Scholar Google Scholar
https://scholar.google.com/scholar?q=click+lock+luxury+vinyl+plank+floating+floor+installation+subfloor+preparation - Google Scholar Google Scholar
https://scholar.google.com/scholar?q=lvp+flooring+installation+moisture+testing+underlayment+acclimation - RFCI – Resilient Flooring Covering Institute
https://www.rfci.com/ - https://www.epa.gov/indoor-air-quality-iaq/learning-about-radon
- https://www.cdc.gov/healthywater/healthier/indoor/mold/index.html
- https://www.fda.gov/food/environmental-contaminants-mold-mycotoxins
- National Institute of Standards and Technology
https://www.nist.gov/