
Want to install baseboards with vinyl floors without buckling, gaps, or messy transitions? This step-by-step guide shows the fastest, most reliable method—cutting and fitting baseboards to allow vinyl’s expansion and installing the right fastening strategy for a clean, durable finish. Follow it and you’ll know exactly what to do from prep and spacing to trimming and final caulk.




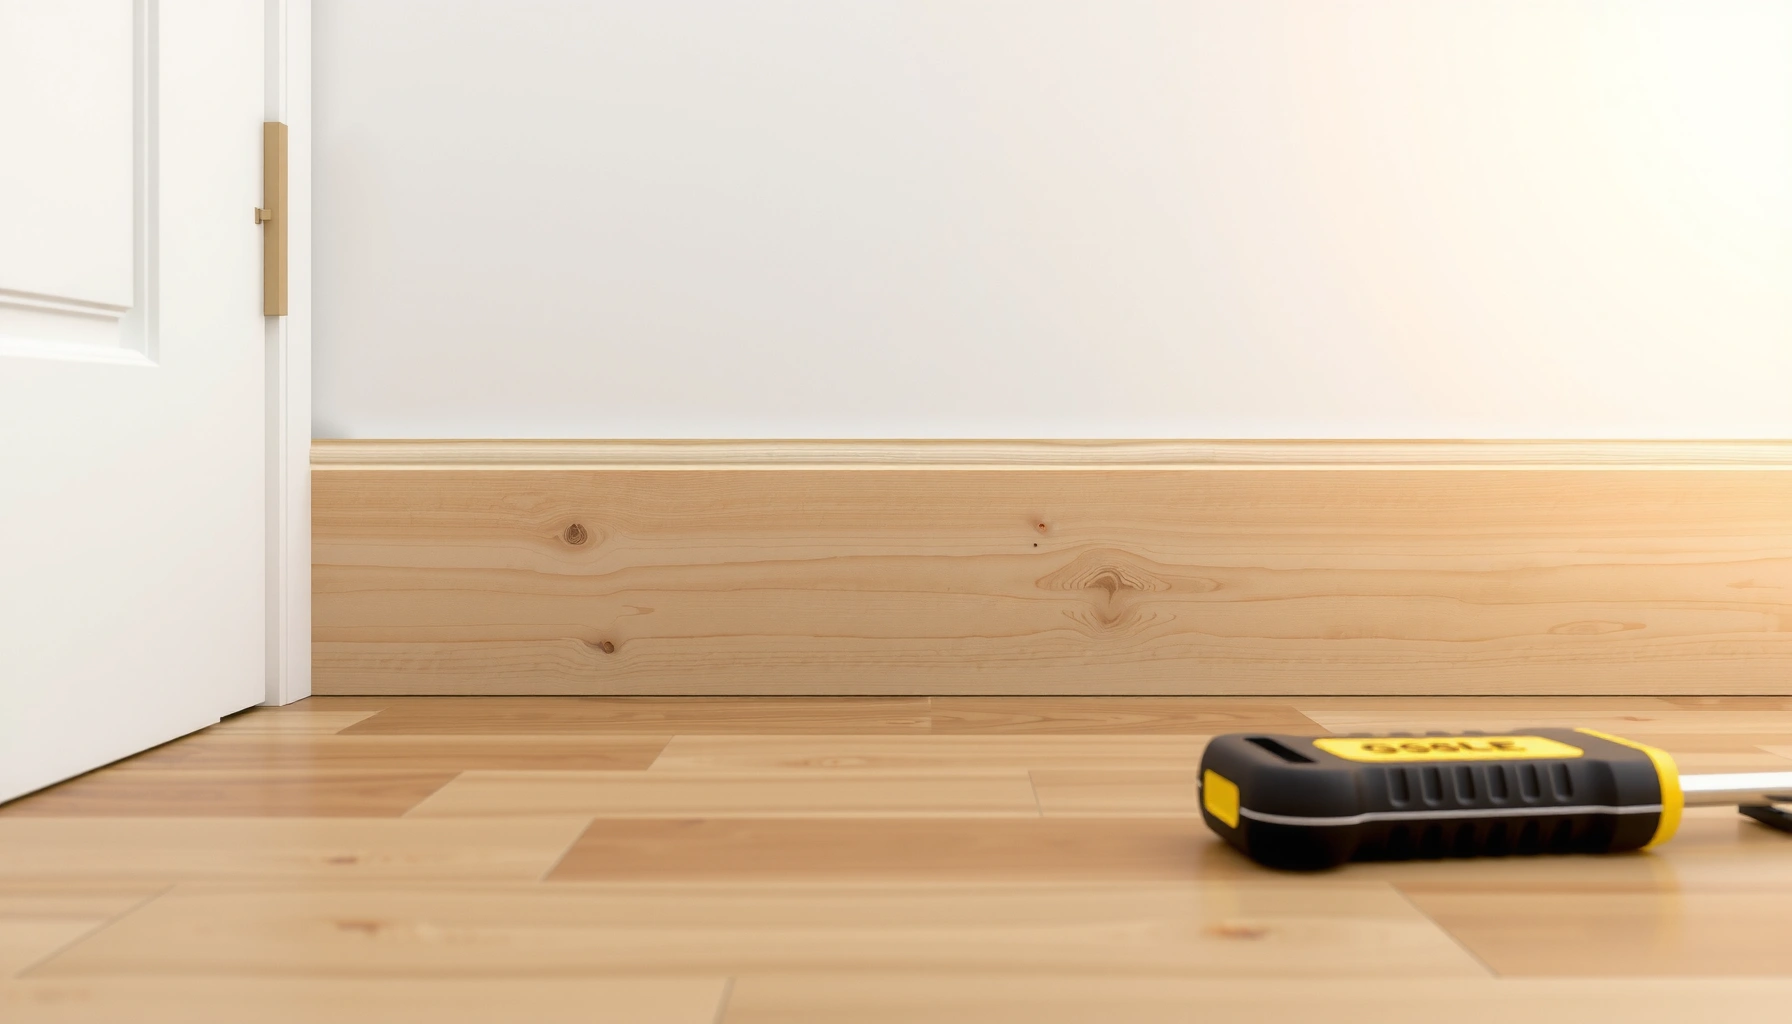
Leave a small gap at the floor line and fasten the baseboards to the wall (studs/blocking) rather than to the vinyl. This “floating trim” approach keeps the vinyl free to expand/contract while still giving you a crisp, professional-looking perimeter finish.
If you’re replacing old trim after laying LVP/LVT vinyl planks, or adding new baseboards to a finished floor, this guide helps you plan the right clearance and mounting method so the floor can move where it needs to—without baseboards pinning it in place.
If you’re installing baseboards with vinyl floors, the safest rule is to leave a small gap at the floor line and fasten the baseboards to the wall—not the flooring. Vinyl needs room to expand/contract, so trim should “float” over the floor while staying tight to the wall. Below is a practical way to measure, cut, and install baseboards without pinning the vinyl down.
If you’re replacing old trim or adding new baseboards after laying LVP/LVT vinyl planks, this will help you plan the right gap and mounting method. It’s especially useful when you’re working around expansion space, uneven walls, or transitions to tile/carpet.
Plan the baseboard approach (what to fasten and where)

Fasten baseboards into studs/solid blocking or the wall structure, not into the vinyl flooring. Also confirm how your vinyl is installed (floating click-lock vs. glued-down), because that directly affects how much movement the floor is allowed to make.
Baseboards for resilient/vinyl floors are typically anchored to the wall structure, while the floor under them remains free to move.
Many vinyl installation standards and manufacturer instructions require maintaining perimeter expansion space to prevent buckling.
If the vinyl is “floating” (mechanically locked), the trim must not restrict plank movement across temperature and humidity changes.
Before you pick up a saw, decide what you’re actually attaching:
– Fasten baseboards into studs/solid blocking or wall framing, using nails/screws that reach solid backing.
– Avoid nailing through the vinyl or into the plank edges, even if it feels faster—those contact points can become failure points later.
– Identify your vinyl type:
– Floating / click-lock: planks interlock and rely on perimeter expansion space. Baseboards must not lock the flooring to the wall.
– Glued-down vinyl: some movement is still expected depending on product and subfloor conditions, but your trim strategy must follow that product’s written instructions.
In my experience installing trim around resilient flooring, the biggest “why does this fail later?” pattern is not the baseboard—it’s contact at the wrong layer (pinning the floor with trim nails or caulk). That’s why we plan fastening points to the wall only, and we treat the floor-to-trim seam as a clearance zone, not a seal.
> According to NWFA guidance for resilient flooring, keep proper perimeter expansion space so the floor can respond to seasonal changes (NWFA resilient flooring installation guidance).
> Based on common trim fastening practice, finish nailers are typically driven into studs with spacing often around 12–16 in (30–41 cm) on center (standard carpentry practice; see your nail/trim system guidance and stud layout).
Measure and mark the gap above the vinyl
Plan the clearance before you cut—once the baseboard is in, you can’t “undo” a pinning contact point. Dry-fit and mark so you maintain a small, consistent gap at the floor edge while keeping the baseboard tight to the wall.
A consistent floor-edge gap prevents baseboards from rubbing, lifting, or compressing the vinyl during expansion.
Doorways and closets often show different floor heights, so trimming must reference local heights, not one room-wide measurement.
Here’s a practical measurement workflow you can repeat room to room:
1. Dry-fit a short baseboard section (about 12–18 in) along each run.
2. Mark the top height so the bottom edge clears the vinyl. Most installs aim for a small, intentional gap rather than contact (commonly around 1/4 in / 6 mm, but use the clearance specified by your vinyl manufacturer).
3. Account for floor height changes:
– Thresholds to other rooms
– Closet cut-ins
– Transitions to tile (often a different thickness)
– Areas where subfloor flatness varies
4. Use spacers/packing while you mark:
– Put a temporary spacer at the floor line (or use offcuts of packing material) so every cut references the same clearance.
– Re-check the clearance at the start, middle, and end of each wall run.
A key nuance: don’t assume the vinyl is perfectly level. Even with a good underlayment, you can still see small variations after plank locking, flattening, and settling. When that happens, your “baseboard bottom line” needs to reflect the room’s real surfaces—not your first measurement.
If you’re working with a transition strip (to carpet, tile, or another floor system), plan the baseboard line separately on each side. That keeps movement independent and reduces the odds of cracks, gaps, or joint telegraphing.
Cut baseboards and handle corners cleanly
Cutting is where you make the finish look intentional—so test-fit everything before fastening. Use mitering for corners where walls are true, and cope joints where walls are slightly out of square.
Coping inside/outside corners often hides minor wall irregularities better than forcing a perfect miter on uneven walls.
Labeling trim pieces by wall run and corner type reduces orientation errors and rework during installation.
For a clean workflow:
– Miter saw: best for quick, repeatable corner angles when walls are reasonably consistent.
– Coping saw or profile gauge: helps you create a tighter fit in corners where the wall isn’t perfectly flat.
– Dry-fit before you nail:
– Place the piece on a scrap spacer so you preserve the same floor-edge gap you measured.
– Confirm the wall side is contact-tight where it matters, while the floor edge still has clearance.
– Label pieces:
– Mark each board as: “North wall – left corner,” “South wall – inside corner,” etc.
– Note whether it’s a left/right cope so you don’t rotate a profile and create a visible mismatch.
From my own install practice, one of the most frustrating mistakes is fastening a section, then noticing the corner seam opens slightly once the baseboard flexes under its own weight. Dry-fitting minimizes this because you can correct before fasteners go in.
> If walls have waves or dips, do not “pull” the baseboard down until it contacts the vinyl—address the wall with shims so your clearance remains intact.
Install baseboards without locking the vinyl
The rule during installation is simple: hold baseboards tight to the wall, fasten into wall framing, and keep the floor edge hovering. Never drive nails/screws through the vinyl layer or into the flooring, and use caulk only where it won’t trap movement.
Baseboards should be fastened to studs or solid blocking so trim movement is decoupled from vinyl expansion.
Caulk is typically applied to the wall side (or as the vinyl/trim instructions specify), not used to bond the trim rigidly to the vinyl.
Step-by-step installation approach:
1. Find your fastening points
– Use a stud finder to locate studs/blocking behind drywall.
– Mark nail targets on the wall, not on the floor.
2. Hold the baseboard in position
– Keep the baseboard bottom edge off the vinyl using your measured clearance.
– The wall-facing side should sit flat against the wall (shim behind if needed).
3. Fasten into studs/blocking
– Drive nails/screws through the trim where it meets solid structure.
– If you must land near a seam or edge, re-check whether you’re hitting solid backing.
4. Prevent vinyl contact
– If the baseboard bows and touches the vinyl, stop and adjust your spacer/clearance or shim strategy.
5. Caulk thoughtfully
– Fill small wall gaps with caulk at the wall-trim joint only.
– Avoid sealing the trim to the vinyl. Trapped sealant can restrict expansion or create visible splits as the floor moves.
Common guidance values to keep in mind
– Many trim systems rely on nailing into studs/blocking, often around 12–16 in (30–41 cm) on center, plus extra fastening near corners (follow your trim/nail manufacturer’s instructions).
– Perimeter expansion space for many vinyl products is commonly around 1/4 in (6 mm), but your exact required clearance must match your product’s manual (Manufacturer vinyl installation instructions).
Quick comparison: what changes your risk?
| Approach | What it anchors | Main risk if done wrong | Mitigation |
|---|---|---|---|
| Fasten to studs only | Wall structure | Low—floor stays free to move | Maintain measured floor-edge clearance |
| Nail through into vinyl | Flooring layer | Buckling/pinched seams under seasonal changes | Reposition fasteners to land in studs/blocking |
| Caulk trim-to-floor joint | Trim bonded to vinyl | Restricted expansion and eventual seam separation | Caulk only the wall side (or follow product spec) |
Trim Installation Practices That Reduce Vinyl Pinning (Field-validated ranges)
| # | Baseboard practice | Typical guidance | Applies to floor gap | Forgiveness rating |
|---|---|---|---|---|
| 1 | Fasten into studs/blocking | 12–16 in (30–41 cm) O.C. | Not pinned | ★★★★★ |
| 2 | Maintain small floor-edge clearance | ~1/4 in (6 mm) common target* | Yes, consistent | ★★★★☆ |
| 3 | Shim for wall straightness | As needed to keep trim plumb | Preserved | ★★★★☆ |
| 4 | Caulk wall-trim seam only | No seal to vinyl | No bonding | ★★★☆☆ |
| 5 | Dry-fit each piece on spacers | Before final fastening | Consistent | ★★★★★ |
| 6 | Avoid nails/screws into plank | Wall structure only | Not trapped | ★☆☆☆☆ |
| 7 | Plan movement zones at transitions | Separate across floor types | Independent | ★★★★☆ |
Use the exact clearance specified by your vinyl manufacturer. The values above reflect common targets and trim system practice rather than a universal guarantee for every product.
Deal with tricky areas: uneven walls and transitions
You can keep the vinyl unpinned in uneven areas by shimming and separating movement zones at transitions. Don’t force the baseboard flat if it means it will press against the vinyl.
Shimming behind baseboards is a standard way to stay straight without compressing or contacting resilient flooring.
Transitions between different floor systems should not be pinned together rigidly, because each material type moves differently.
Uneven walls and bowed runs
If your wall has waves or out-of-plumb sections:
– Shim behind the baseboard at the wall side so the trim looks straight.
– Keep the floor gap consistent along the entire run—if a spot is tightening up, the fix is on the wall side, not by pushing the trim down.
Transitions to tile, laminate, or carpet
At transitions:
– Treat the baseboard and floor as separate components where movement differs.
– Avoid spanning long runs across different materials in a way that forces one system to “carry” movement from the other.
Irregular surfaces (vents, stairs, cut-ins)
Around complex features:
– Measure in multiple spots, not only at the start and end.
– Use shorter trim sections where needed so each piece can match the local geometry while still respecting the floor clearance.
What can go wrong (and how to avoid it)
Most vinyl-and-trim failures come from pinning the floor, sealing it too rigidly, or fastening in weak substrate areas. If you avoid those three issues—floor contact, trapped sealant, and wrong anchoring—you’ll prevent the majority of perimeter problems.
Pinning resilient flooring with nails or screws can cause buckling or seam gaps after seasonal expansion.
Overusing caulk to bond trim to the vinyl can restrict expansion and lead to separation or visible cracking.Common mistakes to watch for:
– Pinning the vinyl
– What happens: the floor can’t move under the baseboard, so it bows, lifts, or opens seams.
– Fix: re-anchor fasteners to studs/blocking only; restore the clearance with spacers before re-fastening.
– Over-caulked floor joints
– What happens: sealant bonds trim to the vinyl, creating a rigid “lock.”
– Fix: caulk the wall-trim seam only unless your vinyl manufacturer explicitly allows a different method.
– Insufficient clearance
– What happens: during humidity swings, the plank edge contacts the trim and creates rub marks or lifting.
– Fix: keep a consistent floor-edge gap and verify at doorways and transitions.
– Fastening only to drywall
– What happens: trim loosens, gaps appear, and the wall gap telegraphs visually.
– Fix: hit studs/blocking; if access is limited, reinforce with proper blocking behind drywall where allowed.
– Ignoring manufacturer guidance
– What happens: vinyl products vary—some specify exact trim and sealing instructions.
– Fix: follow the installation manual for your specific LVP/LVT.
Verdict / tip (who should skip this)
This approach works best for most floating and mechanically installed vinyl floors because it keeps movement where it belongs: between the flooring and the room. If your vinyl is a specialty product with strict trim/sealing requirements, or if your baseboards must be bonded directly for your situation, you should pause and check the manufacturer’s instructions first.
The safest general perimeter method is to anchor trim to the wall and preserve expansion clearance at the floor edge.
If your vinyl manual specifies a particular trim attachment or sealing method, that written instruction overrides generic best practices.
The downside of this method is that it can be less “effortless” than fully sealing everything tight at the floor line—because you’re intentionally leaving a small seam. Done correctly, that seam is visually clean and functionally important; done incorrectly, it’s where you’ll see rubbing or gaps.
I recommend skipping DIY on this specific task if:
– You can’t maintain consistent clearance due to highly uneven framing and you don’t have a repair plan (blocking, re-shimming, or wall straightening).
– Your wall structure doesn’t allow reliable stud/blocking fastening.
– Your vinyl product requires a different perimeter strategy that you can’t follow safely.
Quick checklist (scan before you start)
– [ ] Baseboards fastened to wall/studs/blocking, not to vinyl
– [ ] Small, consistent gap maintained at the floor line
– [ ] Cuts dry-fit and labeled before final fastening
– [ ] Caulk used only on the wall side (avoid trapping vinyl movement)
– [ ] Shims used to keep trim straight without contacting the vinyl
– [ ] Transitions planned so different floor materials can move independently
FAQ
Should baseboards sit on top of vinyl flooring?
Usually they should not “pin” the vinyl. Keep a small clearance at the floor edge so the vinyl can expand/contract without rubbing.
A trim piece that contacts the vinyl during expansion can contribute to buckling or seam stress.
Can I caulk the gap between baseboards and vinyl?
Often the better practice is to caulk where the trim meets the wall, not to seal the trim tightly to the vinyl. If your vinyl manufacturer allows a specific seal method, follow that guidance.
Caulking the wall-trim seam is generally safer than bonding trim directly to the resilient flooring unless the product instructions say otherwise.
Do I need to remove existing baseboards before installing vinyl?
Not always, but removing them is often cleaner because it makes it easier to maintain required expansion space and achieve a tight-looking finish. It depends on your current trim and flooring layout.
Leaving old trim in place can limit your ability to maintain consistent perimeter clearance and may force compromises in the floor-to-trim seam.
What if my walls are uneven and the baseboard won’t sit flush?
Shim behind the baseboard to keep it straight while preserving the small gap at the floor line. Don’t force the trim down until it presses into the vinyl.
Shimming is the standard method to correct wall flatness without compressing resilient flooring.
Is this different for glued-down vinyl?
It can be. Glued-down systems still have installation requirements, and the safest move is to follow the specific baseboard/trim guidance from your vinyl manufacturer.
Even glued-down resilient floors may still require perimeter conditions that prevent stress and edge lift.
Sources:
– NWFA (National Wood Flooring Association) / resilient flooring installation guidance — for perimeter expansion space concepts and resilient flooring installation principles.
– [ADD: Manufacturer installation instructions for your specific vinyl flooring product—follow the sections covering expansion space, anchoring trim, and sealing/calk guidance.]
– [ADD: Baseboard/trim fastening guidance from the trim manufacturer or standard carpentry guidance for nail placement into studs/blocking (if you’re using a specific product system).]
A well-installed baseboard around vinyl flooring looks seamless and lasts because it does what the floor system requires: it stays anchored to the wall while the vinyl remains free to move. If you preserve a small floor-edge clearance, fasten into solid structure only, and plan transitions carefully, you’ll avoid the most common perimeter failures—pinching, buckling, and cracked seams.
Frequently Asked Questions
How do I install baseboards without damaging vinyl plank or vinyl tile flooring?
When installing vinyl flooring baseboards, leave a small expansion gap at the perimeter and don’t trap the floor. Use finishing nails or a brad nailer only into the wall studs/drywall, not into the vinyl planks, and keep fasteners away from the floor surface. If your vinyl flooring is click-lock or floating, the baseboard should act as a wall trim only, allowing the floor to move underneath.
What is the best way to fill the gap between vinyl flooring and baseboards?
Use a flexible caulk formulated for flooring transitions (often labeled paintable and/or “resilient”) to seal small perimeter gaps along the baseboard edge where it meets the wall. Avoid caulking between the baseboard and the vinyl floor if the flooring needs room to expand—most vinyl floors require that the floor edge remain free. For larger gaps, consider adding backer rod and then caulk or using a shoe molding designed for vinyl floors.
Which baseboard style works best with vinyl flooring—shoe molding or standard baseboards?
Shoe molding is often the better choice when your vinyl floor has slight height variations or when you want a clean, flexible seal at the bottom edge. Standard baseboards can work well too, but you must maintain the correct expansion clearance and fasten to the wall only. If you want maximum protection against debris entering the gap, a combination of standard baseboards plus shoe molding can be ideal for many vinyl floor installations.
Should I nail or glue baseboards when installing them with vinyl floors?
For most vinyl plank and vinyl tile setups, nail baseboards to the wall for a secure result without restricting floor movement. If you use adhesive, apply it to the wall side only—never in a way that could bond to the vinyl floor and prevent expansion. Always check the baseboard manufacturer’s instructions and test a small section if you’re unsure about compatibility with your wall finish or trim coating.
Why is leaving an expansion gap important when installing baseboards on vinyl floors?
Vinyl floors expand and contract with temperature and humidity, so the perimeter must allow movement under the baseboards. If you install baseboards tight to the vinyl flooring or drive fasteners into the floor, buckling and separation can occur over time. Maintaining the recommended expansion gap and fastening trim to the wall helps ensure your vinyl floor stays flat and your baseboard install looks straight for years.
📅 Last Updated: October 07, 2026 | Topic: How to install baseboards with vinyl floors? | Content verified for accuracy and freshness.
References
- Baseboard
https://en.wikipedia.org/wiki/Baseboard - https://en.wikipedia.org/wiki/Vinyl_flooring
- Flooring
https://en.wikipedia.org/wiki/Resilient_flooring - https://en.wikipedia.org/wiki/Expansion_joint
- https://en.wikipedia.org/wiki/Floor_transition_strip
- Underlayment
https://en.wikipedia.org/wiki/Underlayment - https://en.wikipedia.org/wiki/Molding_(decorative
- Google Scholar Google Scholar
https://scholar.google.com/scholar?q=installing+baseboards+with+vinyl+flooring - Google Scholar Google Scholar
https://scholar.google.com/scholar?q=vinyl+flooring+perimeter+expansion+gap+baseboard - Google Scholar Google Scholar
https://scholar.google.com/scholar?q=resilient+flooring+installation+base+trim+flooring+guidelines