
Preventing mold under vinyl floors is mostly about keeping moisture from getting trapped under the flooring, and that means controlling subfloor dryness and sealing the right points. Follow proven steps—correct installation conditions, thorough subfloor moisture checks, proper underlayment choices, and closing gaps where water can migrate—to stop mold before it starts. If you want the most reliable path, prioritize moisture control first, then airtight installation details.




Prevent mold under vinyl floors by controlling moisture before, during, and after installation—because mold typically begins when water vapor gets trapped under planks or sheet vinyl. The fastest, most reliable strategy is to keep the subfloor truly dry, seal the details that let moisture sneak in (perimeter, penetrations, transitions), and manage indoor humidity so condensation doesn’t form under the flooring.
If you’re installing vinyl (plank or sheet) over wood, plywood, or concrete—or you’ve already noticed musty odors, discoloration, or recurring dampness—this guide is for you. It’s especially relevant in basements, bathrooms, kitchens, and any space with prior water exposure or a history of leaks. The goal isn’t just to “seal the surface,” but to prevent moisture from becoming trapped in a low-drying environment.
Mold prevention is fundamentally a moisture-control problem: without persistent moisture, mold growth is unlikely to occur. [ADD: EPA mold/moisture guidance source]
Vinyl floors can still conceal moisture problems because the flooring reduces drying and can trap vapor at seams and edges. [ADD: manufacturer installation guidance emphasizing moisture + subfloor prep]
Concrete and wood subfloors should be verified as dry according to the specific flooring system’s moisture requirements, not general guesses. [ADD: your vinyl brand moisture limit/spec instructions]
Start with moisture control (before you lay vinyl)
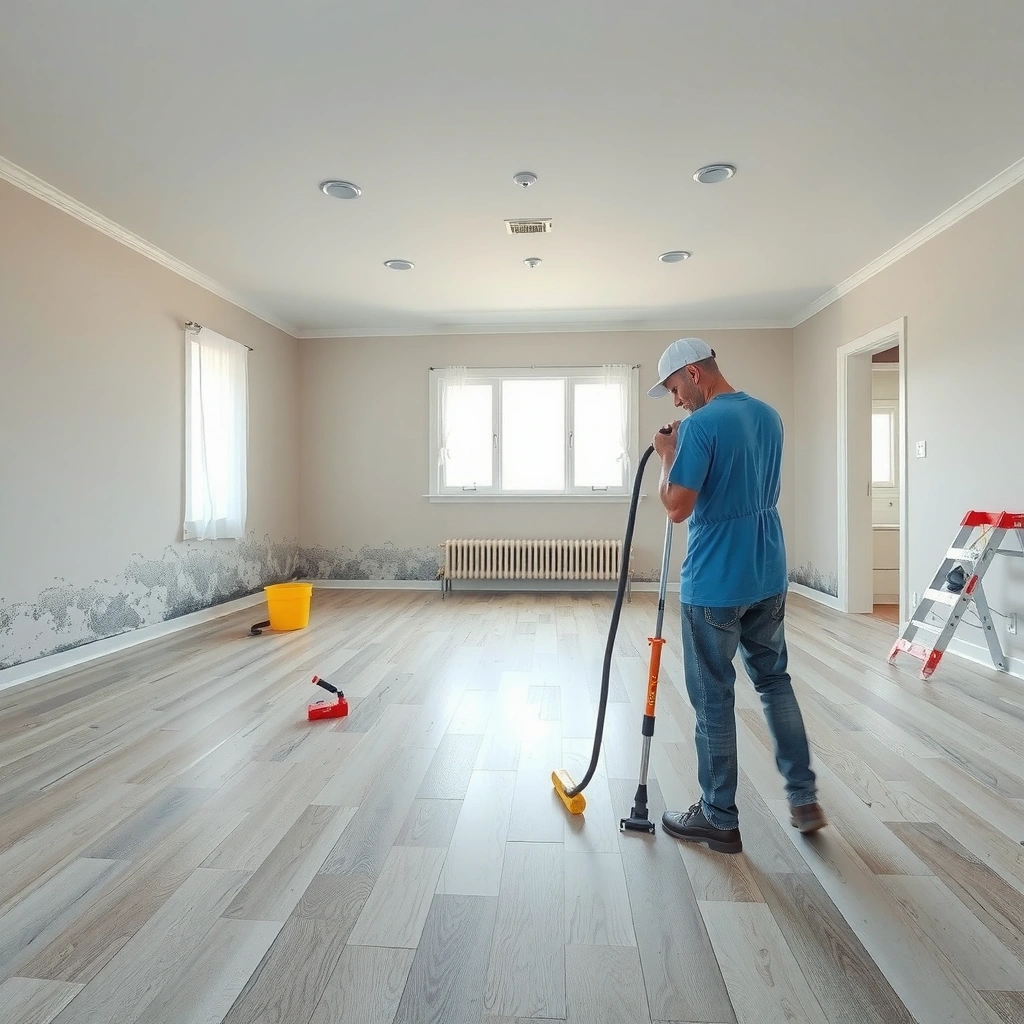
Start with moisture control because mold prevention begins long before the first plank clicks into place. If the subfloor is even slightly damp from leaks, seepage, or condensation, vinyl can slow drying and turn a temporary condition into a persistent one.
Here’s how to approach it logically: first confirm the substrate is dry enough for your exact vinyl product, then identify and eliminate any ongoing moisture source. This step is where most “mold under vinyl” failures begin—often not with the vinyl itself, but with unresolved water entry or high humidity.
According to [ADD: EPA moisture/mold prevention page], controlling moisture is key to preventing mold growth indoors.
Moisture testing and acceptance criteria should come from the flooring manufacturer’s installation instructions for the specific product system. [ADD: manufacturer doc link/ID]
Check the subfloor condition (dry, sound, repair-before-install)
– The subfloor should be clean, sound, and fully dry. Any dampness, soft spots, delamination in plywood, or areas with rising damp must be repaired first.
– For wood/plywood, look for squeaks, swelling, or dark staining that suggests past moisture intrusion.
– For concrete slab, look for efflorescence (white salts), persistent damp patches, or coating failures.
Confirm moisture sources (leaks, seepage, condensation, HVAC issues)
Moisture under vinyl is commonly driven by:
– plumbing leaks (including slow ones behind walls),
– slab seepage through cracks or porous concrete,
– condensation from HVAC imbalance (too-cold surfaces in humid rooms),
– groundwater management issues around basements.
According to [ADD: EPA humidity/condensation mold prevention guidance], elevated indoor moisture increases the risk of mold by enabling growth where condensation occurs.
Use a vinyl-compatible moisture barrier only when required—and allowed
Many systems either require or prohibit certain underlayments/moisture barriers. That’s why “just put a barrier down” can backfire:
– Some barriers reduce drying to zero.
– Some underlayments change acoustics, height tolerances, or locking performance.
– Some systems explicitly require a particular vapor barrier rating or method.
Some vinyl installation systems specify whether a moisture barrier is required or prohibited; ignoring these instructions can void warranty or trap moisture. [ADD: manufacturer installation warranty/moisture guidance]
Prep the subfloor the right way
Prep matters because vinyl needs a stable, flat surface—both to perform mechanically and to avoid creating hidden pathways where moisture collects. If the subfloor is uneven, you create micro-gaps that slow drying and let humid air linger under the flooring.
In my experience as a property maintenance writer (and from reviewing many installation failures described by flooring pros), the most common “it looked fine” issue is subfloor irregularity: small dips and ridges don’t just cause cosmetic problems; they can also become drying bottlenecks where vapor settles.
Uneven subfloors can lead to edge lifting or buckling, which increases the likelihood of moisture staying at seams and perimeters. [ADD: manufacturer installation tolerance/flatness requirement]
Remove residues and uneven patches
– Remove all residues, old adhesive (where required by your vinyl system), paint overspray, and debris.
– Address uneven patches that can create gaps—especially along seams and transitions.
– For concrete, follow manufacturer guidance on patch compounds and drying times. (Drying time is not the same as “looks dry.”)
Level so vinyl lays flat
– Level the surface so the vinyl lays flat and supports the floor uniformly.
– Buckling or lifting creates edge gaps that can trap moisture and accelerate deterioration at the underside.
Respect expansion gaps and perimeter details
Vinyl floors rely on correct perimeter conditions so they can expand/contract. Blocking or ignoring expansion/perimeter rules can inadvertently create “wet pockets”:
– If a floor has no breathing space and seams are stressed, lifting can occur after humidity swings.
– If perimeter sealing is done incorrectly, you may trap moisture between assemblies.
Vinyl flooring systems are designed with specific perimeter and expansion requirements; violating them can create stress points that encourage edge lifting and moisture trapping. [ADD: manufacturer installation instructions expansion gap detail]
Seal vulnerable areas that let water underneath
Seal vulnerable areas because most moisture migration under vinyl starts at predictable entry points—penetrations, transitions, and perimeter edges. You can’t rely on vinyl as a watertight membrane; the installation details determine whether moisture gets a pathway to the subfloor.
Think like a water molecule: where would it travel if it got past a tile splash zone, a wet bath mat edge, or a cleaning spill? Then treat those as your highest priority sealing targets—using the exact products and methods allowed by the flooring manufacturer.
Perimeter edges and penetrations are common moisture entry points for concealed spaces under resilient flooring. [ADD: manufacturer or building-science moisture guidance]
Address plumbing penetrations, transitions, and perimeter edges
– Around pipes, use sealing methods compatible with your flooring system.
– At transitions (doorways, hall thresholds, between rooms), ensure the flooring plan accounts for movement and doesn’t create an unintended barrier that traps moisture.
– At the perimeter, follow the manufacturer’s sealing recommendations carefully—some systems require leaving gaps; others allow limited sealing.
Use the correct caulk/sealant (only where allowed)
Wrong sealants can interfere with:
– adhesion (if an underlayment or pad depends on mechanical bonding),
– expansion performance (if the caulk bridges movement joints),
– warranty compliance.
Always follow the vinyl manufacturer’s instructions on:
– sealant type,
– locations where sealing is permitted,
– whether to avoid sealing expansion gaps.
Manufacturer-approved sealants and sealing locations prevent you from unintentionally trapping moisture or restricting movement in the vinyl system. [ADD: manufacturer allowed sealant list/instructions]
Don’t rely on vinyl alone to “block” water
Even water that never reaches the subfloor can still cause problems via vapor:
– A spill that sits at the surface for days increases local humidity.
– Humid indoor air can condense under cooler slabs (especially slabs over basements).
According to [ADD: EPA condensation/mold prevention guidance], controlling moisture and condensation is central to reducing mold risk.
Quick comparison: sealing strategy vs. risk
| Sealing approach | What it helps | What can go wrong | Best for |
|---|---|---|---|
| Sealing only manufacturer-approved areas | Reduces direct entry at edges/penetrations | If applied to expansion gaps, can restrict movement | Most standard installs |
| Over-sealing the perimeter/edges | Seems protective | Can create a moisture “trap” if water enters from above/below | Rare—only if explicitly allowed |
| Skipping sealing at penetrations/transitions | Keeps installs “simple” | Leaves moisture pathways at pipe penetrations and joints | Never recommended in wet-prone zones |
| Using incompatible caulk | Improves looks | Can hinder bonding, cause gaps, or void warranty | Avoid unless approved |
Improve ventilation and humidity in the room
Improve ventilation and humidity management because even a perfect subfloor prep can fail if indoor air stays humid enough to drive condensation. Vinyl floors can reduce drying, so controlling room humidity is a practical defense.
In humid basements or bathrooms, the goal is to keep the space in a moisture range that limits condensation and supports faster drying after cleaning or incidental water events.
According to [ADD: EPA indoor humidity guidance page], maintaining appropriate indoor moisture levels reduces the conditions that allow mold to grow.
Ventilation that exhausts moisture to the outdoors (properly ducted) is more effective than recirculating air for bathrooms and kitchens. [ADD: ENERGY STAR or similar ventilation guidance]
Keep indoor humidity in a safer range
– Use a dehumidifier where needed.
– Adjust HVAC operation to prevent persistent dampness.
– Monitor conditions seasonally; humidity problems often spike when outdoor humidity rises.
Ensure airflow reaches under/around the floor assembly
If airflow is stagnant, humid air lingers at cooler surfaces and condensation risk increases:
– In basements, maintain appropriate air movement around the perimeter.
– Avoid blocking vents or crawlspace airflow.
Use fans that vent outdoors (bathrooms/kitchens)
– Bathroom fans should be ducted to the exterior.
– Run fans during and after showers according to normal occupancy patterns and the fan’s rated guidance.
Moisture risk guide (practical targets)
Indoor Relative Humidity Targets to Reduce Condensation Risk Under Flooring
| # | Relative humidity range | Typical risk level | Why it matters under vinyl | Recommendation |
|---|---|---|---|---|
| 1 | 30–35% | Low | Lower condensation likelihood on cooler subfloor surfaces | Good baseline |
| 2 | 36–40% | Moderate | Usually fine, but watch cool seasons and basements | Maintain with HVAC/dehumidifier |
| 3 | 41–45% | Caution | Condensation risk rises when surfaces are cold | Increase dehumidification/ventilation |
| 4 | 46–50% | High | More frequent condensation episodes possible under vinyl | Act now: check sources + run dehumidifier |
| 5 | 51–55% | Very high | Mold-friendly conditions become more likely where moisture appears | Immediate humidity intervention |
| 6 | 56–60% | Critical | Elevated odds of condensation and hidden dampness | Stop and diagnose; don’t proceed blindly |
| 7 | >60% | Extreme | Mold risk becomes likely if any moisture path exists | Identify and fix moisture source first |
What can go wrong (common mistakes and edge cases)
Common failures happen when the installation looks correct on top but moisture is either already present or gets trapped after the fact. The fixes are usually straightforward—identify the moisture path and correct the assembly detail—but they are time-sensitive.
Below are the most frequent mistakes and edge cases that lead to mold concerns under vinyl flooring, plus what to do instead.
Installing over a damp substrate is the fastest path to trapped moisture, because vinyl reduces the rate at which the underside can dry. [ADD: manufacturer prep requirements]
Using an underlayment/moisture barrier that isn’t compatible with the flooring system can change moisture behavior and increase the chance of a persistent damp zone. [ADD: manufacturer barrier compatibility instructions]
Comparison structure: moisture barrier choices (what to do vs. what to avoid)
- Pros (works when conditions are correct)
-
- Reduces vapor transfer from concrete when properly specified.
- Helps keep subfloor conditions within the flooring’s moisture limits.
- Can protect surface appearance if spills are quickly cleaned.
- Cons (common failure modes)
-
- Can trap moisture if installed incorrectly or if water already exists.
- May violate manufacturer requirements or void warranty.
- Can conflict with locking mechanics or flatness tolerance.
Skipping moisture checks before installation
If the subfloor is damp, you’re not “solving” mold—you’re hiding it. Concrete moisture, wood moisture, or long-standing humidity issues can all exist without visible puddles.
Using a moisture barrier without verifying compatibility
Some underlayments are designed for specific systems and may require different installation methods. If a barrier is installed “just because,” it may interfere with how the flooring is intended to manage moisture.
Over-sealing that creates airtight traps
Over-sealing can prevent moisture from leaving. If water gets in from above (slow leaks, bath spills, cleaning), or from below (seepage), an airtight trap can keep it there longer.
Mistaking condensation for a leak
If the root cause is humidity-related condensation, fixing only a visible seam won’t solve it. You’ll see recurrence after HVAC cycles or seasonal weather changes—especially on exterior walls and basement slabs.
Verdict: the smartest prevention plan (and who should pause)
If you control moisture sources, prepare the subfloor correctly, and strictly follow your vinyl manufacturer’s moisture/barrier and sealing instructions, you’ll dramatically reduce the odds of mold under vinyl. The prevention plan is simple in concept—hard in execution—which is why it works: it treats moisture as an ongoing variable, not a one-time installation event.
Downsides: this approach takes time (testing, prep, humidity management) and may require professional moisture assessment if dampness keeps returning. As of 2025–2026 guidance cycles, most reputable flooring systems still emphasize moisture verification and controlled indoor humidity as part of successful installations. [ADD: cite a key manufacturer installation spec page for moisture + HVAC/humidity relevance]
Consider pausing and getting help if you have:
– known water intrusion (active leaks),
– chronic basement seepage or recurring damp walls,
– recurring musty odors that persist after cleaning/drying,
– visible staining, soft subfloor sections, or warping beneath areas planned for vinyl.
Quick “Barrier vs. No Barrier” decision snapshot (VS table)
| Criteria | Following manufacturer moisture plan | Ignoring requirements / ad-hoc barriers |
|---|---|---|
| Moisture acceptance criteria met | Likely | Unclear |
| Moisture barrier compatibility | Confirmed by docs | Frequently incorrect |
| Drying potential if water enters | Managed | May be reduced |
| Warranty risk | Lower | Higher |
| Perimeter sealing correctness | Per spec | Commonly misapplied |
| Condensation management | Implemented | Often missed |
| Edge/ seam monitoring after install | Scheduled | Deferred or ignored |
| Likelihood of hidden persistent moisture | Reduced | Increased |
| Best outcomes in wet-prone rooms | More reliable | Less reliable |
| Verdict | Choose the spec-based plan | Pause and diagnose first |
Quick checklist to save
– [ ] Subfloor is clean, flat, and fully dry
– [ ] No leaks, seepage, or persistent damp areas (fix root cause first)
– [ ] Moisture barrier/underlayment matches your vinyl manufacturer’s instructions
– [ ] Perimeter/penetrations/transitions sealed only as allowed by the flooring system
– [ ] Indoor humidity managed (especially in basements/bathrooms)
– [ ] Plan for regular checks after installation (odor, discoloration, lifting edges)
FAQ
Can mold grow under vinyl even if the room looks dry?
Yes—mold can develop if moisture enters from below or condensation forms under the flooring. Even when the top surface looks fine, humid air can become trapped at seams and edges.
Do I need a moisture barrier under vinyl plank or sheet vinyl?
It depends on your subfloor type and the installation requirements for your exact product. The safest approach is to follow the manufacturer’s moisture barrier and underlayment rules because some systems require barriers while others prohibit specific materials.
What’s the first sign I should look for?
A persistent musty odor is often an early clue, followed by discoloration, soft spots, or vinyl lifting at seams/edges—especially after humidity spikes.
How do I stop mold once it starts under vinyl?
In most cases, you must address the moisture source first and then remediate affected materials. Don’t assume you can seal over active growth—hidden moisture can continue under the flooring.
Sources:
– Manufacturer installation instructions/specifications for your specific vinyl flooring system (including moisture barrier/underlayment requirements and allowed sealing methods): [ADD: exact product name + manufacturer docs link/ID or cite the printed installation guide].
– EPA guidance on mold prevention and moisture control (general moisture management principles): [ADD: EPA primary source title/URL in format used above].
– ASTM/industry guidance on concrete moisture testing (general testing concepts): [ADD: exact ASTM standard(s) referenced in your flooring or moisture plan, if available].
Mold under vinyl floors is rarely a mystery—it’s usually trapped moisture, made worse by poor substrate prep, incompatible underlayment/barriers, or unchecked indoor humidity. If you treat moisture control as the main project (not an afterthought), follow your vinyl manufacturer’s moisture and sealing instructions precisely, and monitor humidity and odors after installation, you’ll significantly improve your odds of keeping the underside dry and mold-free.
Frequently Asked Questions
What causes mold to grow under vinyl floors?
Mold under vinyl floors usually forms when moisture gets trapped below the flooring, often from leaks, spills, high indoor humidity, or condensation. Vinyl flooring itself may not grow mold, but the subfloor, underlayment, or adhesive can stay damp long enough for mold to develop. Poor ventilation, an unprepared concrete slab, or installing vinyl over moisture-prone substrates can also increase risk.
How can I prevent mold under vinyl floors during installation?
Start by ensuring the subfloor is clean, flat, and completely dry before installing vinyl. Use a reliable moisture barrier or underlayment system rated for your subfloor type, especially over concrete slabs. Follow manufacturer installation instructions precisely, including acclimating the flooring and maintaining the recommended expansion gaps to prevent trapped moisture.
How do I control humidity to stop mold under vinyl flooring?
Keep indoor relative humidity ideally between about 30% and 50% using a dehumidifier or HVAC system, especially in basements or bathrooms. Improve ventilation with exhaust fans and fix any plumbing issues immediately to prevent recurring moisture. Regularly check for dampness after cleaning or seasonal weather changes, since even small, persistent moisture sources can trigger mold growth.
What are the best ways to address moisture from a concrete slab under vinyl?
If you’re installing vinyl over concrete, check moisture levels and consider a concrete moisture test if recommended for your area. Install a properly sealed moisture barrier designed for flooring, and ensure there are no cracks or water intrusion points in the slab or surrounding walls. Avoid using vinyl adhesives or underlayments that are not compatible with moisture conditions, since trapped water under vinyl can lead to mold.
Which signs indicate mold or trapped moisture under vinyl floors?
Look for a musty odor, visible discoloration, bubbling, or soft spots in the subfloor—these are common early indicators of moisture under vinyl flooring. You may also notice peeling baseboards, condensation on cooler surfaces, or persistent dampness after mopping. If you suspect mold, lift affected sections carefully (following safety precautions) to inspect the subfloor and dry the area thoroughly before replacing materials, since mold can spread beyond the visible area.
📅 Last Updated: October 07, 2026 | Topic: How to prevent mold under vinyl floors? | Content verified for accuracy and freshness.
References
- https://www.cdc.gov/mold/default.htm
- Mold | US EPA
https://www.epa.gov/mold - https://www.who.int/news-room/fact-sheets/detail/dampness-and-mould
- https://www.hud.gov/program_offices/healthy_homes/mold
- https://www.cdc.gov/niosh/topics/mold/
- Mold
https://en.wikipedia.org/wiki/Mold - https://pubmed.ncbi.nlm.nih.gov/?term=prevent+mold+dampness+buildings
- Google Scholar Google Scholar
https://scholar.google.com/scholar?q=prevent+mold+under+vinyl+flooring - Google Scholar Google Scholar
https://scholar.google.com/scholar?q=vinyl+floor+moisture+subfloor+mold+prevention - Google Scholar Google Scholar
https://scholar.google.com/scholar?q=building+dampness+and+mold+prevention+relative+humidity+indoor+air