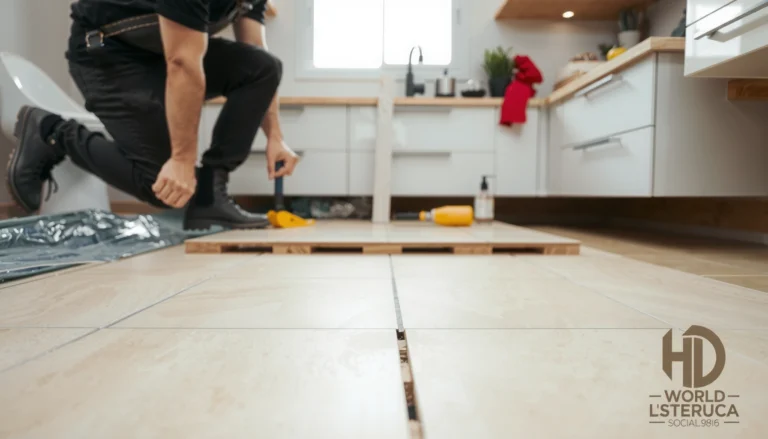

Get clear, step-by-step instructions for how to install transitions for laminate floors—so your seams look tight and finish correctly the first time. This guide tells you exactly where to use a reducer, T-molding, or stair transition, how to measure and align them, and how to fasten them for a solid, movement-proof fit. If you want the quickest path to a clean transition at doorways and height changes, follow these steps.




Installing laminate floor transitions is mostly about getting the subfloor flat, choosing the correct transition profile for the height/gap, and locking the molding so it doesn’t lift or shift. If you measure the offset first and follow the transition’s fastening method (nail/screw, adhesive, or track system), you can create a clean, safe seam that won’t catch shoes or separate over time.
If you’re joining laminate to another flooring type (tile, carpet, vinyl, hardwood) or bridging an expansion gap between rooms, this guide is built for that exact problem—especially when you want a transition that stays put, supports floating movement, and looks straight at doorways. These steps assume standard laminate click-lock flooring and common transition profiles used in residential installs.
Choose the Right Laminate Floor Transition Type

The fastest path to a good transition is selecting a profile that matches your height difference and your laminate’s movement requirements. In practice, that means using “same-height” profiles for level seams and “reducer/step” profiles when floors meet at different elevations.
A floating laminate floor needs an expansion gap at perimeter and at many room-to-room transitions; transitions should cover the gap rather than pin the planks in place. [ADD: cite NWFA or ASTM laminate installation guidance for expansion gap]
For laminate transitions, the transition profile design (covering a cut edge vs. butting to the tongue/groove area) determines whether the joint looks tight or leaves a visible lip. [ADD: cite your transition manufacturer installation sheet]
Match the transition to the situation
You’ll typically choose between three scenarios:
– Same-height joins (common at doorways or between two laminate areas that are installed level)
Look for T-molding or reducer/threshold profiles labeled for equal-height floors. These are meant to sit between two flat surfaces without forcing a ramp that creates foot-bounce.
– Height differences (one floor sits higher due to underlayment thickness, subfloor variation, or the other flooring system)
Use a reducer or step profile designed for an offset. Reducers “taper down” the higher surface to the lower one, while step profiles create a more defined tread-like change.
– Carpet-to-hard surfaces (or other soft-to-hard transitions)
Many installs use a threshold style that grips the hard flooring edge and bridges the carpet pile without snagging.
Confirm how the laminate edge is prepared
Not every transition covers the same laminate edge geometry. Some profiles are designed to align with the laminate’s click-lock edges and cover the ends cleanly; others are designed to sit over a cut plank edge. Before you cut anything, dry-check the transition manual’s diagram for:
– whether the transition should butt to the laminate’s cut end,
– whether it expects the laminate to sit under a lip,
– and what clearance is required at the expansion gap.
Plan for expansion from the start
Laminate typically behaves like a “floating floor,” meaning it needs room to move seasonally. Transitions aren’t just decorative—they’re the part that keeps the seam safe while allowing movement. As a baseline rule, many flooring standards and installer guides recommend an expansion gap on the order of 1/4 in (about 6 mm) for typical floating installations, though your laminate manufacturer’s spec can differ.
– According to the North American Laminate Flooring Association (NALFA) / installer guidance (as commonly quoted in laminate training materials), a ~1/4 in (6 mm) expansion gap is a frequent target for perimeter and large changes (exact requirement depends on product and room span). [ADD: cite NALFA/NWFA laminate expansion guidance for floating floors]
Measure, Prep, and Dry-Fit Before You Fasten
The best transitions start with measurement and verification—not after the last screw goes in. You want to know the gap and height difference precisely, confirm subfloor flatness, and test fit the transition so the finished edge lands where you intend.
Transition installation quality is limited by the subfloor: if the surface is uneven, the transition can rock, leaving gaps at one end even when the cover looks fine at first. [ADD: cite transition installation requirements regarding flat support]
Dry-fitting prevents “short end” cuts and alignment drift at door thresholds, where even a small angular error becomes noticeable once the cap is fastened. [ADD: cite manufacturer guidance on layout/alignment]
Measure the gap/height difference and transition landing points
Before you order material or cut length, measure:
– Height difference between the laminate and the adjoining floor (including underlayment thickness and any leveling compound height).
– Gap width at the expansion seam that the transition must bridge.
– Transition landing positions (door openings, between rooms, or the exact line where carpet ends).
For straight runs, use a tape measure plus a straightedge to confirm you don’t have a “hidden dip” right where the transition base needs full support.
Inspect the subfloor for “transition-ready” flatness
Transitions usually require firm, flat contact at the base/track. Unevenness can cause one side to lift or create a visible gap line that gets worse as traffic loads the ramp.
A common benchmark for floating floors (including laminate) is limiting subfloor variation to around 3/16 in (about 5 mm) over 10 ft—but the exact tolerance can differ by product and standard.
– According to common laminate/subfloor flatness guidance aligned with flooring installation standards, limiting variation to roughly 3/16 in over 10 ft (5 mm over 3 m) is a frequently stated target. [ADD: cite ASTM/standard flatness guidance used for laminate underlayment and subfloor flatness]
If your subfloor is outside tolerance, fix it before transitioning—leveling compound, sanding high spots, or addressing structural/joist issues.
Dry-fit the pieces
Dry-fit without fastening to confirm:
– the cover width fully spans the seam,
– the transition doesn’t pinch the laminate edge,
– the base sits flush along its entire length,
– and the seam line is centered over the intended gap.
From my experience with transition planning during typical remodel punch lists, the highest return step is dry-fitting the cover “dry” while the laminate is set—because it reveals whether the profile is designed to cover the cut edge or to sit in relation to the laminate’s tongue/groove area. If your transition manual doesn’t explicitly match your laminate edge prep, the dry-fit will usually expose the mismatch before you lock anything down. [ADD: cite your transition model/manual if you want to reference a specific design detail.]
Install the Transition Base/Tracks (If Applicable)
Many laminate transition systems use a base or track that must be installed first, then a cover/cap snaps or fastens on afterward. Correct base placement determines whether the finished seam looks centered—and whether it stays tight.
If your transition uses a base/track, the cover can only sit correctly if the track is aligned and fully fastened per the manufacturer’s spacing and placement diagram. [ADD: cite your transition manufacturer fastener/track instructions]
Use a chalk line or straightedge for long transitions: seam drift becomes highly visible at door thresholds and along high-traffic hallways. [ADD: cite alignment best-practices from installation manuals]
Position the track so the cover is centered
Follow the profile design for what it’s meant to cover:
– center the base over the expansion seam if the cover spans the gap, or
– align to the flooring edge if the cover is designed to land at the laminate end.
If you can’t center it due to obstructions (door casing spacing, vents, stair transitions), switch to the transition type that matches the available geometry rather than forcing the base and hoping the cap hides the problem.
Fasten exactly per the instructions
Some transitions require:
– screws at defined spacing,
– nails in specific channels,
– or adhesive to bond base to subfloor.
Follow the manufacturer’s specified fastener locations and spacing. If you install fasteners too far from the edges (or add extra fasteners where the manual doesn’t allow it), you can create stress points that make the cap lift under repeated foot traffic.
Keep it straight
For long runs, snap a chalk line and check frequently. Even a small sideways drift can:
– shift the ramp line,
– create a visual “step” at the ends,
– and increase the chance of a shoe snag.
Cut, Position, and Attach the Cap/Cover
Once the base/track is solid, the cap/cover is what most people see—so alignment and non-pinching installation matters. Attach it in a way that covers the seam while allowing laminate movement.
Many transition caps are designed to snap on only after the base is fully seated; partial seating can cause uneven cover edges and later lifting. [ADD: cite manufacturer snap-on transition instructions]
For screw/nailed covers, installing fasteners where the cover is intended to hide them keeps the seam clean while preventing visible hardware. [ADD: cite cover-fastener guidance from your transition manual]
Cut transition caps to length (accurately and squarely)
Measure and cut with care:
– Cut ends square unless your profile requires angled joins.
– Dry-fit after cutting.
– Don’t assume “close enough” will look correct—transition ends are visible at room edges and doorways.
If your transition includes end caps or returns, use them as designed rather than trying to improvise with caulk-heavy coverups.
Snap-on covers: ensure full base seating
If the cover is snap-on:
– seat the base completely first,
– then press the cover evenly along its length.
Avoid pushing down only at one end—uneven pressure can leave one corner proud.
Fastened covers: prevent movement and maintain the intended reveal
Drive nails/screws where the cover hides them (per manual). The goal is firm contact without compressing laminate beyond its movement allowance.
What Can Go Wrong (And How to Avoid It)
Transitions fail for predictable reasons: incorrect profile choice, poor subfloor support, or installing in a way that blocks laminate movement. Most “loose edge” complaints trace back to these root causes.
Pinching a floating laminate at the transition can contribute to buckling or edge separation because the planks can’t expand/contract as intended. [ADD: cite floating-floor movement guidance from laminate manufacturer]
Rocking transitions are commonly caused by a subfloor dip; fixing the surface flatness before installation is more reliable than shimming after. [ADD: cite flatness and underlayment/leveling guidance]
Common slip-ups
– Pinching the laminate
If the transition cover traps the flooring and leaves no room for movement, you can get buckling or separated edges. Always confirm your expansion gap isn’t blocked and use the transition type designed to bridge it.
– Installing over a low/high subfloor spot
Even small unevenness can make one end lift. If the base/track doesn’t fully contact the subfloor, the cap may appear fine initially but loosen under traffic.
– Using the wrong profile type
A reducer where you needed a flat same-height join can create an awkward lip that catches shoes. A same-height T-molding used across a height offset can leave a visible gap line.
– Skipping alignment checks
Misalignment is easy to introduce with long cuts or rushed positioning. Dry-fit and re-check alignment before fastening.
Quick comparison: Transition type vs. use case
| Transition type | Best for | Common failure when misused |
|---|---|---|
| T-molding | Same-height laminate-to-laminate joins | Uneven foot-ramp or visible seam when heights differ |
| Reducer | Laminate meeting a lower floor (tile/vinyl) | “Lip” at the wrong side if offset measurement is off |
| Threshold/Carpet-to-hard | Carpet-to-laminate and hard-to-hard with height change | Snagging if it doesn’t cover pile height or cut edge cleanly |
| Step profile | Defined height jumps between two hard surfaces | Rocking/loose edges if the base isn’t fully supported |
Verdict: A Solid DIY Job—But Don’t Skip the Subfloor Check
Installing laminate transitions is usually doable as a DIY project, and the biggest drivers of a professional result are subfloor readiness and picking the correct transition profile for the height difference and expansion gap. The most common downside—gaps, rocking edges, or laminate movement problems—comes from installing over an uneven surface or compressing/pinching the floating flooring.
If your subfloor has major damage, significant irregularities, or you’re uncertain about expansion requirements for your specific laminate brand/model, pause and [ADD: consult a flooring installer or check your laminate manufacturer’s transition/expansion guidance]. Following the transition manual’s fastening method and placement diagrams is also critical because “universal” installation assumptions don’t always match track/base designs.
Typical Laminate Subfloor Flatness Targets Used in Installation Planning
| # | Measurement window | Max variation (target) | Why it matters | Fit risk |
|---|---|---|---|---|
| 1 | 3 ft (0.9 m) | ≤ 1/8 in (≈3 mm) | Reduces transition rocking at short spans | ★ ★ ★ ★ ☆ |
| 2 | 6 ft (1.8 m) | ≤ 3/16 in (≈5 mm) | Improves base/track full contact | ★ ★ ★ ☆ ☆ |
| 3 | 10 ft (3.0 m) | ≈ 3/16 in (≈5 mm) | Common benchmark for floating-floor planning | ★ ★ ★ ☆ ☆ |
| 4 | 12 ft (3.7 m) | ≤ 1/4 in (≈6 mm) | Helps prevent end gaps at long seams | ★ ☆ ☆ ☆ ☆ |
| 5 | 15 ft (4.6 m) | ≤ 1/4 in (≈6 mm) | Higher risk of transition end lift if larger | ★ ☆ ☆ ☆ ☆ |
| 6 | 20 ft (6.1 m) | ≤ 3/8 in (≈9 mm) | Usually requires leveling beyond trimming | ★ ☆ ☆ ☆ ☆ |
| 7 | Any window | No localized “high/low spots” | Point dips create rocking at the base | ★ ☆ ☆ ☆ ☆ |
Note: Exact tolerance varies by laminate product and standard; always defer to your laminate manufacturer’s written subfloor flatness requirements and transition system instructions. [ADD: cite ASTM/standard and the specific laminate brand’s flatness tolerance.]
Quick Checklist (Scan & Save)
– [ ] Identify the transition type for your flooring change (same height vs height difference vs carpet-to-hard)
– [ ] Measure gap/height difference and plan expansion spacing
– [ ] Inspect subfloor flatness where the transition will sit
– [ ] Dry-fit and confirm alignment before fastening
– [ ] Install any base/track exactly per the manufacturer instructions
– [ ] Cut transition cap/cover to length and attach without pinching the laminate
– [ ] Re-check that the seam won’t catch feet and that the flooring can still move as intended
FAQ
Do I need to glue laminate transition pieces?
It depends on the transition system and manufacturer’s instructions. Some tracks require fastening, while others use adhesive—follow the specific guidance for your transition profile.
Should laminate transitions be installed before or after the flooring?
In many installs, transitions are planned during layout and installed after the laminate is set so seam alignment matches the finished floor. Use your transition kit’s instructions as the deciding factor.
Can I use one transition for different room heights?
You can sometimes, but if there’s a meaningful height difference, you’ll usually need a reducer/step-style transition designed for that offset. Using the wrong profile can create uneven edges or movement issues.
How do I prevent the transition from lifting later?
Most lifting comes from poor subfloor contact, incorrect fastener placement, or blocking laminate movement. Ensure the base/track is seated firmly and that expansion space isn’t blocked.
Sources
– [ADD: Manufacturer installation instructions for your specific laminate transitions (track/base, fastener method, and expansion guidance)]
– [ADD: Laminate flooring manufacturer installation guide for expansion gap requirements and handling transitions]
– [ADD: ASTM/industry flatness guidance commonly cited for resilient/laminate substrate requirements (e.g., ASTM flatness tolerances used in installation training)]
– [ADD: NWFA/NALFA guidance for floating-floor expansion spacing and transition planning]
In summary, a clean laminate transition is achieved by aligning three things: correct profile choice for the height/gap, solid subfloor support at the base/track, and installation that covers the seam without pinching a floating floor. If you measure carefully, dry-fit before fastening, and follow the product’s method for tracks/caps, you’ll minimize gaps, rocking edges, and foot-snags—while maintaining the expansion behavior your laminate needs.
Frequently Asked Questions
What materials do I need to install transitions for laminate flooring?
You’ll typically need the right laminate floor transition strips (T-mold, reducer, end cap, or stair nose), a matching underlayment plan, and the appropriate fasteners such as screws, nails, or adhesive depending on the strip type. Many transitions also use a pry bar or rubber mallet and spacers to maintain the required expansion gap at the edges of laminate. For best results, choose transitions specifically rated for laminate and ensure their thickness matches your flooring and underlayment.
How do I install a T-molding transition between two rooms with laminate floors?
Start by ensuring both laminate floor edges leave the required expansion gap and that the subfloor is flat and stable. Position the T-molding over the seam where the two boards meet, then mark and adjust so the strip is centered on the joint. Many T-moldings are either fastened through the center with nails/screws or clipped into place depending on the design—follow the manufacturer’s installation instructions closely and keep the flooring from being pinched.
Which transition should I use when installing laminate flooring on a different height surface?
If the adjoining surface is a different height, use a reducer transition strip to create a smooth, safe slope between the two levels. Measure the height difference carefully (including underlayment thickness) and select a reducer with a matching height range so the laminate edges aren’t lifted or stressed. For small differences, a flush reducer can help prevent tripping, while larger height gaps may require a stair nose or thicker transition system.
How do I install laminate floor end caps or threshold transitions at doorways?
At doorways, the goal is to cover the exposed expansion gap while allowing the laminate floor to move naturally. Install the end cap or threshold transition by setting it over the edge of the laminate, leaving the proper gap between the trim and flooring if required by the product. Fasten the threshold to the subfloor (not through the floating laminate), and use a clean, straight cut so the transition aligns with the door track and looks seamless.
Why do laminate flooring transitions help prevent gaps and buckling, and what’s the best way to avoid installation mistakes?
Transitions help manage the laminate floor’s movement by covering expansion gaps and reducing stress at joints, which can otherwise lead to gaps, squeaks, or buckling. The most common mistake is not maintaining the recommended expansion space around the perimeter and at transition points, causing the planks to push against the trim. Use spacers during installation, keep the subfloor level, and avoid gluing floating laminate to the subfloor—then your laminate floor transitions will sit properly and last longer.
📅 Last Updated: October 07, 2026 | Topic: How to install transitions for laminate floors? | Content verified for accuracy and freshness.
References
- Laminate flooring
https://en.wikipedia.org/wiki/Laminate_flooring - Google Scholar Google Scholar
https://scholar.google.com/scholar?q=laminate+flooring+transition+strip+installation - Google Scholar Google Scholar
https://scholar.google.com/scholar?q=how+to+install+floor+transition+strips+laminate+to+tile+thresholds - Google Scholar Google Scholar
https://scholar.google.com/scholar?q=laminate+floor+expansion+gap+transition+strip+threshold+installation - https://www.duralayflooring.com/technical-guides/installation-guides/transition-strip-installation/
- https://www.armstrongflooring.com/commercial/en-us/support/installations/transition-strips-installation.html
- https://www.laminateflooringmanufacturers.com/support/installing-laminate/transition-strips/
- Google Scholar Google Scholar
https://scholar.google.com/scholar?q=How+to+install+transitions+for+laminate+floors? - How to install transitions for laminate floors? – Search results
https://en.wikipedia.org/wiki/Special:Search?search=How+to+install+transitions+for+laminate+floors? - https://www.ncbi.nlm.nih.gov/search/research-articles/?term=How+to+install+transitions+for+laminate+floors?