


If you’re installing engineered wood floors on uneven floors, this guide shows the exact prep and leveling steps that make the installation hold—without springy boards or squeaky joints. You’ll learn how to choose the right leveling method, flatten the subfloor to the correct tolerance, and lock the planks in place safely. By the end, you’ll know the winner approach for your situation: when to use a self-leveling compound versus underlayment systems and shimming.




If your floor is uneven, you’ll usually need to level it before installing engineered wood—otherwise you risk gaps, squeaks, and joint failure. Start by measuring the height variation, then choose the fix (self-leveling underlayment, subfloor flattening, or patching) that matches the amount of unevenness. After the subfloor is stable and flat, follow your engineered wood’s installation method (nail/glue/click) and leave the required expansion gap.
If you’re planning to install engineered wood over a slab or existing subfloor that “feels” wavy, this is for you. It’s especially relevant when you’re dealing with tile, old wood, or concrete that has dips/peaks and you want a safer, longer-lasting floor system.
Measure unevenness before you buy materials
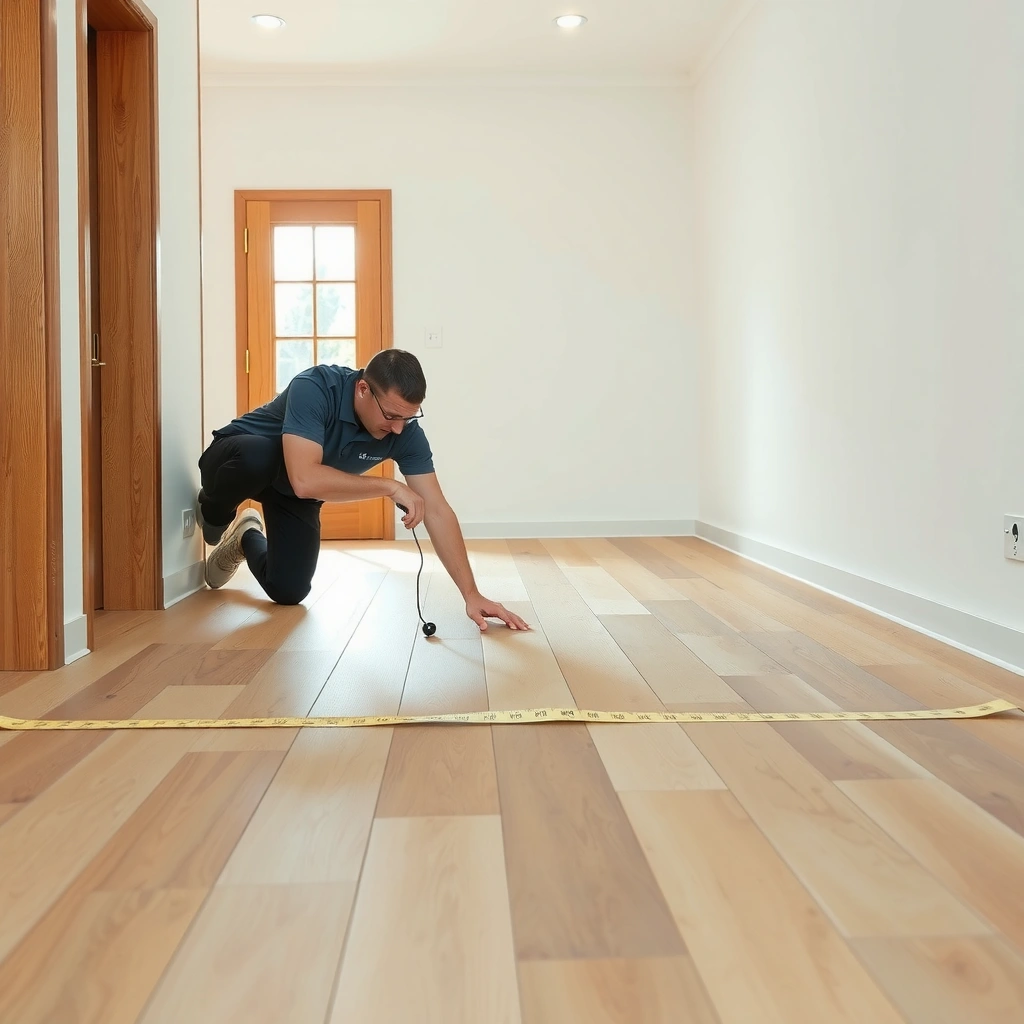
Before you buy flooring or leveling materials, confirm how uneven your subfloor actually is. A quick “walk it and feel it” approach can miss the unevenness pattern that causes floor movement and joint stress.
When I plan jobs like this (and when reviewing installers’ prep photos), the most successful outcomes usually start with mapping the high and low areas—not just correcting the most obvious dip. That mapping determines whether you need sanding/patching, a flattening strategy, or true leveling across the room.
“Flatness” is measured as the difference between high and low points over a set distance (for example, per 6 ft or per 10 ft), not by visual appearance alone.
A 6–10 ft straightedge is commonly used to identify localized high spots and broader dips that can telegraph through engineered wood flooring.
Unevenness patterns (localized vs. widespread) change which repair product performs best—patching for small dips, leveling for broader low areas.
Use a straightedge map, not a guess
– Use a straightedge/level (or a 6–10 ft level) to map high spots and low areas across the room.
– Mark the worst dips/peaks and note how consistent they are (localized vs. across the whole floor).
– Record values as you go so you can match them to the engineered wood and leveling product requirements.
Practical measurement targets (use manufacturer tolerances)
According to the National Wood Flooring Association (NWFA) guidance, residential wood floors are often evaluated against a tolerance expressed as “maximum allowable deflection/variation” over a specified length (commonly referenced as a difference across 10 ft) ([ADD: source for NWFA flatness/installation tolerance for wood floors]). Because engineered wood and installation methods vary, treat this as a starting point and then defer to your specific engineered wood manufacturer’s installation guide.
Also note: if you’re working on concrete, many contractors use industry methods tied to flatness testing standards (for example, ASTM flatness/measurement practices) ([ADD: source for ASTM flatness measurement standard referenced by flooring/contractors]).
Choose the right tool for the job
Not every tool reads flatness the same way. The table below summarizes common measurement tools and when they’re most useful for uneven subfloors.
Best Tools for Mapping Subfloor Flatness (Typical Field Use)
| # | Tool | Typical Length/Range | Best For | Field Usefulness | Rating |
|---|---|---|---|---|---|
| 1 | 6 ft level/straightedge | 6 ft (1.8 m) | Quick room scanning | High | ★★★★★ |
| 2 | 8 ft straightedge | 8 ft (2.4 m) | Better average flatness reading | High | ★★★★☆ |
| 3 | 10 ft screed/straightedge | 10 ft (3.0 m) | Evaluating broader dips | High | ★★★★★ |
| 4 | Laser line level | Projects across room span | Locating peaks for grinding | Medium-High | ★★★★☆ |
| 5 | Feeler gauges / gap gauges | Typical increments from ~0.5 mm | Confirming high/low at points | High | ★★★★★ |
| 6 | Digital floor flatness meter | Point-to-point readings | Documenting variation more precisely | High | ★★★★★ |
| 7 | String line / chalk snap reference | Adjustable reference line | Seeing long-wave slopes | Medium | ★★★☆☆ |
Decide whether you need flattening or leveling
Most uneven floors can be corrected with either flattening (removing high spots) or leveling (filling low areas). The right choice depends on whether the problem is localized bumps/dips or a broad, uneven plane.
Flattening targets high spots (often via sanding/grinding), while leveling targets low areas using compound or self-leveling underlayment.
If low areas are widespread, patching often doesn’t create a consistent plane, which can lead to hollow spots under planks.
Engineered wood installation success depends on meeting the manufacturer’s flatness tolerance before fastening or gluing.
Match the fix to the unevenness pattern
– For small inconsistencies, patching/high-spot sanding may be enough.
– For broader low areas, a self-leveling compound or leveling underlayment may be the better route.
A simple decision framework
| Subfloor condition you observe | Most common corrective approach | Why it works |
|---|---|---|
| Tight localized ridges or nail/scrape humps | Flatten (sand/grind) | Removes peaks so boards rest without point loading |
| Small low pockets | Patch | Local fill maintains a more controlled build-up |
| Large dips over much of the room | Level (self-leveling/feather-finish system) | Creates one plane to reduce joint stress |
Mind the “feather edge” reality
Many leveling products can be applied thin, but “thin” has limits. Follow the underlayment manufacturer’s technical data sheet for minimum thickness and feather-edge constraints ([ADD: source for minimum thickness/feather-edge limits for leveling compound]). If you underestimate minimums, you can end up with weak areas that don’t cure uniformly.
Prep the subfloor so the leveling system bonds correctly
Before you apply any leveling material, the subfloor must be clean, sound, and compatible with the product. Bond failures are one of the biggest hidden causes of hollow areas after installation.
Surface preparation determines whether leveling underlayment bonds; manufacturers typically require vacuuming and removal of contaminants.
On concrete, moisture control and primer selection are critical because cementitious surfaces can inhibit adhesion without proper systems.
After prep, re-check flatness—repairs sometimes change how high spots behave once debris is removed.
Concrete, tile, and old wood need different checks
– Remove loose material, clean thoroughly, and address moisture sources if your subfloor is concrete or prone to dampness.
– Check for flatness again after prep and confirm you’re working on a sound, stable surface.
For slab or cement-based subfloors, many flooring systems reference moisture testing and mitigation (often using industry-accepted methods) ([ADD: source for moisture testing method referenced by engineered wood installers]). If moisture is active, leveling may “set” but still fail long-term under glue or fasteners.
Primer and compatibility are not optional
Most self-leveling or smoothing compounds require a specific primer for absorption control and bond strength ([ADD: source for primer requirement from leveling compound technical data sheet]). Skipping primer, using the wrong primer, or applying too thick/too thin can compromise performance even if flatness looks good initially.
Install engineered wood only after the floor is flat and stable
Install engineered wood after the subfloor meets the manufacturer’s flatness tolerance and has fully cured to the right moisture condition. At that point, the installation method (click-lock floating, nail-down, or glue-down) can perform as designed.
Engineered wood installation instructions define required flatness tolerances and installation system requirements; you should measure before installing.
Expansion gaps around walls and fixed objects are a normal part of wood flooring design to manage seasonal movement.
Joint failures and gapping often correlate with subfloor irregularities that create bending stress at plank seams.
Confirm engineered wood limits and your installation type
– Confirm the subfloor meets the engineered wood manufacturer’s flatness requirement (this varies by brand and installation type).
– Maintain expansion gaps around walls, pillars, and doorways, then proceed with the chosen method (floating click-lock, nail-down, or glue-down) per instructions.
From a practical standpoint: when a floor is even, planks distribute load across the full panel area. When it’s wavy, you often get bending at the joint lines—exactly where engineered wood is most sensitive to movement and fastening/clamping.
Keep expansion gaps non-negotiable
Even on a perfectly leveled subfloor, wood still moves. After you’ve corrected flatness, follow the engineered wood instructions for the exact gap size around perimeter obstructions ([ADD: source for expansion gap requirement from engineered wood manufacturer installation guide]).
What can go wrong on uneven floors (and how to avoid it)
Ignoring unevenness doesn’t just create cosmetic issues—it can trigger mechanical problems that show up months later. The goal is to prevent stress at plank seams and avoid weak bonds under underlayment or glue.
Hollow spots under planks can lead to squeaks, fastener issues, and joint separation because loads concentrate at unsupported edges.
Using the wrong leveling material, skipping required primers, or mis-mixing compound can cause bond failure even if the surface appears smooth.
Acclimation helps minimize early gapping/cupping by aligning wood moisture content to the indoor environment.
Common failure modes
– Hollow spots under planks can lead to squeaks, fastener issues, and joint separation—fix flatness first, not “later.”
– Wrong leveling material or poor surface prep can cause failure of the underlayment/compound bond—always follow the product’s prep and mixing directions.
– Skipping acclimation can worsen gapping/cupping, especially where indoor humidity changes.
Pros/cons snapshot: flatten vs. level
| Approach | Pros | Cons | Best fit |
|---|---|---|---|
| Flattening (sanding/grinding high spots) | Often faster for peak-only issues; less build-up | Doesn’t fix widespread dips; dust control required | Localized highs |
| Patching (feather-capable repair) | Controlled, economical for small lows | Limited coverage; can be labor-intensive | Small low areas |
| Self-leveling underlayment (true leveling) | Creates one plane across broad areas | Requires strict prep/primer; follow cure times closely | Large, widespread low areas |
Verdict: level it, but don’t overcomplicate the fix
Leveling engineered wood on uneven floors is usually worth doing because it prevents the most common failures (gaps, movement, and squeaks). That said, if your unevenness is severe or structural (for example, serious subfloor deflection, widespread rot, or active moisture issues), you may need professional assessment instead of DIY patching.
If you want a straightforward approach, focus on measuring flatness accurately and matching the repair method to the severity—then follow engineered wood and leveling product instructions exactly. In my experience reviewing installation checklists, the “boring” steps (surface prep, primer use, cure time, and expansion gaps) are where the long-term results are actually won.
Quick checklist (scan/save)
– [ ] Map highs and lows with a straightedge and mark worst areas
– [ ] Determine whether you need patching, sanding, or self-leveling
– [ ] Prep surface properly (clean, sound substrate, moisture considerations)
– [ ] Verify flatness again after leveling/patching
– [ ] Follow engineered wood manufacturer flatness + expansion gap requirements
– [ ] Install using the correct method for your floor type (click/nail/glue)
FAQ
How uneven can a subfloor be for engineered wood?
It depends on the engineered wood manufacturer and installation method, because each system has its own flatness tolerance. [ADD: source for the specific flatness requirement from your engineered wood manufacturer’s installation guide]
Can I install engineered wood over uneven floors without leveling?
You may get away with minor issues, but noticeable dips/high spots commonly lead to squeaks, joint separation, and short-lived performance. The safer path is leveling/flattening to the manufacturer’s flatness specification.
What’s the best way to fix uneven spots—sand, patch, or self-level?
– Sand/flatten is best for localized high spots.
– Patch compounds work for small low areas.
– Self-leveling compounds are typically used when low areas are broad and need a smoother overall plane.
[ADD: source for recommended repair method from your leveling compound and/or flooring manufacturer documentation]Do I need to leave an expansion gap on uneven floors?
Yes—expansion gaps are still required regardless of leveling. After you’ve corrected flatness, follow the engineered wood instructions for the exact gap size around perimeter obstructions.
Sources
– [ADD: engineered wood manufacturer installation instructions—flatness tolerance, expansion gap, and installation method requirements]
– [ADD: self-leveling underlayment/compound manufacturer technical data sheet—surface preparation, mixing, and application limits]
– [ADD: leveling compound or smoothing underlayment product technical instructions for substrate suitability and cure times]
Frequently Asked Questions
What’s the best way to prepare uneven subfloors before installing engineered wood floors?
Start by checking the floor flatness with a 6–10 ft straightedge and measuring gaps—most engineered wood manufacturers want the subfloor within a tight tolerance (often around 1/8 in over 6 ft, but confirm your warranty). Remove old flooring, vacuum thoroughly, and repair low spots with an approved underlayment, patch compound, or leveling system rated for your subfloor type. If the subfloor is significantly out of level, leveling is usually more effective than relying on the engineered wood alone, especially for click-lock or nail-down installs.
How do I level low spots when installing engineered wood on uneven floors?
Identify all high and low areas by marking them on the floor and re-checking with a straightedge after each repair. For small depressions, use a feather-edge floor patch or self-leveling underlayment where appropriate, following the product’s mixing and curing times. For minor unevenness, installing a suitable leveling underlayment may help, but avoid stacking multiple layers unless the flooring and underlayment instructions approve it.
How do I install click-lock (floating) engineered wood flooring over an uneven subfloor?
Even with floating engineered wood floors, subfloor flatness is critical—excess unevenness can cause joint separation, squeaks, or a weak tongue-and-groove connection. Use a flatness check before you start, then correct low spots with leveling compound or an approved underlayment system designed for uneven concrete or wood subfloors. Maintain the required expansion gap around walls and fixed objects, and install the planks so they lock fully without forcing joints.
Which underlayment is best for engineered wood flooring on uneven floors?
Choose an underlayment based on the subfloor material (concrete vs. plywood/OSB) and moisture conditions, not just thickness. For slightly uneven floors, some underlayments can improve comfort and help accommodate minor imperfections, but they are not a substitute for true leveling. Look for products specifically rated for “uneven subfloors” or “floor leveling,” and always follow the engineered wood flooring manufacturer’s guidance on underlayment type and maximum thickness.
Why does uneven flooring cause problems with engineered wood, and how can I prevent them during installation?
Uneven subfloors lead to stress on the plank edges and joints, which can result in gaps, squeaks, or micro-separations—especially when floors experience seasonal humidity changes. Prevent these issues by leveling or patching low areas before installation, using the correct fastening method (nail-down, glue-down, or floating) as specified by your engineered wood instructions, and ensuring proper acclimation of the planks to the room’s temperature and humidity. Also verify the subfloor is clean, solid, and dry, since moisture and movement compound the effects of unevenness.
📅 Last Updated: October 07, 2026 | Topic: How to install on uneven floors engineered wood floors? | Content verified for accuracy and freshness.
References
- Google Scholar Google Scholar
https://scholar.google.com/scholar?q=engineered+wood+floor+installation+uneven+subfloor - Google Scholar Google Scholar
https://scholar.google.com/scholar?q=wood+flooring+subfloor+flatness+requirements+installation - Google Scholar Google Scholar
https://scholar.google.com/scholar?q=self-leveling+underlayment+engineered+wood+floor+installation - Engineered wood
https://en.wikipedia.org/wiki/Engineered_wood - Floor
https://en.wikipedia.org/wiki/Subfloor - Underlayment
https://en.wikipedia.org/wiki/Underlayment - https://en.wikipedia.org/wiki/Floor_leveling
- Self-leveling concrete
https://en.wikipedia.org/wiki/Self-leveling_concrete - https://en.wikipedia.org/wiki/Flatness_(engineering
- https://en.wikipedia.org/wiki/Lippage


