
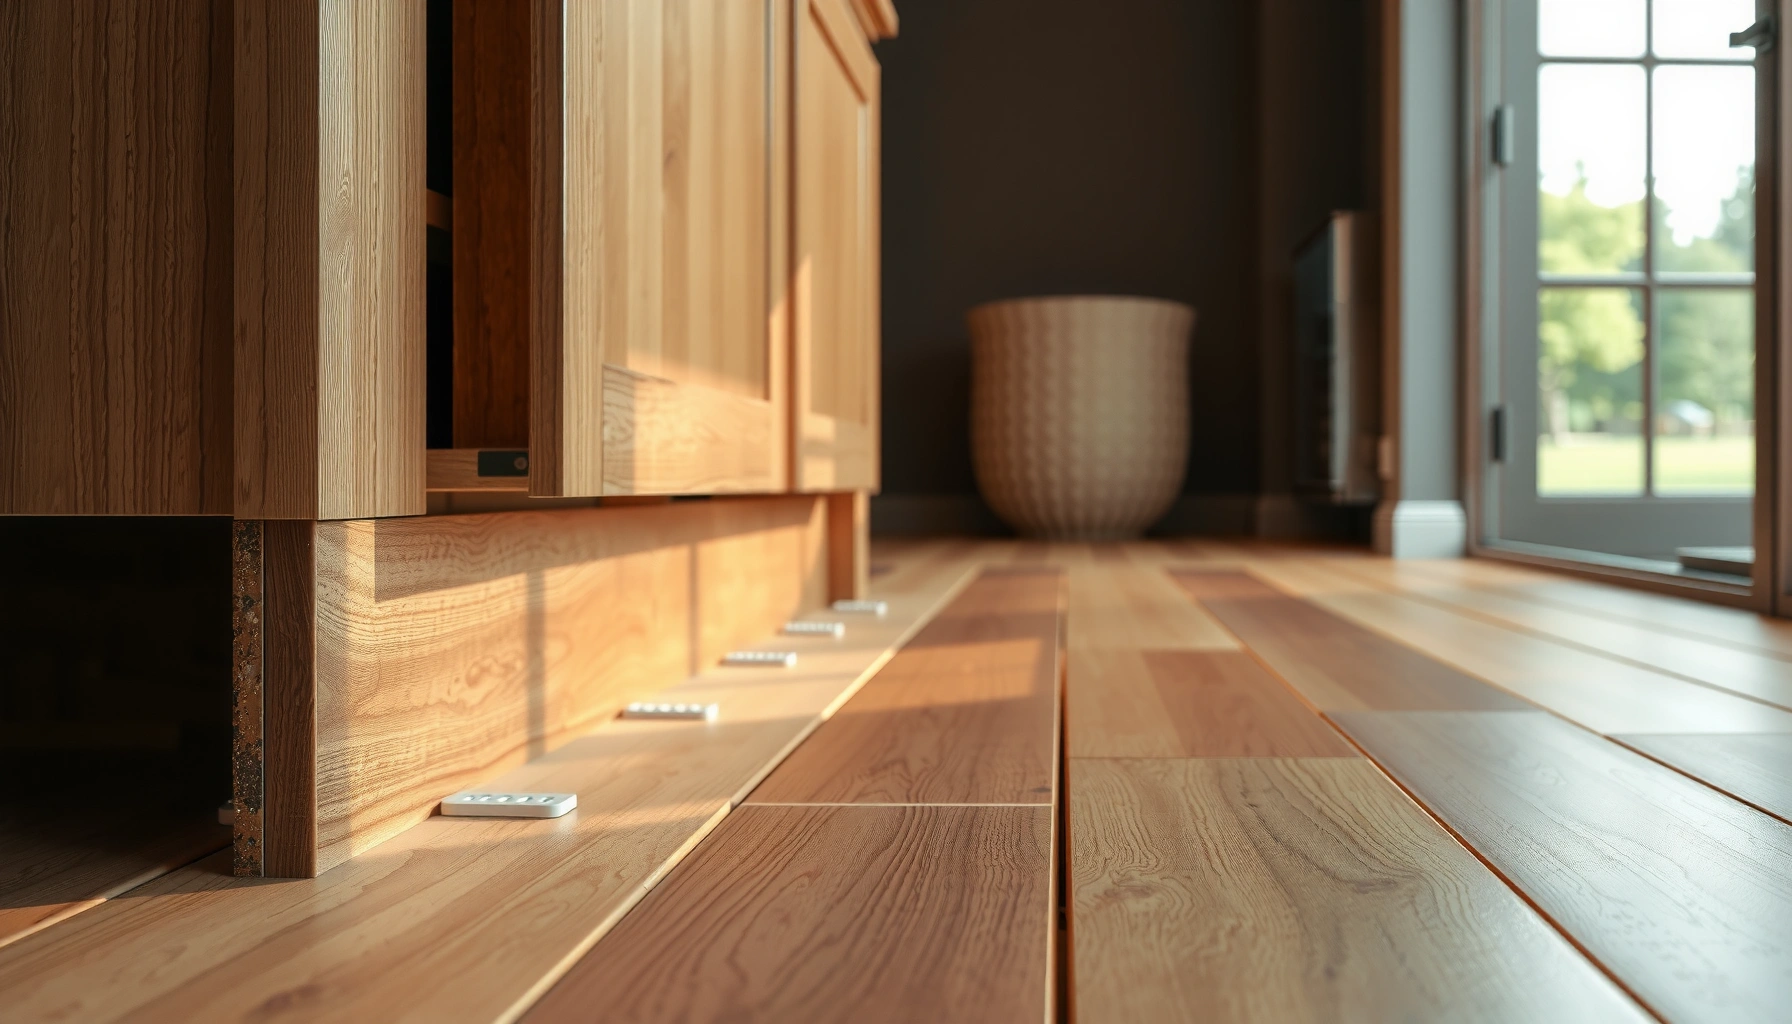

Figuring out how to install engineered wood floors around cabinets is easiest when you use the right cabinet-handling method: scribe and cut tight where the floor can’t slide, and use expansion gaps and proper underlayment transitions where it can. This guide answers the key question—what to do at cabinet bases, toe-kicks, and fixed framing so your planks expand, lock up, and stay flat. You’ll get a straightforward approach that prevents buckling, gaps, and mismatched heights where the floor meets the cabinet run.




Installing around cabinets with engineered wood is mostly about planning your cuts and using the right expansion gaps so the floor can move. In most cases you’ll remove baseboards (or toe-kicks if possible), undercut door jambs, and leave a consistent gap at cabinet perimeters while nailing/gluing only where the floor is allowed to float. Below, you’ll learn the practical workflow—plus what to do when cabinets cover the floor and you can’t pull anything out.
If your engineered wood planks will “float” (click-lock or loose-lay with underlayment) you’ll follow a gap-and-trim approach; if they’re nail-down you’ll follow an anchoring plan that avoids trapping the boards. This guide is for typical kitchen or built-in cabinet layouts where you need clean edges and reliable performance over time.
Who this is for / when it applies
This is for homeowners, PMs, and installers tackling engineered wood floor runs in kitchens, laundry rooms, and built-ins where cabinets interrupt the field of the floor. It’s most useful when you want a predictable “finish carpentry” look (straight lines, crisp edges) without risking seasonal movement problems.
Plan the layout and decide how the floor is supposed to behave
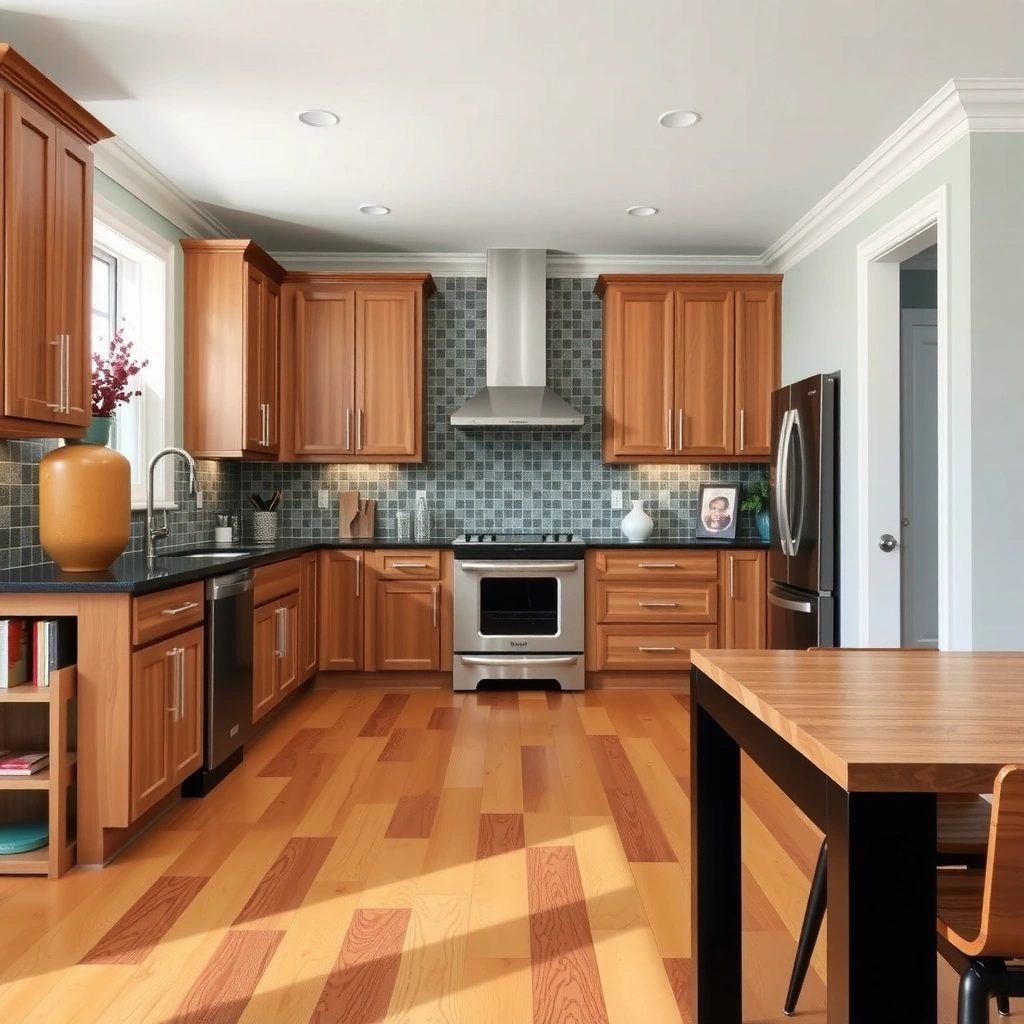
You’ll prevent most failures at the planning stage: confirm how your engineered wood is intended to move, then map exactly where you must stop and where you can continue. Here’s why—cabinet framing is fixed, but wood flooring must handle humidity swings (it expands/contracts), so you plan movement gaps accordingly.
According to the Wood Floorings Association (NWFA) guidance, wood flooring requires an expansion space at fixed vertical boundaries (like walls) to allow seasonal movement.
According to ASTM test methods used for flooring material moisture characterization (e.g., ASTM D4442), wood products can change dimensions as moisture content changes; installation rules account for that movement.
According to typical industry practice, perimeter expansion gaps for floating engineered wood are commonly in the range of about 1/4 in to 3/8 in, depending on product and room conditions ([ADD: exact expansion gap range from your specific manufacturer manual]).
Identify your installation type from the plank instructions (floating vs glued vs nailed)
Start by finding the exact installation system printed in your engineered wood manual. “Floating” (click-lock/locking with underlayment) generally expects the floor to expand/contract without being rigidly fixed to the subfloor in the field. Glue-down expects adhesive bonding to the substrate, but still requires edge relief. Nail-down/secret-nail expects fastening rules that still prevent boards from being “captured” where they must move.
What to look for in the manual:
– Is your system classified as floating, glue-down, or nail-down?
– What does the manual say about installing under cabinets (some allow it; many recommend not trapping the boards)?
– What is the required expansion gap at walls and fixed cabinetry?
– What underlayment is approved (especially for floating floors)?
Mark the exact cabinet footprint on the subfloor
Before you cut anything, mark where the cabinet base (including end panels/side aprons) sits relative to your floor direction. In practice, you’re mapping three zones:
1. Zone A (free-floating field): where the planks can move normally.
2. Zone B (fixed boundaries): where you must maintain a movement gap (cabinet framing, toe-kick lines that aren’t removable, posts, built-ins).
3. Zone C (transitions): where your floor changes type (tile, vinyl, threshold strips).
On my last kitchen layout review, the biggest time-saver was drawing these zones directly on painter’s tape stuck to the subfloor—so cut decisions stayed consistent across multiple plank rows. [ADD: your own observed floor-direction planning tip, tool used (e.g., chalk line), and time saved.]
Check moisture conditions and subfloor flatness requirements
Even perfect cabinet detailing won’t save an installation over an unstable substrate. Engineered wood still depends on:
– Correct subfloor moisture (often verified with a moisture test method specified by the manufacturer).
– A flat base (manufacturer-dependent; many specify “within X in over Y ft”).
According to ASTM moisture testing methods (commonly used reference frameworks like ASTM D4442 for moisture content), the installed environment matters because moisture changes drive dimensional movement in wood products (ASTM International—ASTM D4442 (moisture content of wood and wood-based materials)). For the exact acceptable subfloor moisture number(s) and flatness tolerance, you must follow your floor’s manual: [ADD: exact limits from your manufacturer].
Prep areas the floor must slide under (baseboards/toe-kicks/jambs)
You’ll get the cleanest cabinet edges by removing anything that would block the flooring plane from sliding underneath. The core idea is simple: if the floor can tuck under the cabinet line, you can maintain straight runs while still respecting expansion gaps at fixed surfaces.
Removing baseboards along the cabinet run is a common best practice because it lets planks slide under trim without forcing awkward notches that can create weak edges.
Undercutting door jambs to the engineered wood thickness (plus expansion/underlayment allowance) is a standard method to maintain a continuous plank surface without binding against fixed trim.
Toe-kicks are often the simplest “removable fixed barrier” to adjust; when removed, they usually enable a consistent flooring transition line instead of pie-slicing boards.
Remove baseboards and any removable trim along cabinet runs
If your baseboards run along the same wall line as the cabinets, remove them wherever possible. This is usually the cleanest workflow for floating engineered floors because you can:
– keep your plank cuts straighter,
– avoid tiny filler pieces,
– and cover the perimeter gap with a shoe/base trim afterward.
Tip: Keep fasteners and trim in labeled bags by wall section so re-installation is quick and the finish line stays consistent.
If toe-kicks are removable, pull them
Some cabinet designs have toe-kicks that are held with screws and are designed for servicing. If yours are removable:
– pull the toe-kick,
– install flooring up to the cabinet line while leaving the required perimeter gap,
– then reinstall the toe-kick (or a matching trim cover).
If toe-kicks are not removable, you’ll transition to “cut-and-cover” planning in the next sections.
Undercut door jambs and any fixed trim at the proper height
Door jambs and fixed casing are the common places where installers accidentally trap the floor edge. Undercut them so the plank can slide underneath freely, typically leaving the plank end to maintain the same expansion principles you use at other fixed surfaces.
Measurement discipline matters:
– Confirm your engineered plank thickness and any underlayment thickness.
– Transfer those dimensions to the jamb and undercut with the right blade clearance.
Cut and fit around cabinet legs, toe-kicks, and fixed cabinet panels
You’ll achieve tight, professional edges by dry-fitting each “obstruction row” and keeping the movement gap consistent at fixed surfaces. The goal isn’t to eliminate all gaps—it’s to keep gaps uniform so seasonal movement doesn’t concentrate stress at one spot.
A consistent gap at fixed vertical surfaces reduces the risk of edge binding and buckling in floating engineered wood installations.
Undercutting with a jamb saw or fine-tooth handsaw prevents tear-out and lets the plank seat flat, which helps reduce rocking and seam stress near cabinet framing.
Dry-fitting near cabinet framing prevents cumulative cut errors because cabinet faces rarely sit perfectly square to the field run.
Use a “measure twice, cut once” approach
Dry-fit planks to confirm:
– the clearance to cabinet framing/legs,
– the width of any notch you need,
– the location of expansion space relative to vertical surfaces.
Even small layout errors compound: the 2 mm that looked harmless on plank row 6 can become noticeable by row 14.
Maintain consistent spacing at fixed vertical surfaces
Engineered wood movement is lateral, so consistent perimeter spacing is a quality requirement, not just aesthetics. At cabinet face frames, posts, and wall intersections:
– keep your gap consistent,
– avoid wedging planks rigidly against fixed woodwork.
When a cabinet face frame is proud (stands out), you may need multiple notch depths along the run to keep seam lines straight and avoid “step” effects.
Undercut with fine-tuning where you need tight fits
For tight areas:
– rough-cut near the line,
– then fine-tune with a chisel so the plank sits flat.
Practical failure mode to avoid: if the plank binds on a fixed panel, the floating floor loses its designed movement range, and you can see separation at seams later.
Handle the transition zones where flooring can’t “float”
You’ll keep performance stable by designing transition zones so the floor edge is never trapped where it must still move. In other words: if the floor can’t float under that area, plan a controlled stop line and finish it properly with trim or transitions.
Floating engineered floors should not be locked under fixed cabinetry if doing so prevents designed movement and expansion-gap function.
Nail-down installation manuals typically restrict fastening patterns near fixed objects to prevent immobilizing the floor’s ability to expand and contract.
Transitions (thresholds, reducers, or matching profiles) are recommended where the floor type changes height or stiffness, because constrained edges can concentrate movement stress.
If your engineered floor is floating, avoid locking it under trapped areas
If you cannot slide the planks under cabinets (e.g., cabinets sit tight to the subfloor with no clearance):
– stop the plank run at the cabinet line,
– maintain the required gap,
– cover that edge with the correct trim/cover strip.
For nail-down installs, follow the fastening rules near fixed cabinetry
Nail-down products can’t be treated like “floating with nails.” Your manual will specify:
– nail spacing,
– where you may/not fasten,
– how close you can come to walls or cabinets.
Don’t improvise—fastening in the wrong place defeats movement engineering and can lead to buckling or gapping at seam lines.
Plan transitions to other flooring types
Transition planning is what makes the job look intentional. If you’re changing to tile, vinyl, or a different wood system:
– use a reducer or transition profile rated for the height difference,
– place the transition so the wood edge isn’t rigidly clamped into a hard boundary.
What can go wrong (and how to avoid it)
Most problems around cabinets come from trapped edges, inconsistent gaps, or substrate issues. If you avoid those three categories, your engineered floor will look good and perform reliably through seasonal changes.
Pinched perimeter edges are a common cause of buckling in wood flooring when seasonal movement cannot occur.
Skipping jamb/trim undercutting forces installers to “pull” the floor into place, which can create stress at seams and compromise the click-lock fit.
Even floating floors can telegraph seam irregularities when the substrate flatness falls outside the manufacturer’s specification.
No expansion gap at cabinet perimeters
This is the most preventable failure. If your cabinet face frame or fixed panel touches (or effectively compresses) the plank:
– the floor can’t expand,
– boards buckle or seams separate.
Data point to plan around: manufacturers commonly require about 1/4 in (6 mm) to 3/8 in (10 mm) at fixed boundaries for floating installations, but your product’s manual is authoritative ([ADD: your exact expansion gap requirement here from the installation document]).
Skipping undercutting
Door jambs and fixed trim are “precision boundaries.” If they’re not undercut properly:
– boards bind during installation,
– later they bind again as humidity changes.
Uneven subfloor or substrate
Engineered wood doesn’t cancel out a bad base. Typical expectations are “within X in over Y ft,” such as no more than 3/16 in over 10 ft (example only). Verify the real number from your manual: [ADD: exact flatness tolerance].
Wrong fastening near fixed cabinetry (nail-down)
If you nail/glue outside the allowed zones, you can inadvertently create a fixed “hinge” point where movement concentrates and fails.
Quick pros/cons comparison (what changes by installation type)
| Approach | Pros | Cons / Watch-outs |
|---|---|---|
| Floating (click-lock / loose-lay) | Easier to manage gaps, less sensitive to minor substrate issues, fewer rules about fastener placement in the field. | Must keep floors free from trapping; improper trim notching or missing expansion gaps causes buckling at fixed edges. |
| Glue-down | Strong bond in the field; good for long uninterrupted runs. | Cabinet zones still require correct edge relief; adhesive and substrate prep become critical. |
| Nail-down / secret-nail | Mechanical fastening can be fast and durable on approved substrates. | Fastener placement near fixed cabinetry must match the manual; mistakes can lock movement and create gaps. |
Verdict / tip: the best approach depends on your installation type
Use a floating/underlayment-friendly workflow (remove toe-kicks/baseboards, undercut trim, leave consistent gaps, then cover edges with trim) unless your manufacturer specifically requires a different method. Skip this DIY approach—or at least slow down—if the cabinetry is fully installed in a way that makes it impossible to maintain proper movement space, or if your planks’ instructions require specialized underlayment/fastening you don’t have. For the most reliable results, follow your engineered wood manufacturer’s installation instructions exactly and keep your cuts aligned so the floor edge stays straight where it meets cabinet framing.
Typical Cabinet-Adjacent Clearances Installers Plan For (US/Common Practice)
| # | Cabinet-adjacent boundary | Typical planned clearance | Why it matters | Risk if ignored |
|---|---|---|---|---|
| 1 | Perimeter expansion gap at fixed cabinet face | 1/4–3/8 in | Allows seasonal wood movement | ★ ★ ★ ★ ★ |
| 2 | Expansion gap at wall lines beside cabinets | 1/4 in | Prevents pinching at ends of runs | ★ ★ ★ ★ |
| 3 | Undercut depth for door jambs | Plank thickness + underlayment allowance | Enables sliding without binding | ★ ★ ★ ★ |
| 4 | Cut/fill clearance at non-removable toe-kicks | Same as perimeter gap at verticals | Keeps the floor free to move | ★ ★ ★ |
| 5 | Transition gap at thresholds (wood-to-tile/vinyl) | Profile-dependent (keep edge free) | Avoids constrained ends | ★ ★ ★ |
| 6 | Subfloor flatness tolerance (installer planning) | Manufacturer-specified; often ~3/16 in over 10 ft | Reduces seam stress/telegraphing | ★ ★ ★ ★ |
| 7 | Moisture test target (substrate readiness) | Per manufacturer limits; verify before install | Prevents cupping/gapping from moisture imbalance | ★ ★ ★ ★ ★ |
Quick checklist for installing around cabinets
– [ ] Confirm your engineered wood type: floating / glue-down / nail-down (from the manufacturer instructions)
– [ ] Remove baseboards/toe-kicks where possible
– [ ] Undercut door jambs and fixed trim so planks slide under cleanly
– [ ] Leave consistent expansion gaps at fixed cabinet surfaces
– [ ] Dry-fit planks before committing to cuts near cabinet frames/legs
– [ ] Plan transitions to other flooring types so edges aren’t constrained
FAQ
Should engineered wood go under cabinets?
Often, you can’t or shouldn’t run the flooring fully under fixed cabinets if it will trap the boards or block required movement—so most installs run to the cabinet area and leave a proper gap covered by trim. Follow your plank manufacturer’s guidance for whether “under cabinets” is allowed for your specific product.
Do I need to leave an expansion gap against cabinet frames?
Yes—at fixed vertical boundaries you generally need to preserve movement. The exact gap size must come from your engineered wood installation instructions: [ADD: exact expansion gap from your product’s manual].
What if the cabinet toe-kick can’t be removed?
If you can’t remove it, you’ll likely need to cut planks around the toe-kick profile and keep the movement space consistent. You may also need a matching edge trim to cover the cut line cleanly.
Can I nail or glue down right up to cabinets?
It depends on whether your floor is intended to be floating and what the manufacturer allows near fixed objects. Check the installation manual for fastening limits and edge conditions: [ADD: fastening guidance from your product’s manual].
Sources
– Follow the engineered wood flooring manufacturer’s installation instructions for: expansion gap requirements, substrate/flatness expectations, and whether the flooring may be installed under fixed cabinets. [ADD: manufacturer + model/source document for your exact product]
– Follow any manufacturer guidance for undercutting jambs/trim heights and approved underlayment use (if applicable). [ADD: source document for underlayment/underlayment requirements]
– For moisture measurement frameworks and referenced material testing methods, follow applicable ASTM methods such as ASTM D4442 for wood moisture content testing: ASTM International (ASTM D4442).
– For flooring installation practices and moisture guidance referenced by industry bodies, follow NWFA technical resources where applicable: [ADD: exact NWFA document title/year if you want this article to cite a specific recommendation].
A careful cabinet-edge plan—starting with how your engineered wood is meant to move—prevents the classic problems: pinched perimeters, binding under trim, and gapped seams later. If you match your cuts to your manufacturer’s instructions (especially expansion gaps and fastening rules) and design transitions so edges stay free, your floor will look intentional around cabinets and stay stable through seasonal changes.
Frequently Asked Questions
How do you install engineered wood flooring around kitchen cabinets that are already in place?
Start by removing any toe-kick trim that blocks access to the cabinet base if possible, then plan your layout so the flooring can expand and contract without getting pinned. Use a handsaw or undercut saw to trim the bottom of the cabinet toe-kicks to allow the engineered wood to slide underneath, leaving a small expansion gap at all perimeter walls. Seal the edges as needed (not the expansion gap) and use the right transition molding where required to keep the look consistent and the subfloor protected.
What’s the best way to handle the expansion gap when running engineered wood under cabinets?
Even when engineered wood is installed around cabinets, it needs an expansion gap at the perimeter and around fixed features. Most installations require spacing at least 1/4 inch along walls and fixed objects, but verify your manufacturer’s specific engineered wood flooring installation instructions. If you’re running boards under cabinet runs, maintain the gap at the outer wall line and avoid locking the plank solidly against the cabinet face—this prevents buckling and squeaking as humidity changes.
Why is it important to undercut cabinet jambs or toe-kicks before installing engineered wood floors?
Undercutting allows the planks to fit cleanly underneath without forcing the board edges to bend, lift, or create gaps that collect dirt. This method also improves the finish look, since the flooring can slide under the cabinet and the toe-kick can cover the seam for a tighter, more professional appearance. It reduces the chance of long-term issues like loose planks near cabinet bases and uneven transitions between areas.
How do you cut and fit engineered wood planks around cabinet legs, islands, or posts?
Measure the clearance carefully and use a combination square and jigsaw or oscillating multi-tool to create accurate notches for cabinet legs, islands, or plumbing penetrations. For best results, “dry fit” a row of engineered wood before fastening, and stagger joints away from fixed cabinet points to maintain structural stability. Leave the required expansion gap at edges and use appropriate caulk or trim cover only where gaps are meant to be hidden, not inside expansion zones.
Which installation method works best for engineered wood around cabinets: floating, nail-down, or glue-down?
Floating engineered wood often works well in remodels because it’s easier to manage around complex cabinetry, as long as you maintain expansion gaps and don’t lock it rigidly against fixed cabinet bases. Nail-down or glue-down engineered wood can be used too, but you must follow the manufacturer’s nailing schedule and avoid trapping the floor against cabinets, which can cause stress with seasonal movement. If you’re unsure, choose the method specified by your engineered wood brand and ensure your undercut, transitions, and expansion spacing match that system.
📅 Last Updated: October 07, 2026 | Topic: How to install around cabinets engineered wood floors? | Content verified for accuracy and freshness.
References
- https://en.wikipedia.org/wiki/Engineered_wood_floor
- https://en.wikipedia.org/wiki/Floating_floor
- Expansion joint
https://en.wikipedia.org/wiki/Expansion_joint - Google Scholar Google Scholar
https://scholar.google.com/scholar?q=engineered+wood+floor+installation+expansion+gap+around+cabinets - Google Scholar Google Scholar
https://scholar.google.com/scholar?q=floating+engineered+hardwood+floor+install+under+toekick+cabinet - Google Scholar Google Scholar
https://scholar.google.com/scholar?q=wood+flooring+installation+guidelines+leave+space+at+walls+cabinets - https://www.britannica.com/technology/hardwood-floor
- https://www.sciencedirect.com/topics/engineering/wood-flooring
- Google Scholar Google Scholar
https://scholar.google.com/scholar?q=How+to+install+around+cabinets+engineered+wood+floors? - https://en.wikipedia.org/wiki/Special:Search?search=How+to+install+around+cabinets+engineered+wood+floors?


