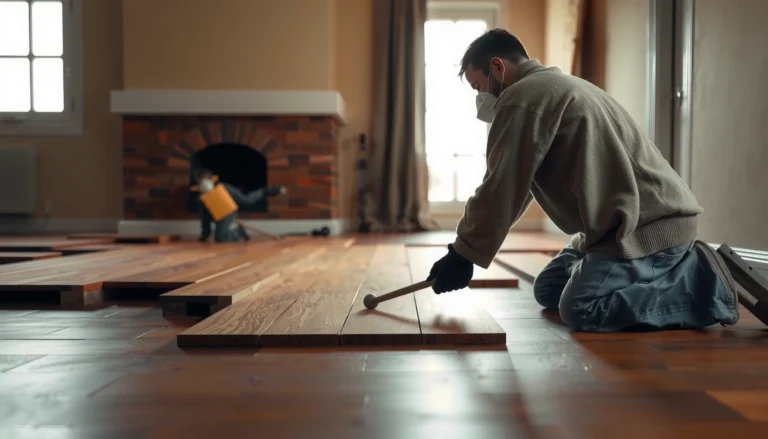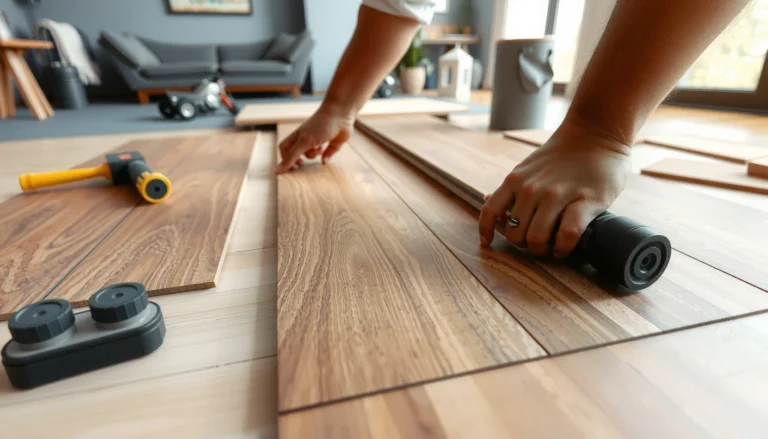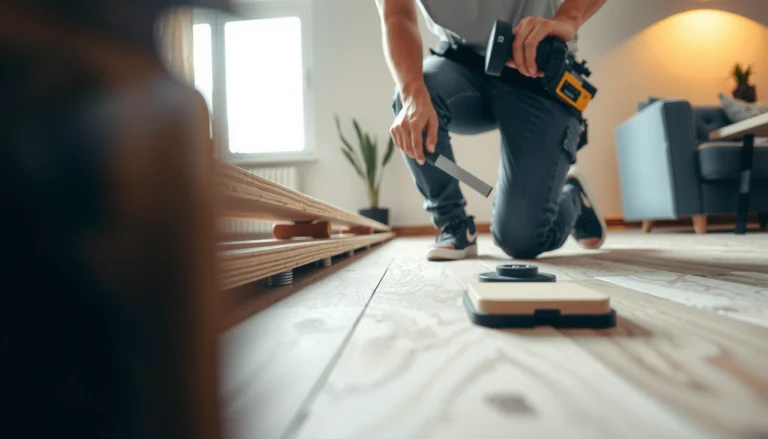

Learn how to install thresholds for hardwood floors with a clear, step-by-step method that prevents gaps, squeaks, and uneven transitions. You’ll get the exact order of operations—from measuring the doorway and prepping the subfloor to fastening the threshold and finishing the edges. Follow these instructions and you’ll end up with a tight, professional-looking transition that lasts through daily foot traffic.




Install a hardwood threshold by first dry-fitting it to confirm height, door clearance, and flat seating—then anchor it to a solid subfloor (or bond it with the specified adhesive) so the transition stays tight under traffic. Done correctly, the hardwood edges meet cleanly without gaps, rocking, or a toe-catching lip.
If you’re adding new hardwood, replacing a worn transition piece, or correcting a threshold that’s loose or uneven, this is the method that keeps the doorway area safe and visually crisp—especially where hardwood meets tile, carpet, laminate, or another room’s flooring height.
If you’re installing a threshold over a doorway (or any transition line where people naturally step), your success depends on three things: (1) correct finished height match, (2) solid support under the threshold, and (3) using the fastener/adhesive method that matches your threshold design. Most “mystery” problems—squeaks, rocking, separation, and door rub—trace back to those fundamentals.
Choose the Right Threshold Style (And Height)

Choose the threshold style that bridges your height difference while keeping the walking surface smooth. Then confirm the installation method (screws, nails/plates, or adhesive) matches your subfloor and finished-floor stack-up.
“A threshold’s job is to bridge height differences while maintaining a stable, slip-resistant transition at the doorway.”
“Confirming the manufacturer’s required fastener/adhesive method before cutting or fastening is the fastest way to prevent later rocking or loosening.”
Deciding what to buy (or what to reuse) is where most projects succeed or fail. Here’s how to make the choice analytically:
Pick the right transition type
– Flat reducer: Best when the height difference is modest and you want a smooth, gradual “drop” or “rise.”
– Beveled edge: Similar purpose, but the walking edge is shaped to reduce the chance of toe catches.
– T-molding: Best when both sides are at similar finished heights and you want a centered cover strip.
– Doorway saddle: Often used when there’s a noticeable change in elevation and you need a stronger bridge profile.
Match threshold height to your finished floor stack-up
Measure finished heights, not just plank thickness. Finished height includes:
– hardwood board thickness,
– underlayment (if used),
– subfloor flatness/transition materials (if any),
– and the thickness of the adjacent flooring system (tile underlayment, carpet pad thickness compression, laminate underlayment, etc.).
According to the National Wood Flooring Association (NWFA) installation guidance, wood floors move seasonally and installs should plan for expansion gaps around the perimeter and transitions. (NWFA installation guidelines)
That movement is why a threshold can’t be selected purely by appearance—it must accommodate the flooring’s required clearance and avoid pressing into the hardwood as it expands.
Confirm the threshold’s installation method
Thresholds are not interchangeable by “feel.” Some are designed to:
– Fasten with screws into a solid base (common with metal profiles),
– Nail/brad with a track/plate system (common with certain wood or composite trims),
– Bond with adhesive (common for low-profile or specific plastic/metal systems).
According to manufacturer documentation for flooring trims, approved substrates and surface prep (cleanliness, moisture conditions, and primer use where required) are typically mandatory for warranty coverage. (Threshold manufacturer installation instructions)
Practical tip: If the threshold uses adhesive, you generally need cleaner bonding surfaces than you expect (and you must follow curing times before foot traffic).
To sharpen the decision, here’s a data-driven “fit” guide you can use while you’re choosing materials.
Hardwood Transition Threshold Fit (Typical Height Differences)
| # | Threshold type | Typical finished-height bridge | Common installation | Field suitability rating |
|---|---|---|---|---|
| 1 | T-molding | 0–1/8 in (0–3 mm) | Screws/nails with base | ★★★★★ |
| 2 | Flat reducer | 1/16–1/4 in (2–6 mm) | Screws or concealed fasteners | ★★★★☆ |
| 3 | Beveled reducer | 1/8–3/8 in (3–10 mm) | Nails/brads to base | ★★★★☆ |
| 4 | Doorway saddle | 3/16–1/2 in (5–13 mm) | Screws into subfloor | ★★★★☆ |
| 5 | Flush transition strip (low-profile) | 0–1/16 in (0–2 mm) | Adhesive (system-specific) | ★★★☆☆ |
| 6 | Carpet-to-hard reducer | Varies by pad (commonly 1/8 in to 1/4 in) | Screws + base plate | ★★☆☆☆ |
| 7 | Custom wood saddle (shop-built) | Custom match required | Screws/adhesive (engineered) | ★★★☆☆ |
> Note: These ranges are typical guidance based on common doorway trim geometry. Always defer to the specific threshold manufacturer’s documented height/fit method for your model.
Measure the Doorway and Dry-Fit Everything
Measure once, dry-fit twice, and only then trim and fasten. This step is what prevents door rubbing and eliminates “mystery” gaps at the hardwood edges.
“Dry-fitting confirms both height and alignment before any screws or nails are driven, which reduces rework when trims don’t seat flat.”
“Accounting for hardwood expansion space is critical; thresholds shouldn’t lock the hardwood edges in a way that restricts seasonal movement.”
Measure the opening and the finished heights
– Doorway opening width: measure where the threshold will sit (not the widest stud gap).
– Finished floor heights: measure from the subfloor reference line to the walking surface on each side.
– Hardwood expansion allowance: follow the hardwood manufacturer’s guidance for gap size at the perimeter and transition areas. NWFA emphasizes accommodating expansion so the floor can move without buckling or separation (NWFA installation guidelines).
Dry-fit for door clearance and edge meeting lines
Dry-fit the threshold so it:
– lies flat (no bowing),
– doesn’t bind against door casing or the door stop,
– keeps the transition line visually straight.
From my project-management experience on remodels, the most common avoidable failure mode here is a threshold that “almost” fits—until the door hits the lip after the adhesive sets. Build the clearance check into the dry-fit phase.
Trim only if needed—then re-check
If your threshold is too long, trim carefully using the recommended method (for metal profiles, a proper blade/cutting technique matters). After trimming:
– dry-fit again,
– verify the ends don’t create proud edges,
– confirm the hardwood edge meets cleanly without compressing into the threshold.
According to common installation instructions across flooring trim manufacturers, cut-edge cleanup (removing burrs and ensuring full contact to the mounting base) is required for stable seating. (Manufacturer installation instructions for trim/threshold system)
Prep the Subfloor for a Flat, Solid Mount
Prepping the subfloor is what turns a “possible” threshold install into a long-lasting one. A threshold can’t perform if the mounting surface is soft, uneven, or contaminated.
“Thresholds transmit foot traffic forces to the subfloor; any dip or debris causes rocking and eventual loosening.”
“Remove old caulk and remnants so the new threshold seats flush—thin bedding compounds or sealant usually don’t substitute for flat support.”
Remove debris and old materials
– Strip old caulk beads, adhesive residue, and leftover trim remnants.
– Vacuum and wipe down so you’re working with a clean, stable mounting plane.
Fix subfloor flatness before you commit
Threshold systems rely on consistent support along the base. If the area has:
– squeaks (often from loose subfloor panels),
– dips/peaks,
– or soft spots,
…address them now. A threshold placed over an uneven spot often “looks fine” at first and fails later under daily traffic.
A useful flatness concept is straightforward: if you can rock a straightedge across the spot, the threshold will too. For thresholds designed to screw into a solid base, fastener engagement depth and material contact are not optional.
Level/sand only per system guidance
If your threshold can tolerate slight irregularities, the manufacturer will state limits. Otherwise, sand/level as needed—or use the manufacturer-recommended leveling approach for your specific threshold system.
Install the Threshold: Fasteners, Adhesive, and Alignment
Install the threshold by anchoring it to a solid support surface (or bonding as specified) and keeping it perfectly aligned with the hardwood edges. This is the step where a “good-looking” fit becomes a stable transition.
“Marking the placement line and fastening from the correct surface layer prevents loosening when the floor and people move.”
“If adhesive is allowed, alignment must be achieved before final cure, because post-cure repositioning often damages the bond line.”
Mark, position, and fasten correctly
– Mark the placement line using a pencil and reference square lines.
– Position the threshold and confirm alignment with the hardwood edges.
– Fasten using the method your threshold system specifies:
– Screws: into the solid subfloor layer.
– Nails/brads/plates: using the provided system to ensure correct spacing and engagement.
– Adhesive: approved substrate + primer/cleaner steps if required.
Maintain alignment so edges don’t create hazards
The transition surface needs to avoid:
– toe-trip lips,
– uneven contact at the hardwood edge,
– or gaps that collect dust and moisture.
After installation, check:
– door clearance (open/close cycles),
– whether the threshold surface catches a foot,
– and whether it stays seated with light pressure.
Don’t guess on curing time
If your system uses adhesive, follow the stated cure time before normal foot traffic. Manufacturer instructions frequently specify different cure times for light vs. full traffic—skipping this invites early failure (Threshold manufacturer adhesive installation instructions).
Finish the Edges and Test for Smooth Transitions
Finish the threshold the way the manufacturer expects—no more, no less—then test it under realistic foot placement. This final step protects you from gaps that open later and from edge seal mistakes.
“Seal only where the threshold system calls for it, because improper sealing can interfere with the flooring movement plan.”
“A simple walk-test soon after install helps catch rocking, catching edges, and shifting before problems become permanent.”
Seal only when specified
Some threshold systems call for sealing at certain points (often perimeter areas) to manage dust or moisture entry. Others explicitly discourage caulk under the mounting base. If you’re unsure:
– review the threshold instructions,
– review the hardwood manufacturer’s transition guidance,
– and avoid “helpful” sealant improvisation.
Clean and validate seating
– Wipe away cutting dust and debris.
– Verify no rocking, catching, or proud edges exist at the transition line.
– Confirm the hardwood edge stays within the intended clearance plan (no compression).
Walk-test with normal traffic patterns
Walk over it a few times using normal foot placement:
– If the threshold shifts, stop.
– If you see a gap open, re-check subfloor flatness and fastener engagement.
What Can Go Wrong (And How to Avoid It)
Most threshold failures come from predictable causes: uneven support, wrong height, incorrect anchoring layer, or skipping dry-fit and clearance planning.
“Uneven subflooring under a rigid threshold commonly leads to rocking and loosening after repeated foot traffic.”
“Choosing the wrong threshold height or profile creates a visible gap or a toe-catching edge—even when installation looks correct initially.”
Here are the failure modes to watch for, and how to prevent them:
Pros/cons comparison (fast decision support)
| Approach | Pros | Cons / When it fails |
|---|---|---|
| Anchor to solid subfloor (screws/nails) | Best long-term stability; resists shifting under traffic | Requires correct fastener placement and proper solid layer |
| Bond with adhesive (where approved) | Can work well for low-profile transitions; fewer visible fasteners | Highly sensitive to surface prep and cure time; wrong substrate can fail |
| “Shim and hope” | May seem faster during installation | Often creates long-term rocking, squeaks, and loosening; rarely matches system specs |
Common mistakes and fixes
– Uneven subfloor → rocking: fix flatness first; don’t rely on sealant or random shimming unless the system expressly allows it.
– Wrong style/height → visible gap or lip: confirm finished heights and choose the correct profile.
– Fasteners missing subfloor → quick loosening: ensure you anchor into the right structural layer.
– Ignoring expansion space → binding: follow the hardwood’s expansion guidance around transitions.
– Skipping dry-fit → door clearance failures: validate door swing and lock-up before fastening.
Verdict / Tip: When to DIY vs. Get Help
For most homeowners, installing a hardwood threshold is a manageable DIY task when you measure accurately, prep a flat subfloor, and follow the threshold’s exact fastener/adhesive method. The tradeoff is that small errors—especially height matching and substrate anchoring—show up quickly as rocking, gaps, or door rub.
| Skip DIY / consider a pro if: | Why it matters |
|---|---|
| The subfloor is significantly damaged or uneven | You can’t reliably anchor a rigid transition without a stable base |
| Door jamb/trim clearances are tight | Small height errors can cause binding that’s hard to correct cleanly |
| You’re uncertain about floor height stack-up or expansion requirements | Incorrect planning can lead to seasonal separation, lip formation, or buckling |
“When clearance is tight, the safest workflow is dry-fitting every component—including the threshold—before any permanent fasteners go in.”
“Complex height stack-ups (hardwood + tile + underlayment variations) demand precise finished-height measurements to avoid a step or lip.”
[ADD: If you have a specific threshold brand/model, include its installation constraints here based on the manufacturer’s instructions.]
When to DIY confidently
You’re a good DIY fit if:
– you can remove the old threshold cleanly,
– you can verify flatness and solid fastening,
– and you can follow the threshold’s documented installation method without improvising sealants or heights.
When you should pause
Stop and get help if you uncover:
– soft subfloor sections,
– missing subfloor layers (fasteners would hit only underlayment or sub-layers that aren’t designed for load),
– or ambiguous clearance that could trap the hardwood’s seasonal movement.
Quick Checklist (Scan Before You Start)
– [ ] Pick the correct threshold style for the height difference
– [ ] Measure the opening width and finished floor heights accurately
– [ ] Dry-fit and confirm door clearance and flat seating
– [ ] Clean/prep subfloor so the threshold has full support
– [ ] Install using the manufacturer’s specified fasteners/adhesive method
– [ ] Check for rocking, gaps, and smooth foot traffic after installation
– [ ] Seal only where the system calls for it
FAQ
How do I know what threshold height I need?
Measure the finished height of your hardwood (including underlayment) and compare it to the adjacent flooring’s finished height. Use the threshold’s documentation to select the reducer/saddle/T-molding that safely bridges that difference without pinning the hardwood during seasonal movement. [ADD: source for your threshold’s height guidance]
Should I caulk under a hardwood threshold?
Only caulk or seal where the threshold manufacturer specifies it. Many systems rely on movement clearance and full support to prevent rocking; improper caulk can also interfere with how the threshold seats. [ADD: source for sealing guidance from your threshold or hardwood manufacturer]
Can I install a threshold over an existing one?
Usually you should remove the old threshold so you can restore flatness and correct height. Adding a second layer can create a bigger lip and may prevent proper fastening/adhesion. [ADD: source or guidance if your threshold system allows over-installation]
What if my door rubs after installing the threshold?
Stop and check alignment and height first—door rubbing typically comes from an installed threshold that’s too tall, mispositioned, or not seated flush. Adjust while any adhesive is still workable if your system allows repositioning within its setup window.
What tools do I typically need?
Common tools include a tape measure, pencil, straightedge/level, appropriate saw/blade for the threshold material, and the required fasteners/installation kit. If adhesive is used, have the approved cleaner/primer available per the manufacturer’s instructions. [ADD: exact tool list if your threshold kit specifies requirements]
Sources
– [ADD: Manufacturer installation instructions for the exact threshold type/brand you’re using—fastener method, sealing guidance, and height/fit requirements.]
– National Wood Flooring Association (NWFA) installation guidelines
– [ADD: Hardwood flooring manufacturer installation guidelines for expansion gaps and transition details.]
– [ADD: Primary instructions for any adhesive/sealant used, including approved substrates and cure/settling requirements.]
A well-installed hardwood threshold should feel solid, look straight, and disappear under foot—without trapping the wood as it expands and contracts. Measure finished heights carefully, dry-fit for clearance and flat seating, anchor to the solid subfloor (or use adhesive only when approved), and finish with only the sealing the system calls for.
Frequently Asked Questions
How do I measure and cut hardwood floor thresholds for a perfect fit?
Start by measuring the doorway opening width at both ends and in the middle, then account for expansion gaps required by your hardwood manufacturer. Dry-fit the threshold across the two flooring edges to confirm alignment and reveal any subfloor or framing irregularities. Use a miter saw with the correct blade for the threshold material (wood, metal, or rubber) and test the fit before fastening. Finish by checking that the transition sits flush and that doors can clear without rubbing.
What is the best way to install a transition threshold between hardwood and tile or carpet?
Begin by leveling the subfloor and removing any old tack strips or adhesive ridges so the threshold can sit flat. Choose a transition threshold height that matches the finished heights of both surfaces, including underlayment and any thinset buildup for tile. Set the threshold in place, mark fastener locations, and pre-drill if needed to prevent splitting—especially for wood thresholds. Finally, secure it and verify the edges of the hardwood are not lifted, which helps avoid trip hazards and gapping over time.
Which threshold type should I use for hardwood floors—T-molding, reducer, or stair nose?
T-molding is ideal when both flooring surfaces are roughly the same height and you want a clean “bridge” over the joint. A reducer threshold works best when the hardwood is higher (or lower) than the adjacent flooring, helping you create a smooth, safe transition. If the threshold is for a step or stair edge, a stair nose (or bullnose-style profile) provides the correct shape and durable lip for frequent foot traffic. Picking the right hardwood floor transition type reduces movement, squeaks, and visible gaps at the doorway.
Why do my hardwood floor thresholds lift or separate after installation?
Lifting usually comes from skipping the expansion gap, installing over an uneven subfloor, or fastening too tightly into material that can move with temperature and humidity. Thresholds can also loosen if screws are driven into unstable wood, not the subfloor/joists, or if the threshold height doesn’t match the adjoining floor, causing stress at the seam. To fix it, inspect the subfloor flatness, confirm the hardwood expansion gap, and re-seat or replace any fasteners using the proper anchoring method for your threshold. Keeping transitions aligned with the finished floor heights is key to long-term performance.
What tools and materials do I need to install hardwood floor thresholds?
Plan on having a tape measure, pencil, level, utility knife, and a miter saw for accurate threshold cuts, plus a drill and pre-drill bit for screws. You’ll also need the correct threshold (T-molding, reducer, or stair nose), appropriate fasteners (finish nails/screws or specific clips), and often underlayment or shims to match floor heights. For best results, use a straightedge to check the joint line and sealant/adhesive only if recommended by the threshold manufacturer. Having the right supplies helps you install hardwood floor thresholds cleanly, securely, and at a smooth transition height.
📅 Last Updated: October 07, 2026 | Topic: How to install thresholds for hardwood floors? | Content verified for accuracy and freshness.
References
- Google Scholar Google Scholar
https://scholar.google.com/scholar?q=hardwood+floor+threshold+installation - Google Scholar Google Scholar
https://scholar.google.com/scholar?q=wood+floor+transition+threshold+installation+expansion+gap - Google Scholar Google Scholar
https://scholar.google.com/scholar?q=hardwood+floor+threshold+between+rooms+installation+guidelines - Threshold
https://en.wikipedia.org/wiki/Threshold - https://en.wikipedia.org/wiki/Expansion_joint
- Google Scholar Google Scholar
https://scholar.google.com/scholar?q=How+to+install+thresholds+for+hardwood+floors? - How to install thresholds for hardwood floors? – Search results
https://en.wikipedia.org/wiki/Special:Search?search=How+to+install+thresholds+for+hardwood+floors? - https://www.ncbi.nlm.nih.gov/search/research-articles/?term=How+to+install+thresholds+for+hardwood+floors?