To strip wood floors in 10 easy steps, first gather tools like a chemical stripper, scraper, gloves, and brushes. Clear and protect the room, then clean the floor to remove dirt. Choose a chemical or manual stripping method, apply the stripper evenly, and allow it to work. Scrape off the old finish carefully, remove residue, then rinse and dry thoroughly. Inspect for damage and sand the pavimento to prepare for refinishing. A detailed approach guarantees effective stripping with minimal wood harm.
Gather the Necessary Tools and Materials

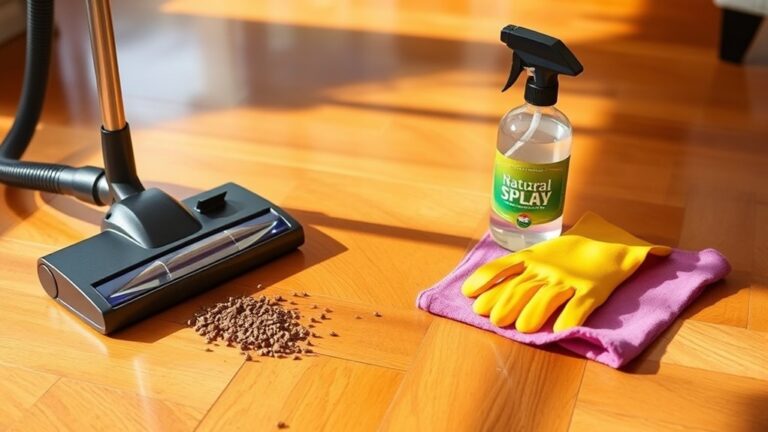
Before you begin stripping your wood floors, you’ll need to gather the essential tools and materials to guarantee the process goes smoothly. Assess your wood floor types, as different species like oak or maple may require specific stripping techniques. Essential tools include a chemical stripper suited for hardwood, a scraper or floor machine with abrasive pads, protective gloves, and safety goggles. You’ll also need a stiff-bristle brush for detailed areas and clean rags for residue removal. Make sure you have a bucket for water or cleaning solution and a fan or dehumidifier for drying. Selecting the right products and tools tailored to your floor type guarantees effective finish removal while preserving wood integrity. Preparing these materials beforehand empowers you to execute stripping techniques efficiently and confidently.
Prepare the Room for Stripping
Before stripping your wood floors, remove all furniture and personal items to provide unobstructed access. Use protective coverings on adjacent surfaces to prevent damage from stripper chemicals. Ascertain the room is well-ventilated by opening windows or using fans to maintain air quality during the process.
Clear Furniture and Items
While stripping wood floors, you’ll need to confirm the room is completely cleared of all furniture and items to provide unobstructed access to every section of the floor. Efficient furniture removal is essential to avoid damage and confirm a smooth workflow. Prioritize item storage in a designated, safe area to protect belongings and maintain workspace organization.
Focus on these key steps:
- Disassemble large furniture where possible for easier removal
- Use protective pads to prevent floor scratches during moving
- Store removed items in a dry, secure location away from the work zone
- Label and organize smaller items to facilitate reassembly
Protect Adjacent Surfaces
Once you’ve cleared the room of furniture and items, your next step is to shield all adjacent surfaces from potential damage during the stripping process. Apply durable protective coverings—such as heavy-duty plastic sheets or painter’s tape—to baseboards, door frames, and any trim bordering the floor. Pay close attention to adjacent areas like walls and vents, ensuring they’re fully sealed to prevent chemical or debris exposure. Use drop cloths to cover nearby thresholds and connections to other flooring types. This meticulous protection prevents staining, scratching, or chemical damage, preserving the integrity of your surrounding surfaces. Taking these precise precautions allows you the freedom to work efficiently and confidently, knowing your adjacent areas remain intact throughout the stripping operation.
Ensure Proper Ventilation
Although stripping wood floors involves potent chemicals and dust, you must guarantee proper ventilation to maintain a safe working environment. Ensuring effective air circulation reduces inhalation risks and accelerates drying times for treated surfaces. Follow these ventilation tips to prepare the room efficiently:
- Open multiple windows and doors to create cross-ventilation, promoting continuous airflow.
- Use high-velocity fans positioned strategically to push contaminated air outside.
- Seal off HVAC vents to prevent chemical fumes from spreading to other areas.
- Consider wearing a respirator mask when natural ventilation is insufficient.
Clean the Floor Thoroughly
Before you begin stripping your wood floors, you need to clean them thoroughly to remove all dirt, dust, and debris that could interfere with the stripping process. Start by sweeping or vacuuming the floor to eliminate loose particles. Next, apply appropriate cleaning products designed for wood surfaces to dissolve grime and residues without damaging the wood. Avoid harsh chemicals that may compromise the wood’s integrity or complicate floor maintenance post-stripping. Use a damp mop, not soaking wet, to guarantee no excess moisture penetrates the floor. This meticulous cleaning step guarantees the stripper adheres evenly, optimizing the removal of old finishes. Proper cleaning is essential for achieving a smooth, professional result and preserving your freedom to restore your floors effectively.
Choose the Right Stripping Method

You need to decide between chemical and manual stripping based on the floor’s condition and your comfort with each method. Chemical strippers are effective but require strict safety precautions, including proper ventilation and protective gear. Manual stripping offers control and reduces exposure to harsh chemicals but demands more physical effort and time.
Chemical vs. Manual Stripping
When deciding between chemical and manual stripping methods, consider the condition of your wood floor and the level of finish buildup. Chemical effectiveness is ideal for heavy buildup or multiple finish layers, allowing you to remove coatings efficiently with less manual labor. Conversely, manual stripping relies on physical abrasion and is best for minor touch-ups or delicate wood that might degrade under harsh chemicals.
Evaluate these factors to choose the right method:
- Thickness and type of finish buildup
- Wood floor condition and sensitivity
- Time constraints and effort capacity
- Environmental impact and ventilation availability
Safety Precautions to Consider
Although selecting the appropriate stripping method is essential, prioritizing safety precautions guarantees the process doesn’t compromise your health or property. Always wear proper protective gear, including gloves, goggles, and respiratory masks, to shield yourself from harmful chemicals and dust particles. Follow safety guidelines meticulously, especially when using chemical strippers, to prevent skin irritation or respiratory issues. Ascertain adequate ventilation in the workspace to minimize inhalation risks. When opting for manual stripping, handle tools carefully to avoid injury. Before starting, read product labels and material safety data sheets to understand hazards and first aid measures. By adhering to these safety protocols, you maintain control over the stripping process and protect your freedom to enjoy your revitalized wood floors without health setbacks or property damage.
Apply the Stripping Solution
Begin by thoroughly mixing the stripping solution according to the manufacturer’s instructions to guarantee its effectiveness. Proper solution application is essential to successful stripping techniques, ensuring even penetration and ideal finish removal. Use a low-pressure pump sprayer or a synthetic bristle brush for controlled, uniform coverage. Work in manageable sections to maintain wetness and prevent premature drying.
Keep in mind these important points during application:
- Apply a consistent, thin layer to avoid puddling and uneven stripping.
- Work along the wood grain to enhance solution absorption.
- Avoid over-application, which can damage the wood substrate.
- Use protective gloves and ventilation to maintain safety during application.
Mastering these steps will empower you to strip your wood floors efficiently and prepare them for refinishing.
Allow the Stripper to Work

Since the stripping solution needs time to break down old finishes, you’ll want to let it sit undisturbed for the manufacturer’s recommended duration. This waiting period is essential for maximizing stripper effectiveness. Avoid rushing or prematurely wiping the surface, as insufficient dwell time reduces the chemical’s ability to penetrate and soften the finish. During this phase, the solution interacts with the layers of varnish or polyurethane, loosening them for easier removal. Keep the area well-ventilated but free from drafts that could dry the stripper unevenly. By respecting the prescribed waiting period, you guarantee ideal chemical action, minimizing labor in subsequent steps. This patience guarantees a more thorough finish removal, giving you the freedom to proceed confidently with the next stage of your wood floor restoration.
Scrape Off the Old Finish
Once the stripper has fully softened the old finish, you can start scraping it off. This step requires attention to the specific finish types involved and the best techniques overview to guarantee efficient removal without damaging the wood. Use a scraper with a sharp, flat blade held at a low angle to gently lift the finish. Work systematically in small sections to maintain control and avoid gouging.
Use a sharp scraper at a low angle, working in small sections to safely remove softened finish.
- Choose a scraper compatible with your floor’s finish type
- Apply consistent, moderate pressure to prevent wood damage
- Scrape along the wood grain for cleaner removal
- Dispose of the removed finish safely to avoid recontamination
Mastering this step frees you from the old coating, setting the stage for a smooth, refinished surface.
Remove Residue With a Scrubbing Pad
Use a scrubbing pad to effectively remove any remaining residue left after scraping off the old finish. Different residue types—such as wax buildup, old sealer, or dried stripper—require targeted cleaning techniques. Select a pad with the appropriate abrasiveness: medium-grade for stubborn residues, fine-grade for delicate surfaces. Apply consistent pressure in circular motions to break down residue without damaging the wood fibers. Avoid excessive moisture to prevent wood swelling. This method guarantees thorough removal of residual contaminants, preparing the floor for subsequent refinishing steps. By mastering these precise cleaning techniques with a scrubbing pad, you maintain control over the stripping process, achieving a clean surface that liberates your wood floor from past coatings and sets the stage for a flawless finish.
Rinse and Dry the Floor
After thoroughly scrubbing away residue, you’ll need to rinse the floor to remove any lingering cleaning agents or loosened particles. This step is essential to prevent residue buildup, which can interfere with subsequent treatments. Use clean, lukewarm water and a mop or sponge to rinse thoroughly. Follow these floor maintenance tips for best results:
- Change rinse water frequently to avoid redepositing residues.
- Use minimal water to prevent wood swelling or warping.
- Dry the surface immediately with a clean, absorbent cloth or microfiber mop.
- Guarantee adequate ventilation to speed drying and reduce moisture damage.
Proper rinsing and drying maintain wood integrity and prepare your floor for refinishing. Avoid harsh cleaning solutions at this stage to preserve the wood’s natural state.
Inspect and Sand the Floor for Refinishing
Before refinishing, you’ll need to inspect the floor carefully to identify any damage, uneven areas, or remaining finish that could affect the sanding process. Start your wood floor inspection by checking for cracks, gaps, and loose boards, marking any irregularities. Use a flashlight at a low angle to reveal surface imperfections. Once identified, select appropriate sanding techniques: begin with coarse-grit sandpaper to remove old finish and level uneven spots, then progress to finer grits for a smooth surface. Employ a drum sander for large areas and an edge sander for corners, ensuring consistent pressure to avoid gouges. Proper sanding prepares the wood for a flawless finish and extends floor longevity—precision here grants you the freedom to achieve professional-quality results.