Installing flooring on stairs blends beauty and safety beautifully. Start by choosing the right material—laminate or vinyl are cost-effective, while hardwood adds timeless elegance. Remove old flooring for a clean slate, and measure each step precisely, adding 10% to your total for mistakes. Use quality tools, like a jigsaw for intricate cuts and guarantee a snug fit for treads and risers. Secure everything with adhesive and let it cure fully. Don't overlook aesthetics; decorative trims elevate your look. For a stunning finish, keep an eye on maintenance, and you'll find even more tips to perfect your stairway soon.
Overview of Flooring Options
When it comes to choosing flooring for your stairs, you've got a variety of options that blend beauty with functionality. Each type of flooring offers unique benefits, allowing you to express your personal style while guaranteeing durability.
Laminate flooring is a top contender for stairs, known for its resilience and cost-effectiveness. It mimics the look of hardwood, providing an upscale aesthetic without breaking the bank. With a variety of designs available, you can easily find one that complements your home's decor.
If you're concerned about moisture, vinyl plank flooring might be your best bet. It's soft underfoot and resistant to humidity, making it perfect for high-moisture areas. Plus, it's available in stunning designs that can elevate your stairway's look.
Hardwood flooring offers a timeless appeal that can increase your home's value. However, be mindful that it may not withstand heavy foot traffic as well as other materials, leading to scratches and dents over time.
Carpet is another popular choice, providing cushioning and sound-dampening qualities that make your stairs feel cozy. Just keep in mind that you'll need to commit to regular maintenance to keep it looking fresh.
Lastly, while stone or tile can impart a sophisticated vibe, they can be slippery. If you go this route, consider safety measures like anti-slip treatments. Whatever you choose, guarantee your stair tread aligns with your aesthetic and functional needs for the best flooring installation experience.
Preparing Your Stairs
Before you can lay down that beautiful new flooring, it's important to guarantee your stairs are primed for the transformation. Start by removing existing carpet, padding, nails, and any stubborn adhesive residues. You want a clean slate—an inviting canvas for your stylish new surface.
Next, check the level of each step. Unevenness can be a sneaky culprit that leads to an unstable installation. If you find any irregularities, don't hesitate to repair them using a belt sander or scraper. A flat, secure base is vital for a flawless finish.
Once your stairs are prepped, it's time to measure the dimensions of each step with precision. This isn't just about getting it right; it's also about freedom from future headaches. Add an extra 10% to your total square footage calculation to cover any potential mishaps or repairs down the road.
And here's an important tip: acclimate the laminate in your home environment for at least 48 hours before installation. This step prevents warping or buckling, ensuring your flooring stays stunning for years to come.
Essential Tools and Materials
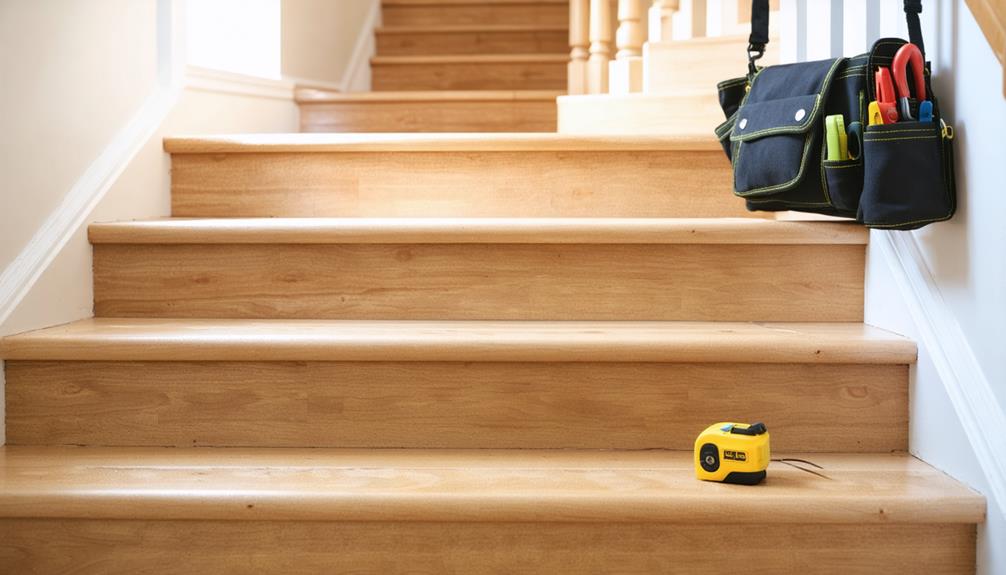
Before you commence on your stair flooring project, you'll want to gather a few essential tools and materials that will transform your vision into reality. From a jigsaw that glides through planks to a caulk gun for those perfect, polished edges, each item plays a vital role in achieving a seamless finish. So, let's explore what you'll need to create a stunning and safe staircase that enhances your home's charm.
Required Installation Tools
Installing flooring on stairs requires a solid set of tools to achieve a polished and professional look. To begin this journey of transforming your staircase, gather the essential tools that will guide you through the process. With the right equipment, you'll not only guarantee precision but also enjoy the freedom to create a stunning aesthetic.
| Tool/Material | Purpose | Notes |
|---|---|---|
| Jigsaw | Cutting planks to fit stair dimensions | Use a fine-tooth blade for smooth cuts |
| Tape Measure | Accurate measurements | Essential for precise fitting |
| Carpenter Square | Confirming cuts are square and precise | Guarantees clean, right angles |
| Caulk Gun | Applying adhesive along edges and seams | Ensures strong bonding |
| Screws or Nails | Fastening treads and risers securely | Provides stability and support |
| Wood Glue | Securing laminate pieces together | Ideal for seamless joints |
| Construction Adhesive | Attaching stair nosing for a finished look | Creates a polished appearance |
With these tools in hand, you're well on your way to successfully installing laminate flooring on your stairs, blending functionality with beauty. Enjoy the creative process!
Necessary Materials Overview
Transforming your stairs into a stunning feature of your home requires more than just the right tools; it is vital to gather the necessary materials that will bring your vision to life. Start with high-quality laminate flooring that complements your aesthetic. You'll need a fine-tooth blade for your jigsaw to measure and cut cleanly, avoiding splintering that can detract from your project's beauty.
To secure the laminate planks, don't skimp on high-quality construction adhesive—it's essential for ensuring your flooring withstands the daily hustle and bustle. Pair this with stair nosing to finish the edges elegantly while providing safety.
As you work, remember to fasten risers and treads with screws or nails for added stability, ensuring your new stairs remain intact over time. And just in case you make a misstep, keep some extra materials handy—having a few spare laminate planks and putty for filling screw holes can save you from future headaches. With these tools and materials, you're well on your way to creating stairs that not only look inviting but also stand the test of time.
Step-by-Step Installation Process
Typically, the first step in your stair flooring installation involves carefully measuring each stair tread and riser to secure a snug fit. This precision is key to achieving a polished look, so take your time. Once you've got your measurements, here's how to proceed:
- Cut your laminate pieces to fit each tread and riser, making sure to account for the stair nose width in your tread measurements.
- Glue the subfloor with three beads of quality wood glue before placing your tread pieces. Be careful not to let any glue seep onto the laminate surface—it's all about that clean finish!
- For the risers, apply glue to the back of the laminate and press it firmly against the vertical surface. If you want extra stability, you can use a nail gun for an added boost.
Next, it's time to install the stair nosing. Apply construction adhesive to the subfloor, positioning it to slightly overlap the tread piece. Secure it with screws to guarantee stability, completing your elegant staircase look.
Lastly, be patient! Allow 12-24 hours for the adhesive to cure before you start using your newly transformed stairs. This time is essential for confirming that everything is securely set and ready to take on daily use.
With this detailed step-by-step guide, you're well on your way to achieving a stunning staircase that reflects your unique style and freedom of expression!
Cutting and Fitting Flooring
As you prepare to cut and fit your flooring, remember that every accurate measurement is a step toward a flawless finish. With the right tools, like a jigsaw for those tricky notches and a table saw for clean edges, you'll create pieces that fit together seamlessly. Don't forget to leave that essential expansion gap; it's the little details that make your stairs not just functional, but a stunning focal point in your home.
Measuring for Accurate Cuts
When you're ready to tackle the task of installing flooring on stairs, precise measurements are your best friend. Here are three essential tips to guide you through measuring for accurate cuts:
- Measure Each Step Individually: Every stair tread and riser can have variations in width and height. Measure each one to guarantee a precise fit for your flooring materials.
- Use a Carpenter's Square: Confirm that your cuts are square, which will prevent gaps and guarantee a snug installation on each step. A square edge is vital for a polished aesthetic.
- Create Templates from Cardboard: For those complex cuts around spindles or unique stair shapes, cardboard templates can be a lifesaver. They'll help you visualize your cuts before committing.
And remember, always measure twice and cut once to minimize waste and avoid costly errors. Don't forget to maintain a 1/4 inch (6 mm) expansion gap around the edges of the stair treads to accommodate natural expansion and contraction of the laminate flooring. This attention to detail will elevate your installation, bringing both beauty and functionality to your staircase.
Techniques for Smooth Fitting
Achieving a seamless fit for flooring on your stairs hinges on mastering the right cutting techniques. Start by carefully measuring the length, width, and depth of each stair step with a tape measure and a carpenter square. This guarantees precise cuts that elevate the aesthetics of your space. When you cut the laminate, creating cardboard templates can save you from costly mistakes—verify the fit before you make any permanent cuts.
For those tricky corners or notches, don't hesitate to use a jigsaw. It allows for clean, smooth edges, giving your stairs that professional finish you desire. As you fit the laminate, remember to maintain a 1/4 inch (6 mm) expansion gap between pieces; this accommodates natural movements with changes in temperature.
Once you've cut and fit the laminate, apply construction adhesive generously to the back of each plank, especially around the edges. This guarantees a strong bond and prevents any unwanted shifting after installation. By following this step-by-step guide, you'll not only transform your stairs but also embrace the freedom of a beautifully finished home.
Tools for Precision Cutting
Having mastered the cutting techniques for a seamless fit, you're now ready to equip yourself with the right tools for precision cutting. The perfect combination will elevate your flooring project and guarantee your laminate pieces shine with elegance. Here are three essential tools to take into account:
- Jigsaw: Ideal for intricate cuts around spindles or creating gentle curves, a jigsaw allows for precise fitting, guaranteeing your laminate flows beautifully along the stairs.
- Table Saw: For larger laminate pieces, a table saw or circular saw will deliver straight cuts, guaranteeing clean, accurate edges for your treads and risers.
- Fine-Tooth Blade: To minimize chipping and maintain a smooth finish, a fine-tooth blade is your best friend when cutting laminate. It preserves the aesthetic appeal of your flooring.
Don't forget your measuring tape to get those accurate dimensions of each stair step, and a carpenter square to check the squareness of your cuts. With these tools in hand, you'll create a stunning staircase that reflects your unique style—freedom in every step!
Securing Treads, Risers, and Nosing
Securing treads, risers, and nosing is essential for a safe and visually appealing staircase. Start by applying three beads of quality wood glue to the subfloor before positioning your tread piece. This guarantees a strong bond, while keeping excess glue from seeping onto the surface—nobody wants a messy finish! Once the tread is in place, you might want to use a nail gun for extra stability, especially if you're working with risers. Apply wood glue to the back of the riser and press it firmly into position; the nail gun will help prevent any unwanted movement while the glue dries.
Now, let's talk about that all-important nosing strip. This isn't just a decorative touch; it provides safety and durability. Apply construction glue to the subfloor and overlap it slightly with the tread piece, then secure it with screws. This guarantees your staircase can withstand the test of time and foot traffic.
After everything is secured, take a moment to fill any exposed screw holes with putty using a plastic putty knife. This not only enhances the overall texture and finish but also keeps things looking polished. Finally, don't rush the process—allow the adhesive to cure by avoiding stair use for 12-24 hours after installation. It's a small wait for a long-lasting, stunning staircase that feels like freedom underfoot. Happy installing!
Finishing Touches and Aesthetics
With your treads, risers, and nosing firmly in place, it's time to elevate the visual appeal of your staircase. This is where those finishing touches come in, transforming your work into a stunning focal point. Here are three key elements to contemplate for enhancing aesthetics:
- Fill Exposed Screw Holes: Use a plastic putty knife to fill any exposed screw holes with putty, guaranteeing a seamless appearance that matches the laminate finish. This small detail can make a huge difference.
- Clean Up Adhesive: Don't forget to clean any excess adhesive immediately from the laminate surface. A polished look not only feels good but also showcases your hard work.
- Add Decorative Trim: Think about installing decorative trim or molding around the edges of the stairs. This adds elegance and complements the laminate, serving as the perfect finishing touch.
Once you've completed these steps, remove the protective tape from your stair nosing. This will reveal a clean, finished edge that enhances the overall aesthetics. Regularly inspect your installation for any imperfections and address them promptly to maintain that sleek, polished look. These small, yet significant actions will guarantee that your staircase not only serves its purpose but also becomes a beautiful part of your home. Enjoy the freedom of creativity as you transform your stairs into a stunning masterpiece!
Maintenance Tips for Longevity
To keep your beautiful stair flooring looking pristine, establishing a regular cleaning schedule is vital. A gentle sweep or vacuum will whisk away dirt before it scratches the surface, while a damp mop with a laminate-safe cleaner guarantees a deep clean without excess moisture. By taking these steps, you'll not only enhance the aesthetic appeal but also extend the life of your stunning stairs.
Regular Cleaning Schedule
A well-maintained staircase not only enhances the beauty of your home but also guarantees safety and longevity for your laminate flooring. Establishing a regular cleaning schedule is essential, and here are three key practices to keep in mind:
- Weekly Sweeping or Vacuuming: Make it a habit to remove dirt and debris at least once a week. This simple step prevents scratches and reduces wear on your beautiful laminate.
- Bi-Weekly Damp Mopping: Use a damp mop with a laminate-safe cleaner every two weeks. This will maintain the shine without risking warping from excessive moisture.
- Monthly Inspections: Take the time to inspect stair nosing and risers for any signs of wear or loose components. Ensuring they remain secure not only keeps your stairs looking great but also safe for use.
Additionally, regularly check for gaps between planks and address any expansion issues promptly. Reapplying protective coatings every six months will enhance durability. By committing to this maintenance routine, you can enjoy a stunning staircase that stands the test of time.
Avoid Excessive Moisture
Moisture can be a silent enemy to your beautiful laminate flooring, lurking in the corners of your home and threatening to warp its elegance. To keep your planks pristine, you must be vigilant about the environment they're in. Here's a quick guide:
| Moisture Source | Prevention Tips |
|---|---|
| Spills | Wipe up immediately to protect seams |
| High Humidity | Use dehumidifiers to regulate levels |
| Leaks | Regularly inspect plumbing and roofs |
| Cleaning Methods | Use a damp mop, not soaking wet |
Excessive humidity can lead to damaging warping, so maintain a dry environment, especially in moisture-prone areas. When cleaning, a laminate-safe cleaner and a damp mop should become your best friends. Remember, soaking the floor is a definite no-no! It's crucial to wipe up spills right away—liquid seeping into seams can compromise the integrity of your flooring. By staying proactive about moisture control, you'll guarantee that your laminate flooring remains the stunning centerpiece of your home for years to come. Embrace this freedom, and let your floors shine!
Cost Considerations
When contemplating the cost of installing flooring on stairs, you'll find that prices can vary widely based on the materials you choose and whether you opt for professional help. To give you a clearer picture, here are three key factors to take into account:
- Material Costs: Laminate flooring typically ranges from $0.80 to $3.00 per square foot. The quality and type of laminate you select will greatly impact the total cost.
- Extra Materials: Don't forget to budget for additional materials like adhesive, screws, and putty. These can add an extra 10-20% to your overall project cost.
- Installation Options: Professional installation usually adds $2 to $5 per square foot. If you're feeling adventurous and handy, a DIY approach might save you money, but make sure you're comfortable with the process.
As you plan, it's wise to order about 10% more laminate than you think you'll need. This accounts for cuts and potential errors, which can further influence your budget. While you're crunching numbers, remember that laminate flooring offers long-term savings due to its durability and lower maintenance costs compared to hardwood or carpet.
In the end, the right balance of materials, installation choices, and a little extra planning will lead you to a stunning staircase that reflects your style without breaking the bank. So, go ahead and explore your options; freedom in design awaits!
Safety Precautions During Installation
Installing flooring on stairs can be a rewarding yet challenging task, and prioritizing safety is crucial to guarantee the process goes smoothly. By taking the right precautions, you can create a secure environment that allows you to focus on the aesthetics of your new flooring without the worry of accidents.
First, always equip yourself with appropriate personal protective equipment. That means wearing safety goggles to shield your eyes, dust masks to protect your lungs, and ear protection if you're using power tools. A clear workspace is essential; make sure the area is free of obstacles or debris to minimize tripping hazards.
When tackling higher areas, use a sturdy ladder or platform, and avoid leaning over the edge of the stairs while cutting materials. Keeping tools and materials organized and within reach will reduce unnecessary trips up and down, further enhancing safety. Additionally, consider utilizing anti-slip mats or safety grips on the stairs for added traction.
Here's a quick reference table to help you remember these safety tips:
| Safety Gear | Purpose | Additional Tips |
|---|---|---|
| Safety Goggles | Protects eyes from debris | Always wear when cutting |
| Dust Masks | Prevents respiratory issues | Use with power tools |
| Ear Protection | Reduces noise exposure | Necessary for loud tools |
| Clear Workspace | Minimizes trip hazards | Regularly check for clutter |
| Sturdy Ladder | Guarantees safe access | Never lean over while working |
Frequently Asked Questions
Is It Hard to Install Flooring on Stairs?
When it comes to stair flooring, you might feel like you're climbing a mountain! It can be tough due to installation challenges like precise cuts and ensuring safety precautions. Material selection is key— consider the aesthetics, but don't forget durability. Think about stair treads that match your vision. Maintenance tips can keep your stairs looking great, but if you're unsure, don't hesitate to call in the pros to help navigate the process!
Do You Glue Down Vinyl Plank Flooring on Stairs?
You definitely want to glue down vinyl plank flooring on stairs to guarantee stair safety. Using a high-quality adhesive type designed for vinyl will enhance both the aesthetics and durability of your stairs. Before you start, proper stair preparation is key—clean the surface and gather your installation tools. Remember, securing the planks with glue not only looks great but also simplifies flooring maintenance, giving you peace of mind as you navigate your space.
Do You Nail Laminate Flooring on Stairs?
You shouldn't nail laminate flooring on stairs. Instead, consider adhesive recommendations for a strong bond that enhances stair safety. When exploring flooring material options, think about stylish stair tread designs that elevate your space. Don't forget underlayment considerations to improve comfort and sound absorption. For lasting beauty, follow stair maintenance advice to keep your flooring pristine. Embrace a creative approach to laminate flooring installation that reflects your unique aesthetic while ensuring durability.
How Do You Transition Vinyl Flooring to Stairs?
Changing vinyl flooring to stairs can be a game-changer for your home's aesthetic. Start by considering vinyl stair nosing for seamless elegance. Pay attention to stair height considerations—measure accurately to guarantee a snug fit. Safety measures are essential, so opt for non-slip finishes. Use vinyl installation techniques like applying adhesive properly to avoid mishaps. Don't forget maintenance tips to keep your stairs looking stunning, allowing you the freedom to enjoy your beautiful space without worry!


