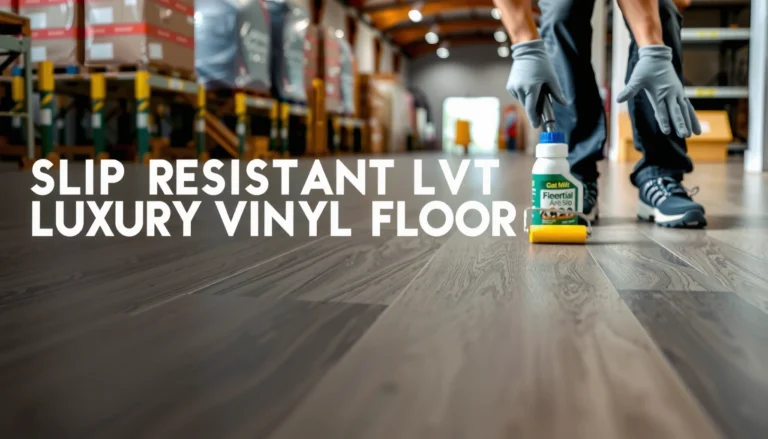
To clear streaks from hardwood floors safely, wipe with a barely-damp microfiber (or lightly damp mop), then do a quick clean-water pass and dry immediately. Hardwood floor streaks usually come from using the wrong cleaner strength or leaving residue behind, which then shows up under angled light.




If you’re seeing visible lines after mopping, spot-cleaning, or using store-bought “floor shine” products, this guide walks you through a residue-safe approach. It’s also helpful if the floor looks clean in some spots but streaks show up under lights.
If you want a streak-free result without compromising your finish, this is especially relevant for sealed hardwood floors (polyurethane, conversion varnish, or similar topcoats). The same general logic—remove grime first, minimize moisture, and rinse away any film—also applies to many engineered wood floors, but always verify your finish type before choosing cleaners.
Spot the cause of the streaks (so you pick the right fix)

You can usually identify why hardwood streaks are showing by how the lines look and when they appear—right after cleaning versus only after drying. The “right fix” is different depending on whether you’re dealing with residue, dirt transfer, or mineral buildup.
Hardwood streaks tend to be one of three failure modes. I often explain this as surface chemistry vs. surface grit: chemistry failures leave films; grit failures smear; mineral failures “lock in” as water evaporates.
– Residue streaks: often look “shiny,” cloudy, or rainbow-like and show up right after cleaning. This is typically leftover cleaner, floor shine, or product layering that dries into a thin film.
– Dirt transfer streaks: tend to look dull or gray and move depending on the mop direction. These usually mean the mop pad/cloth is redistributing soil instead of lifting it.
– Hard-water or cleaner buildup: can leave persistent marks even after “spot” wiping. When minerals from water or residues from alkaline/acidic products remain in pores or micro-scratches, they can reappear under light.
Prep for safe streak removal (what to do before you clean)
Before you clean, decide whether your floor is sealed, waxed, or unfinished—because the safest cleaner is finish-dependent. Then do a small test so you don’t turn streaks into haze or dull patches.
For clarity, sealed hardwood means the wood has a protective topcoat (commonly polyurethane). Unfinished/waxed hardwood has a different surface chemistry and may be sensitive to cleaners intended for sealed finishes.
– Check the finish type (sealed hardwood vs. unfinished/waxed) so you don’t use the wrong chemicals. If you’re unsure, look for the last product used (label instructions, invoice notes, or the sheen type).
– Test first in a hidden area with the method you plan to use, then wait for it to dry fully. In many cases, streaks appear only as the film dries, so don’t judge at first wipe.
– Use the right tools: microfiber pads/cloths, clean buckets (or a clean rinse container), and dry towels. A second rinse container is helpful because it reduces “reintroducing” cleaner film during the clean-water pass.
Important chemistry note (why “barely damp” matters)
Hardwood streaks are often a moisture-and-residue problem. Too much liquid increases wicking into seams and makes dissolved minerals or surfactants dry into visible lines. Clean-water rinsing works because it lifts residual film that the first cleaner application may have dissolved but not fully removed.
Safe step-by-step: remove streaks without damaging the finish
You’ll get the least risk and the best odds by treating streaks as a residue problem first, not a “scrub harder” problem. Use the same basic workflow every time: dry/grit removal → barely-damp wipe → clean-water rinse → immediate drying.
This approach aligns with a practical risk-control mindset similar to ISO 31000-style thinking: identify the hazards (abrasion, excess moisture, incompatible chemistry) and reduce exposure rather than escalating force.
– Step 1: Remove surface grime
– Dry-dust or vacuum first (use a soft attachment) so you’re not smearing grit. Dirt acts like abrasive paste once you add cleaner or water.
– If you mop first, streaks can worsen because residue combines with dirt.
– Step 2: Wipe with a barely-damp microfiber
– Lightly dampen with clean water or the wood-floor cleaner diluted exactly per label instructions.
– Wipe in one consistent direction, replacing the cloth/pad when it starts to look dirty. Flipping the cloth and reusing a grimy side is how streak paths get “recreated.”
– Step 3: Do a clean-water pass (residue check)
– Go over the same area with a cloth dampened with clean water to lift any remaining cleaner.
– Think of this as a “final surfactant removal” step—many cleaners dissolve soil and then leave behind a film if not rinsed.
– Step 4: Dry immediately
– Buff gently with a dry microfiber or towel until no moisture remains.
– Pay attention to edges and corners where cleaner can pool and leave trails. Drying quickly also reduces spotting when airborne minerals land on wet film.
– Step 5: If streaks persist, repeat once—don’t escalate to harsh chemicals
– Keep it to another gentle cycle (damp microfiber → clean-water pass → dry).
– If it still won’t clear, move to the “what can go wrong” section for likely causes—especially finish incompatibility or layered product buildup.
About the tools: Microfiber is effective because it traps dirt in its fibers instead of pushing it around. A microfiber cloth that is too wet behaves like a smear tool; “barely damp” keeps it in lift-and-wick mode without flooding the seams.
Choose the right cleaner (and what to avoid)
Choose a cleaner based on finish compatibility and—just as important—use dilution correctly. When in doubt, clean water plus the microfiber workflow is usually lower risk than trying to neutralize streaks with a stronger chemical.
Below is a practical comparison you can use to decide what to do next. The core idea: pH-neutral cleaners reduce the likelihood of damaging finishes or leaving aggressive residue films, while harsh products can cause dulling or persistent haze.
| Cleaner approach | Pros (why people try it) | Cons (why it can streak) |
|---|---|---|
| pH-neutral sealed-floor cleaner (label dilution) | Lifts oils/soil while minimizing finish stress; works well when followed by clean-water rinse + drying. | If diluted incorrectly or not rinsed, residual film can still show under lights. |
| Clean water + microfiber + drying | Lowest chemical risk; excellent for residue check and streak correction. | May not fully remove oil-based buildup without a compatible cleaner first. |
| Vinegar / acidic cleaners | Can dissolve some mineral scale on certain surfaces. | On many hardwood finishes, it can leave effects that show as haze or streaking rather than a clean wipe. |
| Steam mops / wet mopping | Convenient for deep cleaning on tile or sealed stone. | Excess moisture can affect seams and can drive residue deeper before it dries. |
– Safer options
– A pH-neutral cleaner made for sealed hardwood floors, used at the exact dilution on the label.
– Clean water for the final rinse/buff step to reduce residue.
– Avoid for streak-prone or finish-damaging results
– Vinegar, harsh degreasers, strong detergents, and all-purpose cleaners (these can leave residue or dull finishes).
– Steam mops or wet mopping that leaves excess water in seams.
– If you used a “floor shine” product
– Streaks often come from layered residue—your best bet is the clean-water pass plus thorough drying, repeated carefully.
How cleaners’ pH tendencies relate to streak risk (quick reference)
Across surfaces, stronger deviation from neutral pH typically increases the chance of leaving films, dulling topcoats, or reacting with waxes/finishes in unexpected ways. Household white vinegar is commonly ~5% acetic acid (by volume) (Encyclopaedia Britannica) and sits around pH ~2–3 depending on concentration (PubChem). Household ammonia solutions are often roughly pH ~11–12 (PubChem).
Representative pH of Common “Streak Fix” Chemicals and Streak Safety Margin
| # | Chemical people reach for | Typical pH (approx.) | Why it’s used | Finish-safe rating | Streak safety margin (3 – |ΔpH|) |
|---|---|---|---|---|---|
| 1 | Clean water (rinse step) | ~7.0 | Residue rinse | ★★★★★ | +3.0 |
| 2 | pH-neutral sealed-floor cleaner | ~6.0–8.0 | Soil removal | ★★★★☆ | +1.5 |
| 3 | Baking soda solution | ~8.3 (approx.) | Odor/oil support | ★★★☆☆ | +0.3 |
| 4 | Borax (sodium borate) solution | ~9.2 (approx.) | Alkaline boost | ★★☆☆☆ | -0.2 |
| 5 | Ammonia-based cleaner | ~11.5 (approx.) | Grease cutting | ★☆☆☆☆ | -2.5 |
| 6 | White vinegar (acetic acid) | ~2.4–3.0 | Mineral/film “cutting” | ★☆☆☆☆ | -2.1 |
| 7 | Sodium hydroxide (lye) | ~13–14 | Strong degreasing | ☆☆☆☆☆ | -6.0 |
Note: The “streak safety margin” above is a simplified pH-deviation heuristic, not a guarantee of finish compatibility. Always follow your flooring manufacturer’s guidance and the cleaner’s label.
What can go wrong (common streak-making mistakes)
Even with the right products, streaks can persist when cleaning process details create new residue lines. Most failures come from excess moisture, reusing dirty cleaning tools, or skipping the clean-water rinse that removes dissolved film.
When you’re troubleshooting streaks, resist the urge to “fix” the symptom with a stronger chemical. Stronger chemistry can dissolve more of the finish film, then redeposit it as haze.
– Over-wetting the floor
– Too much liquid can seep into seams and leave mineral lines as it dries.
– Wet mopping also increases the chance of streaks because dissolved residues travel farther before drying.
– Using a dirty mop head or one cloth for the whole room
– You’ll redistribute grime and keep re-creating streak paths.
– A grimy pad can also drag fine dust that becomes “invisible slurry” on the next pass.
– Not doing a clean-water rinse
– Many cleaners dissolve and then dry in place—leaving a faint film that shows as streaks under light.
– This is especially common after using products marketed for shine or gloss.
– Skipping drying
– Even “safe” damp mopping can leave drying marks if moisture remains.
– Pay extra attention to edges, around baseboards, and along traffic lanes where airflow and drying rates differ.
– Using the wrong method for the finish
– Waxed or specialty finishes may require different care than sealed floors. If you’re unsure, confirm with the finish manufacturer or follow the flooring warranty guidance.
When streaks don’t behave like residue
If the marks don’t lift with clean-water rinsing and still look etched or permanently hazy, the cause may be sanding-through of the finish, abrasion, or chemical dulling. In that case, repeating microfiber passes may not help—and escalation can make the surface worse.
Verdict / tip (a practical recommendation—with downsides)
If your goal is streak-free hardwood without risking finish damage, start with the gentle workflow: dry-removal → barely-damp microfiber wipe → clean-water pass → immediate drying. This approach is effective for most streaks caused by residue or dirt transfer because it removes both soil and the thin film that often causes visible lines.
Downsides / limits:
– If streaks are caused by years of buildup (or the wrong product layer), you may need repeated gentle clean passes or professional refinishing guidance. Some “shine” products build layered residues that don’t fully clear with one rinse cycle.
– If your floor is unfinished/waxed and you use sealed-floor cleaner steps, you could dull or alter the surface—so pause and confirm finish compatibility first.
– If you see damage beyond streaks (cupping, gaps, haze that doesn’t move), don’t keep scrubbing—stop and reassess.
If you’re dealing with stubborn hazing, let me know your flooring finish type (sealed vs. waxed/unfinished) and what product you last used (brand or ingredient type), and I can help you choose the least risky next step.
Quick checklist you can save (safe streak removal)
– ☐ Dust/vacuum first to avoid smearing grit
– ☐ Test in a hidden spot before treating the whole area
– ☐ Use microfiber; keep it barely damp, not wet
– ☐ Mop/wipe in one direction
– ☐ Do a clean-water rinse pass to remove residue
– ☐ Dry immediately with a towel/microfiber
– ☐ Repeat gently once if needed—avoid harsh escalation
Frequently Asked Questions
What’s the safest way to remove streaks from hardwood floors without damaging the finish?
Start by identifying whether the streaks are from cleaner residue, water spots, or dirt buildup, because different causes need different solutions. Use a barely damp microfiber mop or cloth (not soaking wet) and a pH-neutral hardwood floor cleaner to lift residue gently. Avoid harsh chemicals, abrasive pads, and ammonia-based cleaners, since they can dull or damage the hardwood finish and leave more streaking. Finish by drying with a clean, dry microfiber towel to prevent water marks.
How do I clean streaks from hardwood floors after using a mop or cleaner?
Streaks often come from using too much cleaner, not rinsing adequately, or allowing cleaner to dry on the surface. Re-mop the area with a lightly damp microfiber pad using plain water (or a cleaner manufacturer-recommended “rinse” method) to remove leftover residue. Then buff dry using a separate dry microfiber cloth to restore a uniform, streak-free look. If the streaks persist, try a dedicated residue remover labeled safe for hardwood floors.
Why do hardwood floors get streaks even when I’m using the right cleaner?
Over-spraying, using dirty mop heads, or working in small sections that dry too quickly can cause streaks. High-gloss finishes can also highlight streaking if you don’t dry immediately or if the floor cleaner isn’t properly diluted. Hard water can leave mineral deposits that look like haze or streaks, especially after wet mopping. Using distilled water for a final wipe and consistently changing or rinsing your microfiber pads can help prevent recurrence.
Which cleaning method works best for stubborn streaks on sealed hardwood floors?
For stubborn streaks, use the “clean then buff dry” approach: apply a small amount of pH-neutral cleaner to a damp microfiber pad, wipe with light pressure, and keep the area consistently moist (not wet). Follow immediately with a second dry microfiber cloth to buff away moisture and residue. If the finish still looks hazy, try an approved hardwood floor degreaser for streaks caused by oily film, but always spot test first in an inconspicuous area. Never use steel wool or scouring powders, as they can permanently damage the finish.
What’s the best way to prevent future streaks when cleaning hardwood floors?
Use a microfiber mop or cloth that’s clean and well-rung—excess liquid is a common cause of streaks and water spots. Measure your hardwood floor cleaner carefully, dilute exactly as the label instructs, and avoid extra “double cleaning” with concentrated product. Work in sections and don’t let cleaner dry on the surface; wipe and dry promptly. For drying and shine, buff with a dry microfiber pad and consider adding a floor maintenance product that’s specifically designed to reduce residue buildup.
📅 Last Updated: November 04, 2026 | Topic: How to safely clean streaks from hardwood floors? | Content verified for accuracy and freshness.
References
- Wood flooring
- https://www.epa.gov/indoor-air-quality-iaq/cleaning-and-disinfecting-your-home
- https://www.cdc.gov/coronavirus/2019-ncov/community/disinfecting-building-facility.html
- 404 Error
- https://www.armstrongflooring.com/support/maintenance/how-to-clean-hardwood-floors.html
- https://scholar.google.com/scholar?q=how+to+remove+streaks+from+hardwood+floors Google Scholar
- https://scholar.google.com/scholar?q=hardwood+floor+cleaning+residue+film+streaks+microfiber Google Scholar
- https://scholar.google.com/scholar?q=wood+floor+care+maintenance+remove+haze+and+build-up Google Scholar