To repair stained concrete floors, start by cleaning the surface with an organic cleaner and scrubbing to remove residues. Once dry, assess any damage and patch with cementitious fillers, ensuring color blending for a seamless finish. For re-staining, mix concrete dye as per instructions and apply three to four thin coats using a sprayer, letting each coat dry before applying the next. Seal the dyed surface with an appropriate sealer to prevent moisture trapping and maintain color integrity. Regular maintenance helps to prolong the floor's appearance and durability. You'll find useful tips for specific techniques ahead.
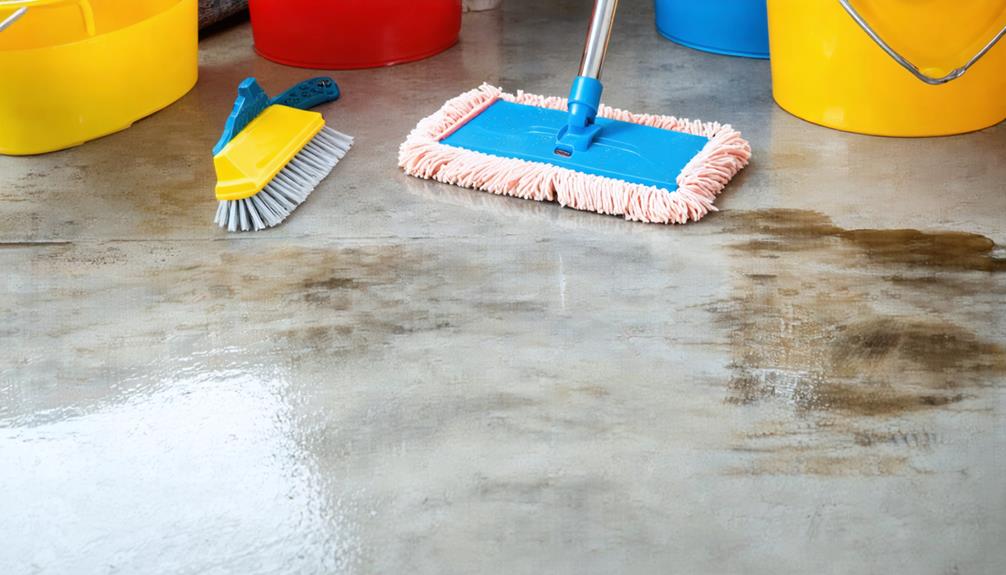
Cleaning the Concrete Surface
When it comes to maintaining your concrete floor's integrity, cleaning the surface is an essential first step. The cleaning process begins by selecting an organic concrete cleaner and degreaser, which effectively removes any residues and contaminants. Applying this cleaner allows you to tackle the various stains and dirt that accumulate over time.
To clean the floor thoroughly, you'll need to scrub the surface diligently. Using a stiff-bristled brush or a floor scrubber, focus on areas with heavy staining or buildup to guarantee you eliminate all dirt, stains, and residues. This step is crucial not only for the cleanliness of the floor but also for the successful application of any dyes or sealers that follow.
Once you've scrubbed the surface, the next action is to rinse the concrete entirely. This helps remove any remaining cleaning agents, making sure that you have a clean slate to work with. After rinsing, allow the concrete floor to dry completely. Moisture left on the surface can hinder dye absorption and affect the performance of sealers.
This initial cleaning step is essential for addressing issues related to acid staining and guaranteeing optimal adhesion of subsequent treatments. By taking the time to properly prepare the surface, you're setting yourself up for success in the repair process, allowing your concrete floor to look and perform its best for years to come.
Sealing the Concrete
Sealing the concrete surface is an essential step in guaranteeing your stained concrete floor not only looks its best but also stands the test of time. Proper sealing prevents uneven dye absorption and enhances the longevity of your dye application. Here's how to effectively seal the concrete:
- Clean Thoroughly: Before sealing the concrete, make sure it's completely clean and dry. Any dirt or moisture can hinder the adhesion of the concrete sealer.
- Choose the Right Sealer: For porous and outdoor concrete surfaces, an acrylic concrete sealer is recommended. For indoor spaces, opt for water-based sealers to guarantee proper ventilation and minimize harmful fumes.
- Apply the Sealer: Apply one coat of the chosen concrete sealer evenly across the surface. Confirm you cover every area to maintain a uniform appearance.
- Allow to Cure: After application, let the sealer cure as per the manufacturer's instructions. This is essential for achieving maximum effectiveness and durability.
Mixing the Concrete Dye
After sealing your concrete surface, the next step is to mix the concrete dye properly to achieve the desired color and consistency. Start by reading the packaging instructions meticulously; they provide essential guidelines for mixing concrete dye effectively. It's important to adhere to these instructions to guarantee you achieve consistent color throughout your stained concrete floors.
Before diving in, gear up with safety goggles and gloves. These protect you from potential hazards associated with the dye. Once you're prepared, set up your workspace by covering nearby surfaces and removing any contaminants. This helps prevent any unwanted interference that could affect your dye mixture.
When you begin mixing, pour the dye into a clean container. Gradually add the appropriate amount of water, as specified on the packaging. Use a mixing tool to combine the dye and water thoroughly. It's essential to achieve an even color distribution; insufficient mixing can lead to streaks or uneven application on your concrete surface. Aim for a uniform consistency that's neither too thick nor too runny.
If you're unsure about the mixing ratios or techniques, consider consulting additional resources or seeking guidance from professionals. This can optimize your results and help you achieve the perfect shade for your project. With the concrete dye mixed correctly, you're now ready to move on to the application process.
Applying the Concrete Dye
To achieve a professional-looking finish, it is crucial to apply the concrete dye with care and precision. Before you start, verify that your surface preparation is thorough. The concrete should be completely clean and sealed with an acrylic concrete sealer to prevent uneven dye absorption.
Follow these steps for ideal application:
- Mix the Concrete Dye: Adhere to the packaging instructions, using gloves and goggles for safety. Thoroughly mix the dye to guarantee even color distribution.
- Use a Sprayer: Apply the dye using a sprayer, moving systematically. Start from one side and work right to left, then shift north to south. This technique helps maintain a consistent application.
- Apply Thin Coats: Aim for three to four thin coats of dye. This method reduces the risk of pooling and allows for better control over the drying process.
- Remove Excess Dye: After each coat has dried completely, use a dry buffer or dust mop to remove any excess colorant. This step enhances the final appearance and prevents discoloration during subsequent sealing.
Removing Residue
Removing residue from stained concrete floors is essential for maintaining their aesthetic appeal and longevity. Start by ensuring that the dye has dried completely. Once it's dry, use a dry buffer, soft cloth, or dust mop to eliminate any excess colorant. This step is important because accumulated residue can mar the appearance of your floors.
Before dye application, it's critical to prepare the surface properly. Utilize organic concrete cleaners and degreasers to scrub the area thoroughly, removing all contaminants that could interfere with dye adhesion. After scrubbing, be sure to rinse the surface completely and allow it to dry fully. Any remaining cleaning agents on the surface can disrupt the dye's effectiveness.
If you encounter deeper scratches that penetrate the sealer, clean those areas with solvents like xylene. This will help remove dirt and debris, paving the way for a uniform finish once you reapply the sealer. Remember, regular maintenance is key to preventing residue buildup. Make a habit of immediate spot cleaning spills and dirt to prolong the life and visual appeal of your stained concrete floors.
Sealing Dyed Concrete
Once you've effectively removed any residue from your stained concrete floors, sealing the dyed surface becomes the next priority. Properly sealing dyed concrete is vital for protecting the color and integrity of the surface. It helps prevent uneven dye absorption and enhances the longevity of your concrete stain application. Here's how to do it right:
- Guarantee Complete Drying: Make sure the dyed concrete is completely dry before applying the sealer. This prevents trapping moisture, which can compromise the finish.
- Use an Appropriate Sealer: Reapply the same acrylic concrete sealer used prior to dye application. This guarantees a consistent finish while providing additional protection against wear and environmental factors.
- Apply Evenly: Utilize a pump-up sprayer for even application. This tool guarantees that the sealer spreads uniformly, reducing the risk of uneven patches. If you're using solvent-based sealers indoors, maintain proper ventilation to avoid inhalation hazards.
- Address Previous Issues: Before sealing, consider stripping any old sealer or addressing any previous acid stains. This step is essential for ideal results and helps prevent discoloration.
Troubleshooting Staining Issues
Staining issues on concrete floors can be frustrating, but identifying the root cause is vital for effective resolution. Begin by evaluating the severity of the stains. Are they surface-level, or have they penetrated deeper into the concrete? This assessment will dictate the necessary repair methods. For surface-level stains, cleaning might suffice, while deeper stains may require more intensive treatment.
If you're dealing with uneven staining, consider blending techniques such as wet on wet or wet on dry. These methods can help achieve a more consistent appearance across the surface, making the flaws less noticeable. However, if the concrete sealer has failed, it's time to re-seal. Using a high-quality water-based polyurethane can restore vibrancy and provide protection against future damage.
Before re-staining, don't overlook the benefits of acid etching. This process improves adhesion for the new stain application, ensuring a more durable finish. Regular inspections every 3-5 years are essential for maintaining the integrity of your stained concrete floors. These inspections can help you identify and address staining issues before they escalate into significant problems, preserving the beauty and longevity of your floors.
Blending Stained Colors
When blending stained colors, you can use the wet on wet technique to mix multiple hues while they're still wet, creating natural patterns. This method allows for a seamless shift between colors, enhancing the overall aesthetic of your concrete floor. Remember to apply lighter colors first if you're using the wet on dry technique, as this helps them blend more effectively with darker stains.
Wet on Wet Technique
In the wet on wet technique, applying multiple colors of stain while the first layer remains wet allows for a seamless blend, creating subtle patterns that enhance the floor's aesthetic. This method is ideal for achieving a natural look in your stained concrete floors. Here are some key points to take into account when using the wet on wet technique for your staining jobs:
- Consistent Application: Use a sprayer or brush for uniform color distribution. Consistency is key to achieving a professional finish.
- Work Quickly: Time is of the essence. The first layer must remain wet when applying the second color to guarantee proper blending.
- Color Selection: Opt for lighter colors first. They'll blend more easily with the darker shades that follow, allowing for a more complex finish.
- Depth and Complexity: The merging of colors creates depth, enhancing the overall aesthetic of your decorative concrete.
Mastering the wet on wet technique will not only elevate your staining jobs but also transform your concrete floors into stunning visual statements.
Lighter Colors First
Achieving a visually appealing blend of stained colors on concrete floors starts with a essential step: applying lighter colors first. This technique is important for ideal visibility and coverage, especially when dealing with darker hues. By using the wet on dry method, you can layer these lighter colors effectively, ensuring they don't get muddied by the darker shades.
When blending, remember that mixing multiple colors while they're still wet allows for subtle patterns on the surface, enhancing the uniqueness of your stained concrete floors. If you aim for gradual changes, the wet on wet technique can be beneficial; however, for more distinct layering, stick with the wet on dry method.
If you're touching up previously stained areas, this approach maintains consistency and prevents muddiness. Keep in mind that if your concrete has a deep original stain, you may need extensive preparation to lighten the surface before applying the lighter colors. This step is necessary for achieving an even and harmonious look when you re-stain. By prioritizing lighter colors first, you set the foundation for a stunning and cohesive appearance in your stained concrete floors.
Concrete Patching Techniques
To effectively restore stained concrete floors, mastering concrete patching techniques is crucial. By addressing chipped or cracked areas, you not only repair the surface but also maintain the aesthetic appeal of your flooring. Here's a concise approach to guarantee you get the best results:
- Surface Preparation: Start by thoroughly cleaning the damaged areas. If needed, grind the surface to create a rough texture that enhances adhesion.
- Choose the Right Filler: Opt for cementitious fillers rather than silicone or caulking. These materials bond more effectively with concrete, providing a durable repair that withstands wear and tear.
- Apply the Patch: Once the area is prepped, fill in the damaged spots with the cementitious filler. Smooth it out carefully to match the surrounding surface level.
- Blending Techniques: To achieve a seamless look, use blending techniques to match the color of the patch with your existing stained concrete floors. This step is crucial for avoiding noticeable repairs.
Don't forget that regular inspection and maintenance of patched areas can prevent further damage and prolong the life of your concrete surface. By mastering these concrete patching techniques, you're guaranteeing that your stained concrete floors not only look great but also stand the test of time. Enjoy the freedom of a beautifully restored space!
Steps for Re-staining Concrete
Re-staining concrete floors can breathe new life into your space, enhancing both aesthetics and durability. To achieve the best results, follow these detailed steps:
| Step | Action | Purpose |
|---|---|---|
| Sample the stain | Test on a small, inconspicuous area | Verify compatibility with existing color |
| Remove old products | Grind the surface to eliminate previous stains | Prepare for better adhesion of new stain |
| Clean the surface | Use mild soap and water to wash the area | Eliminate dust and residue |
| Apply bonding agent | Coat the prepared surface with bonding agent | Minimize staining issues |
Start by sampling the new stain on a small area of the old concrete. This verifies the new color harmonizes with the existing finish. Once you're satisfied, grind the surface to remove any previous staining or sealing products; this is crucial for maximum adhesion of the new stain.
After grinding, make sure to clean the surface thoroughly with mild soap and water. This helps eliminate any dust or residue that could interfere with the staining process. Once dry, apply a bonding agent to the clean surface, as this is essential for confirming the new stain adheres properly.
Frequently Asked Questions
How to Fix a Bad Stained Concrete Floor?
Fixing a bad stained concrete floor is like restoring a faded painting; it requires precision and care. Start with surface preparation methods to clean thoroughly, then explore stain removal techniques for deeper issues. Once the surface is ready, employ color matching strategies to blend any repairs seamlessly. Don't forget to choose the right concrete sealing options to protect against future stains, ensuring your floor remains vibrant and appealing for years to come.
Can You Restain Concrete That Has Already Been Stained?
Yes, you can restain concrete that's already stained. Start with thorough preparation steps like cleaning and grinding the surface to guarantee proper adhesion. Consider your color options carefully, as darker stains typically cover existing colors better. Apply a bonding agent to improve absorption and enhance the new stain's longevity. Use precise application techniques for even results. For ongoing maintenance, keep the surface clean and consider resealing every few years to maintain its appearance.
Can You Patch Stained Concrete Floors?
Yes, you can effectively patch stained concrete floors using proper techniques. Start with thorough surface preparation—clean the area and remove any loose debris. Use cementitious fillers designed for durability and adhesion. Avoid silicone or caulking, as they can harm the floor's integrity. After patching, employ color matching techniques to blend the repaired section with the surrounding stained concrete, ensuring a seamless appearance. Finally, reapply a concrete sealer for protection and uniformity.
Can Stained Concrete Floors Be Refinished?
Yes, stained concrete floors can be refinished. Imagine a vibrant restaurant floor that's lost its luster. With the right staining techniques, you can restore it using various color options. Start with thorough surface preparation, which may involve grinding or sanding to remove old layers. After that, apply a new stain followed by a sealant for added protection. Regular maintenance tips, like cleaning and resealing, will keep your refinished floor looking fresh for years.


