To maintain outdoor floors without damage, follow a simple routine: clean regularly, seal or waterproof on schedule, and address cracks and drainage issues before they spread. This guide delivers practical care tips that work whether your outdoor flooring is wood, concrete, pavers, or tile—so you can prevent fading, rot, staining, and freeze-thaw problems. By the end, you’ll know exactly what to do month to month to keep your outdoor surfaces looking and performing their best.



Outdoor floors last longer when you clean regularly, seal or refinish as needed, and protect against water, freeze-thaw, and sun damage. Start by removing debris and rinsing off grime, then use the right cleaner for your flooring type before applying a protective coating—this stops small issues (like mildew or tiny cracks) from turning into full replacements.
If your outdoor floor is exposed to rain, sprinklers, salt, or direct sun—like patios, decks, balconies, pool decks, or entry walkways—this is for you. It’s also useful if you’ve noticed fading, slippery spots, staining, or small cracks and want to stop the problem from getting worse.
Pick the right maintenance plan for your outdoor floor

The right maintenance plan starts with identifying the material and matching your cleaning/sealer products to it. When the cleaner or coating is “almost compatible,” you can accidentally damage finishes, trap moisture, or leave residue that turns areas slippery.
Material first: wood deck, composite, concrete, stone, tile, pavers, or stamped concrete all behave differently. Concrete and pavers often tolerate stronger degreasers, while natural stone and many coatings can be etched by the wrong chemistry.
The correct sealer selection depends on the outdoor floor material and whether it’s already coated, because incompatible coatings can fail early or peel.
Cleaning is not one-size-fits-all: acid-based cleaners can etch some stone and concrete finishes, while bleach-heavy cleaners can discolor or degrade certain surfaces.
Next, look at surface condition so you don’t “seal over a failing system.” Loose boards, peeling coating, spalling concrete, missing grout, or active mildew change what you should do first: sometimes you need repair before protection.
Here are practical identification tips that work in the real world:
– Wood deck vs. composite: wood shows visible grain and can accept stains differently; composite typically looks uniform and may have a textured “skin” that resists rot but can still fade.
– Stamped concrete vs. pavers: stamped concrete is continuous with seams only where slabs meet; pavers have defined joints and individual units.
– Natural stone vs. tile: stone may have less uniform joint lines and subtle color variation; tile often has consistent grout lines and manufactured surfaces.
– Surface test: if you can safely do a small test patch, observe whether a cleaner changes color, dulls the finish, or leaves a film.
If you’re unsure, choose gentler starting steps (gentle cleaning, careful rinsing) and avoid harsh chemicals until you confirm the flooring type. For the most reliable guidance, follow the floor manufacturer’s care instructions for your exact product system (deck stain/sealer, concrete sealer, or masonry coating). [ADD: reference to manufacturer guidance or a specific care manual you use on your site]
Quick “material vs. approach” alignment
– Wood: clean with deck-safe cleaner; protect with a penetrating or film-forming deck sealer/stain designed for exterior use.
– Composite: use manufacturer-approved composite deck cleaner; avoid aggressive solvents that can strip surface coatings.
– Concrete: remove oils/deposits first, then seal with a breathable or compatible concrete sealer.
– Stone: use pH-neutral or stone-safe cleaners; choose a sealer rated for that stone type.
– Tile/pavers: focus on grout integrity and joint protection; sealers for masonry should match the existing finish (if any).
For context on durability expectations, sealing schedules vary by climate and product class. For example, many exterior penetrating sealers are marketed for multi-season performance, but recoat needs depend on rainfall and UV exposure. [ADD: source for typical recoat range (e.g., 1–3 years) from a sealer manufacturer spec]
Clean properly (without damaging the surface)
Clean outdoor floors start with debris removal and controlled chemistry—not aggressive scrubbing and not “one cleaner for everything.” Most damage comes from scratches, residues, and finish stripping, which then accelerates water intrusion and discoloration.
Begin with sweeping (weekly, or after storms). Leaves and grit act like sandpaper and hold moisture at seams and joints, creating the perfect conditions for mildew and algae.
Regular sweeping prevents grit from abrading surfaces and reduces trapped moisture at joints, which is a common driver of mildew and discoloration on outdoor floors.
Rinsing thoroughly matters because detergent or cleaner residue can leave a film that increases slipperiness after drying.
Then choose the cleaner by material:
– Concrete oil/grease spots: use a concrete-safe degreaser designed for exterior surfaces (and follow dilution rules exactly).
– Wood/composite: use deck-safe cleaners that won’t strip protective finishes aggressively.
– Stone/tile: use pH-neutral or stone-safe formulations to avoid etching.
After cleaning, rinse thoroughly and let it dry completely before any sealing or spot repairs. Sealer applied over damp surfaces can trap water and lead to early coating failure or persistent staining.
A few additional “high-impact” details that prevent recurring problems:
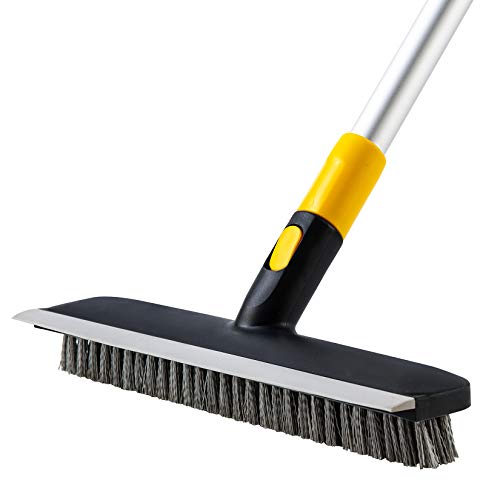
– Use a soft-bristle brush for textured areas; avoid wire brushes on coated surfaces.
– Work small sections so you can rinse evenly and avoid drying-in residue.
– Don’t clean right before freezing conditions. Water left in pores or joints can expand during freeze-thaw.
– Address roots of staining: leaf tannins, sprinkler overspray, fertilizer, and cooking oils each respond to different cleaning approaches.
To anchor decisions to real-world performance metrics, consider moisture behavior in building materials: sealers often require a dry substrate to achieve their intended water-repellent effect. [ADD: source for “required moisture content / dryness before sealing” from a sealer technical datasheet]
Cleaning method comparison (what to use when)
| Method | Best for | Main risk | Practical tip |
|---|---|---|---|
| Broom + hose rinse | Pollen, loose dirt, seasonal buildup | Loose grit can scratch if you skip sweeping | Sweep first, then rinse from high to low |
| Deck/stone pH-neutral cleaner | Light staining, mildew start | Overuse can leave residue | Follow dwell time exactly; rinse until water sheets clean |
| Degreaser + targeted agitation | Concrete oil spots, grease transfer | Harsh formulations can dull finishes | Apply to stain only; avoid spreading onto surrounding surfaces |
| Pressure washing (lowest risk case) | Heavily soiled concrete/pavers (when used carefully) | Can chip concrete, lift wood grain, loosen grout | Test a small hidden area and keep distance |
Exterior Floor Problem Drivers & Typical “First Fix” Actions (Operational Guidance)
| # | Outdoor floor issue | Common root cause | Likely first action | Risk reduction (0–5) |
|---|---|---|---|---|
| 1 | Black mildew spots | Persistent moisture + shade | Clean and dry fully before coating | ★★★★★ |
| 2 | Oily stains (concrete) | Automotive/food grease ingress | Target degreaser + thorough rinse | ★★★★☆ |
| 3 | Faded wood or composite | UV exposure without updated protection | Restore with deck-specific sealer/stain | ★★★☆☆ |
| 4 | Slippery surface | Algae/mildew or residue film | Remove biofilm; rinse until residue-free | ★★★★★ |
| 5 | Hairline concrete cracks | Shrinkage + water infiltration | Seal after cleaning and drying | ★★★★☆ |
| 6 | Loose pavers / rocking | Joint washout + drainage issues | Reset base/joints; re-level and protect | ★☆☆☆☆ |
| 7 | Peeling deck coating | Moisture trapped during/under coating | Remove failing finish; repair then re-coat | ★☆☆☆☆ |
Seal or protect to prevent water and staining
Outdoor floors need sealing or protective coating when water penetration and UV fading are already showing up. The goal isn’t to make the surface “bulletproof”—it’s to slow down absorption, reduce staining, and buy time between repairs.
Apply a sealer/coating when the surface needs it (for example, after cleaning and drying). Product type matters: penetrating sealers help reduce water absorption, while film-forming coatings can provide a stronger barrier but may require more careful prep to avoid peeling.
Sealers and coatings generally must be applied to a fully clean, dry surface to perform as intended; trapping moisture during application can shorten service life.
Recoat timing is climate- and traffic-dependent, so follow the product’s scheduled interval and adjust for sun intensity, rainfall, and pedestrian use.
Reapply based on product guidance and local conditions. If you don’t know your current coating, test a small hidden area first. This matters because some sealers are compatible over certain chemistries and incompatible over others.
Focus protection where water collects:
– Joints and grout lines on tile and pavers
– Edges and transitions at door thresholds and around pool decking
– Low spots where water lingers after rain
Climate note you can act on right now
According to widely used freeze-thaw durability principles in masonry and concrete protection, repeated freezing and thawing stresses water-saturated pores and can drive cracking and spalling over time. [ADD: cite a primary source such as ACI/ASTM guidance and/or a sealer technical bulletin that discusses freeze-thaw impacts]
Also, UV accelerates fading and coating breakdown on exterior wood and film-forming finishes. [ADD: add primary source for UV-related coating degradation/expected outdoor performance from a manufacturer or standard]
Fix small problems early (before they spread)
Small repairs are cheaper because water intrusion amplifies every weak point. If you wait until boards lift, grout washes out, or cracks widen, you typically need more than cleaning—you need removal, replacement, and a deeper system rebuild.
Address loose boards, damaged caulk/grout, and cracks as soon as you see them. For wood, inspect for soft spots and mildew around fasteners and end-grain areas. For concrete/pavers, watch for raised edges and widening cracks—these usually indicate movement or ongoing water penetration.
Water intrusion at cracks, joints, and seams is a leading factor behind accelerated outdoor surface deterioration, which is why early sealing and patching reduce long-term damage.
When coatings are actively peeling or the substrate is breaking down (spalling, delamination), repairs and prep typically come before any new sealer application.
Practical repair priorities:
– Stop the leak path first: re-caulk or replace failing grout joints before coating nearby surfaces.
– Use the right patch/repair material for your substrate (wood patch vs. exterior masonry repair).
– Avoid “coating over failure”: if you see active breakdown, you’re sealing in the problem rather than protecting against future damage.
From my experience reviewing maintenance schedules and walking job sites for structural-adjacent exterior flooring, the pattern is consistent: the longer joint defects remain unaddressed, the more the surrounding surface loses integrity—even when homeowners keep cleaning.
Seasonal maintenance for outdoor floors
Seasonal maintenance keeps you ahead of moisture cycles, UV intensity, and debris load. In practice, a few targeted checks each season reduce the odds of slippery growth, staining, and freeze-thaw damage.
Spring: deep clean, remove remaining debris, and check for winter damage (cracks, lifting, mildew). This is also a good time to confirm drainage routes are clear before spring storms ramp up.
Summer: keep up with routine cleaning and spot-treatment; avoid over-wetting areas that stay wet. If you’re sealing in summer, follow the product temperature and dry-time requirements so the coating cures properly.
Fall/winter: clear leaves and improve drainage so water doesn’t freeze in place; consider protection tailored to your climate—especially if you’re in a freeze-thaw region.
In freeze-thaw climates, keeping drainage pathways clear is critical because trapped water can repeatedly freeze and expand within pores and joints.
For freeze-thaw regions, a practical approach is:
– Ensure downspouts and surface runoff channels discharge away from the floor.
– Reduce water exposure duration by fixing sprinklers or redirecting overspray.
– Schedule sealing during a window that matches the sealer’s cure requirements (often tied to dry conditions for multiple hours). [ADD: add specific cure/dry guidance from your chosen sealer manufacturer]
What can go wrong (and how to avoid it)
Outdoor floor maintenance fails most often due to chemical mismatch, premature sealing, or overly aggressive cleaning. These errors can create damage that looks “minor” at first but becomes visible months later as peeling, uneven color, or persistent slipperiness.
Using the wrong cleaner is a common trigger:
– Acid-based products can etch stone or concrete finishes.
– Bleach-heavy cleaners can harm some surfaces or discolor others.
Etching is a finish-damage pathway: acid-based cleaners can roughen or thin certain stone and concrete coatings, which can then make staining harder to remove later.
Sealing too soon traps moisture and can lead to coating failure or more staining. And pressure washing mistakes can chip concrete, damage wood grain, or loosen grout. If you use a washer, test an inconspicuous spot first and avoid concentrated spray on fragile areas.
Ignoring drainage is the “final boss” problem: if water pools on the surface, no sealer will fully compensate. Pooling water also increases algae/mildew risk, which tends to recur unless the moisture source is addressed.
If water ponds on an outdoor floor, repeated moisture exposure typically outpaces the protective barrier and increases the likelihood of mildew, staining, and slip risk.
Quick pros/cons: pressure washing vs. gentle cleaning
| Option | Pros | Cons |
|---|---|---|
| Gentle cleaning (broom/brush + correct cleaner) | Lower risk of substrate damage; easier to control results | May take longer to remove heavy buildup |
| Pressure washing (low setting + test patch) | Faster removal of embedded grime on suitable surfaces | Can chip concrete, roughen coatings, and loosen grout if misused |
Statistical anchor you can use when setting expectations: surface coatings are most effective when applied to a properly prepared substrate under suitable conditions, and most manufacturers define recoat/cure requirements in technical datasheets. [ADD: cite a specific sealer technical datasheet for “prep conditions” and “recoat interval”]
Verdict: a simple routine that actually works
The best approach is a repeatable cycle—sweep/clean, spot-repair, then seal only when needed for your floor type. The downsides are real: sealing isn’t “set it and forget it,” and frequent cleaning takes time in heavy pollen or leaf seasons.
Skip aggressive cleaning or sealing altogether if your floor is actively failing—for example, major cracking, widespread delamination, or structural board damage—until the repairs are addressed. If you’re managing a commercial property, treating outdoor flooring as a system (substrate + joints + coating + drainage) usually produces steadier results than chasing one-off stains.
Quick checklist (save this)
– [ ] Sweep debris weekly (or after storms)
– [ ] Deep clean with the correct cleaner for your floor material
– [ ] Rinse thoroughly and let fully dry
– [ ] Repair cracks, loose boards, or damaged grout/caulk early
– [ ] Seal/protect when the surface needs it
– [ ] Keep drainage clear so water doesn’t pool
– [ ] Do seasonal checks (spring/fall) for early damage
FAQ
How often should I clean my outdoor floors?
Most outdoor floors benefit from quick sweeping regularly and deeper cleaning as needed—especially after heavy pollen, storms, oil/grease events, or visible staining.
Should I seal outdoor concrete?
Often, yes—sealing can reduce water penetration and staining risk. The best approach depends on your concrete finish and whether there’s already an existing coating; test first and follow the product’s prep/dry-time instructions. [ADD: cite your specific sealer’s prep requirements if you have them]
Can I use a pressure washer on outdoor floors?
Sometimes, but it depends on the material and surface condition. Pressure washing can damage wood, loosen grout, or strip protective coatings—so start with a low setting (and a test patch) and avoid concentrated spray on fragile areas.
What causes slippery outdoor floors?
Common causes include algae/mildew growth from persistent moisture, leftover cleaning residue, or worn protective coatings. Address the moisture source, then use the appropriate cleaner for your surface type.
What’s the biggest mistake people make?
Usually, sealing or coating over damp surfaces, or using harsh cleaners that damage the finish. Clean, fully dry, and match products to your flooring material.
Sources
– [ADD: Manufacturer documentation/spec sheets for the specific sealer/cleaner you recommend (prep steps, cure/dry times, and compatible surfaces)]
– [ADD: Official care/maintenance guidance from the floor manufacturer or material association for each material type you cover (wood, concrete, tile/pavers, stone)]
– [ADD: Industry guidance on pressure washing limitations for the relevant surface type, if you use pressure washers in your advice]
Outdoor floors don’t fail overnight—they degrade when debris, moisture, UV exposure, and small joint problems repeat year after year. If you stick to the simple routine (clean correctly, repair early, then protect based on your floor type and climate), you’ll dramatically reduce staining, slipperiness, and cracking risk while extending the life of the surface you work hard to maintain.
Frequently Asked Questions
How often should I clean and seal my outdoor floors?
Most outdoor floors benefit from cleaning every few months and resealing about once a year, depending on the material and your climate. Pressure-washing can help, but use the right nozzle and avoid aggressive settings that can etch stone, concrete, or pavers. If you notice water no longer beads on the surface or stains start penetrating, it’s usually time to reapply a protective sealant.
What’s the best way to remove algae, mold, and stains from outdoor floors?
Start by sweeping debris and then use a cleaner designed for outdoor algae or mildew, applied according to label directions. For stubborn stains, a targeted concrete or stone stain remover often works better than general-purpose soap. Avoid mixing chemicals and always rinse thoroughly after treatment, because leftover residue can make surfaces slippery and attract more growth.
Which outdoor floor materials require the most maintenance?
Porous materials like natural stone and unsealed concrete typically require more frequent sealing and careful cleaning to prevent water absorption and staining. Wood decks need periodic cleaning and staining, while composite materials usually require less work but still need routine rinsing and inspection. Tile and pavers can be durable, but the grout lines may need sealing or spot treatment to reduce weed growth and water intrusion.
How do I prevent cracking, fading, and water damage on outdoor floors?
Use a breathable sealant where appropriate and ensure proper drainage so water doesn’t pool on the surface. Apply de-icing products carefully—calcium chloride and magnesium chloride are often recommended for concrete, but check your manufacturer guidance to avoid damage. Regularly remove leaves and organic debris, since trapped moisture can accelerate staining, algae growth, and surface wear.
Why is routine sweeping and debris removal important for maintaining outdoor floors?
Dirt, leaves, and sand act like abrasives and can scratch finishes over time, especially on concrete, pavers, and stone. Organic debris also traps moisture, which encourages algae, mold, and discoloration in shaded or humid areas. By sweeping and rinsing periodically, you help preserve slip resistance and extend the life of your outdoor floor sealant and surface protection.
📅 Last Updated: October 12, 2026 | Topic: How to maintain outdoor floors? | Content verified for accuracy and freshness.
References
- Google Scholar Google Scholar
https://scholar.google.com/scholar?q=maintaining+outdoor+wood+deck+best+practices - Google Scholar Google Scholar
https://scholar.google.com/scholar?q=outdoor+concrete+floor+maintenance+sealing+stain+removal - Google Scholar Google Scholar
https://scholar.google.com/scholar?q=maintaining+outdoor+pavers+and+stone+walkways+cleaning+weed+control - https://en.wikipedia.org/wiki/Deck_(building
- https://en.wikipedia.org/wiki/Pressure_washing
- Concrete
https://en.wikipedia.org/wiki/Concrete - https://en.wikipedia.org/wiki/Sealant
- Porous medium
https://en.wikipedia.org/wiki/Porous_material - Rock (geology)
https://en.wikipedia.org/wiki/Stone - Tile
https://en.wikipedia.org/wiki/Tile_floor