To level uneven floors in older homes, start by identifying the problem areas using a level or straightedge. Common causes include foundation settling or humidity effects, which can be assessed through simple measurements. You can fix unevenness by installing shims under joists, using adjustable floor jacks, or applying self-leveling compounds. Make sure to clean the area and repair any major subfloor damage first. Don't forget safety gear during your project. Understanding these basics will set you up for success as you work towards a safer and more functional living space—there's plenty more to explore about the techniques and tools involved.
Understanding Floor Unevenness
Uneven floors can be more than just an eyesore; they can lead to safety hazards and structural issues in your home. Understanding floor unevenness is vital for maintaining a safe living environment. You might not realize it, but your floor design can greatly affect how your home functions. When the foundation shifts or settles over time, it can create slopes or dips that aren't only uncomfortable but can also pose tripping risks.
To address this problem, it's important to explore various leveling techniques. The first step is identifying the extent of the unevenness. A simple ball test can help; if a ball rolls to one side, that area likely needs attention. For minor unevenness, self-leveling compounds can be an effective solution. These materials flow and settle into low spots, creating a smooth surface.
For more considerable issues, you might need to adopt more advanced leveling techniques, such as shimming or using adjustable floor jacks. Shimming involves inserting small pieces of material under the floor joists to raise them and achieve a level surface. If your home has a crawl space, adjustable jacks can provide the support necessary to correct unevenness.
Ultimately, addressing uneven floors not only enhances the aesthetic appeal of your home but also guarantees safety for you and your family. Taking proactive steps to level your floors can save you from more extensive repairs down the line, making it a worthwhile investment in your home's integrity.
Common Causes of Uneven Floors
Uneven floors can stem from a few common issues that you should be aware of. Foundation settling, moisture and humidity, and deteriorating support beams often play significant roles in creating those frustrating bumps and dips. Identifying these causes is the first step toward restoring your floor to its original level.
Foundation Settling Issues
Many homeowners may not realize that foundation settling issues can be a significant cause of uneven floors. Over time, homes settle due to various factors, including changes in soil density or moisture levels, which can lead to cracks and shifts in the foundation. If you notice sloping or sagging floors, it's vital to address these issues promptly.
One common cause of foundation settling is poor soil conditions. Expansive clay, for instance, can shift with moisture changes, causing your foundation to sink or rise unevenly. Inadequate drainage around your home can exacerbate these issues, leading to further instability.
To guarantee your home remains safe, consider foundation repair as a viable solution. This might involve reinforcing the foundation or employing soil stabilization techniques to improve the ground's support beneath your home. Hiring a professional to assess the issue is essential, as they can provide tailored advice and solutions specific to your situation.
Moisture and Humidity Effects
While you might not always notice it, moisture and humidity can greatly impact your floors over time. High humidity levels can lead to wood floors expanding and contracting, which might cause unevenness. This fluctuation can make your once-level floors feel bouncy or creaky, creating safety concerns in your home.
To combat these issues, consider installing moisture barriers in your crawl spaces or basements. These barriers help prevent moisture from seeping into your flooring, reducing the risk of warping and other damage. Additionally, implementing humidity control measures—like using dehumidifiers or improving ventilation—can considerably stabilize your indoor environment.
Keep an eye out for signs of moisture damage, such as discoloration or mold growth, as these can exacerbate uneven floors. Regularly inspecting your home for leaks or water intrusion is essential in maintaining a safe living space.
Deteriorating Support Beams
Support beams play an essential role in maintaining the structural integrity of your home, so it's alarming when they start to deteriorate. Over time, factors like moisture, pests, and age can weaken these critical supports, leading to uneven floors. If you notice sagging or bouncing floors, it might be time to inspect those beams.
The first step is to evaluate the condition of your support beams. Look for signs of rot, cracks, or insect damage. If you find significant issues, beam replacement may be necessary to restore stability to your home. Ignoring these signs can result in more severe structural problems down the line.
Once you address any deterioration, consider structural reinforcement options. This could involve adding additional beams or supports to distribute weight more evenly. It's essential to consult with a professional to determine the best approach for your specific situation, ensuring safety and long-term effectiveness.
Don't underestimate the importance of maintaining your support beams. Taking proactive measures now can prevent costly repairs and enhance the overall safety of your home. Remember, a solid foundation begins with strong support beams!
Assessing the Level of Unevenness
Before tackling the challenge of leveling uneven floors, it's vital to accurately assess the extent of the unevenness. Start by using floor measurement techniques like a simple level or a long straightedge. Place the level or straightedge across the floor in various areas, noting any gaps between it and the floor surface. This will help you identify how pronounced the unevenness is.
Next, pay attention to unevenness indicators. Look for signs such as doors that stick, gaps around windows, or cracks in the walls. These symptoms often point to underlying issues related to your floor's stability. If you notice any of these, it might indicate that the unevenness is more than just cosmetic; it could affect the structural integrity of your home.
As you assess, take measurements at different points throughout the room. It's important to document your findings, as this data will guide your leveling process later on. Don't forget to check for slope variations, particularly in corners and near walls where issues often arise. If you find that a specific area has a significant drop or rise, it's important to highlight that for future reference.
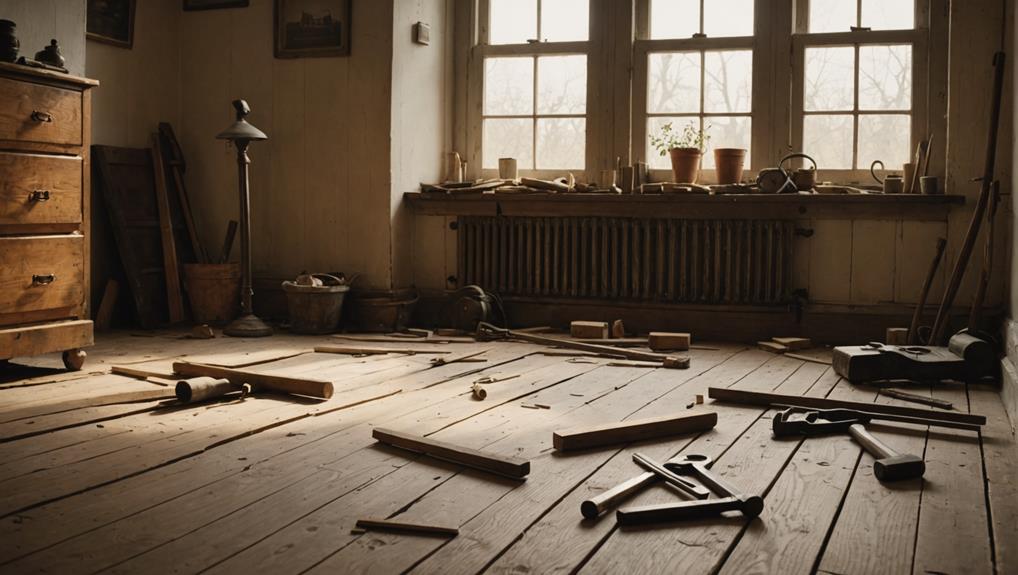
Tools and Materials Needed
To level uneven floors effectively, you'll need a few essential tools and materials that make the process smoother and more efficient. Start by gathering floor leveling tools such as a spirit level, measuring tape, and a straightedge. These will help you assess the extent of the unevenness and mark the areas that need adjustment. A floor scraper is also vital for removing any old flooring or debris that might obstruct your leveling work.
Next, consider your leveling compound or underlayment. Self-leveling compound is often the best choice, as it flows easily and fills low spots, creating a smooth surface. When selecting materials, pay attention to the manufacturer's guidelines for compatibility with your existing flooring type. It's helpful to have a mixing bucket and a trowel for applying the compound properly.
Make certain you have safety gear as well. A dust mask, safety goggles, and knee pads will protect you while working on your project. If your floors have significant dips or rises, you might also need shims or plywood to provide structural support before applying the leveling compound.
Lastly, remember to keep your workspace clean and organized. This not only guarantees your safety but also allows you to work more efficiently. Following these material selection tips and having the right tools on hand will set you up for success in leveling those uneven floors.
DIY Leveling Techniques
Leveling uneven floors can seem intimidating, but with the right techniques, you can tackle this project with confidence. There are several effective DIY solutions that can help you achieve a level surface without breaking the bank.
One popular method is using a self-leveling compound. Start by cleaning the area thoroughly and repairing any significant cracks or holes. Mix the compound according to the manufacturer's instructions, then pour it onto the floor. Use a trowel to spread it evenly, allowing gravity to do the work. This method is ideal for minor dips and can create a smooth surface for your flooring.
If you're dealing with larger discrepancies, consider shimming the joists. You'll need to access the crawl space or basement. Use wooden shims or metal shims, placing them under the low points of the joists. Tap them in gently until the floor is even. Be sure to check your work with a level frequently to verify accuracy.
Another option is to install a floating floor or engineered hardwood, which can disguise minor unevenness while providing a stable surface. Just remember to use an underlayment that can accommodate slight variations.
Throughout the process, prioritize safety. Wear protective gear and maintain proper ventilation, especially when working with compounds. By employing these DIY floor leveling techniques, you can restore your home's comfort and aesthetics without the need for professional help.
Hiring a Professional Contractor
If DIY methods aren't yielding the results you hoped for, hiring a professional contractor can be a wise choice for addressing uneven floors. A qualified contractor brings expertise and experience, ensuring the job's done right and safely. Here are some key points to take into account when selecting the right contractor for your project:
- Contractor Qualifications: Look for licensed and insured professionals with a solid reputation. Check their credentials and ask for references to verify their previous work.
- Experience: Find someone who specializes in flooring and has experience with older homes. They'll understand the unique challenges that come with your property.
- Cost Considerations: Get multiple quotes to gauge the average cost for your project. Keep in mind that while lower prices can be tempting, they might not always guarantee quality. Reflect on the materials and methods they'll use, as these can greatly impact the overall cost.
- Communication: Choose a contractor who communicates clearly and promptly. They should be willing to explain their process, answer your questions, and keep you informed throughout the project.
Using Self-Leveling Compound
When faced with uneven floors, using a self-leveling compound can be an effective and straightforward solution. This material is specifically designed for self-leveling applications, allowing it to flow and fill in low spots, creating a smooth surface. Before you start, verify you've got the right safety gear, like gloves and a mask, since the dust can be harmful.
First, you'll need to prepare the area. Clear the floor of any debris and make sure it's clean and dry. If necessary, apply a primer to help the compound adhere better. Next comes the most critical part: compound mixing. Follow the manufacturer's instructions carefully to get the right consistency. Typically, you'll combine the powdered compound with water in a bucket, using a mixer for a smooth blend. Avoid lumps, as they can affect the leveling process.
Once you've mixed your compound, pour it onto the floor, starting at the lowest point. The compound will naturally seek its level, so you won't need to spread it too much. You can use a trowel to help guide it if necessary. Remember to work quickly, as self-leveling compounds can set fast.
After application, allow it to cure completely before walking on it or installing flooring. Following these steps not only enhances the level of your floors but also contributes to the overall safety and appearance of your home.
Installing Shims for Support
Before you start installing shims, it's essential to assess how uneven your floor really is. By identifying the high and low spots, you can determine the best places to position your shims for maximum support. This thoughtful placement will help guarantee your floor is both level and stable.
Assessing Floor Unevenness
Uneven floors can be a homeowner's nightmare, causing everything from aesthetic concerns to functional issues. To tackle this problem effectively, you'll need to begin with a thorough floor inspection. Here are some measurement techniques to help you assess the unevenness:
- Use a Level: Place a level on various sections of the floor to identify high and low points.
- Check for Gaps: Slide a credit card or a small piece of paper under furniture legs to find gaps, which indicate uneven areas.
- Measure the Height: Use a measuring tape to record the height from the floor to a fixed point, like a door frame, at several locations.
- Observe Slopes: Walk around the room and notice any noticeable slopes or dips that might not be caught by other methods.
Once you've gathered this information, you'll have a clearer picture of the floor's condition. This assessment is essential before moving on to installing shims for support, ensuring you address any safety concerns while stabilizing the floor effectively.
Proper Shim Placement
To effectively support your floor, proper shim placement is essential, as it guarantees stability and prevents future issues. Start by selecting the right shim types for your project. Common options include wooden shims, composite shims, and metal shims. Each type has its advantages, so consider the specific needs of your flooring.
Next, choose appropriate shim materials. Wooden shims are great for interior applications, while plastic or metal shims can be more suitable for areas exposed to moisture. Once you've got your materials, it's time to install them.
Begin at the lowest point of your floor, inserting shims beneath the joists. Make sure to space them evenly, typically every 16 inches. Confirm that shims are snug but not overly compressed, as this can lead to further instability. After placing your shims, use a level to check the floor's evenness. Adjust the shim height as necessary until everything is level.
Repairing Subfloor Issues
Repairing subfloor issues is vital for achieving a stable foundation for your flooring. A well-maintained subfloor not only enhances the durability of your flooring but also guarantees your safety. To start, performing a thorough subfloor inspection is essential. Look for signs of damage, such as sagging, rot, or mold. Once you've identified the problem areas, you can take the appropriate steps to fix them.
Here's a quick guide to help you through the process:
- Identify the Damage: Check for soft spots or squeaking sounds when walking. These often indicate underlying problems.
- Remove the Flooring: If necessary, carefully take up your existing flooring to expose the subfloor. This will give you a clear view of any issues.
- Make Repairs: Depending on the damage, you might need to reinforce or replace sections of the subfloor. For serious damage, subfloor replacement may be the best option.
- Reinstall Flooring: After repairs are made, reinstall your flooring, making sure it's secure and level.
Always prioritize safety when working on your subfloor. Use the right tools, wear protective gear, and consider consulting a professional if you're unsure about the repairs. Taking these steps will help you maintain a strong foundation and prevent further issues down the line.
Preventing Future Unevenness
Maintaining a level floor isn't just about fixing problems as they arise; it's also about taking proactive steps to prevent future issues. One of the best ways to guarantee your floors remain even is through regular inspections. By keeping an eye on your home's structure, you can catch potential problems early, saving both time and money in the long run.
Start by checking for signs of moisture or water damage, as these can lead to foundation issues. Look for cracks in walls or ceilings, which may indicate shifting or settling. If you notice any irregularities, address them immediately. Preventive maintenance is key; make it a habit to inspect your floors and subfloors at least once a year.
Additionally, verify your home's gutters and downspouts are functioning properly. Poor drainage can lead to water pooling around your foundation, which can cause unevenness over time. Regularly cleaning your gutters will help maintain their efficiency.
Another effective strategy is to maintain consistent humidity levels in your home. Excess moisture can warp wooden floors and weaken the subfloor structure. Using dehumidifiers or air conditioners can help regulate humidity, especially in damp areas like basements.
Lastly, consider consulting a professional for periodic assessments of your home's foundation. Their expertise can provide invaluable insights and preventive measures tailored to your specific situation. By incorporating these practices into your routine, you'll not only enhance your home's safety but also preserve its structural integrity for years to come.
Frequently Asked Questions
How Can I Tell if My Floors Are Uneven Without Measuring Tools?
You might think your floors are perfectly fine, but a simple visual inspection can reveal a lot. Look for gaps between the floor and baseboards or check if your furniture rocks. Pay attention to floor creaks—if they're more pronounced in certain areas, that's a sign of unevenness. Trust your instincts; if something feels off, it probably is. Keeping your home safe and sound starts with noticing these subtle signs!
Will Uneven Floors Affect My Home's Resale Value?
Yes, uneven floors can greatly affect your home's resale value. Buyers often perceive uneven floors as a sign of underlying structural issues, which can lead to concerns about safety and necessary repairs. This perception can lower their offers or deter potential buyers altogether, impacting your resale impact. If you're considering selling, addressing any unevenness before listing your home could improve buyer confidence and potentially lead to a better sale price.
Can I Level Floors in a Finished Basement?
Imagine trying to balance a stack of books on a wobbly table—it just won't work. When it comes to leveling floors in your finished basement, there's hope! DIY floor leveling solutions like self-leveling compounds can help you create a smooth surface. Just guarantee you follow safety precautions and check for moisture issues first. With the right approach, you'll transform that uneven space into a cozy, usable area for family gatherings or relaxation.
Are There Any Temporary Fixes for Uneven Floors?
If you're dealing with uneven floors, there are temporary fixes you can try. One effective method is using shimming techniques. You can place shims under the low points of the floor to help level it out. Just make sure to choose sturdy materials and check regularly for stability. While these fixes aren't permanent, they can improve safety and comfort until you're ready to tackle a more thorough floor leveling solution.
How Long Does It Typically Take to Level Uneven Floors?
When leveling uneven floors, the time it takes can vary greatly. If you choose professional options, expect the process to take a few days, considering prep and installation. DIY methods might take longer, depending on your skills. Don't forget to factor in cost considerations—materials and tools can add up. It's essential to prioritize safety throughout, so make certain you've got the right equipment and knowledge before starting any project.


