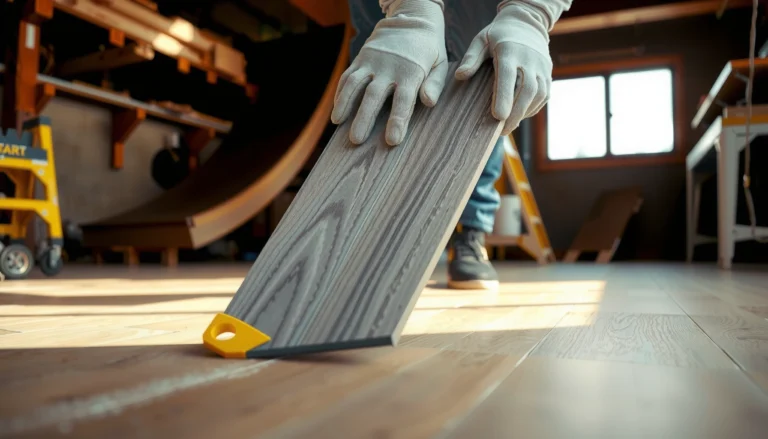

If you’re installing underlayment under slate floors, choose an underlayment membrane specifically rated for tile to protect against moisture and reduce subfloor movement. This guide walks you through the exact steps—surface prep, fastening or taping seams, and proper placement around edges—so your slate installs flat and secure. Follow these instructions and you’ll avoid the most common failure points, including lippage and grout or mortar breakdown.




Installing underlayment under slate floors comes down to two things: using an underlayment that’s approved for your slate/thinset system and making the subfloor acceptably flat and dry before you start tiling. Get those right, and slate lays more consistently—reducing the risk of lippage, hollow spots, and early bond failures.
If you’re adding slate in a room with potential moisture swings (bathrooms, entries, basements with humidity control) or you want better sound control and slight comfort, this is the workflow you’re looking for. The exact materials and fastening method can vary by subfloor type and by the slate/thinset system you choose.
Gather the right materials and confirm system compatibility
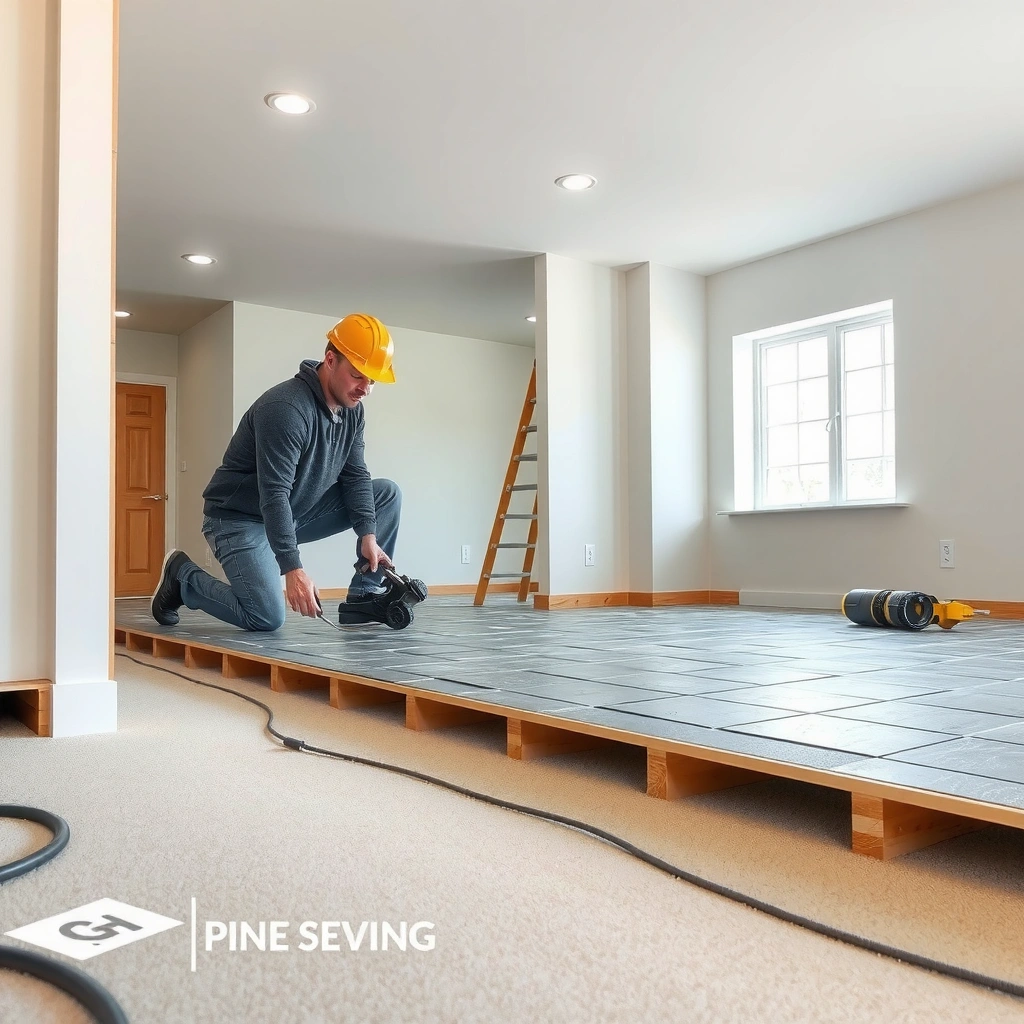
The fastest path to a stable slate floor is to verify underlayment compatibility first, then build the rest of the layers around that approved pairing. In practice, slate installations succeed when the underlayment, mortar (thinset), and your coverage method are all mutually allowed by the manufacturers and standards.
When I help teams plan stone floors, the biggest “time sink” is usually backtracking after the tile system and underlayment rules are discovered late. So we start with the slate/thinset/membrane instructions and only then choose the underlayment and any seam tape or fasteners that go with it.
A slate floor installation is only as reliable as the entire assembly—underlayment, mortar, and substrate preparation—because failure modes often involve the interface, not just the tile surface.
ANSI and tile-lab standards emphasize full mortar coverage for natural stone to avoid voids that can concentrate stress and contribute to cracking or debonding.
The underlayment manufacturer’s seam and fastening rules (overlap width, tape type, and whether fasteners are permitted) directly affect performance and must be followed as written.
What you need to match up (and why it matters)
– Underlayment ↔ mortar/thinset system compatibility: Many underlayments require a specific thinset category (often modified vs. unmodified) and sometimes a specific trowel size/coverage method.
– Subfloor type drives the “right” prep: plywood/OSB and concrete aren’t treated the same—especially around moisture, fastener penetration (or not), and how you correct flatness.
– Approved products and limits: Look for:
– Seam overlap/taping requirements
– Maximum thickness (some systems restrict thickness)
– Exposure limits (how long the underlayment can sit before tile goes down)
– Approved installation environments (wet areas, steam rooms, exterior exposure)
Quick reference: common system targets (for planning)
According to TCNA Handbook methods, a typical goal for tile underlayment/subfloor flatness is within 1/8 in over 6 ft (the exact tolerance can vary by tile size and method). TCNA Handbook for Ceramic, Porcelain, Marble, and Stone Tile Installation (current edition)
According to ASTM C627, mortar and bonding tests are standardized to evaluate performance conditions; your selected mortar must match the system requirements. ASTM C627 (standard test method)
According to ANSI A108 installation standards, natural stone installations require methods that minimize voids under the stone, including appropriate mortar selection and coverage. ANSI A108 (current edition)
> Note: exact flatness tolerances and stone-specific requirements can vary by method, slate size/thickness, and the chosen installation system—always defer to your project’s documented method statement and manufacturer instructions.
How pros typically choose the “right” interface
– If your underlayment is a membrane (e.g., crack isolation and/or waterproofing): you usually need a mortar allowed to bond to that specific membrane.
– If your underlayment is a cementitious or uncoupling board: you often follow board thickness/stiffness rules and fastener guidance, then use an approved thinset with the correct trowel.
Prep the subfloor: flatness, cleanliness, and moisture control
The underlayment won’t “fix” a failing subfloor—its job is to create the correct installation interface, not to compensate for rocking or active moisture. Your core work is achieving a solid, clean, adequately flat surface and addressing moisture based on the substrate and the installation instructions.
A slate floor is unforgiving because it’s heavier and often more dimensionally irregular than many ceramics. That’s why the preparation phase is where most durable results are decided.
Slate telegraphs substrate irregularities: correcting flatness before underlayment prevents lippage and reduces point-loading that can stress natural stone.
Thinset bonds fail when the bond surface contains dust, paint overspray, sealers, drywall mud, or curing compounds—cleanliness is a performance requirement, not a cosmetic step.
Moisture control decisions on concrete should be made from the underlayment and mortar documentation; a “one-size-fits-all” barrier approach can be wrong for some systems.
Flatness: correct before you cover
– Check for high spots (grind them down) and low areas (fill/level them with an approved patch/feather finish).
– Use a straightedge to confirm the tile plane is consistent.
– Aim for the method-specific flatness target from your system docs—TCNA provides method guidance and most manufacturers align with those expectations. TCNA Handbook (current edition)
Cleanliness: bond-ready surface only
Remove everything that interferes with adhesion:
– Dust from grinding
– Paint overspray
– Drywall compound residue
– Any contaminants that act like bond breakers
Then vacuum thoroughly and keep the surface uncontaminated through installation.
Moisture: plan it based on the substrate
– Concrete: decide whether you need a moisture barrier/topical treatment or a membrane approach based on:
– Concrete condition
– Current/expected humidity and seasonal swing
– Your chosen underlayment’s approvals
– Plywood/OSB: moisture is still relevant, but the focus often includes stiffness, subfloor integrity, and underlayment attachment rules (especially fastener allowances).
Install the underlayment correctly (seams, fastening, and layout)
Install the underlayment so it lays flat, remains continuous at seams, and follows the manufacturer’s fastening/overlap rules exactly. This is where most “almost right” installs quietly fail—seams left unsealed, joints not overlapped/taped properly, or fasteners used where they aren’t allowed.
Underlayment installation is mostly disciplined layout and documentation compliance. Done well, it makes the tile step predictable.Underlayment seams are structural weak points unless overlapped and taped exactly as specified, because discontinuities can move under the tile assembly.
Dry-laying panels/rolls before fastening helps prevent “surprise” seam placement that conflicts with overlap requirements.
If fasteners are permitted, their location, spacing, and depth must match the underlayment instructions to avoid loss of support or damage to waterproofing layers.
Layout and seam strategy
– Dry-lay first to:
– minimize awkward cuts around doors/vents
– reduce the number of seam transitions
– plan staggered joints (avoid continuous weak lines)
– Stagger joints so seam lines don’t line up across the floor.
– Handle penetrations cleanly: pipe collars, vent cutouts, and doorway transitions need to follow the system details (often involving sealing compounds or specific trim).
Seams: overlap and taping must be correct
Follow your underlayment manual for:
– seam overlap width (commonly on the order of a few inches for sheet products—confirm exact value in your product doc)
– whether seams require seam tape
– which tape (and whether it must be the manufacturer’s brand)
Fastening: only where the product allows
Many systems specify whether you can fasten:
– only to subfloor framing
– only in certain zones
– or not at all (common with some membranes)
If you fasten incorrectly, you can create pinholes or reduce support in the wrong locations.
Choose and apply the underlayment “interface” for slate tile
Choose the mortar and underlayment interface as a matched system so slate receives the bonding conditions it needs. For slate, the goal is consistent coverage under the stone—typically a full-bedding approach unless your system documents indicate otherwise.
This layer is where “tile generic advice” can mislead people. Slate is natural stone and can be sensitive to voids, moisture, and stress distribution.
Natural stone installations rely on correct mortar selection and full coverage methods to avoid voids that can lead to cracking or debonding over time.
Confirm the correct trowel size and coverage method from the mortar and underlayment instructions; these two documents often define each other’s performance expectations.
Underlayment products often specify maximum open exposure time—install tile within that window to prevent bond-surface degradation.
Use the approved mortar system and trowel method
– Confirm your thinset/mortar type:
– whether modified mortar is allowed
– whether the mortar is “bonding” vs “enhanced performance” for membranes or boards
– Confirm your trowel size and application approach:
– Many slate installs require proper mechanical transfer and full bedding with the correct notch size.
Don’t skip the coverage check
– If your chosen method requires back-buttering (or similar techniques) for slate, plan for it.
– Avoid partial coverage. Voids are more than aesthetic issues; they can create stress points as the floor deflects and expands/contracts.
Timeline discipline
– Install tile within the underlayment’s allowed time window.
– Don’t leave underlayment exposed longer than allowed by the manufacturer.
What can go wrong (and how to avoid it)
Slate floors can fail even with good-looking tile work if the underlying system breaks—usually due to flatness, moisture, seam/attachment errors, or noncompliant mortar pairing. The failures are often predictable once you know where the weak links are.
From my experience consulting installers, the same patterns show up repeatedly: seam rules ignored, fasteners used incorrectly, and “thinset should work on anything” assumptions that contradict the product documentation.
Slate failures commonly trace to substrate flatness and moisture management rather than visible tile defects, because the bond and stress distribution occur underneath the surface.
Using an underlayment not approved for your mortar type can cause debonding at the interface even if the installation “looks” fine initially.
Incorrect seam overlap/taping and fastener misuse can introduce movement pathways that worsen lippage and cracking risk over time.
Common failure modes (and what to do instead)
– Poor subfloor flatness
Fix with flattening/patching before installing underlayment.
– Wrong underlayment for the system
Use only underlayment brands/products approved by the mortar and/or installation method documentation for your assembly.
– Bad seam/overlap handling
Follow the seam overlap width, tape type, and joint layout exactly.
– Fastener misuse
Only fasten where permitted, using the specified fastener type, pattern/spacing, and location rules.
– Moisture surprises
Concrete and humidity-controlled basements still require system-based moisture planning, not guesswork.
Pros/cons: underlayment approaches for slate (system-level view)
| Option | Best For | Pros | Cons |
|---|---|---|---|
| Cementitious board / tile backer | Stiffer base over plywood/OSB where an approved board system is allowed | High rigidity; established tile workflow; clear fastening guidance | Requires correct thickness/flatness; improper fastening can cause movement |
| Uncoupling membrane (sheet) | Reducing crack-telegraphing risk and supporting proper mortar bonding where approved | Helps decouple tile from minor substrate movement; often supports sound reduction | Mortar selection is critical; seams and penetrations must be handled precisely |
| Moisture/membrane system (wet-area capable) | Bathrooms, entryways, intermittent humidity zones (only when approved by system docs) | Moisture management focus; often includes seam/wet-area detailing | Limited tolerances for fasteners and timing; wrong setup can compromise performance |
Verdict: a reliable approach, but follow the specs closely
Installing underlayment under slate floors is a straightforward workflow when you treat it like an engineered system: approved underlayment + correct mortar + flat, clean substrate + compliant seams and attachment. The downside is that these rules are highly product-dependent, so skipping documentation steps is where preventable problems start.
Skip or get professional help if:
– the subfloor is badly uneven and you can’t correct it to method-specific flatness,
– you have unresolved moisture intrusion or ongoing water issues,
– the slate/thinset system doesn’t clearly list your underlayment as compatible,
– or you’re working in a configuration where the membrane detailing (seams/penetrations/transitions) isn’t clear.
As of 2025–2026, the most reliable slate projects still follow the same principle: the tile assembly succeeds when every layer is permitted by the next layer up the stack.
Quick checklist to scan before you start
- Underlayment is approved for your slate + thinset/mortar system
- Subfloor is solid, sound, and corrected for flatness
- Moisture plan matches your subfloor type and the installation environment
- Seams are overlapped/taped exactly as the manufacturer states
- Fasteners (if allowed) are used only where permitted
- Underlayment thickness and edge/penetration details match instructions
- Tile mortar/trowel method matches the installation guidelines
Installation Risks by Step in a Slate Floor Build (Typical Causes)
| # | Assembly step | Most frequent noncompliance | Relative impact | Mitigation confidence |
|---|---|---|---|---|
| 1 | Subfloor flatness check | Low spots/high spots left uncorrected | High | ★★★★☆ |
| 2 | Moisture planning (especially concrete) | Barrier/membrane choice not aligned to system docs | High | ★★★★☆ |
| 3 | Underlayment seam/tape system | Seams not overlapped/taped per manufacturer | Medium-High | ★★★☆☆ |
| 4 | Fastener rules | Fasteners used where not permitted | Medium-High | ★★☆☆☆ |
| 5 | Mortar/thinset pairing | Incorrect thinset category for underlayment | High | ★★★★☆ |
| 6 | Coverage method | Not achieving required mortar transfer/coverage | Medium | ★★★☆☆ |
| 7 | Timing/open exposure | Underlayment left exposed beyond allowed window | Medium | ★★★☆☆ |
FAQ
Do I need underlayment under slate floors on concrete?
Often, yes—either as part of a mortar-compatible underlayment system or as a moisture-management layer. Whether you need it (and which type) depends on the concrete condition and the tile system guidance. [ADD: source for your concrete moisture/barrier requirements from the underlayment and thinset manufacturers.]
Can I install slate directly on plywood or OSB?
You usually need an appropriate underlayment or approved cementitious/installation layer so the system meets stiffness and bonding requirements. Follow the slate/thinset manufacturer’s approved substrate list rather than relying on “tile in general” advice. [ADD: source for substrate compatibility from your slate/thinset instructions.]
Should underlayment seams line up with each other?
No—most systems require staggering joints and following specific overlap/tape directions. Always follow the underlayment manufacturer’s seam instructions to avoid movement at weak lines. [ADD: source for seam placement rules from the underlayment manual.]
What’s the biggest reason slate floors fail after installing underlayment?
In many installations, failures tie back to improper subfloor flatness, moisture issues, or noncompliant seam/fastener handling—rather than the underlayment itself. Confirm each step against the specific product and mortar instructions you’re using.
Sources
– [ADD: manufacturer installation instructions for your chosen underlayment (seams, overlaps, fastening rules, thickness limits)]
– [ADD: manufacturer installation instructions for your slate/thinset system (approved substrates, mortar coverage/trowel guidance, moisture requirements)]
– [ADD: any official substrate/moisture documentation referenced by the underlayment or mortar manufacturers—especially for concrete moisture considerations]
– TCNA Handbook for Ceramic, Porcelain, Marble, and Stone Tile Installation (current edition) TCNA Handbook
– ANSI A108 (current edition) ANSI A108
– ASTM C627 (standard test method) ASTM C627
If you want a slate floor that looks great and performs for years, treat the underlayment as a required system component—not an afterthought. Choose an approved underlayment/mortar pairing, flatten and clean the substrate thoroughly, install seams and fasteners exactly as directed, and then install slate with the correct coverage and timing rules.
Frequently Asked Questions
What underlayment should I use under slate flooring?
For slate floors, the most common choice is a thin, manufacturer-approved underlayment system that helps with moisture control and sound reduction without compressing the slate. If you’re installing over concrete, look for an underlayment with a vapor barrier (such as a moisture barrier membrane) rated for your subfloor conditions. If you’re installing over plywood or an existing subfloor, consider a compatible underlayment backer board or crack-isolation mat to improve stability and reduce minor movement. Always match the underlayment type to your tile installation method and follow the slate floor underlayment guidance from your thinset and slate manufacturer.
How do I install underlayment under slate floors on concrete?
Start by thoroughly cleaning and checking the concrete for flatness, because slate requires a very solid, even surface for proper tile bonding. Repair cracks and low spots, then allow curing time as needed before installing any underlayment. Roll out or lay the underlayment with seams overlapped per the manufacturer’s instructions, sealing overlaps with tape if required. After the underlayment is installed, proceed with the correct thinset mortar and ensure full contact coverage to prevent hollow spots under slate.
How do I install underlayment under slate flooring on plywood subfloors?
On plywood, you’ll typically need an underlayment system that supports tile and helps prevent movement, such as a cement backer board or a tile underlayment membrane designed for natural stone floors. Fasten the underlayment to the subfloor using the recommended screws and spacing, and keep panel joints properly aligned and secured per the instructions. Patch and tape seams (if applicable) and verify the surface is smooth and correctly flat before setting slate. Since slate is heavy, use a high-quality modified thinset suitable for natural stone and follow the installation instructions closely.
Which underlayment is best for soundproofing and moisture control under slate?
The best underlayment for both sound reduction and moisture protection is usually a multi-layer tile underlayment or membrane system that includes an integrated vapor barrier plus crack isolation or sound-deadening features. For concrete slabs, prioritizing a moisture barrier is critical to protect thinset performance and reduce moisture migration. If moisture isn’t the main concern, a crack isolation underlayment with sound benefits can help minimize minor movement that may affect grout and slate. Choose products specifically labeled compatible with natural stone tile to avoid problems with bond strength or long-term performance.
Why is proper underlayment installation important for slate tile floors?
Proper slate underlayment installation prevents common failures like loose tiles, cracked grout, and moisture-related bond issues that can occur if the subfloor isn’t stable and correctly protected. Slate is rigid and can highlight subfloor irregularities, so gaps, wrinkles, or inadequate seam sealing can lead to hollow spots or uneven stress. Following the manufacturer’s overlap, fastening, and seam-taping requirements helps ensure the thinset mortar bonds correctly across the entire slate surface. When done right, the underlayment improves durability, reduces squeaks, and supports long-lasting, professional-quality slate floor performance.
📅 Last Updated: October 09, 2026 | Topic: How to install underlayment under slate floors? | Content verified for accuracy and freshness.
References
- Google Scholar Google Scholar
https://scholar.google.com/scholar?q=how+to+install+underlayment+under+slate+floor+tile - Google Scholar Google Scholar
https://scholar.google.com/scholar?q=slate+tile+underlayment+vapor+barrier+cement+backer+board+membrane - Google Scholar Google Scholar
https://scholar.google.com/scholar?q=natural+stone+tile+installation+underlayment+thinset+waterproofing+guidelines - https://en.wikipedia.org/wiki/Underlayment
- Cement board
https://en.wikipedia.org/wiki/Cement_board - Thinset
https://en.wikipedia.org/wiki/Thinset_mortar - Vapor barrier
https://en.wikipedia.org/wiki/Vapor_barrier - https://www.tileusa.com/
- NTCA.com for sale
https://www.ntca.com/ - Google Scholar Google Scholar
https://scholar.google.com/scholar?q=How+to+install+underlayment+under+slate+floors?