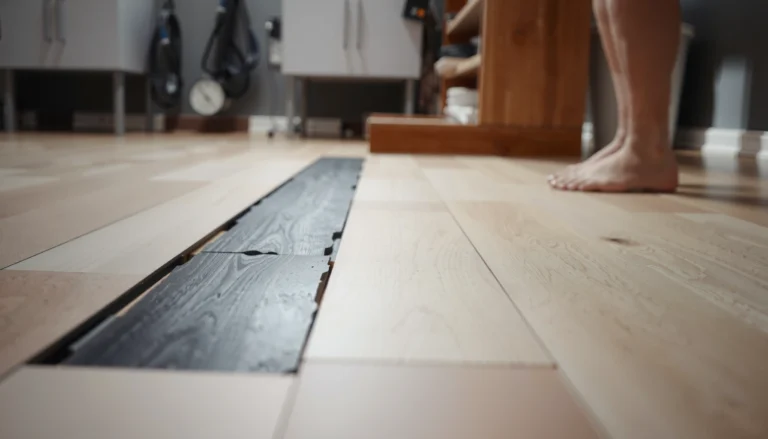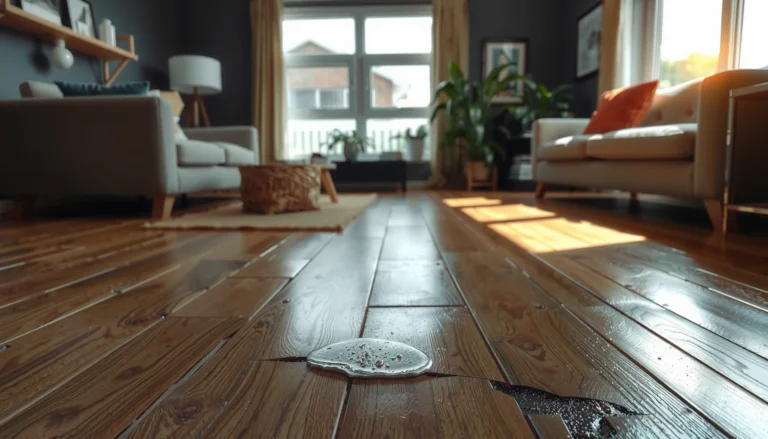

Fixing gaps in hardwood floors is mostly a matter of choosing the right method for the size and cause of the separation, and then applying it correctly. This step-by-step guide shows you exactly how to fill minor cracks, re-secure wider boards, and finish the repair so the floor looks uniform and stays stable. If you want a clear, reliable way to eliminate gaps instead of covering them up, this is the playbook.


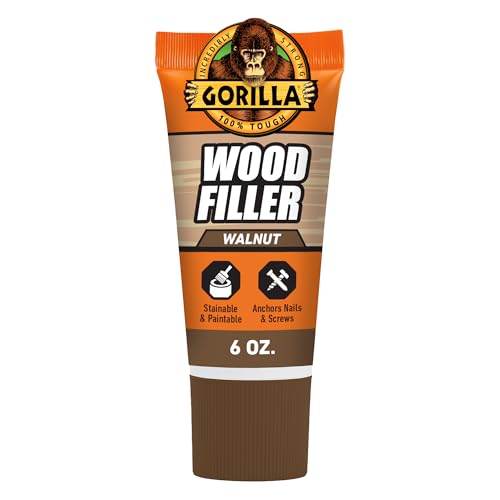
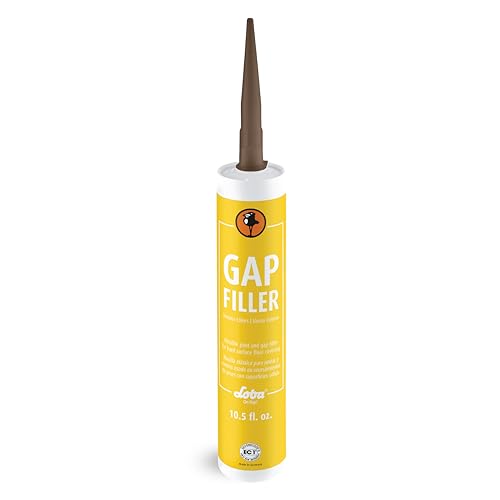
Gaps in hardwood floors are usually caused by seasonal humidity swings or movement between the subfloor and the flooring, and the right fix depends on gap width plus whether the gap is stable or widening. Start by checking moisture/leaks and measuring the gaps in multiple locations; then repair using wood filler for small, stable separations, a matching spline/strip for larger but controlled gaps, or professional board/subfloor work when the floor is actively moving.
If you’re noticing thin lines between boards, cupping/warping, or noticeable spacing near vents, baseboards, or doorways, this guide is for you. Use it whether your hardwood is newly installed and still “settling,” or older floors that expand and contract each season.
Find the cause: moisture, movement, or installation issues

You fix hardwood gaps faster (and more safely) when you first confirm whether the floor is expanding/contracting normally or reacting to a moisture or subfloor problem. If the moisture source is wrong—or the floor is losing structural stability—closing gaps with filler alone can temporarily hide symptoms and make the underlying issue worse.
“Maintaining indoor relative humidity within a recommended range is one of the most effective ways to reduce seasonal wood movement in residential settings.” [ADD: NWFA indoor relative humidity guidance for hardwood floors]
“The EPA notes that keeping indoor relative humidity around the mid-range helps reduce conditions that support mold and moisture-related damage.” [ADD: U.S. EPA indoor humidity guidance]
“CDC guidance links higher indoor humidity levels to increased likelihood of mold growth.” [ADD: CDC mold and humidity threshold guidance]
What to check (and why it matters)
1. Check humidity and wet spots.
Use a hygrometer (humidity meter) and inspect for leaks or chronic condensation. Pay special attention to:
– Exterior walls and corners (common cold surfaces → condensation)
– Crawl spaces and basements (moisture migration)
– Areas near plumbing, dishwasher supply lines, or HVAC drains
2. Measure the gap pattern.
Location matters. As a general rule:
– Consistent gaps across many rooms often point to seasonal movement or whole-house humidity
– Worse near exterior walls strongly suggests moisture/temperature gradients
– Only along one wall/doorway can indicate a localized subfloor issue, a blocked expansion gap, or an installation detail
3. Look for movement signs beyond “just spacing.”
Cupping (edges higher), crowning (center higher), board flex, and squeaks can mean the subfloor is not flat, has inadequate fastening, or is flexing under load. In those cases, your repair strategy must address movement, not only appearance.
Quick moisture/movement indicators you can spot
– Board edges look “lifted” or bowed → likely moisture gradient or subfloor flatness problem
– Gap widens rapidly within weeks → active movement (often seasonal cycling or moisture intrusion)
– Gaps return after a repair → filler isn’t the root fix
Measure and classify the gaps before you pick a repair
You’ll choose the correct repair method only after you classify the gap size and behavior (stable vs. worsening). Measure carefully in multiple spots—then match the repair to your hardwood type (solid vs. engineered) and whether boards are loose.
“Wood movement repairs should be selected based on how the floor behaves over time, not only on the visible width of the gap.” [ADD: manufacturer/industry seasonal movement principles for hardwood]
“Solid and engineered hardwood can respond differently to humidity because they have different construction layers and expansion behavior.” [ADD: manufacturer installation guidance solid vs. engineered hardwood movement]
Step 1: Measure gap width in more than one location
Use a ruler or feeler gauge to record:
– Narrowest gap width (e.g., 1–2 boards’ worth)
– Typical gap width
– Worst-case gap width
– Whether gaps are perimeter-only or center-of-room too
If the gap is changing month-to-month, that’s a clue that the repair must tolerate movement.
Step 2: Identify construction type
– Solid hardwood (single wood species plank) usually relies on proper site humidity and often expects seasonal change.
– Engineered hardwood has a layered structure, so it can be more dimensionally stable—but it still moves with moisture and can separate if the subfloor isn’t sound.
If you’re unsure, check your installation paperwork or look for markings on leftover pieces.
Step 3: Confirm whether boards are loose
Try gently lifting or pressing a board (carefully—avoid damaging finished surfaces). If boards are loose or the planks can flex significantly, a filler-only fix will not stay put. At that point you need fastening corrections, subfloor evaluation, or board replacement.
Quick fixes for small, stable gaps (filler-based)
If the gaps are small and stay fairly consistent, a high-quality, color-matched filler can restore a clean surface without forcing the wood against stress. This approach works best when the floor is moving normally and the subfloor is fundamentally stable.
“Filler-based repairs are intended for cosmetic-level gaps and work only when the floor movement is limited and predictable.” [ADD: technical guidance from your filler manufacturer]
“Bonding performance depends on clean, dust-free wood surfaces so filler can adhere reliably.” [ADD: adhesion/prep instructions from filler manufacturer]
Step 1: Clean thoroughly
Remove:
– Dust from between boards
– Old finish residue or debris
– Any loose splinters
A vacuum + lightly compressed air can help remove grit that prevents adhesion.
Step 2: Choose a filler made for hardwood
Pick a filler/putty system explicitly labeled for wood flooring. Match color as closely as possible. For most products, thin, controlled layers prevent shrinkage and improve sanding accuracy.
Step 3: Apply, scrape, and sand flush
– Apply the filler carefully into the seam.
– Slightly overfill, then scrape flush.
– After cure time (follow the container), sand lightly until the surface blends with surrounding finish.
Step 4: Seal/finish only if the filler instructions call for it
Some fillers are “final-finish friendly,” while others require topcoat matching. If you skip the recommended finish steps, the repaired seam can discolor or look dull compared with the rest of the floor.
Repair larger gaps: splines/strips or controlled board work
When gaps are wider, spreading, or recurring at specific locations, you typically need a repair that bridges distance without pinning the floor. That usually means adding a matching wood spline/strip or doing controlled board removal and replacement—especially when the perimeter expansion path is involved.
“A spline/strip repair addresses the physical separation by bridging the gap with wood, which can perform better than filler when movement is larger.” [ADD: installation/repair guidance from a reputable flooring/repair system]
“Leaving a proper perimeter expansion gap is essential; blocking it with trim or improper fasteners can concentrate stress and worsen separations.” [ADD: NWFA/perimeter expansion gap guidance for hardwood floors]
Step 1: Check the perimeter expansion space
Often, the “real” fix isn’t the middle of the floor—it’s the edge.
– Make sure baseboards and transitions are not trapping the floor.
– Confirm that the floor has the manufacturer-recommended expansion allowance around the perimeter and at fixed verticals.
Step 2: Choose between spline/strip vs. board replacement
Here’s the practical decision logic:
| Repair approach | Best for | Strengths | Watch-outs |
|---|---|---|---|
| Color-matched wood filler | Small, stable gaps | Fast, low disruption | Can crack if the floor keeps moving |
| Matching spline/strip | Larger gaps that are localized and consistent | Bridges separation with wood | Requires precise cutting and accurate wood matching |
| Controlled board repair | Loose boards, recurring widening gaps, or subfloor-related issues | Restores stability where movement starts | More invasive; may require finishing touch-ups |
| Professional replacement | Widespread cupping/warping or major subfloor failure | Long-term correction | Higher cost and schedule impact |
Step 3: Address subfloor flatness and fastening issues
If gaps are coupled with board cupping or squeaks, the spline won’t hold the floor flat by itself. You may need:
– Screws/nails refastening to the subfloor
– Subfloor leveling/flattening (as advised by installers)
– Replacement of damaged subfloor sections
If multiple areas keep worsening, treat the floor as a system: humidity + subfloor + installation details.
What can go wrong (and how to avoid it)
Most repair failures happen when the underlying moisture/movement problem isn’t corrected or when the repair traps the floor in a stressed state. Use these warnings as a quality checklist before you close the seams.
“Overfilling active movement paths can trap stress and contribute to buckling or raised edges.” [ADD: installation/seasonal movement caution from hardwood manufacturer]
“Moisture is the primary driver of dimensional change in wood; repairs that ignore moisture can fail even when the cosmetic work looks good initially.” [ADD: wood moisture/behavior guidance from a standards body or manufacturer]
Common mistakes to avoid
– Overfilling while the floor is expanding.
If you apply filler during a humid period, the wood may move again and cause cracked filler or surface distortion.
– Ignoring moisture sources.
Filler can hide a seam temporarily, but the next humidity cycle can reopen it.
– Sanding too aggressively.
Removing too much finish can create an uneven sheen or expose soft edges, making future repairs harder.
– Using the wrong product.
Not all wood fillers tolerate expansion/contraction. Choose a system designed for flooring gaps and movement.
A short comparison of risks (so you can choose confidently)
Filler-based fixes tend to fail cosmetically (cracking, discoloration) when movement is too large.
Spline/strip and board repair tend to fail structurally when the subfloor or perimeter expansion path is incorrect.
Verdict / tip: choose the simplest option that matches the gap size
If the gaps are small and stable, a careful filler-based repair is the most practical DIY route—clean prep, thin application, and correct cure time matter more than brand hype. If gaps are large, spreading, or clearly tied to loose boards or subfloor movement, filling alone is usually a short-term patch; switch to spline/strip work or professional board/subfloor correction.
Skip DIY bridging entirely if you suspect:
– Ongoing moisture intrusion (visible dampness, condensation, recurring damp smell)
– Major cupping/warping or a floor that feels structurally unstable
– Widespread separations across many rooms that keep widening season to season
Quick checklist: what to do next
– [ ] Measure gap width in multiple locations and note whether it’s changing
– [ ] Check for moisture sources (leaks, basement humidity, condensation, wet exterior walls)
– [ ] Confirm perimeter expansion space (don’t block it with trim/fasteners)
– [ ] Decide repair type: filler (small/stable) vs spline/strip or board repair (larger/recurring)
– [ ] Match product to hardwood movement needs and follow cure times
– [ ] Re-check humidity habits (or use a humidifier/dehumidifier if needed)
Indoor Relative Humidity Levels and Wood/House Risk (Practical Targets)
| # | Indoor RH (Relative Humidity) | Dryness / Expansion Risk | Moisture / Mold Risk | Recommended Use |
|---|---|---|---|---|
| 1 | 30% | Higher (more shrink) | Lower | Okay short-term, monitor |
| 2 | 35% | Moderate | Low | Good target (often) |
| 3 | 40% | Lower | Low | Stable zone |
| 4 | 45% | Low | Low–Moderate | Often ideal |
| 5 | 50% | Low | Moderate | Monitor ventilation |
| 6 | 55% | Moderate (more expansion) | Moderate | Valid if controlled |
| 7 | 60% | Higher (more expansion) | Higher mold risk | Avoid prolonged exposure |
FAQ
Will wood filler permanently fix gaps in hardwood floors?
It can help for small, stable gaps, but it won’t correct ongoing moisture/expansion cycles. If humidity conditions keep shifting or the subfloor is moving, gaps may return—or filler can crack as the boards move.
How do I know if the subfloor is the real issue?
Look for patterns: persistent widening gaps paired with cupping/crowning, squeaks, or boards that feel loose often indicates a subfloor flatness or movement problem rather than typical seasonal wood expansion.
Should I close all gaps right away?
Not necessarily. If your floor is currently expanding (commonly during more humid periods), filling immediately can trap movement and contribute to edge distortion. Stabilize humidity and then repair based on what the floor is doing.
Can gaps be normal in hardwood floors?
Yes. Seasonal humidity changes naturally expand and contract wood. However, unusually large gaps, gaps that keep widening, or gaps tied to moisture sources should be investigated instead of treated as “normal.”
Sources
– [ADD: NWFA (National Wood Flooring Association) indoor relative humidity guidance for hardwood installations/maintenance]
– [ADD: U.S. Environmental Protection Agency (EPA) guidance on indoor relative humidity control]
– [ADD: CDC guidance on mold growth conditions and humidity thresholds]
– [ADD: Your hardwood flooring manufacturer’s installation instructions for perimeter expansion gap requirements and seasonal movement expectations (solid vs. engineered)]
– [ADD: Your selected wood filler/spline repair system manufacturer technical data sheet and installation instructions]
Gaps in hardwood floors aren’t one-size-fits-all, but the process is straightforward: verify moisture and movement conditions, measure the gap behavior, then choose the simplest repair that can tolerate the floor’s real motion. Use filler for small, stable gaps; use spline/strip or board/subfloor correction when gaps are larger, recurring, or tied to structural movement. If you spot signs of active moisture intrusion or widespread cupping/warping, prioritize fixing the cause (or hire a flooring pro) before closing the seams—because sealing symptoms without correcting conditions is how floors end up worse than before.
Frequently Asked Questions
How can I fix gaps in hardwood floors without replacing boards?
Start by identifying the cause—most gaps come from seasonal humidity changes, improper acclimation, or subfloor movement. For minor gaps, you can use hardwood floor filler that matches your stain or apply a color-matched wood putty, then sand and seal. If the gaps are wider or boards have shifted, you may need to pull and re-secure a loose row of planks (or use a wood spline system) rather than relying only on filler.
What’s the best way to fill small cracks between hardwood floor boards?
Use a high-quality wood filler designed for hardwood floors and choose a shade close to your floor color to minimize visible patching. Clean the gap thoroughly, apply filler with a putty knife, and scrape off excess so the surface stays level before it cures. After curing, sand lightly, then finish with a compatible sealer or polyurethane to blend the repaired areas and help prevent future moisture issues.
Why do gaps appear in hardwood floors even if the flooring is new?
New hardwood floors can develop gaps if the wood wasn’t properly acclimated to your home’s temperature and humidity or if the home’s HVAC settings fluctuate. Wide or expanding gaps often indicate the subfloor wasn’t flat, there’s inadequate fastening, or moisture is pulling away from the planks. To prevent recurring gaps, maintain consistent indoor relative humidity (often around 35–55%) and address any underlying moisture or ventilation problems.
How do I fix larger gaps where simple filler won’t work?
For wider gaps, you may need to re-tighten the boards by locating loose planks and reinstalling fasteners to the subfloor. If the planks can’t be pulled close enough, use a floor puller and spacer method to bring boards together before securing them. In cases of warping or repeated movement, you can also consider adding splines or replacing severely affected boards, then sanding, staining, and refinishing to restore a uniform hardwood floor surface.
Which humidity range helps prevent future gaps in hardwood floors?
Most hardwood floors perform best when indoor relative humidity stays fairly stable, typically around 35–55%. Too much dryness causes the boards to shrink and create floor gaps, while excessive moisture can lead to cupping, expansion, or other damage. Use a hygrometer to monitor conditions, run a humidifier in winter if needed, and ensure proper ventilation so your hardwood floors stay consistent year-round.
📅 Last Updated: October 07, 2026 | Topic: How to fix gaps in hardwood floors? | Content verified for accuracy and freshness.
References
- Google Scholar Google Scholar
https://scholar.google.com/scholar?q=how+to+fix+gaps+in+hardwood+floors - Google Scholar Google Scholar
https://scholar.google.com/scholar?q=seasonal+movement+hardwood+floors+humidity+gaps - Google Scholar Google Scholar
https://scholar.google.com/scholar?q=hardwood+floor+installation+moisture+control+prevent+gaps - https://en.wikipedia.org/wiki/Wood_flooring
- https://en.wikipedia.org/wiki/Wood_shrinkage
- Wood warping
https://en.wikipedia.org/wiki/Wood_warping - https://en.wikipedia.org/wiki/Relative_humidity
- Hygrometer
https://en.wikipedia.org/wiki/Hygrometer - https://en.wikipedia.org/wiki/Dimensional_change
- Thermal expansion
https://en.wikipedia.org/wiki/Thermal_expansion