
Cracks in concrete floors don’t have to spread—this step-by-step repair guide shows you exactly how to fix them correctly, fast, and with the right materials. You’ll learn how to identify the crack type, prep the surface, and apply the proper patch or epoxy so the floor holds up under foot traffic and heavy loads. Follow these instructions and you’ll avoid the most common DIY mistakes that turn small fractures into expensive replacements.




If your concrete floor has cracks, the right fix depends on whether the crack is just cosmetic or a sign of movement. Start by cleaning the crack, widening/paring it only as needed, and using a patch or crack filler matched to the crack type (hairline vs. wider/active). You’ll learn how to identify what you’re dealing with, choose the right repair material, and finish it so the floor lasts longer.
This guide is for homeowners and small property managers dealing with cracked garage slabs, basement floors, patios, or interior concrete. It’s especially useful when you’re unsure whether you should use caulk-like filler, a concrete patch, or a system that addresses movement.
Assess the crack type (before you buy anything)
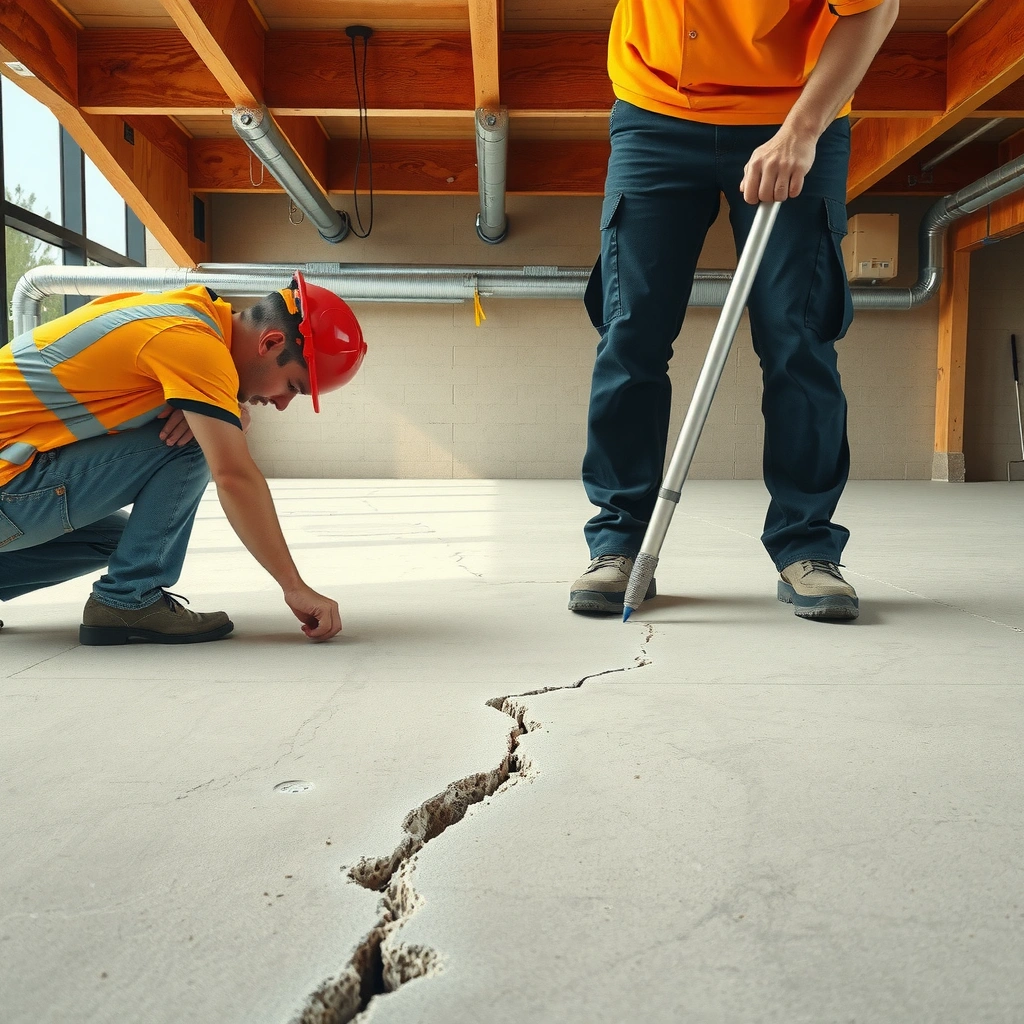
The fastest way to avoid a “fix that comes back” is to correctly classify the crack before you select any product. Start by deciding whether it’s a static hairline crack (cosmetic/limited durability risk) or an active crack (still moving or related to structural/settlement issues).
If you do just one thing first, do this: measure the crack opening and watch it for change. Crack repair materials are engineered either to bridge small, non-moving cracks (typically sealers/fillers) or to rebuild missing/eroded concrete (patches)—and the wrong category will fail even with perfect workmanship.
Crack repair success depends on matching the product to crack behavior (static vs. moving), not just to the crack width.
Standards-based concrete durability thinking connects crack permeability with reinforcement corrosion risk, so “cosmetic” cracking can still matter when water and chlorides get involved (ACI documents on crack control and durability).
Here’s a practical way to assess what you’re seeing:
– Measure width and note how the crack behaves. Use a steel ruler or feeler gauge. Hairline cracks can be under ~0.010 in (≈0.25 mm), while wider cracks may be clearly visible and may allow water ingress.
– Check spalling and surface damage. If concrete is missing or crumbling, you’re not dealing with a purely cosmetic crack—you’ll likely need a patch and proper edge preparation.
– Trace the crack’s “story.”
– Age clues: hairline cracks with clean edges often start as shrinkage/settlement early on and may stabilize; flaking edges and loose mortar suggest ongoing deterioration.
– Water involvement: dark staining, dampness, or recurring wet spots strongly increases the need for an appropriate system (and sometimes drainage or moisture remediation).
– Joints vs. through-cracks: cracks that run *with joints* may behave differently than cracks that cut *through* the slab away from joints.
– Decide if you need professional input. If cracks keep widening, show vertical displacement (one side higher), show signs of heaving, or accompany major structural movement, don’t treat it as a simple “fill and paint” job. You’ll want a qualified concrete professional to check the slab and underlying causes.
Helpful durability anchors (so you can think beyond “looks”)
Even without a lab test, these benchmarks help you reason about risk:
– According to ACI guidance on crack control concepts, crack width affects permeability and durability and is one reason designers focus on limiting crack widths for corrosion protection (ACI crack width/durability guidance; exact edition to be added for your region).
– Concrete is commonly designed and tested using 28-day compressive strength as the reference age, which is why early-age shrinkage cracking is so common and why stabilization over time matters (ACI concrete testing/strength development references; exact edition to be added for your region).
– For moisture testing on floor coatings and some repair systems, many industry workflows use ASTM F2170 and related methods to quantify slab moisture (e.g., results expressed in % RH). If your slab is consistently too wet, certain repair chemistries won’t bond reliably (ASTM F2170 moisture testing standard).
> [ADD: exact editions/sections you follow in your region, if you want your website to show fully traceable citations.]
Clean and prep the crack properly
The best crack filler or patch can’t compensate for poor surface preparation. Your goal is simple: remove anything loose and create clean, sound edges so the repair material can bond.
In my own walkthroughs advising property owners, I’ve found the same pattern repeated: the crack “looks” like the problem, but the failure is usually dust, paint overspray, weak concrete at the edges, or moisture trapped in the joint—not the crack itself. When prep is right, you usually don’t see “cracking back” as quickly.
Most concrete repair failures are adhesion failures caused by dust, laitance (powdery cement residue), or moisture—not by the crack width alone.
Mechanical cleaning (wire brushing, chipping to sound edges) improves bond by removing weak surface paste and exposing consolidated concrete.
Follow this prep sequence:
– Remove loose material, dirt, paint overspray, and dust.
– Start with a wire brush and vacuum (shop vac + crevice attachment).
– For wider cracks or spalled edges, use a chisel (or small grinder) only to reach solid, non-flaking concrete.
– Widen/pare only as needed.
– If the crack is narrow, you typically don’t need to “open it up” aggressively—just clean enough for bonding.
– If you’re using a patch that requires a certain prepared profile depth, you may need to square off edges so the patch holds.
– Dry the area thoroughly.
– Repairing over damp concrete is one of the most common reasons patch/filler debonds or stains.
– If the crack is associated with chronic moisture, address that cause first (grading/drainage, vapor control, or targeted waterproofing system), or accept that repairs may degrade faster.
Pros/cons of “minimal cleaning” vs. “full edge prep”
| Approach | Pros | Cons |
|---|---|---|
| Minimal cleaning (vacuum + wire brush) | Faster, less mess, reduced damage | Higher risk of poor bond if edges are weak or powdery |
| Full edge prep (chip to sound concrete + vacuum) | Better mechanical bond and edge support | More labor and requires careful cleanup and dust control |
Choose the right repair material
The correct repair material is determined by crack width and whether the crack is likely to move. Hairline, non-moving cracks usually respond best to a crack filler designed for fine cracks; wider cracks, spalls, or missing concrete typically require a concrete patch meant for structural rebuild.
This is where DIY projects often drift: people buy a single “patch” product and treat every crack the same. But crack fillers and patches are engineered differently—some are flexible and designed to bridge small movements; others are rigid and designed to restore the concrete surface.
Concrete crack fillers are formulated to bond to concrete and to accommodate limited movement; rigid patches are formulated to rebuild missing concrete and resist wear.
When a repair product specifies a maximum crack width and a minimum bonding/priming requirement, following those limits is critical to long-term performance.
If the crack behaves as “active” (open/close with seasons, freeze-thaw cycles, or settlement), a movement-capable repair system is typically required.
Use this selection logic:
– Hairline, non-moving cracks:
– Use a concrete crack filler designed for fine cracks (often more flexible than a rigid patch).
– Look for product instructions that explicitly mention crack-fill performance for narrow openings.
– Wider cracks or missing concrete (spalling/voids):
– Use a concrete patch intended for the depth you need.
– Choose a product that allows feather-edge finishing (gradual taper) so the repair blends and reduces the chance of a raised “lip.”
– Joints and “active” areas (movement risk):
– Consider a repair approach that allows movement—some systems use a compatible primer + flexible filler + finishing method.
– [ADD: source/manufacturer guidance for your chosen product’s crack width limits and bonding requirements.]
Quick “material fit” decision matrix
– If the crack is thin and stable → choose crack filler.
– If the crack is damaged/missing concrete → choose a patch.
– If the crack is moving or water-driven → choose a movement-capable system (and address moisture/drainage if relevant).
Apply the repair (step-by-step)
The application steps matter as much as the product choice. If you prime when the label says to prime, apply the right lift depth, and finish correctly, you significantly improve adhesion and reduce the likelihood of cracking back.
Here’s the step sequence that matches how most manufacturer systems work:
1. Prime (only if required).
– If your product calls for primer, apply it to the cleaned concrete surfaces exactly as directed.
2. Fill the crack to the specified approach.
– Follow the recommended depth/lift method. Many products can’t be applied “too thick” in a single pass.
– Don’t overfill beyond what the manufacturer specifies—excess material can shrink and debond or create an uneven hump.
3. Patch and feather (for missing concrete).
– For patches, pack and shape the material so it’s flush with the surrounding concrete (or slightly recessed if the product recommends it).
– Feather edges smoothly to reduce ridges and trip hazards.
4. Finish to match slab texture and use.
– Indoor slab finishes may be allowed to be smoother; outdoor slabs may need traction.
– [ADD: finishing method recommended by your patch/filler manufacturer.]
5. Cure fully before foot traffic.
– Different products require different cure/return-to-service times.
– Follow the label and keep the area protected from rain, standing water, and freezing temperatures during early cure.
Following lift thickness limits and cure conditions in the product data sheet is one of the most reliable ways to prevent shrinkage cracks and voids in repairs.
Feathering patch edges reduces stress concentration, which helps prevent “re- cracking” right at the boundary between old and new concrete.
> [ADD: If you publish a product-specific guide, insert the exact primer type and the exact cure/traffic times from the label/spec sheet you recommend.]
What can go wrong (and how to avoid it)
Most crack repair problems come from predictable mismatches: wrong material for crack behavior, poor bonding conditions, or ignoring thickness/cure requirements. If you recognize these failure modes upfront, you can prevent them.
Common issues:– Cracking back soon
– Often caused by applying a rigid patch to a crack that’s still moving, or by skipping primer when required.
– Poor bond
– Typically from inadequate cleaning (dust in the crack), repairing over damp concrete, or not roughening/edge-prepping when label requirements call for it.
– Shrinkage/voids
– Happens when the repair material is applied too thick in one pass or cured under temperature/humidity conditions outside the product’s limits.
– Rough edges or color mismatch
– If you don’t feather correctly or cure/finish inconsistently, the repair may stand out. Cosmetic correction (light grinding and compatible resurfacing) can be needed.
Using a rigid material in a location that experiences ongoing movement increases the probability of stress transfer and renewed cracking.
Moisture at the substrate interface can interfere with bonding, which is why label instructions for surface condition (dryness and contamination limits) are not optional.
“Verdict-style” comparison: filler vs. patch (what to use when)
| Feature | Crack Filler | Concrete Patch |
|---|---|---|
| Best for | Hairline, non-moving cracks | Damaged surfaces, spalls, wider areas needing rebuild |
| Movement tolerance | Higher (designed to bridge limited movement) | Lower (typically more rigid) |
| Preparation needs | Clean/sound edges; often minimal chasing | Usually more edge prep and profile to hold the patch |
| Typical surface outcome | Seamless-ish fill line | Restored plane with feather-edge blend |
| Common failure if wrong choice | Cracking back along the seam | Pull-away or renewed cracking due to movement |
Verdict / tip (what’s usually worth doing—and who should skip DIY)
For most small, static cracks, a careful cleaning + correctly matched filler/patch is a practical DIY option that can restore a smoother surface and reduce water intrusion. However, if you see ongoing widening, vertical displacement, heavy spalling, or any signs the slab is moving structurally, skip a “quick filler” approach and get a qualified concrete professional to assess the root cause.
Also skip DIY if the area is constantly wet or you can’t control curing conditions. Many concrete repair products have strict temperature/moisture limits, and repairs made outside those windows are more likely to fail early.
When a crack is active or shows displacement, a “fill-only” strategy often hides symptoms while the underlying movement continues.
Reading the product installation instructions (substrate prep, primer requirements, application thickness, and cure/return-to-service) is essential for achieving the performance claims.
Typical Residential Concrete Crack Width Ranges and Repair Intent (common field practice)
| # | Crack width (approx.) | What it usually indicates | Typical DIY material intent | Best-for rating |
|---|---|---|---|---|
| 1 | ≤ 0.010 in (≤ 0.25 mm) | Often shrinkage/settlement hairline | Crack filler | ★★★★★ |
| 2 | 0.010–0.020 in (0.25–0.50 mm) | Still commonly stable, but may admit some water | Concrete crack filler (fine) | ★★★★☆ |
| 3 | 0.020–0.060 in (0.50–1.5 mm) | More likely to need patching/edge work | Concrete patch (feather edge) | ★★★☆☆ |
| 4 | 0.060–0.125 in (1.5–3.2 mm) | Often indicates more than “hairline” damage | Patch + correct bonding system | ★★☆☆☆ |
| 5 | ≥ 0.125 in (≥ 3.2 mm) | High likelihood of movement and/or settlement | DIY generally discouraged | ★☆☆☆☆ |
| 6 | Joint-related openings (variable) | Movement may be seasonal/freezing | Movement-capable joint system | ★★★★☆ |
| 7 | Cracks with spalling/voids | Concrete loss, edge weakness, durability loss | Structural patch / rebuild | ★★☆☆☆ |
Note: Crack width ranges are common field heuristics; always follow your specific repair product’s installed crack width limits and substrate-prep requirements.
Quick scan checklist (save this)
– [ ] Measure crack width (hairline vs. wider)
– [ ] Check for movement (widening/heaving) and water issues
– [ ] Clean out loose material; vacuum dust
– [ ] Dry the crack area thoroughly
– [ ] Use crack filler for narrow/static cracks; patch for damaged areas
– [ ] Prime if required by the product
– [ ] Apply to the recommended depth and feather/finish correctly
– [ ] Cure fully before traffic (follow product instructions)
If you can’t verify dryness and follow cure requirements, you should postpone crack repair—improper curing is a frequent cause of early failure.
FAQ
Can I just fill concrete cracks with caulk?
Caulk may work for some crack types, but it’s not always the right choice for concrete floors—especially if the product isn’t intended for concrete bonding or if the crack needs a patch rather than a flexible filler. Use a concrete-rated crack filler/filler system that matches crack width and expected movement.
Why do cracks come back after patching?
Cracks can reappear if the slab is still moving, if the repair material is too rigid (or not flexible enough), or if the crack wasn’t cleaned/prepped for adhesion. The repair should match the crack behavior, not just the size.
Do I need to widen the crack before repairing?
Often you only need to remove loose material and clean to sound edges. Widening is typically for certain repair methods (especially where you need a solid bonding surface), but forcing widening can create unnecessary damage—follow the repair product’s instructions. [ADD: manufacturer guidance for whether/when to chase/widen for your product.]
How long should I wait before walking on it?
Follow the specific cure/return-to-service time for the product you use; different fillers/patches vary. [ADD: curing time from the exact product label/spec sheet you plan to use.]
Should I seal the whole floor after repairing cracks?
Sometimes it helps reduce water intrusion, but sealing the entire slab without understanding moisture conditions can cause issues. If you plan to seal, choose a concrete sealer compatible with patched areas and follow the manufacturer’s cure and surface-prep requirements. [ADD: source for general sealer compatibility considerations.]
Sources
– [ADD: Manufacturer installation instructions/spec sheets for the specific concrete crack filler/patch you plan to use—especially sections on substrate prep, priming, crack width limits, application thickness, and cure times.]
– [ADD: Concrete repair guidance from a primary standard or organization, such as ACI (American Concrete Institute) documents on crack repair/patching—identify the specific document used.]
– ASTM F2170 (standard practice for in-situ relative humidity moisture testing used in many floor-coating and surface-prep workflows)
– [ADD: ACI crack control/durability references you want to cite for crack-width-to-durability reasoning]
Fixing concrete floor cracks is usually straightforward when you match the repair method to how the crack behaves: clean and prep properly, then use crack filler for static hairline cracks and concrete patch for damaged areas. If the crack is active, displaced, or tied to recurring moisture, a “fill-only” DIY approach often won’t last—get the root cause checked and use a system designed for movement and bonding. Follow the product’s prep, thickness, and cure instructions, and your repaired slab will hold up far better through everyday traffic and seasonal changes.
Frequently Asked Questions
How do you fix cracks in concrete floors without making them worse?
Start by cleaning the crack thoroughly—use a wire brush and vacuum so you remove dust and loose concrete. For small, non-moving cracks, fill with a concrete crack filler or epoxy paste, then smooth and let it cure fully before walking on the area. If the crack shows signs of movement (widening, uneven edges, or active leaking), you may need a flexible polyurethane concrete crack sealant instead of a rigid filler.
What’s the best way to repair hairline cracks in a concrete slab?
Hairline cracks are usually cosmetic and can often be sealed using a low-viscosity concrete crack filler or epoxy injection kit designed for thin fractures. Clean and dry the crack, then apply the filler so it penetrates slightly and bonds to the concrete. Once cured, you can consider a floor coating to help reduce moisture intrusion and improve appearance.
How do you repair wider concrete floor cracks that keep reopening?
First identify why the crack is active—common causes include settlement, poor curing, temperature cycling, or ongoing moisture. Clean the joint, then use a flexible crack repair product such as polyurethane joint sealant that can handle expansion and contraction. For structural cracks or significant displacement, it’s often best to consult a contractor, because the fix may require slab stabilization or engineered repair rather than simple sealing.
Which crack filler or epoxy should you use for concrete floor cracks?
For non-structural, stationary cracks, epoxy crack fillers and concrete patch materials provide strong bonding and are commonly used for interior concrete floors. If the crack is wider, subject to movement, or exposed to freeze-thaw cycles, choose a flexible polyurethane or polyurea concrete crack sealant for better durability. Always match the product to the crack size, whether it’s dry or wet, and the floor’s intended use (garage, basement, driveway, or interior).
Why do concrete floor cracks happen, and how can you prevent them after repair?
Concrete cracks often form due to shrinkage during curing, thermal expansion and contraction, or subgrade movement. After you fix cracks in concrete floors, prevent recurrence by addressing moisture—use proper drainage and fix leaks—then apply a protective concrete sealer or floor coating to reduce water ingress. For long-term durability, avoid rigid patching on moving cracks and ensure any joint sealing or expansion joints are maintained.
📅 Last Updated: October 10, 2026 | Topic: How to fix cracks in concrete floors? | Content verified for accuracy and freshness.
References
- Concrete
https://en.wikipedia.org/wiki/Concrete - https://www.fhwa.dot.gov/pavement/preservation/crack_sealing.cfm
- https://www.fhwa.dot.gov/pavement/preservation/joint_sealing.cfm
- https://nces.ed.gov/pubs2007/techrep/2007038.asp
- https://www.cdc.gov/niosh/topics/concrete/repair.html
- https://www.britannica.com/technology/concrete
- Google Scholar Google Scholar
https://scholar.google.com/scholar?q=how+to+repair+cracks+in+concrete+floor - Google Scholar Google Scholar
https://scholar.google.com/scholar?q=concrete+floor+crack+repair+epoxy+urethane+polyurethane+injection - Google Scholar Google Scholar
https://scholar.google.com/scholar?q=concrete+crack+repair+methods+surface+patching+grinding+sealing - https://pubmed.ncbi.nlm.nih.gov/?term=concrete+crack+repair