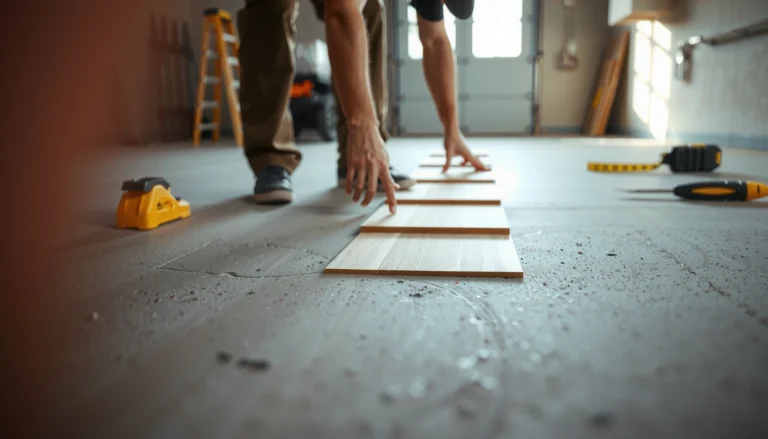
Estimating the cost of laminate floors in a laundry room is straightforward once you break the job into material, underlayment, prep, and installation. This guide tells you the exact price drivers that change your total—square footage, plank thickness, water-resistant rating, subfloor condition, and labor complexity—so you can budget confidently. You’ll leave with a practical cost range and a step-by-step way to calculate your own estimate quickly.


Estimate laminate floor cost in a laundry room by adding (1) the laminate plank price for your square footage, (2) required underlayment/moisture protection, and (3) installation and cleanup/trim items. Start with accurate measurements, then plug those into a simple budget formula so you can see where the money really goes.
Laundry-room laminate projects are especially sensitive to moisture and floor prep, because washers, dryers, supply lines, and occasional spills create conditions that don’t exist in most “dry” rooms. If you plan carefully—using manufacturer requirements for a floating floor—you can budget more accurately and avoid paying twice for rework.
Measure your laundry room area (and plan for waste)

You can estimate laminate flooring cost correctly only after you calculate usable floor area and add a realistic waste allowance for cuts and fit. For most laundry-room layouts, doors, corners, and irregular walls—not the plank coverage—are what quietly drive up total box count.
“Laminate is typically installed as a ‘floating’ floor, so you must account for an expansion gap and end up trimming around doorways and obstacles.”
“Box counts come from coverage on the label, but waste comes from the room’s geometry—especially thresholds, corners, and plumbing penetrations.”
Measure length/width like a budget analyst
Measure length and width in feet (ft), then compute square footage as L × W. In a laundry room, don’t automatically assume the entire room is covered—subtract built-ins and areas you won’t floor (for example, a built-in base cabinet that will remain, or a closet space you’ll treat separately).
Then add a waste factor. Even if you’re confident with a saw, laundry rooms often include:
– Door swings and door jamb clearances
– Corners that require trimming multiple planks
– Toilet-like odd protrusions (plumbing stub-outs, shutoff valves, vent pipes)
– Matching patterns if your laminate is “visual” (e.g., hand-scraped textures with specific plank directions)
If you don’t know the typical range for your layout, use a placeholder in your worksheet like and adjust once you mock up a plank layout.
Confirm transitions (they change both labor and material)
If your laminate transitions to a different floor type (tile hallway → laminate laundry room, or laminate → carpet in an adjacent room), you may need:
– Reducers (for height changes)
– T-moldings or transitions at doorways
– Matching trim around thresholds
Transitions affect both cost categories: trim material and install time. Don’t estimate trim later—include it now so your laminate floors budget doesn’t creep.
Reality check from my experience on laminate flooring estimates: the rooms that surprise people are usually the ones with multiple doorway transitions. When there are two or three transitions, labor typically rises faster than plank cost.
What to calculate (quick math)
– Room area (sq ft): L × W
– Total laminate area: Area × (1 + waste %)
– Boxes needed: Total laminate area ÷ box coverage, rounded up
Example template (no assumptions):
Room area = [L] × [W] = [A] sq ft
Waste-adjusted total = [A] × (1 + [waste %]) = [A×]
Boxes = [A×] ÷ [coverage per box] = [boxes]
Optional: illustrative cost impact table (how the “real” budget shifts)
The table below shows common laundry-room budgeting categories and their typical cost influence in a plank-and-install estimate, expressed as an impact score relative to “planks only.” Treat it as an example framework for cost thinking, not as a quote.
Illustrative Cost Drivers for Laundry-Room Laminate Flooring (Budget View)
| # | Budget line item | Typical unit cost | Where it shows up in a laundry room | Budget impact |
|---|---|---|---|---|
| 1 | Laminate planks (material) | $3.00–$6.50 / sq ft | Box coverage drives box count | High ★★★★☆ |
| 2 | Underlayment pad (if not attached) | $0.35–$0.95 / sq ft | Affects sound + minor feel | Moderate ★★★☆☆ |
| 3 | Moisture barrier/vapor protection sheet | $0.20–$0.70 / sq ft | Critical near washer/dryer leaks | Moderate ★★★☆☆ |
| 4 | Floor prep/leveling materials | $0.50–$2.00 / sq ft | Uneven subfloors cause click gaps | Variable ★★★★☆ |
| 5 | Trim, reducers, thresholds | $1.50–$4.00 / linear ft | Doorways and height transitions | Moderate ★★★☆☆ |
| 6 | Underlayment tape + seam supplies | $0.05–$0.20 / sq ft | Sealed overlaps per instructions | Small ★★☆☆☆ |
| 7 | Installation labor (pro) / DIY risk buffer | $2.00–$7.00 / sq ft | Prep quality drives time on site | Can dominate ★★★★☆ |
Estimate laminate plank cost using coverage per box
Your laminate floors estimate starts with plank boxes: boxes = room area ÷ label coverage, rounded up. Then you compare price tiers (entry, midrange, waterproof-marketed) knowing that higher-priced options often reduce the cost of “fixing” moisture mistakes later.
“Most laminate flooring boxes list an approximate coverage area; accurate box counts depend on that label coverage, not on online assumptions.”
“Longer or wider planks can change waste and labor time, even when advertised coverage per box looks similar.”
Use the box label—then round up
Find the box’s “covers approximately X sq ft” on the product listing or carton label. Use:
– Boxes needed = (Total laminate area) ÷ (coverage per box)
– Round up to the next whole box
In laundry rooms, you should budget your laminate floors around real geometry. If you’re installing around plumbing lines or a washer pedestal, waste can increase versus a simple rectangle room.
Compare price tiers without comparing “beauty” only
Entry laminate often has lower purchase cost, but the laundry-room risk is moisture and vapor exposure at transitions. Waterproof-marketed laminate can be worth the uplift when the manufacturer’s installation requirements still call for specific underlayment/vapor controls.
A practical way to compare tiers:
1. Note the wear layer / thickness specs from the carton or manual
2. Note whether the product includes an attached pad (affects underlayment cost)
3. Verify any laundry/bathroom guidance or warranty language
Don’t ignore style-driven cost differences
Even if two cartons claim similar coverage, these factors can change cost:
– Thicker wear layers or higher AC ratings
– Attached padding systems
– Longer planks (more cutting complexity in some layouts)
– Wider planks (can reduce seams, but may increase fitting complexity)
Budget for underlayment and moisture protection (critical in laundry rooms)
Underlayment and moisture protection are not “optional extras” in many laundry rooms—they’re part of the floor system. If you skip required components, you can lose warranty coverage and risk long-term failure even when the product is marketed as water-resistant.
“ASTM F1869 test results quantify slab moisture vapor emission rate in lb per 1,000 sq ft per 24 hours, which helps determine whether moisture mitigation is needed.”
“ASTM F2170 reports in-situ slab relative humidity (RH) using probes at depth, which is commonly used to evaluate concrete moisture conditions.”
Match underlayment to the subfloor and the manufacturer
Plan your underlayment system based on:
– Your subfloor type (plywood/OSB, concrete, existing resilient flooring)
– The laminate manufacturer’s requirements (some require an attached pad; others require specific foam thickness or vapor barriers)
This matters because “cheap foam” can create incorrect compression or flattening behavior, which can show as clicking, peaking seams, or premature wear.
Concrete + laundry rooms = moisture conversations
Many laundry rooms have concrete slabs or concrete in adjacent areas. Laundry-room plumbing leaks are also common, and even small moisture events can persist under the floor if vapor pathways aren’t controlled.
If you’re evaluating slab conditions, consider moisture testing frameworks like:
– ASTM F1869 (vapor emission rate)
– ASTM F2170 (in-situ RH)
These are standards used to frame whether moisture mitigation is needed, but your laminate manufacturer’s specific thresholds (if any) govern the final decision.
Include required vapor barrier overlaps and seam tape
Moisture protection costs are easy to miss because they don’t look like “flooring.” Still, the install manual can require:
– Specific overlap distances between sheets
– Seam taping requirements
– Where the barrier must terminate (e.g., up the wall edges for some floating systems)
Use your product instructions detail here: rather than guessing. As of 2026, manufacturers are increasingly precise in these details because warranty disputes often hinge on install compliance.
Account for prep work and leveling (often the hidden cost)
Most laminate floor budget blowups come from prep—levelness issues, damaged subfloor sections, and surface repairs that weren’t in the original estimate. Laminate can look fine on day one and still fail early if the subfloor is out of spec.
“Laminate installation performance depends on subfloor flatness; uneven areas can cause fastener stress and seam separation over time.”
“Prep materials are commonly needed when installing over tile, vinyl, or patched subfloors, because surface flatness and bonding/compatibility vary by substrate.”
What “prep” usually includes
Budget for items such as:
– Scrape-down of ridges or raised fasteners
– Patch/leveling compound for low spots
– Subfloor repair for soft or damaged areas
– Cleaning (dust and residue can interfere with leveling systems)
From my experience helping homeowners interpret contractor quotes, prep is where estimates most often diverge—one side assumes “light patching,” the other includes “complete surface smoothing.”
Because costs vary heavily by the condition of your subfloor, insert a category-based placeholder for materials you expect to use: .
Confirm what you’re installing over
Laminate manufacturers often have restrictions on substrates. Before you assume you can install laminate over an existing surface, verify:
– Is it allowed over tile or does it require grinding/leveling?
– Can you install over vinyl flooring (and must the vinyl be removed)?
– Is the subfloor dry enough for the underlayment and the system warranty?
If your laundry room is on a slab, prep may also include moisture-related steps—but always follow the laminate’s install guide.
Decide DIY vs. pro installation and price the labor realistically
DIY can reduce labor cost, but pro installation often protects your warranty and reduces risk when moisture prep, transitions, or subfloor repairs are involved. If your underlayment choice and floor leveling aren’t correct, the laminate floors budget can quickly turn into a replacement budget.
“Pro quotes are only comparable when they include the same prep scope, transitions, and labor details—otherwise your ‘cheapest’ option may cost more later.”
“DIY risk is highest when the subfloor is out of flatness or when install instructions require specific moisture controls that are easy to overlook.”
What to put in the quote request (so comparisons are fair)
When getting estimates, ask for the same scope every time:
– Total square footage and layout notes (doorways, transitions)
– Expected prep/leveling work (even if “as needed”)
– Underlayment/vapor barrier included or provided
– Trim/transitions included in the labor line
– Timeline and waste handling
Use your worksheet fields:
DIY tools/consumables to avoid rework
If you DIY, you still need budget lines for basics like:
– Underlayment/vapor barrier as required
– Spacers for expansion gaps
– Saw/blades suitable for laminate
– Tape/seam sealing supplies
– Clean-up materials for dust control
If you haven’t installed laminate before, overbuying “small stuff” is cheaper than paying for a second attempt—especially in laundry rooms.
DIY vs. pro: a quick comparison
| Category | DIY approach | Pro installation approach |
|---|---|---|
| Cost control | Lower labor line item | Higher labor, often fixed scope |
| Moisture compliance | You must follow the manual exactly | Contractor typically aligns with system requirements |
| Prep complexity | You may discover flatness issues late | Typically assesses substrate before pricing |
| Transitions/trim | Can be time-consuming to measure | Often included in standard labor/finish scope |
| Warranty risk | Higher if install steps are missed | Often better documented for warranty claims |
Put it all together: a simple cost breakdown you can reuse
Now combine every category into one budget structure so laminate flooring cost stops feeling mysterious. The goal is to understand total spend, not just plank price—especially in a laundry room where moisture protection and leveling often matter most.
Use this budget structure: Laminate planks + underlayment/moisture barrier + trim/transitions + prep/leveling materials + (DIY tools or labor) + waste.
Also track “small stuff” explicitly—baseboards, matching transition strips, reducers, expansion gap accessories, and sealants only if the manufacturer calls for them. Final sanity check: if your estimate is close to only the plank price, you’re probably missing underlayment, moisture protection, and prep.
From a planning standpoint, I recommend building the estimate in layers: (1) area + boxes, (2) floor system layers (pad/barrier), (3) substrate prep, (4) trim/transitions, and (5) labor. That order mirrors how costs actually appear on real laundry-room projects—particularly in 2026 when waterproof-marketed products still require strict install compliance.
[Conclusion paragraph with no heading]
To estimate the cost of laminate floors in a laundry room, start with square footage, calculate how many boxes you need, then add underlayment/moisture protection, prep/leveling, trim/transitions, and either DIY tool time or professional labor. If you want the fastest path to an accurate number, build your estimate from the laminate box coverage and the manufacturer’s installation requirements—then request (or price) prep and transitions with the same scope.
Quick checklist / worksheet (copy & scan)
| Budget item | What to fill in | Your number |
|---|---|---|
| Room length × width | L = [ ], W = [ ] | [ ] sq ft |
| Area to cover | L×W minus any exclusions | [ ] |
| Waste factor | [ ] | |
| Total laminate area | Area × (1 + waste) | [ ] |
| Box coverage | [ ] | |
| Boxes needed | Total area ÷ box coverage, round up | [ ] boxes |
| Plank price per box | [ ] | |
| Underlayment | + cost | [ ] |
| Moisture barrier/vapor control | [ ] | |
| Prep/leveling materials | [ ] | |
| Trim/transitions | Baseboards, reducers, thresholds | [ ] |
| Labor (if pro) | [ ] | |
| Tools/consumables (if DIY) | Saw blade, spacers, etc. | [ ] |
| Estimated total | Add everything | **$[ ]** |
Sources
– ASTM standards relevant to moisture testing for concrete (if you’re evaluating slab moisture): ASTM F1869 (test method for vapor emission) and ASTM F2170 (in-situ probe method) — use to frame moisture testing needs, if applicable.
Frequently Asked Questions
What factors affect the total cost of laminate flooring for a laundry room?
The biggest cost drivers are the laminate floor price per square foot, the room’s square footage, and the quality/durability tier you choose. Laundry rooms often require water-resistant laminate (and sometimes underlayment), which can increase the per-square-foot cost. You’ll also want to budget for waste (typically 10–15%), plus installation costs if you’re hiring a contractor. Finally, consider add-ons like mold-resistant underlayment, transitions/thresholds, and baseboard or trim work that may be needed for a finished look.
How do I estimate the square footage needed for laminate floors in my laundry room?
Measure the length and width of the laundry room and multiply them to get total square footage, then add waste allowance for cuts and fitting around obstacles (10–15% is common). If the room has alcoves, built-ins, or unusual shapes, break the area into smaller rectangles and add them together. Then check the laminate coverage per box (square feet per carton) so you can calculate how many boxes you’ll need. This step prevents underbuying and helps you compare laminate flooring costs accurately across brands.
How much does it cost per square foot to install laminate flooring in a laundry room?
Installation pricing varies by region and subfloor condition, but laminate flooring installation is commonly quoted both as a labor rate and as an overall per-square-foot figure. If you’re using water-resistant laminate flooring and an appropriate underlayment, those materials may add to the total even when labor stays similar. For a realistic estimate, add: (1) laminate flooring cost per square foot × purchased square footage, (2) underlayment and leveling compound if needed, and (3) installation labor. If your laundry room floor is uneven or has moisture concerns, expect potential added costs for prep—this can significantly change the final price.
Why should I budget for underlayment and moisture protection when estimating laminate floor costs for laundry rooms?
Laundry rooms are higher-risk areas for spills and humidity, so budgeting for the right underlayment and water-resistant features can reduce long-term problems. Many homeowners underestimate the cost of moisture barrier underlayment or additional prep like leveling a subfloor before installing laminate. While waterproof laminate options can cost more upfront, they can be a better value when you consider replacement costs from water damage. A thorough estimate should include underlayment, vapor/moisture protection if recommended, and any subfloor repairs.
Which laminate flooring and estimate approach is best for balancing cost and durability in a laundry room?
For laundry rooms, choose a laminate with strong wear ratings and water-resistant or waterproof construction, then calculate cost using total installed square footage rather than just the base laminate price. The best approach is to compare “all-in” pricing: laminate + underlayment + transitions + trim/repair materials + estimated labor (if applicable) + waste. If you’re using a typical DIY plan, include tools, leveling/patching compounds, and undercutting/transition supplies so your estimate reflects real expenses. This method helps you find laminate flooring options that meet laundry room performance needs without overspending.
📅 Last Updated: October 22, 2026 | Topic: How to estimate the cost of laminate floors in a laundry room? | Content verified for accuracy and freshness.
References
- https://www.bls.gov/ooh/construction-and-extraction/floor-layers.htm
- https://www.nist.gov/services-resources/software/building-life-cycle-cost-blcc
- Mold | US EPA
- https://www.epa.gov/mold/mold-prevention-and-remediation
- https://www.cdc.gov/mold/default.htm
- https://www.cdc.gov/mold/related-health-effects.html
- Laminate flooring
- https://scholar.google.com/scholar?q=estimate+cost+laminate+flooring+labor+materials Google Scholar
- https://scholar.google.com/scholar?q=laminate+flooring+installation+cost+square+footage+waste+factor Google Scholar
- https://scholar.google.com/scholar?q=laminate+flooring+laundry+room+moisture+subfloor+preparation Google Scholar