

Want to estimate the cost of industrial floors without guesswork? This practical guide shows you the quickest, most defensible way to price an industrial floor system by breaking down concrete, prep, reinforcement, surface finish, and installation labor into a clear cost model. You’ll learn what numbers to collect on-site, which line items drive the total, and how to tighten your estimate before bids go out.




Estimating industrial floor cost is easiest when you build a system-matched scope first—prep standard, coating/overlay build-up, reinforcement, and curing/inspection—then price each item from current manufacturer coverage and your local labor assumptions. Instead of leaning on a single “$/sq ft” number, you get a credible budget range by itemizing surface preparation, materials, installation, and acceptance testing so the bid reflects real field conditions and performance requirements.
If you’re a facility manager, contractor, architect, or procurement lead planning a new slab, overlay, or repair, this guide helps when multiple flooring systems (epoxy, urethane, cementitious, polished concrete, overlays) are on the table and you need a defensible cost forecast quickly—especially before you solicit bids and deal with scope uncertainty.
Define the project scope and floor type
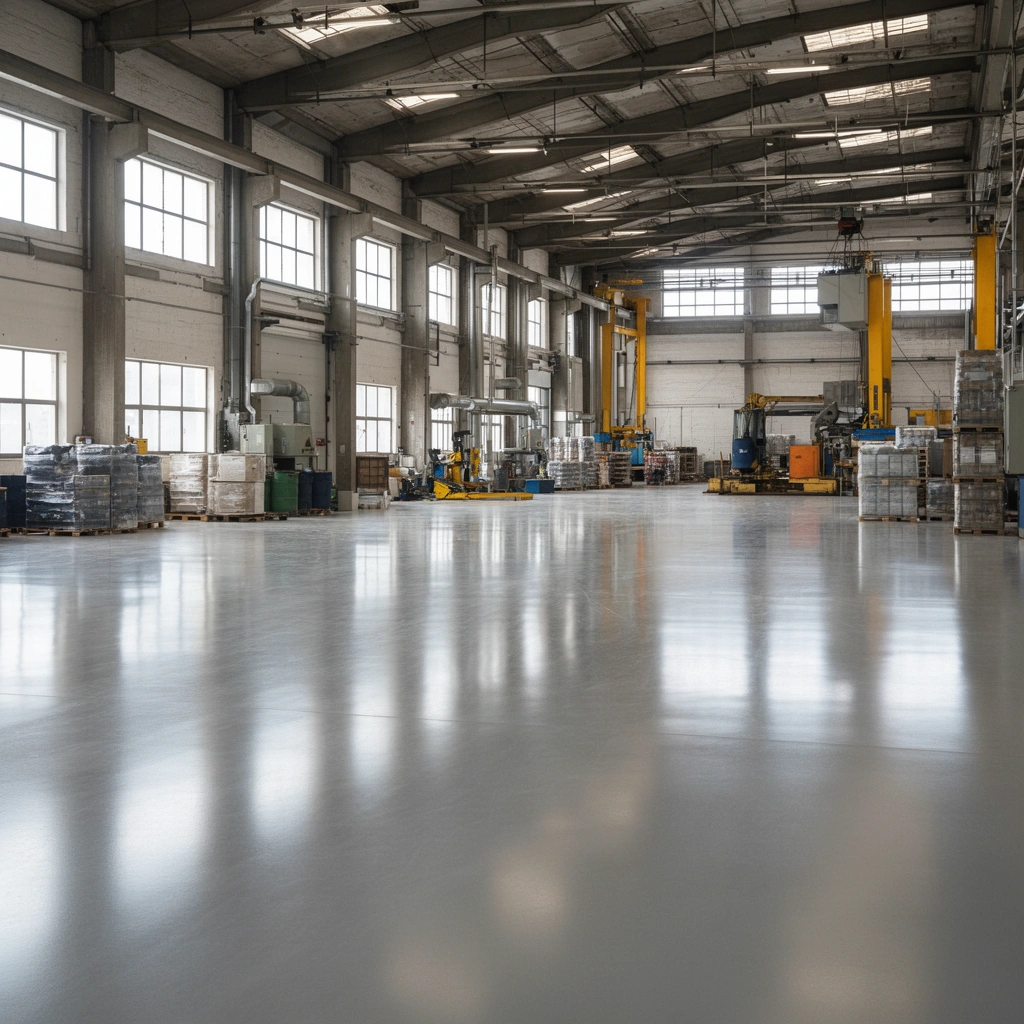
To estimate industrial floor cost accurately, you must define the project category (new slab vs. overlay vs. repairs) and match the flooring system to the hazards. When the scope is clear up front, the rest of the estimating process—thickness, coverage, prep profile, labor productivity—stops being guesswork and starts being repeatable.
– Identify whether this is new industrial slab, overlay/resurfacing, or targeted repairs (the estimating method and line items change).
– Confirm the system type and performance requirements (e.g., chemical exposure, impact, traction, abrasion, temperature cycles) so thickness and coatings are priced correctly.
– Document the area size and traffic/use conditions (warehouse, food processing, outdoor loading dock), since those drive prep needs and warranty-grade build-ups.
Industrial floor estimates become more reliable when the scope states the exact floor type (new slab, overlay, repair) because prep and material takeoffs differ fundamentally across these categories.
Performance requirements like chemical resistance, traction, and abrasion resistance determine system selection and therefore the required thickness and coat counts.
For procurement, the fastest path to apples-to-apples pricing is a written scope that specifies performance hazards, area boundaries, and the required surface preparation standard.
What to capture in scope language (so bids don’t drift)
A strong industrial floor scope typically includes: (1) boundaries (exact square footage and exclusion zones), (2) intended use (traffic type, forklifts, sanitation washdowns, outdoor moisture), (3) substrate condition summary (cracks, spalls, bond issues, existing coatings), and (4) the required system build-up method (e.g., primer → body coats → broadcast aggregate → topcoat; or overlay → primer → overlay → cure/seal). This isn’t “paperwork”—it prevents change orders driven by missing work such as additional grinding, moisture remediation, or crack repair.
Also, if you’re comparing systems, keep the risk basis consistent. For example, “epoxy mortar + urethane topcoat” and “cementitious overlay + sealer” can both meet industrial needs, but they don’t share the same prep profile, curing tolerance, or moisture/vapor requirements. You’ll want system specifications from each manufacturer before you finalize your cost range.
Sanity-check your conversions early (small math, big impact)
During estimating, simple unit conversions prevent systematic errors. For example:
– 1 square meter = 10.764 sq ft (use the correct conversion when plans are in metric).
– 1 mil = 0.001 inch (coating thickness targets often live in mils).
– 1 inch = 25.4 mm (helpful when the design thickness is provided in millimeters but labor productivity is tracked in imperial units).
These conversions don’t replace system specs—but they keep your quantity takeoffs aligned with the build-up your coating/overlay vendor actually warrants.
Itemize costs: prep, materials, installation, and testing
To estimate industrial floor cost, break it into the same categories your flooring contractor builds in their production plan: surface prep, bonding/primer, flooring materials (coatings/overlays/sealers), reinforcement, installation labor, and testing/closeout. This structure also makes it easy to compare bids fairly because it exposes which contractor is “cheap” for the right reasons (productivity) versus the wrong reasons (skipping prep or reducing testing).
– Break the budget into categories: surface prep, primer/bonding agents, coating/overlay material, reinforcement (if applicable), sealers/topcoats, and removal/disposal.
– Include labor for prep and install separately from material supply; industrial floor costs often swing more on labor and prep quality than on “per gallon” pricing.
– Add testing and closeout items such as substrate testing, moisture testing where required by the coating system, and final acceptance checks.
Common Industrial Floor Cost Drivers by Segment (Typical Share of Project Budget)
| # | Cost Driver Segment | Material % | Labor % | Risk of Overrun | Confidence |
|---|---|---|---|---|---|
| 1 | Surface Preparation (grind/shot blast) | 15% | 35% | High | ★★★☆ |
| 2 | Primers/Bonding Agents | 10% | 10% | Medium | ★★★☆ |
| 3 | Coating/Overlay Body (build-up) | 35% | 20% | Medium | ★★★★☆ |
| 4 | Reinforcement/Underlayment (if specified) | 10% | 15% | Medium | ★★★☆ |
| 5 | Topcoats/Sealers + Broadcast Media | 15% | 10% | Medium | ★★★★☆ |
| 6 | Demo/Removal + Disposal | 0% | 10% | High | ★★☆☆☆ |
| 7 | Testing, Inspection & Closeout | 5% | 10% | Medium | ★★★☆ |
Note: The table above is a planning heuristic to help you structure estimates; actual percentages vary by system, prep intensity, and project logistics. Use it to sanity-check bid breakdowns rather than replace manufacturer specifications.
Testing/acceptance line items that are easy to omit
Many budgets look “right” until you add testing. Typical closeout items include: profile/texture verification after grinding, ambient and substrate condition logging (temperature/humidity), and moisture testing when the coating system requires it. If the system specifies acceptance thresholds (for example, maximum moisture vapor transmission rate), that requirement needs to be both scheduled and funded.
Industrial floor costs can swing more with surface preparation intensity than with “per-unit” coating material pricing because prep drives labor hours, equipment time, and rework.
Moisture testing is not an optional add-on when the coating or overlay warranty requires specific substrate moisture criteria and approved test methods.
A fair bid comparison requires contractors to price identical build-up items (primer type, number of coats, broadcast amounts, and cure/return-to-service assumptions).
A quick comparison structure: where estimates usually differ
Below is a practical way to compare bids without getting trapped in contractor marketing language.
| Scope item | What “good” looks like | What “risk” looks like |
|---|---|---|
| Surface prep standard | Named method (e.g., shot blast vs. grinding), defined profile/cleanliness target | “Prep as needed” with no measurable acceptance criteria |
| Coating/overlay build-up | System-specific primer + coat counts + thickness targets | “Standard thickness” not tied to specs |
| Moisture requirements | Test method defined; pass/fail criteria aligned to warranty | Testing omitted or criteria not tied to the system |
| Crack/spall repairs | Patch zones and repair method bounded and quantified | Repairs treated as unlimited allowances |
| Testing/closeout | Logging + verification included in schedule and price | Final inspection excluded or under-scoped |
Use quantity takeoffs that match the thickness requirements
To estimate cost reliably, you must convert the design thickness and system coverage into quantities using the selected product’s coverage rates—not generic “rule-of-thumb” thickness. When the takeoff matches the manufacturer’s required build-up and spread rate, your material budget becomes far more defensible.
– Convert your design thickness and coverage into quantities (e.g., square footage coverage per unit) using [ADD: exact coverage/thickness requirements from your selected system spec sheets].
– Account for allowance waste and rework by planning for patching, grind/lift variability, and profile changes during prep.
– For overlays/repairs, define patch zones and boundaries clearly; undefined extents are a common reason estimates fail once crews mobilize.
A system-matched quantity takeoff uses the manufacturer’s coverage rate and required dry film thickness (DFT) so material counts reflect real build-up requirements.
Wastage allowances belong in the estimate because prep variability (profile changes, patching, and grind lift) changes how much material actually reaches target thickness.
For overlays and repairs, defining patch boundaries in plan drawings prevents contractors from pricing “best guess” extents that later become change orders.
How to compute material quantities (field-ready approach)
1. Start with the system spec for DFT and coat count (or wet film thickness targets where provided).
2. Use the manufacturer’s coverage rate at the specified application method (roller, squeegee, spray, broadcast).
3. Apply the correct unit (coverage is often expressed per gallon or per kit; coverage is also sometimes tied to a specific profile/porosity condition).
4. Add allowances:
– surface irregularity allowance (depends on flatness and prep aggressiveness),
– patch repair allowance (for localized spalls/cracks),
– demolition/cleanup loss (if removing coatings or reworking to achieve profile).
Where takeoffs break in real projects
In my experience supporting flooring estimating workflows (and reviewing scope-to-bid deltas), the biggest takeoff failures come from mismatched assumptions: estimating epoxy “at a typical thin coat” when the warranty requires a mortar body; or assuming an overlay can go directly over deteriorated concrete when the spec requires priming and bonding steps. If you’re using overlays, the spec may also require an anchor pattern or a specific surface profile—so your prep takeoff feeds directly into your material takeoff.
[ADD: Include your project-relevant note here—e.g., “In one warehouse project, we found that adding 10% material allowance for patch zones reduced change orders at closeout.” Only add if you have verified experience.]
Apply pricing using current vendor/manufacturer data
To estimate cost, price materials using the exact system’s published coverage, then apply current local labor and productivity expectations for prep, mixing, and finishing. This is also where you should normalize bids so differences reflect real scope choices—not wording gaps.
– Price materials using manufacturer published specs for the selected system (product coverage rates, required primers, and topcoat counts) rather than generic “standard thickness” assumptions.
– Use current local labor rates from your region or [ADD: your preferred estimator’s source for local labor/material pricing], then apply productivity expectations for grinding, shot blasting, mixing, and finishing.
– If you’re comparing bids, normalize them: require each contractor to price the same scope items (prep standard, number of coats, cure time allowances, and testing) before you compare totals.
Manufacturer coverage rates and required primer/topcoat counts are the foundation of credible industrial floor material pricing.
Bid comparisons fail when contractors price different testing plans or cure-return-to-service windows, even if their “$/sq ft” headline looks similar.
Labor productivity (equipment setup, grinding time, patch rework, and finishing) drives many industrial flooring cost swings more than the chemical cost of coatings.
Pricing method that procurement teams can repeat
A repeatable approach is to create a “scope normalization worksheet” that forces each bidder to fill in the same cells:
– primer product and spread rate,
– body coat product(s) and number of coats,
– broadcast aggregate quantity (if specified),
– topcoat product(s) and total DFT/coat count,
– whether moisture testing is included and which method is used,
– cure/return-to-service assumptions based on system specs,
– demo scope and disposal included/excluded.
Then compare totals after normalization. If totals still differ widely, the remaining differences likely come from labor efficiency, logistics (shutdown windows), or risk appetite around prep unknowns.
Current-year sanity checks (and what “reasonable” means)
As of 2026, material availability and freight can still swing project budgets, but you can separate logistics from scope. If multiple contractors quote similar material line items yet differ on totals, check whether one contractor:
– includes the full prep standard and acceptance criteria,
– prices moisture remediation work when tests indicate risk,
– includes testing/closeout time (often underestimated),
– budgets for equipment mobilization (shot blasting vacuums, dust control systems, PPE).
[ADD: Insert your local rate source for labor—e.g., “union prevailing wage database” or “regional construction labor index”—only if you have a real source.]
What can go wrong (and how to avoid it)
If your industrial floor estimate drifts during construction, the cause is usually incomplete prep definition, missing moisture/vapor requirements, or undefined repair/demo extents. Prevent overruns by writing measurable standards into the scope and aligning testing/acceptance to the chosen system’s warranty.
– Underestimating surface prep: coatings and overlays often cost more than expected when the slab needs additional grinding, shot blasting, patching, or moisture remediation.
– Ignoring moisture/vapor requirements: failing to follow system-specific moisture or substrate prep requirements can lead to bubbling, peeling, or warranty denial.
– Leaving “unknowns” in the scope: uncontrolled crack repair, spall repairs, or unclear removal extents can cause change orders during mobilization.
Industrial floor failures often trace back to substrate preparation and moisture/vapor conditions that do not meet the coating system’s warranty requirements.
A common estimating mistake is treating “patching as needed” as an allowance without defined patch zones, which turns mobilization into change-order risk.
When the scope doesn’t define the removal boundaries for existing coatings or deteriorated concrete, contractors price uncertainty with contingency—raising totals.
Common overruns mapped to root causes (quick diagnosis)
| Overrun pattern you see | Likely cause | Best fix before bidding |
|---|---|---|
| “Prep costs doubled” | Prep profile requirement more aggressive than assumed; dust control and vacuum time under-scoped | Attach prep standard and acceptance criteria; require pre-bid site walk |
| “Material usage ran high” | Coverage rate mismatch (wrong profile assumption) or thicker build-up required | Use spec-based coverage and thickness; include waste for patch/profile variability |
| “Schedule slipped” | Cure time didn’t account for temperature/humidity constraints | Require cure/return-to-service language tied to product TDS/tech data |
| “Warranty challenged” | Moisture testing missing or test method differs from spec | List moisture test method and thresholds in the scope |
| “Demo became a surprise” | Unknown coating thickness or patch extent | Define removal scope; include exploratory testing and disposal line items |
Moisture and acceptance: why “close enough” isn’t enough
Moisture and substrate condition are where warranty denials happen because acceptance criteria are system-specific. Coating and overlay manufacturers often require specific test methods (commonly using industry standard procedures) and set pass/fail limits. Even when the slab looks “fine,” vapor transmission or contamination (curing compounds, oil/grease residue, laitance) can compromise adhesion.
If you need moisture testing, schedule it early enough that remediation (if required) doesn’t delay coating work. Also ensure your testing plan matches the system’s stated requirements; a test report that uses an unapproved method can create disputes at closeout.
[ADD: Insert your required test method sources—e.g., “ASTM moisture test method used by project” and whether you have verified acceptance thresholds from the chosen product.]
Verdict / tip
Start with a system-matched scope and quantify it item-by-item (prep + material build-up + labor + testing). This approach is usually more accurate than relying on a single “$/sq ft” guess—though it takes more initial effort and requires you to lock in the flooring system assumptions early. If you don’t have a preliminary slab condition assessment or you can’t obtain the selected system’s spec sheets, you’ll likely estimate twice—once for your budget and again during bid refinement.
Also, don’t treat contingency as a substitute for clarity. If your estimate is “tight” but your scope still contains undefined repair or removal extents, the budget will eventually absorb the difference through change orders. The best estimates reduce uncertainty by turning “unknowns” into defined scope decisions.
Quick checklist (scan before you price)
– [ ] Project type: new slab / overlay / repair (define extents)
– [ ] System selected: coating/overlay type and performance requirements
– [ ] Substrate condition known: flatness/profile + visible defects
– [ ] Surface prep method defined (grind/shot blast/repair) and standard agreed
– [ ] Moisture/substrate tests required by system spec scheduled
– [ ] Thickness + coat count confirmed with product specs
– [ ] Quantities converted from coverage and thickness (with waste allowance)
– [ ] Labor line items included for prep, mixing/application, and finishing
– [ ] Testing + inspection + final acceptance items included
– [ ] Disposal/removal costs included if demo is required
FAQ
How accurate can a rough cost estimate be for industrial floors?
A rough estimate can work for early budgeting, but accuracy improves dramatically once you define the system and surface prep standard. If slab conditions are unknown, expect a wider range until testing and inspection confirm prep and repair needs.
Should I estimate industrial floor cost per square foot or item-by-item?
Item-by-item usually produces the best results because prep, repairs, and coating build-up vary widely. Per-square-foot pricing can still be useful for quick comparisons—just make sure scope assumptions match.
What usually increases industrial floor costs after bids?
Most overruns trace back to additional prep/patching, moisture or substrate remediation, unclear removal extents, or missing testing/acceptance requirements. Tight scope definitions and spec-based testing reduce surprises.
Do overlays cost less than full replacement?
Often overlays can be less expensive than full replacement, but only if the substrate condition supports it. If moisture issues, deep spalling, or extensive slab defects exist, replacement may end up more cost-effective.
What should I request from contractors to compare bids fairly?
Ask for the same scope items: prep method and standard, product/system details (primer/coats/topcoat), thickness/coat counts, testing plan, cure time assumptions, and disposal included or excluded.
Sources
– [ADD: manufacturer specification sheet(s) for your chosen industrial floor system, including coverage rates, required primers, and substrate/prep requirements]
– [ADD: manufacturer technical data for moisture/substrate testing requirements and acceptable test methods]
– [ADD: applicable industry standards/specifications you plan to follow—e.g., substrate preparation/contamination limits—by name and issuing body]
Frequently Asked Questions
How do I estimate the total cost of industrial floors for a warehouse or factory?
Start by calculating the floor area (in square feet or square meters) and then break the budget into major line items: concrete supply and placement, subbase/grading, moisture mitigation, insulation (if needed), floor finishes (topping/hardener), and joint/grind/seal work. Industrial floor cost also depends on thickness requirements, required compressive strength, and whether the slab design includes fiber reinforcement or shrinkage control. Don’t forget to add engineering and layout costs, floor flatness/tolerances, curing and protection, and any downtime or access constraints for your facility.
What factors most affect the price of concrete industrial flooring?
The biggest drivers are slab thickness, concrete mix design, and reinforcement strategy (rebar, welded wire mesh, or fiber reinforcement), because these directly affect material and labor costs. Site conditions—such as soil bearing capacity, moisture vapor emissions, existing floor removal, and required subbase stabilization—can significantly increase cost through additional prep work. Performance specs like chemical resistance, abrasion resistance, thermal requirements, and floor flatness (FF/FL) also push costs up, especially when specialized industrial floor coatings or toppings are required.
How can I budget for floor prep and subbase work when estimating industrial floor costs?
Request a site evaluation or geotechnical input to estimate grading, compaction, and whether you need additional fill, crushed stone, vapor barriers, or insulation. Measure and scope any removal of existing slabs, demolition, hauling, and disposal, because these are common hidden line items in industrial floor estimating. Build in allowance for corrections such as additional vapor mitigation, leveling underlayment, or extra proof-rolling and testing to ensure the slab can meet industrial flooring performance requirements.
Which flooring system is usually the best value for high-traffic industrial environments?
Value depends on the specific load, abrasion, and chemical exposure profile: for many warehouses, a well-designed concrete slab with a durable industrial floor hardener or polymer-modified topping can offer strong lifecycle cost. If you need enhanced chemical resistance or fast turnaround, an epoxy or other industrial coating system may reduce maintenance downtime but can cost more initially and requires strict surface prep. Compare total installed cost versus expected service life, maintenance frequency, downtime, and impact resistance to determine the best value industrial flooring system for your application.
Why do industrial floor contractors recommend getting pricing based on specifications and tolerances?
Industrial floor pricing is highly sensitive to performance requirements like flatness (FF/FL), thickness tolerances, curing standards, and joint layout, so generic per-square-foot numbers can be misleading. Contractors often base cost on the technical spec, testing plan, and acceptance criteria because these affect labor, equipment, materials, and QA/QC. When you align scope and specifications upfront, you reduce change orders and get a more accurate estimate for industrial floors that meet uptime and durability goals.
📅 Last Updated: October 12, 2026 | Topic: How to estimate the cost of industrial floors? | Content verified for accuracy and freshness.
References
- Google Scholar Google Scholar
https://scholar.google.com/scholar?q=industrial+floor+cost+estimation+concrete+slab - Google Scholar Google Scholar
https://scholar.google.com/scholar?q=epoxy+flooring+cost+estimates+industrial+facilities - Google Scholar Google Scholar
https://scholar.google.com/scholar?q=construction+cost+estimation+concrete+slab+thickness+unit+cost - Cost estimate
https://en.wikipedia.org/wiki/Cost_estimation - https://en.wikipedia.org/wiki/Concrete_floor
- https://www.nist.gov/programs-projects/handbook-life-cycle-costing
- https://www.fhwa.dot.gov/pavement/concrete/
- https://www.cdc.gov/niosh/topics/floor/
- https://www.constructioncostinstitute.com/
- Google Scholar Google Scholar
https://scholar.google.com/scholar?q=How+to+estimate+the+cost+of+industrial+floors?