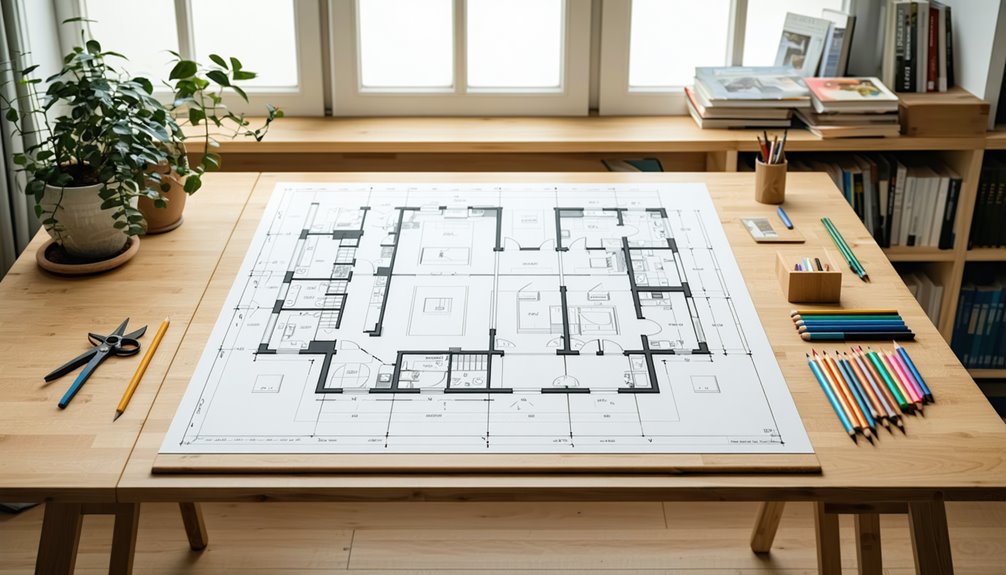
To draw a floor plan, start by accurately measuring your space with a tape measure. Record the dimensions for walls, windows, and doors. Use graph paper to maintain scale and structure. Sketch the basic layout, marking functional areas like living rooms and kitchens, while considering traffic flow. Next, add walls, doors, and windows, using straight lines to guarantee proportionality. Plan furniture placement by selecting pieces that enhance usability and aesthetics. Finally, refine your design for ideal accessibility and comfort. There's a wealth of effective strategies and tools to explore for creating professional-quality floor plans that suit your needs.
Understanding Floor Plans

Understanding floor plans is vital for effective space planning and design. A clear grasp of floor plan symbols allows you to interpret and create layouts that meet your needs. Each symbol represents different elements, from walls and doors to furniture and windows, helping you visualize the space. Familiarize yourself with various layout styles—open concept, traditional, or multi-functional—as they greatly influence the flow and functionality of a space. By mastering these concepts, you can manipulate your environment to achieve greater freedom in how you live or work. This understanding not only enhances aesthetic appeal but also optimizes the use of available space, making it essential for anyone looking to design a functional and liberating area.
Tools Needed for Drawing
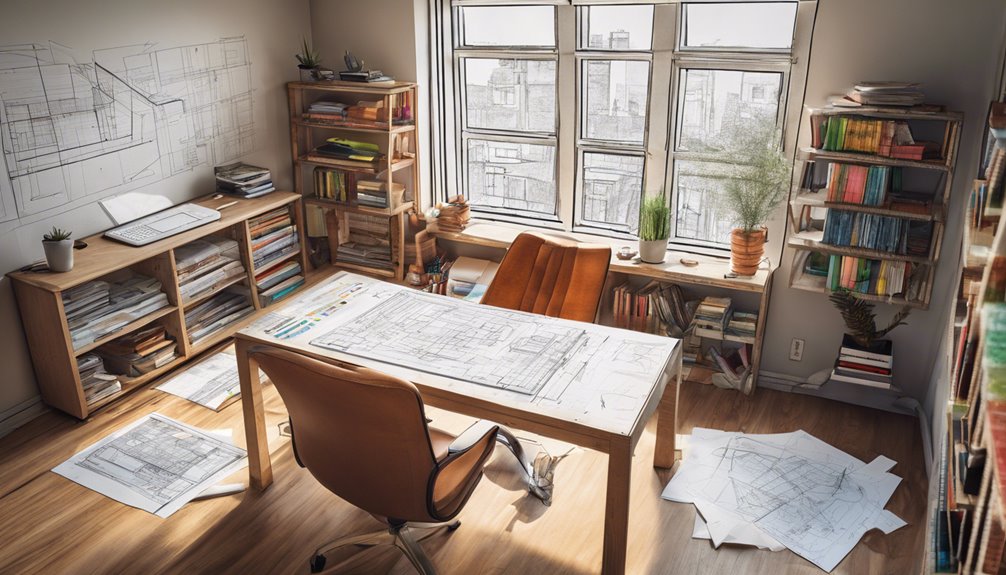
To create an accurate floor plan, you'll need specific tools that guarantee precision and clarity. Start with various pencil types; a mechanical pencil offers consistent lines, while colored pencils can help differentiate elements. A ruler and a compass are essential for straight lines and precise curves. For digital enthusiasts, design software like AutoCAD or SketchUp simplifies the process, allowing for easy adjustments and a professional finish. Additionally, graph paper can be useful for hand-drawn plans, providing a grid for scale and proportion. Don't forget erasers, as mistakes happen. With these tools at your disposal, you'll have the freedom to explore your design ideas effectively and accurately, ensuring your floor plan reflects your vision.
Measuring Your Space

Accurate measurements are essential for a successful floor plan, as even minor discrepancies can lead to significant design flaws. To begin, determine your space dimensions by measuring each wall, using a tape measure for precision. Record each measurement carefully, noting the length and width of the area, along with the height of any windows or doors. Employ various measuring techniques, such as the Pythagorean theorem, to confirm right angles and guarantee your dimensions are accurate. If the space has irregular shapes, break it down into smaller rectangles or squares. Consistency in your measurements will provide a solid foundation for your design, allowing you the freedom to create a layout that truly reflects your vision.
Sketching the Basic Layout
To begin sketching the basic layout, you'll need to determine the dimensions of each room accurately. Next, identify key areas that will influence the flow and functionality of the space. Using graph paper can help maintain scale and proportion as you outline your design.
Determine Room Dimensions
As you begin sketching the basic layout of your floor plan, it is essential to determine the room dimensions with precision. Accurate room size measurements provide the foundation for an effective design. Start by using measurement techniques such as a tape measure or laser distance measurer to capture the length and width of each room. Don't forget to account for irregularities, like alcoves or protrusions, which can impact overall functionality. Record these dimensions carefully, as they'll inform the placement of walls, doors, and furniture. By maintaining a meticulous approach to your measurements, you'll guarantee that your final floor plan reflects your vision while maximizing the potential of your space. Embrace this freedom to design a functional environment tailored to your needs.
Identify Key Areas
Once you've measured your rooms, the next step is identifying key areas within the space to guarantee your floor plan meets your needs. Start by outlining the essential functional areas, such as living rooms, kitchens, and bedrooms. Consider how these key zones will interact; for instance, placing the kitchen near the dining area enhances convenience. Think about traffic flow—ensure pathways between functional areas are clear and unobstructed. Also, consider privacy; separate key zones like bedrooms from social areas. By prioritizing the arrangement of these areas, you'll create a layout that not only maximizes space but also enhances your daily living experience. This strategic planning lays the foundation for an efficient and enjoyable environment tailored to your lifestyle.
Use Graph Paper
Graph paper serves as a valuable tool for sketching your basic layout, providing a structured grid that simplifies the process of translating measurements into visual representation. One of the primary graph paper benefits is its ability to maintain grid alignment, ensuring that your drawings are both accurate and proportional. Each square typically represents a specific measurement, allowing you to scale your design easily. As you begin sketching, use the grid to position walls, doors, and furniture precisely. This method not only enhances organization but also minimizes errors, giving you the freedom to experiment with different configurations. By leveraging graph paper, you can create a cohesive and functional floor plan that effectively meets your spatial needs while maintaining visual clarity throughout the design process.
Adding Walls and Doors

To effectively define your space, you'll need to strategically add walls and doors in your floor plan. Start by evaluating wall placement; consider how each wall will influence the flow of rooms. Utilize straight lines to represent walls, guaranteeing they're proportionate to your scale. Next, choose appropriate door types. Swing doors are common, but consider sliding or pocket doors for tighter spaces. Mark doorways clearly, indicating the direction they open, which helps visualize movement throughout the area. Remember that walls should not only separate spaces but also create a sense of freedom by allowing for easy navigation. Each decision impacts the overall layout, so take your time and guarantee every element serves a purpose in enhancing your design.
Incorporating Windows and Fixtures
When incorporating windows and fixtures into your floor plan, consider strategic placement to optimize natural light and enhance the room's functionality. You'll need to arrange fixtures in a way that maintains scale and proportion, ensuring they complement the overall design. This approach not only improves aesthetics but also maximizes usability within the space.
Window Placement Strategies
Incorporating windows into your floor plan requires careful consideration of both natural light and the overall functionality of the space. You'll want to evaluate various window types—casement, sliding, or fixed—based on your design goals. Positioning windows to maximize natural lighting can enhance mood and reduce energy costs. Consider placing larger windows on south-facing walls to capture sunlight throughout the day while smaller windows can be strategically placed for ventilation. Think about the room's purpose: in a kitchen, for instance, windows should allow visibility and light without obstructing cabinetry. Additionally, align windows with other architectural features to create a cohesive look. Remember, thoughtful placement of windows isn't just about aesthetics; it's essential for creating a welcoming, efficient environment.
Fixture Arrangement Tips
Balancing the placement of fixtures with window locations is essential for optimizing both functionality and aesthetics in your floor plan. You'll want to take into account various fixture types and how they interact with natural light and spatial flow. Here are some tips to enhance your arrangement:
- Align fixtures with windows: Place sinks or desks near windows for natural illumination.
- Group similar fixtures: Keep related items, like appliances and storage, close together to improve efficiency.
- Consider sightlines: Verify that fixtures don't obstruct views or disrupt the flow between spaces, allowing for easy navigation.
Scale and Proportion
Understanding scale and proportion is essential for effectively integrating windows and fixtures into your floor plan. Accurate scale guarantees that each element fits harmoniously within the space, while proportion techniques help visualize their relationship to one another. Here's a concise table to guide your considerations:
| Element | Scale Accuracy | Proportion Techniques |
|---|---|---|
| Windows | Maintain 1:50 scale | Align with wall height |
| Fixtures | Use 1:25 scale | Center fixtures within spaces |
| Doors | 1:50 scale | Guarantee clearance for movement |
| Furniture | 1:20 scale | Keep pathways clear |
| Appliances | 1:25 scale | Space for ventilation |
Implement these concepts to enhance the functionality and aesthetic of your design.
Planning Furniture Placement
As you begin planning furniture placement, it's essential to take into account the flow of movement throughout the space. Effective furniture arrangement not only enhances aesthetics but also optimizes space. Consider the following:
- Furniture styles: Choose pieces that complement the overall design and functionality of the room.
- Functional zones: Designate areas for specific activities, ensuring that each zone serves its purpose effectively.
- Traffic patterns: Maintain clear pathways to facilitate easy movement and accessibility.
Refining Your Design
With furniture placement established, the next step involves refining your design to enhance both functionality and aesthetics. To achieve this, consider making design adjustments that improve spatial flow throughout the area. Assess how movement occurs within the space, guaranteeing pathways are clear and unobstructed. You might want to reposition certain pieces to create more openness or intimacy, depending on your intended atmosphere. Pay attention to scale and proportion; oversized furniture can disrupt harmony, while too-small pieces may feel lost. Additionally, evaluate color schemes and textures to guarantee they complement your layout. By thoughtfully refining these elements, you'll create a cohesive environment that not only looks good but also feels inviting and functional, allowing for effortless movement and interaction.
Exploring Digital Tools
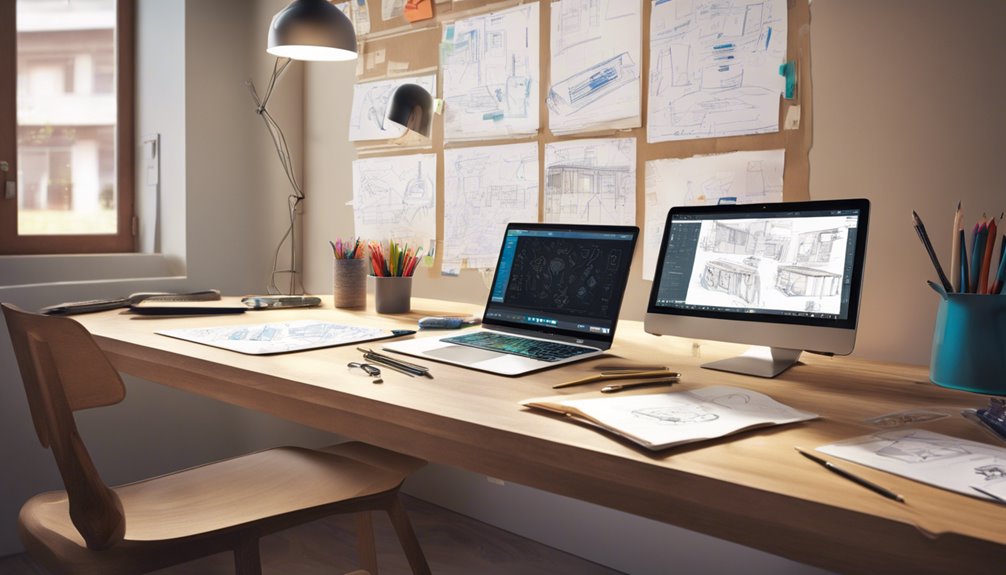
Digital tools have revolutionized the way you can create floor plans, making the process more accessible and efficient. With a variety of options available, you can leverage digital software and online resources to enhance your design experience. Consider utilizing:
- Interactive platforms for real-time collaboration.
- Design apps with extensive template libraries for quick layouts.
- 3D modeling tools that allow virtual reality walkthroughs.
These tools often come with user tutorials, ensuring you can navigate their features with ease. Mobile applications enable you to sketch designs on-the-go, providing flexibility in your workflow. By embracing these advancements, you gain the freedom to experiment with your ideas, streamline your process, and produce professional-quality floor plans with minimal effort.
Frequently Asked Questions
What Is the Purpose of a Floor Plan?
The purpose of a floor plan is to visually represent the layout of a space, showcasing design elements that enhance functionality. It helps you analyze space utilization effectively, ensuring each area serves its intended purpose. By detailing dimensions and relationships between rooms, a floor plan allows for informed decisions, promoting freedom in design choices. Ultimately, it's an essential tool for planning and optimizing the overall flow and aesthetics of a space.
How Do I Choose the Right Scale for My Floor Plan?
Choosing the right scale for your floor plan is like finding the perfect lens to view a beautiful landscape. Scale selection transforms your vision into reality. For instance, a 1/4" = 1' scale is often ideal for residential designs, while 1/8" = 1' works for larger spaces. Consider your project's complexity and available space when deciding. The right scale guarantees your design's freedom shines through, allowing every detail to breathe in its environment.
Can I Draw a Floor Plan by Hand?
Absolutely, you can draw a floor plan by hand. While hand drawing offers a tactile and creative freedom, it requires precision in measurements and layout. You can use graph paper to maintain scale and proportion effectively. However, if you prefer the convenience of digital tools, they can enhance accuracy and allow for easy modifications. Both methods have their merits, so it ultimately depends on your personal style and project requirements.
What Common Mistakes Should I Avoid When Drawing?
When you're drawing, it's essential to avoid common mistakes like improper scale selection and layout errors. If your scale's off, the whole plan could misrepresent dimensions, leading to costly adjustments later. Also, be cautious of layout errors that can create inefficient spaces or obstruct flow. Taking time to double-check measurements and ensuring the design meets your needs will help you achieve a more functional and aesthetically pleasing result.
How Often Should I Update My Floor Plan?
You should update your floor plan regularly, especially after significant design changes or renovations. It's essential to reflect any modifications accurately to guarantee functionality and aesthetics align with your current needs. Ideally, review your floor plan annually or whenever you make substantial alterations. Staying proactive with floor plan updates not only enhances your space but also allows you the freedom to adapt as your lifestyle evolves, making sure your environment remains ideal.


