To disassemble a Nanit Floor Stand, first, you need to remove the screws attaching the base to the pole. Then, carefully detach the pole from the base by lifting it upward.
Introducing the process of disassembling a Nanit Floor Stand is essential for users who may need to relocate or store their device. Whether you are moving to a new space or simply want to free up some floor space, disassembling the floor stand is a straightforward task.
In this guide, we will walk you through the step-by-step process of disassembling the Nanit Floor Stand, ensuring a hassle-free experience. By following these instructions, you will be able to detach the base from the pole without any difficulty. So let’s get started with the disassembly process.
Credit: www.homedepot.com
Preparing For Disassembly
Gathering the necessary tools and equipment is an essential step in preparing for the disassembly of the Nanit Floor Stand. This will ensure that you have everything you need within reach, saving you time and effort during the process. Some of the tools you may need include a screwdriver set, pliers, and a wrench. It is also important to have a clean and safe workspace. Clear any clutter and ensure that the area is well-lit to avoid any accidents or damages. Before starting the disassembly, you should familiarize yourself with the different components of the Nanit Floor Stand. Take a close look at the stand and its various parts to understand how they fit together. This will make the disassembly process much easier and more efficient.
Removing The Camera From The Stand
Removing the Camera from the Stand
Securely detach the camera from the stand
To safely disassemble the Nanit Floor Stand and remove the camera, follow these steps:
- First, ensure that the power is turned off and the camera is disconnected from any power source.
- Gently loosen the camera by unscrewing it from the stand in a counterclockwise motion.
- Once the camera is loose, carefully lift it straight up to detach it from the stand.
Safely handle and store the camera during disassembly
During the disassembly process, it is crucial to handle the camera with care to avoid any damage.
When removing the camera from the stand, make sure to hold it from the base and avoid touching the lens or any delicate parts.
To ensure the camera’s protection, place it in a secure location, preferably in its original packaging or a padded case, to prevent any accidental damage during storage.
Dismantling The Stand
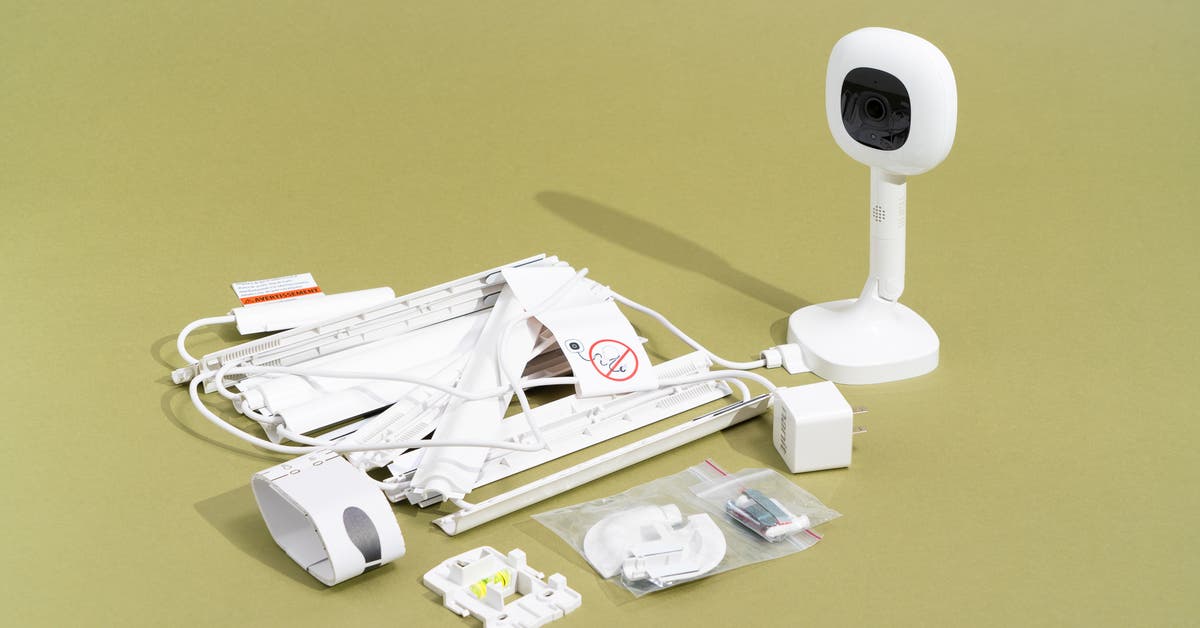
Disassembling the Nanit floor stand is a straightforward process that can be accomplished by following a few simple steps. To begin, it’s important to identify and locate the various parts of the floor stand, such as the base, arms, and brackets. Once identified, you can then proceed to loosen and remove the screws or connectors that are holding the different sections of the stand together. Care should be taken to ensure that all fasteners are fully removed before attempting to separate the sections. You may find it useful to have a screwdriver or wrench on hand to assist with this process. Once the screws or connectors are removed, you can then separate the different sections of the stand, allowing for easy transportation or storage. Overall, dismantling the Nanit floor stand is a simple and efficient process that can be completed with minimal effort.
Detaching The Base
To disassemble the Nanit Floor Stand, start by detaching the base from the main structure. Make sure to safely handle any weight-bearing components during this process. Once detached, store the base securely for future use. By carefully following these steps, you can safely and effectively disassemble the Nanit Floor Stand.
Collapsing The Extension Rod
Collapsing the Nanit Floor Stand extension rod is a simple process that allows for easy storage and transportation. To release the extension rod from the stand, begin by locating the locking mechanism on the side of the stand. It is usually a small button or latch that needs to be pressed or turned to unlock the rod. Once the locking mechanism is released, carefully slide the extension rod out of the stand, making sure to hold onto it securely to avoid any accidental drops or damage. Once the extension rod is removed, it can be collapsed by gently pushing the sections together, folding them into a compact and manageable size. The collapsed rod can then be stored in a safe and convenient location until it is needed again.
Storing And Maintenance Tips
- Disassemble the Nanit Floor Stand with care, following the instructions provided in the manual.
- Separate the different components and place them in individual bags or containers, ensuring they are adequately protected.
- Label each bag or container with the corresponding part name or number for easy identification during reassembly.
- Store the disassembled parts in a cool, dry place away from direct sunlight or extreme temperatures.
Clean and maintain the Nanit Floor Stand components:
- Regularly dust all the components using a soft cloth or gentle brush to keep them free of dirt and debris.
- If necessary, clean the parts with a mild soap solution or appropriate cleaning agent recommended by the manufacturer.
- Avoid using abrasive cleaners or harsh chemicals that may damage the finish or materials.
- Check for any signs of wear or damage, such as loose screws or cracked parts, and address them promptly to ensure safe usage.
Ensure safe transportation if needed for future use:
- If you need to transport the disassembled Nanit Floor Stand, make sure to pack the components securely to prevent any damage.
- Use padding or cushioning materials to protect fragile parts and prevent them from shifting during transit.
- Consider using a sturdy box or a dedicated carrying case designed for the specific purpose of transporting the Nanit Floor Stand.
- Handle the packed components with care and avoid any rough handling or dropping that could cause harm.
Troubleshooting Disassembly Issues
Disassembling a Nanit Floor Stand can sometimes be challenging, but with the right troubleshooting techniques, you can overcome any issues that arise. One common challenge during disassembly is removing the base from the stand. Ensure that the screws holding the base in place are fully loosened before attempting to remove it. If the base still won’t come off, try gently rocking it back and forth while pulling upwards.
Another common issue is loosening the joints between the stand sections. Apply a lubricant, such as WD-40, to the joints and let it sit for a few minutes to loosen them. Then, gently twist and pull to separate the sections.
If you encounter any difficulties during the disassembly process, don’t hesitate to seek professional assistance. A trained technician can provide guidance and ensure that the disassembly is done properly.
| Common Disassembly Challenges | Solutions |
|---|---|
| Trouble removing the base | – Fully loosen the screws – Rock the base back and forth |
| Difficulty loosening joint sections | – Apply lubricant like WD-40 – Twist and pull gently |
Reassembling The Nanit Floor Stand
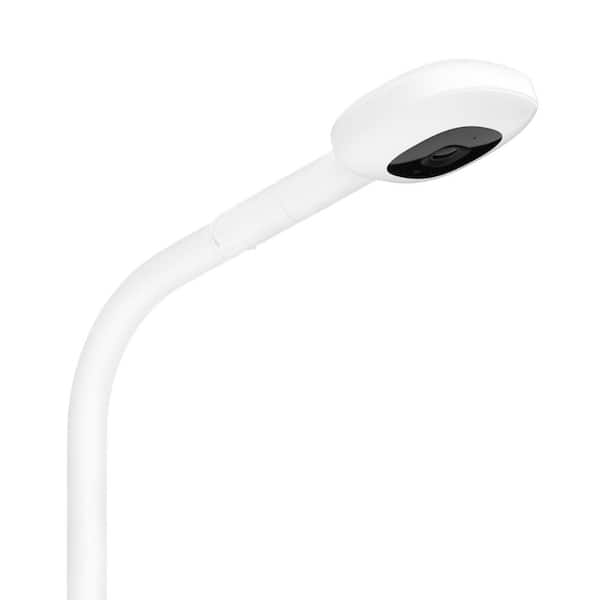
Once you have disassembled your Nanit Floor Stand, reassembling it is a simple process. Follow these step-by-step instructions to securely attach the camera to the stand:
- Start by positioning the camera stand so that the base is flat on the ground.
- Take the camera and align the bottom of the camera with the mounting bracket on the stand.
- Rotate the camera clockwise until it locks into place.
- Make sure the camera is securely attached by gently pulling on it.
- Adjust the angle of the camera as desired by rotating it to the left or right.
- Ensure that the camera is stable and not wobbly.
- Lastly, plug in the power cable and ensure it is connected properly to both the camera and the power source.
By following these simple steps, you can easily reassemble your Nanit Floor Stand and have your camera securely attached for optimal use.
Additional Tips And Recommendations
When disassembling your Nanit Floor Stand, it’s important to keep a few additional tips and recommendations in mind. Firstly, consider alternative storage options for the components to ensure they remain organized and protected. This could include using labeled storage boxes or bags for each individual piece.
If you’re not confident in your assembly or disassembly skills, it may be worth considering professional assembly and disassembly services. These experts can ensure that the process is done correctly and efficiently, minimizing the risk of damage to your Nanit Floor Stand.
Additionally, don’t forget to explore the various accessories and customization options available for your Nanit Floor Stand. These can enhance its functionality and personalize it to suit your specific needs, such as additional shelves, cable management solutions, or color options.
| Additional Tips and Recommendations |
| Explore alternative storage options for components |
| Consider professional assembly and disassembly services |
| Additional accessories and customization options |
Frequently Asked Questions Of How To Disassemble Nanit Floor Stand
How Do You Remove Nanit From Floor Stand?
To remove Nanit from the floor stand, follow these steps: First, make sure the Nanit camera is turned off. Then, loosen the screws on the back of the floor stand. Carefully slide the Nanit camera off the floor stand. Make sure to hold the camera securely while removing it.
How Do You Travel With Nanit Floor Stand?
To travel with the Nanit floor stand, disassemble it by removing the mounting bracket, unscrewing the extension pole, and folding the legs. Pack the components securely and reassemble upon arrival. It’s compact and easy to transport, ensuring hassle-free travel.
Is Nanit Floor Stand Adjustable?
Yes, the Nanit floor stand is adjustable.
Is Nanit Floor Stand Portable?
Yes, the Nanit floor stand is portable, making it easy to move around as needed.
Conclusion
Dismantling the Nanit Floor Stand is a straightforward process that can be easily accomplished by following the step-by-step instructions mentioned above. By disassembling the stand, you can conveniently transport or store it when not in use. Remember to handle the components with care and ensure that you have all the necessary tools and equipment.
With these guidelines, you will be able to dismantle the Nanit Floor Stand effortlessly.


