You can fix loose floorboards without nails by using wood glue, adhesive strips, or rubber shims. Start by cleaning the area, then apply wood glue to the underside of the board and hold it in place with clamps, allowing it to cure for 24 hours. Alternatively, adhesive strips can be cut to fit the gaps, providing immediate usability without mess. For quick stabilization, rubber shims can be inserted into gaps to eliminate squeaks. Each method is effective and simple, ensuring your floor stays secure. To explore more detail on these techniques, keep exploring your options.
Understanding Loose Floorboards
Loose floorboards can be a frustrating issue, often leading to creaks and instability that disrupt the comfort of your home. Understanding the materials used in your floorboards is vital for maintaining their structural integrity. Floorboards can be made from various materials, including hardwood, plywood, and laminate. Each material has different properties and methods for securing, so knowing what you're dealing with is the first step in addressing the problem.
When floorboards become loose, it often indicates that their connection to the subfloor has weakened. This can happen for several reasons, such as moisture, age, or improper installation. It's important to assess the condition of your floorboards carefully. If you're dealing with hardwood, the natural expansion and contraction due to humidity can lead to gaps. Plywood and laminate might not offer the same durability, but they also require proper fastening to maintain their structural integrity.
Before attempting any repairs, make sure you identify the type of floorboard material you have. This understanding will help you select the right tools and methods for fixing the issue. For example, hardwoods may benefit from specific adhesives or wood screws designed for that material. On the other hand, laminate flooring typically requires a different approach.
Addressing loose floorboards promptly not only enhances the safety of your home but also helps preserve its aesthetic appeal. Taking the time to understand the materials involved is a significant step toward effective repair.
Common Causes of Creaking
Creaking floorboards can be a common annoyance in many homes, often leading to frustration and concern over the structural integrity of your flooring. Understanding the creaking causes is essential for addressing the issue effectively. One primary reason your floorboards might creak is the natural movement of wood. As temperatures and humidity levels fluctuate, wood expands and contracts, which can create gaps between the boards and their support structures.
Another common cause is loose floorboards. Over time, fasteners may loosen due to wear and tear, allowing the boards to shift slightly when weight is applied. This movement often produces the characteristic creaking sound. Additionally, if your floor joists are improperly aligned or spaced, this can lead to uneven pressure on the floorboards, resulting in noise when you walk across them.
You should also consider the age of your flooring. Older homes often have floorboards that have settled unevenly over the years, leading to creaks and squeaks. Finally, inadequate sound reduction measures, such as lack of insulation or underlayment, can amplify the noise produced by your floorboards.
Tools You'll Need
To fix those loose floorboards, you'll need a few essential tools to get started. Make sure you have a hammer, a pry bar, and screws handy, as these will help secure the boards effectively. You might also want to contemplate alternative fastening options, which can offer different benefits depending on your specific situation.
Essential Tools Overview
While tackling loose floorboards may seem intimidating, having the right tools on hand can make the process much simpler. First, you'll need a pry bar or a flathead screwdriver to gently lift the loose board without damaging your flooring materials. A hammer is vital for tapping the boards back into place if necessary.
Next, a measuring tape will help guarantee you get precise measurements, especially if you're replacing any sections. A level is important to check that your floorboards sit evenly after repairs.
You should also have wood glue or adhesive specifically designed for flooring, as these repair techniques can effectively secure loose boards without the need for nails. Finally, a utility knife can be handy for trimming any excess material or preparing the edges of the boards for reinstallation.
Don't forget safety gear like gloves and goggles to protect yourself during the process. By gathering these essential tools, you'll be well-equipped to tackle your floorboard repairs confidently and safely.
Alternative Fastening Options
When fixing loose floorboards, exploring alternative fastening options can enhance the durability of your repairs. Instead of using traditional nails, you might consider screw alternatives like wood screws or specialized flooring screws. These options provide a robust hold and allow for easier removal if necessary. Be certain to choose screws that are the right length for your floorboards to avoid damaging the underlying structure.
Additionally, adhesive options can be highly effective in securing loose floorboards. Construction adhesive or wood glue can provide a strong bond that holds up well over time. When using adhesive, verify the surfaces are clean and dry for ideal adhesion. Apply the adhesive evenly and press the boards firmly together, allowing adequate drying time as indicated by the product instructions.
To make your repairs safer and more efficient, you'll also need a few basic tools. A drill or screwdriver will help you install screws, while a caulking gun can be useful for applying adhesive. A putty knife can assist in spreading glue evenly. With these alternatives and tools, you can achieve a secure and long-lasting repair for your floorboards.
Using Wood Glue
If you've got several loose floorboards in your home, using wood glue can be an effective and straightforward solution. This method not only offers a strong bond but also keeps your flooring looking neat and undisturbed. To start your wood glue application, gather the necessary materials: wood glue, a caulking gun (if needed), a putty knife, and some clamps or weights.
Begin by lifting the loose floorboard gently. Clean any debris or dust from both the board and the subfloor to guarantee a strong bond. Next, apply a generous amount of wood glue to the underside of the floorboard, making sure to cover the entire surface that will contact the subfloor. Once you've applied the glue, press the board back into place firmly.
To guarantee the best results, you'll want to keep the floorboard secured while the adhesive dries. Use clamps or weights to hold it down for the duration of the adhesive drying time, which is typically around 24 hours but may vary depending on the specific product.
During this waiting period, avoid walking on the repaired area to allow the glue to cure properly. After the adhesive has dried, check the floorboard to guarantee it's secure. If it feels solid, you can move on to enjoy your newly fixed floor. Remember, patience here is key for a lasting repair!
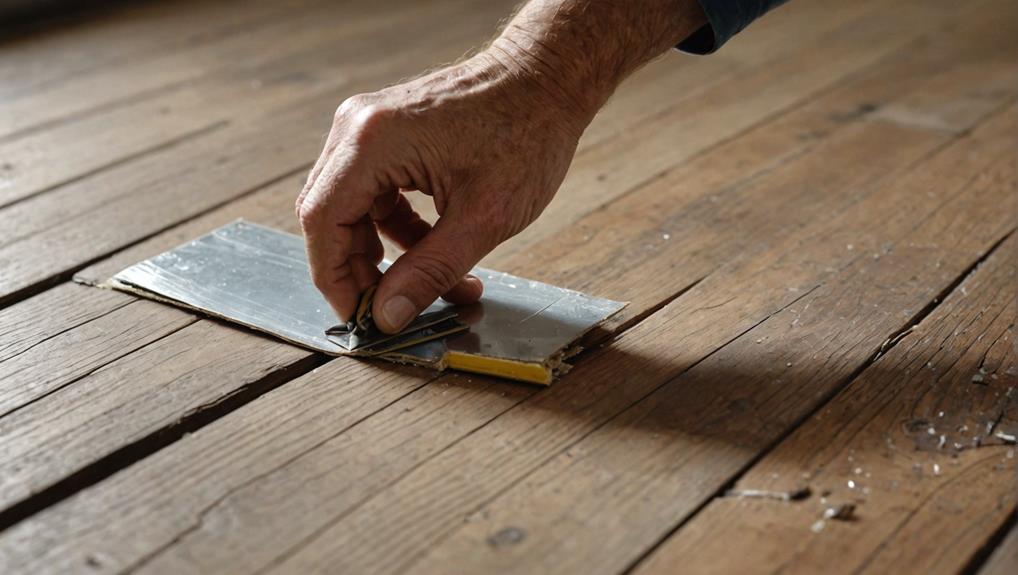
Employing Adhesive Strips
Adhesive strips offer a quick and hassle-free solution for securing loose floorboards without the mess of traditional glues. These strips utilize strong adhesive properties that bond effectively with both wood and subfloor materials, guaranteeing a stable and safe environment in your home. You won't need to worry about the time-consuming drying process associated with liquid adhesives, allowing you to walk on your floor almost immediately after installation.
To begin, clean the area around the loose floorboards thoroughly. Remove any dust or debris to guarantee ideal adhesion. Next, you'll want to measure the length of the gap where the adhesive strip will be applied. Cut the strip to the appropriate size, making sure it's long enough to cover the entire area without overlapping.
When applying the adhesive strip, peel off the backing and press it firmly against the underside of the loose floorboard. Use your hands to apply even pressure across the length of the strip, guaranteeing a strong bond. If you're concerned about safety, consider placing weights on the floorboard for a few minutes to enhance the adhesive's grip.
Once you've secured the floorboard, check for any remaining movement. If it's still loose, you might need to apply another strip or consider alternative installation techniques. Adhesive strips provide an efficient solution that keeps your floor safe and sound, guaranteeing a more stable walking surface throughout your home.
Installing Floorboard Clips
Installing floorboard clips is a great way to secure loose floorboards and prevent future movement. You'll appreciate the benefits they offer, from stability to ease of installation. Let's walk through the installation process and some maintenance tips to keep your floorboards in top shape.
Benefits of Floorboard Clips
Tackling loose floorboards can be a hassle, but using floorboard clips makes the process much simpler and more effective. One of the primary benefits of these clips is that they greatly enhance floorboard durability. By securely anchoring the boards in place, clips help prevent gaps and creaks, ensuring your flooring remains stable over time. You'll notice less wear and tear, which is vital for maintaining the quality of your floors.
Another advantage is the installation efficiency that floorboard clips offer. Unlike traditional methods that require nails, which can damage the wood and complicate repairs, clips allow for a straightforward setup. You can easily position and adjust the clips as needed, ensuring a snug fit without the risk of splitting the wood. This is especially important for DIY enthusiasts who prioritize safety in their projects.
Moreover, floorboard clips can be reused if you decide to change your flooring in the future. This not only saves you money but also contributes to a more sustainable approach to home improvement. Overall, opting for floorboard clips is a smart choice for anyone looking to achieve a long-lasting and safe flooring solution.
Installation Process Overview
When you're ready to secure your loose floorboards with clips, the installation process can be straightforward and efficient. First, gather your tools: a measuring tape, a pencil, a rubber mallet, and the floorboard clips designed for your specific flooring materials. Verify the area is clean and free of debris to facilitate a smooth installation.
Begin by measuring the gaps between the floorboards. Mark the positions where you'll install the clips, typically every few feet, depending on the size of your flooring materials. Next, align the clips with your marks and tap them gently into place using the rubber mallet. This verifies they're snug without damaging your floorboards.
Once the clips are installed, press the floorboards down firmly to secure them in the clips. Check for any movement by walking across the floor. If there's still some looseness, you may need to adjust the clips or add more, depending on the installation techniques you've chosen to use.
Maintenance Tips and Tricks
Proper maintenance is key to guaranteeing your floorboards remain secure and visually appealing. One of the best ways to achieve this is by using floorboard clips. These clips help hold the boards firmly in place, preventing them from shifting or squeaking over time. Here's a quick overview of the benefits of using clips for your floor maintenance.
| Benefits | Emotional Impact |
|---|---|
| Easy installation | Feel accomplished with DIY repairs |
| Increased stability | Enjoy a quieter home environment |
| Long-lasting results | Peace of mind for your family |
To install floorboard clips, simply locate the loose boards, then position the clips beneath each board where they meet the joists. Use a hammer or a rubber mallet to secure the clips gently without damaging the boards. This simple DIY repair not only improves the safety of your flooring but also enhances its lifespan.
Regularly check your floorboards for any signs of wear or looseness. By being proactive with your maintenance, you'll guarantee a safe and attractive environment for years to come. Remember, a well-maintained floor is a happy floor!
Applying a Rubber Shim
Applying a rubber shim can be an effective solution for stabilizing loose floorboards and eliminating unwanted squeaks. This method is straightforward, and it doesn't require any nails or extensive tools, making it a safe choice for DIY enthusiasts. To start the rubber shim installation, you'll first need to identify the areas where the floorboards are loose or squeaky.
Once you've pinpointed these spots, choose your shim material options. Rubber is ideal due to its flexibility and durability, but you can also consider other materials like wood or plastic if rubber isn't available. Be certain the shims you select fit snugly between the joists and the floorboards.
Next, measure the gap between the floorboards and the subfloor to determine the thickness of the shims you'll need. Cut the rubber shims to size if necessary. It's crucial to verify they're not too thick, as this could raise the floorboards unevenly.
Now, carefully insert the rubber shims into the gaps. You'll want to apply enough pressure to fill the space without overstuffing, which can cause additional issues down the line. Once installed, walk over the area to check for stability. If the floor feels solid and the squeaks are gone, you've successfully completed the rubber shim installation. This method not only enhances safety by preventing further movement but also prolongs the life of your flooring. Remember, periodic checks will help maintain the integrity of your floor.
Utilizing Screws for Stability
For those looking to take a more permanent approach to securing loose floorboards, utilizing screws can provide the stability you need. Unlike nails, screws offer superior holding power, making them an ideal choice for long-term repairs. Here's how to effectively incorporate screws into your floorboard repair project:
- Choose the Right Screw Types: Opt for wood screws or deck screws, which are designed for use in wooden materials. Make sure to select screws that are long enough to penetrate the subfloor but not so long that they go through the floorboards.
- Prepare the Area: Clear away any debris or dust around the loose floorboards. This guarantees a clean surface for better adhesion and helps you accurately see where to place the screws.
- Pre-drill Holes: To prevent splitting the wood, pre-drill holes in the floorboards. This step is essential, especially if your boards are older or made of softer wood.
- Install the Screws: Using a power drill, carefully drive the screws into the pre-drilled holes. Verify the screws are flush with the floor surface to avoid tripping hazards.
Exploring Floorboard Fasteners
When tackling loose floorboards, exploring various fasteners can greatly enhance your repair efforts. Instead of relying solely on traditional screws, consider screwless fastening options that provide a secure hold without the hassle of drilling. These fasteners are designed to grip the wood tightly, minimizing movement and reducing the risk of further loosening.
One popular type of screwless fastening is the use of specialized clips or brackets. These innovative materials can be attached directly to the subfloor and then locked into the floorboards, creating a tight connection. They're particularly effective for tongue-and-groove boards, where they can be hidden from view, preserving the aesthetic of your floor.
Another option to explore is adhesive fasteners. These products use strong, durable adhesives designed to bond wood surfaces together effectively. Be certain to choose adhesives that are specifically formulated for flooring repairs, as they'll provide the best long-term results.
If you're concerned about future removal or adjustments, look into removable fasteners that allow for easy disassembly when needed. This can be a practical choice if you plan to replace or refinish your floors down the line.
Regardless of the fasteners you choose, remember that safety is paramount. Verify proper ventilation if you're using adhesives, and always follow manufacturer instructions for installation. By selecting the right fasteners for your project, you can achieve a stable and long-lasting solution for your loose floorboards.
Tips for Preventing Future Issues
To keep your floorboards in top shape, regular inspections are key. Check for any signs of movement or wear, addressing issues before they escalate. Additionally, controlling humidity levels in your home can prevent wood from expanding and contracting, which helps maintain stability.
Regular Floor Inspections
Maintaining the integrity of your flooring is essential for both safety and aesthetics, and regular inspections play a key role in preventing future issues. By conducting routine checks, you can guarantee floor stability and catch potential problems before they escalate. Here are some practical tips for effective inspections:
- Visual Assessment: Regularly examine your floors for any signs of wear, such as cracks, warping, or significant gaps between boards.
- Sound Test: Walk across your floors and listen for any unusual sounds, like creaking or popping, which may indicate loose floorboards.
- Level Check: Use a level to determine if your floors are even. Unevenness can signal structural problems that need immediate attention.
- Moisture Monitoring: Keep an eye on areas prone to moisture, as excessive dampness can weaken floorboards and compromise stability.
Humidity Control Measures
Controlling humidity levels in your home is crucial for preventing issues like loose floorboards and other structural problems. High humidity can lead to moisture effects such as wood expansion, which causes floorboards to loosen or warp. To maintain ideal humidity, aim for levels between 30-50%.
First, consider using a dehumidifier, especially in damp areas like basements. Make certain to regularly empty the water collection tank to confirm it's functioning properly. Next, guarantee proper ventilation in your home. Open windows when weather permits, and use exhaust fans in kitchens and bathrooms to reduce moisture buildup.
Additionally, check your home for leaks or water damage that could contribute to excess humidity. Address any plumbing issues immediately to prevent further moisture control challenges.
Frequently Asked Questions
Can I Fix Loose Floorboards Without Removing Furniture?
Yes, you can fix loose floorboards without removing furniture. First, assess your furniture placement to guarantee you can access the loose boards safely. Next, use wood glue or adhesive strips for floorboard maintenance, applying it carefully between the boards. For added stability, consider using wedges or shims to secure them in place. Just make sure everything's level and allow adequate drying time before moving any furniture back into position.
How Long Does It Take to Fix Loose Floorboards?
Fixing loose floorboards can take anywhere from 30 minutes to a couple of hours, depending on the floorboard types and the repair tools you're using. If you've got a straightforward issue, like a single board, it'll be quicker. However, if multiple boards are affected, it'll take longer. Always prioritize safety; make sure you've got the right tools and wear protective gear while working to avoid any accidents during the repair process.
Will Fixing Loose Floorboards Reduce Noise?
Yes, fixing loose floorboards can greatly reduce noise, especially if you're dealing with squeaky floors. When floorboards move against each other, they create friction, leading to those annoying sounds. By securing them properly, you eliminate that movement, resulting in better noise reduction. This not only enhances your comfort but also creates a safer environment by minimizing distractions. So, if you're tired of creaks, addressing those loose boards is definitely worth your time.
Are There Eco-Friendly Adhesives Available for This Project?
Did you know that nearly 80% of adhesives on the market contain harmful chemicals? If you're looking for eco-friendly options, there are natural bonding adhesives made from sustainable materials. These products not only minimize environmental impact but also guarantee safety for your home. When choosing an adhesive, make certain it's non-toxic and biodegradable, so you can confidently tackle your project while keeping your living space healthy and safe for everyone.
Can I Use These Methods on Laminate Flooring?
Yes, you can use some methods for floorboard maintenance on laminate flooring, but it's important to choose wisely. For laminate installation, avoid traditional nails since they can damage the planks. Instead, consider using eco-friendly adhesives or double-sided tape, which won't harm the surface. Always verify the area is clean and dry before applying any adhesive. This way, you can maintain your laminate flooring safely and effectively without compromising its integrity.


