
To remove glue from hardwood floors, first identify the glue type to choose the right method. Clear the area, clean the floor, then soften glue using warm soapy water or gentle heat from a hairdryer. Use a plastic scraper at a low angle to lift softened glue, avoiding damage. Clean residue with vinegar or mineral spirits, then sand and refinish the spot to restore the finish. Following these steps carefully will help you protect your floor while effectively removing glue, and there’s more you can do to guarantee a flawless finish.
Identifying the Type of Glue on Your Hardwood Floors
How can you tell which type of glue is stuck on your hardwood floors? First, examine the glue’s appearance and texture. White or yellowish glue is often wood glue or PVA adhesive, while clear, rubbery glue might be construction adhesive or hot glue. Some glues, like epoxy, feel hard and glossy once dried. Identifying the type matters because each reacts differently to glue removal techniques. Solvent-based adhesives may require specific solvents, while water-based glues often soften with moisture. Knowing what you’re dealing with lets you choose the safest, most effective removal method without damaging your floors. By understanding the types of adhesives, you gain control over the process, freeing yourself from guesswork and ensuring your hardwood floors stay beautiful throughout the cleanup.
Gathering the Necessary Tools and Materials
Before you start removing glue from your hardwood floors, you’ll need to gather the right tools and materials to make the process efficient and safe. Begin with a tools checklist that includes a plastic scraper, microfiber cloths, a heat gun or hairdryer, gloves, and a gentle adhesive remover suited for your specific adhesive types. Knowing whether you’re dealing with water-based or solvent-based glue helps you pick the right solvent. You might also want sandpaper or a floor buffer for stubborn spots, but only if necessary. Having everything ready upfront saves you time and keeps your workspace organized, making the glue removal smoother and protecting your hardwood. Stick to your tools checklist, and you’ll be set to tackle the job with confidence and freedom.
Preparing the Hardwood Floor Surface

Preparing the hardwood floor surface properly is essential to guarantee effective glue removal and to protect your flooring from damage. Start by clearing the area of any furniture or rugs to give yourself full access. Next, focus on cleaning the surface thoroughly—sweep or vacuum to remove dust, dirt, and debris that could interfere with the removal process. Use a damp cloth with mild soap to wipe down the area, ensuring the floor is dry before proceeding. As you clean, take the time to carefully assess any damage caused by the glue or previous attempts to remove it. Look for scratches, discoloration, or weakened wood fibers so you can adjust your approach accordingly. This preparation step sets the foundation for a smooth and successful glue removal experience.
Testing a Small Area Before Full Application
Why should you test a small area before applying any glue removal method to your hardwood floor? Creating a test patch helps you observe the adhesive response without risking damage to the entire surface. By applying your chosen removal solution on a discreet spot, you can see how the glue reacts and whether the floor finish holds up. This simple step prevents unexpected discoloration, warping, or damage. It also lets you adjust your approach, saving time and effort. Make sure the test patch is representative of the affected area, and wait a few minutes to assess the results fully. Taking this precaution empowers you to proceed confidently, ensuring your hardwood floors stay intact while you work toward removing the glue effectively and safely.
Using Warm Soapy Water to Loosen the Glue

Start by mixing a few drops of mild dish soap into warm water to create a gentle cleaning solution. Apply the soapy water to the glue spot using a soft cloth, making sure to saturate the area without soaking the wood. Let it sit for several minutes to soften the glue before attempting to remove it.
Prepare Soapy Solution
One effective way to loosen glue on hardwood floors is by using a warm soapy water solution. Preparing solution correctly is key to softening the adhesive without damaging your floor. Start by mixing ingredients thoughtfully to maximize effectiveness.
Follow these steps for preparing solution:
- Fill a bucket with about two cups of warm water, not hot, to avoid warping the wood.
- Add a few drops of mild dish soap, guaranteeing the mixture is gentle yet effective.
- Stir the ingredients thoroughly until you see a light foam forming.
- Test the solution on an inconspicuous area to confirm it won’t harm the finish.
This simple preparation lets you tackle glue with freedom and confidence.
Apply and Wait
Although the soapy solution is gentle, you’ll want to apply it carefully to the glue spots and give it time to work. After the glue application, use a sponge or cloth dampened with warm soapy water and cover the area. Let it sit during the recommended wait time to soften the adhesive, making removal easier without harming your hardwood floors.
| Step | Action | Wait Time |
|---|---|---|
| 1 | Apply soapy solution | Immediately |
| 2 | Cover glue spot | 10-15 minutes |
| 3 | Check softness | Adjust as needed |
Patience during this wait time is key to loosening glue effectively, giving you freedom to clean without damage.
Applying Heat to Soften Stubborn Adhesive
When glue proves too stubborn to scrape off easily, applying gentle heat can soften the adhesive, making removal much simpler. Heat application loosens the bond, giving you more freedom to work without damaging your hardwood floor. Here’s how to do it effectively:
- Use a hairdryer or heat gun on low to medium settings to avoid overheating the wood.
- Hold the heat source a few inches above the glue spot, moving it slowly to distribute warmth evenly.
- Warm the glue for about 30 seconds until it becomes tacky and pliable, signaling glue softening.
- Avoid excess heat to prevent warping or discoloration of your floor’s finish.
This controlled heat method lets you tackle tough adhesive with confidence and care.
Using a Plastic Scraper to Gently Remove Glue
You’ll want to pick a plastic scraper with a thin, flexible edge to avoid scratching your hardwood floors. When scraping, hold the tool at a low angle and apply gentle pressure to lift the softened glue without gouging the wood. Taking your time and working carefully helps prevent any damage while effectively removing the adhesive.
Choosing the Right Scraper
Since hardwood floors can be easily scratched, selecting the right scraper is crucial for safely removing glue without damaging the surface. When considering scraper types and scraper materials, you want tools that balance effectiveness with gentleness. Here’s how to choose:
- Plastic scrapers – Ideal for delicate surfaces; they won’t gouge your hardwood.
- Metal scrapers – Use cautiously; they’re sharper but risk scratches.
- Rubber scrapers – Great for softer glue residues, minimizing floor harm.
- Ergonomic handles – Guarantee comfort and control during scraping.
Opting for a plastic scraper with an ergonomic grip usually offers the best freedom to remove glue thoroughly while protecting your floor’s finish. Remember, the right scraper material can make your task easier and safer, letting you restore your hardwood’s natural beauty with confidence.
Scraping Technique Tips
Selecting a plastic scraper with an ergonomic handle is a great start, but using the right technique makes all the difference in protecting your hardwood floor while removing glue. When applying scraping techniques, hold the scraper at a low angle and gently push forward to lift glue without gouging the wood. Avoid harsh, forceful movements; instead, use steady, controlled strokes.
Here are effective methods to keep in mind:
| Technique | Benefit |
|---|---|
| Low-angle push | Minimizes floor damage |
| Slow, steady strokes | Reduces glue residue |
| Frequent cleaning | Prevents buildup on scraper |
Using these scraping techniques guarantees a smooth, damage-free glue removal process, granting you freedom to restore your hardwood floor beautifully.
Preventing Floor Damage
Although it might be tempting to use metal tools for faster glue removal, opting for a plastic scraper helps prevent scratches and dents on your hardwood floor. Different glue types require gentle handling, and a plastic scraper offers enough firmness without damaging the surface. To protect your floor while tackling glue residue, follow these steps:
- Identify the glue type to choose appropriate solvents and methods.
- Hold the plastic scraper at a low angle to gently lift glue without gouging.
- Apply consistent, light pressure, avoiding sudden force that risks floor damage.
- After scraping, clean the area with a mild solution to maintain your floor’s finish.
This approach supports effective floor maintenance and keeps your hardwood looking flawless while removing glue safely.
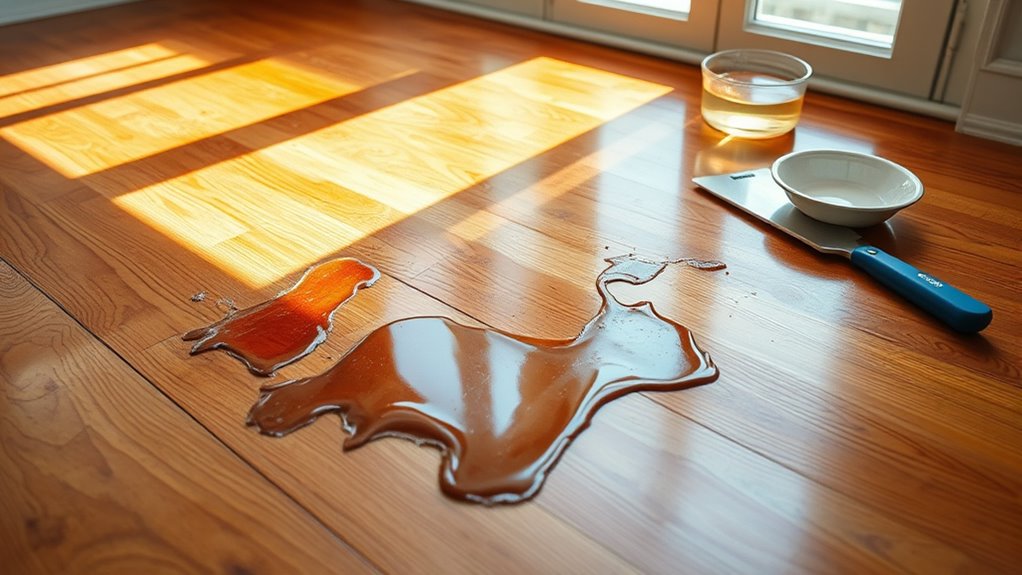
Cleaning Residue With Vinegar or Mineral Spirits
When you’ve removed most of the glue, you’ll likely notice some sticky residue left behind that needs cleaning. To tackle this, you can use a vinegar solution or mineral spirits, depending on your floor’s finish. Mix equal parts of white vinegar and warm water for a gentle vinegar solution. Dampen a soft cloth with it and gently rub the residue, avoiding soaking the wood. If the vinegar solution doesn’t do the trick, mineral spirits are a stronger option. Apply a small amount to a clean cloth and carefully rub the sticky spots. Always test mineral spirits on a hidden area first to verify it won’t damage the finish. Both methods help you dissolve and lift leftover glue without harming your hardwood, giving you freedom to restore your floor’s smooth surface.
Sanding and Refinishing the Affected Area
Once the glue residue is cleaned, you’ll need to choose the right sandpaper grit to avoid damaging your hardwood. Sand the affected area evenly using proper techniques to blend it smoothly with the surrounding floor. Finally, apply a matching finish and sealant to protect the wood and restore its original shine.
Choosing the Right Sandpaper
Selecting the right sandpaper grit is essential for effectively removing glue without damaging your hardwood floors. You want to balance aggressiveness with gentleness to preserve the wood’s integrity. Different sandpaper types and grits serve specific purposes in this delicate task.
- Start with a coarse grit (60-80) to break down thick glue layers.
- Move to a medium grit (100-120) to smooth the surface and remove residual glue.
- Use a fine grit (150-180) for final smoothing without scratching.
- Choose between aluminum oxide for durability or garnet for a smoother finish.
Proper Sanding Techniques
After choosing the right sandpaper grit, you’ll want to focus on how to sand the glue-affected area properly to avoid further damage. Start by using sanding tools like a hand sanding block or an orbital sander for even pressure. Use gentle, consistent strokes following the wood grain, preventing scratches or uneven surfaces. Begin with medium grit to remove glue residue, then switch to finer grit to smooth the area seamlessly. Keep the sanding tools moving to avoid creating low spots or burn marks. Don’t press too hard—let the sandpaper do the work. Clean the dust frequently to see your progress clearly. Mastering these sanding techniques guarantees you restore your hardwood’s natural beauty and maintain its durability, giving you the freedom to enjoy a flawless floor.
Applying Finish and Sealant
Even though you’ve carefully sanded the glue-affected area, you’ll need to apply the right finish and sealant to protect your hardwood floor and blend the repair seamlessly. Here’s how to proceed with applying finish and selecting sealant effectively:
- Clean the sanded area thoroughly to remove dust and debris for better adhesion.
- Choose a finish that matches your floor’s sheen—matte, satin, or gloss—to maintain consistency.
- Apply the finish evenly using a brush or applicator, following the wood grain to avoid streaks.
- Once dry, select a sealant that offers durability and moisture resistance, then apply it carefully to lock in protection.
Preventing Glue Damage in Future Projects
Although removing glue from hardwood floors can be challenging, taking steps to prevent glue damage in future projects will save you time and effort. Start with thorough project planning—identify areas where glue might spill or spread and cover them with protective materials like painter’s tape or plastic sheets. Choose adhesives specifically designed for hardwood floors, as they tend to be less damaging and easier to clean. During application, use minimal glue and apply it carefully to avoid excess. Incorporate preventive measures such as wiping up spills immediately and keeping cleaning supplies handy. By being proactive and intentional in your approach, you’ll protect your floors and maintain their natural beauty, giving you the freedom to complete your projects without worrying about stubborn glue stains or damage.


