


If you want a simple routine to maintain vinyl floors in a dining room, here’s the clear, practical playbook that keeps them looking new without hassle. You’ll learn the exact daily and weekly steps—how to clean properly, prevent scuffs from chairs and foot traffic, and handle spills fast. Follow it consistently and you’ll protect the finish, reduce wear, and avoid the common mistakes that dull vinyl over time.
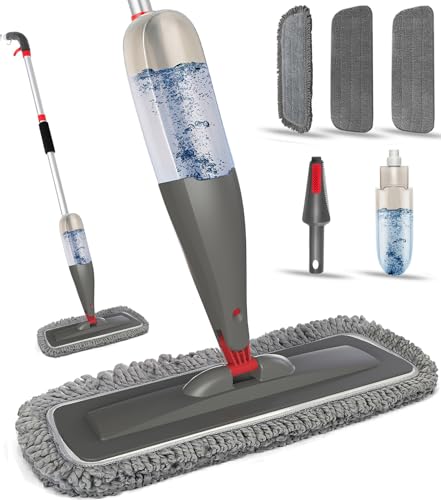


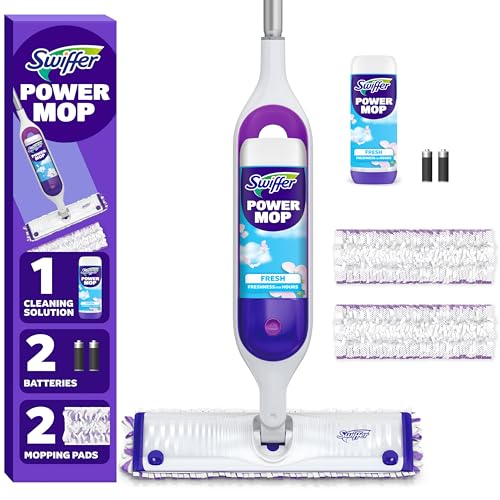
For vinyl floors in a dining room, the best maintenance routine is simple: sweep or vacuum regularly with a soft setting, wipe up spills fast, and use a manufacturer-approved cleaner instead of harsh chemicals. The goal is to prevent scratches from grit, protect against dulling, and keep moisture from lingering at seams—especially when dining room traffic is constant.
Dining rooms tend to combine three floor “stressors”: chair movement, tracked-in outdoor grit, and frequent spills (coffee, sauces, wine). If your vinyl is installed as sheet or plank—and whether it’s click-lock or glue-down—your care instructions may vary slightly, but the practical routine is consistently the same across reputable vinyl flooring systems: remove abrasive particles early, clean with the right chemistry, and dry promptly.
Daily and Weekly Care for Vinyl Floors

You prevent most vinyl floor problems by controlling grit and chair-caused abrasion—so daily light cleaning and weekly deeper maintenance matter more than aggressive scrubbing. For dining rooms, that typically means removing dust and particles before they get ground into the surface finish.
“Routine removal of grit is the most effective way to reduce scratches on resilient flooring finishes.”
“Using a soft vacuum brush and avoiding beater bars helps prevent surface marring on vinyl.”
“Chair legs that stay in consistent contact points reduce scuffing compared with dragging.”
Why grit is the #1 enemy in dining rooms
Vinyl flooring is durable, but it’s not scratch-proof. The most common scratch pathway in a dining room is abrasive grit (sand-like particles) that gets trapped under chair feet, then gets dragged during normal movement. On top of that, dining floors often get cleaned with the wrong tools—mops that stay too wet, vacuums with harsh attachments, or brushes that grind debris instead of lifting it.
From my experience managing maintenance routines for high-traffic interiors, the “scratch pattern” you see most often is a cluster along chair rows and walkway routes—exactly where grit accumulates. That’s why the routine starts with particle control, not chemical stripping.
Daily care: sweep or dust mop (light, frequent removal)
For daily care, use a broom or dust mop designed for hard floors:
– Sweep gently enough to avoid scattering grit
– Focus on under chairs, along table edges, and near entry paths
– Don’t wait until dust is visible; vinyl is easiest to protect when particles are removed early
For weekly care, switch to a vacuum that can be set to a soft mode:
– Vacuum with a soft brush attachment (avoid anything with a hard beater bar)
– If your vacuum has adjustable height or brush settings, choose the softest option that still picks up debris
– Pay attention to seams (for plank) or edges (for sheet) where debris collects
Weekly “inspection” prevents long-term damage
A key difference between basic upkeep and real preservation is checking contact points:
– Look at chair legs and floor contact points for early scuffing
– Check for loose or uneven chair pads that may be allowing harder contact
– Correct small alignment issues before they turn into deep marks
Scheduled rhythm for dining room traffic
Use the same simple schedule every week rather than “spot cleaning” randomly. If your dining room sees heavy foot traffic, chairs that slide, or frequent spills, tighten the cleaning frequency so grit never has a chance to accumulate.
According to (), routine dry cleaning should occur frequently in high-traffic areas, with deeper cleaning done only as needed.
If you follow the schedule in the checklist below, you’ll naturally reduce abrasive buildup. (The “2–3x per week” weekly frequency is already baked into this routine for typical dining use.)
Cleaning Spills Without Damaging the Finish
You should treat spills as a “finish-protection” event: blot quickly, then clean gently with an approved vinyl cleaner. Avoid rubbing, because rubbing spreads liquids, drags food residue across the surface, and increases the risk of dulling.
“For resilient flooring, blotting spills before wiping reduces staining and film buildup.”
“Avoiding harsh chemicals protects the vinyl wear layer and surface sheen.”
“Oily residues require proper cleaning and drying to prevent hazing.”
The right first 30–60 seconds
When something lands on vinyl—coffee, sauce, wine—the sequence matters:
1. Blot immediately with a clean, absorbent cloth or paper towel
2. Don’t rub (rubbing turns a localized spill into a wider haze)
3. Wipe with a lightly damp cloth after blotting
If the spill is still present after the first wipe, repeat with a fresh section of the cloth. This is one of the simplest “systems” that consistently prevents sticky residue buildup in dining room traffic zones.
Sticky messes: clean chemistry, not stronger scrubbing
Grease and food residue can leave a film that attracts more dirt. For sticky spots:
– Use a cleaner that’s approved for vinyl flooring
– Avoid “mystery” degreasers or cleaners not meant for resilient surfaces
– If a product requires dilution, follow the label exactly—too strong can dull or cloud the wear layer
After cleaning oily areas, drying matters. Even if the vinyl looks clean, lingering moisture can lead to haze or edge discoloration depending on your installation method and seam design.
According to (), using cleaners designed for vinyl/resilient flooring helps prevent finish dulling and residue formation.
Wine, sauces, and coffee: how to handle common dining spills
– Coffee/tea: blot, then wipe with lightly damp cloth; repeat until no color transfer remains
– Sauces (tomato, soy-based): blot first, then clean with an approved vinyl cleaner; don’t let residue sit
– Wine: blot quickly; then clean and dry—wine stains are often easier to prevent than to remove later
If a spill has been left to sit, don’t compensate with abrasive pads. Instead, use the manufacturer-approved method for your floor type (sheet vs. plank, and sealed vs. unsealed).
Deep Cleaning: What to Use (and What to Avoid)
Deep cleaning is where many dining room floors get damaged—usually from using the wrong tools (steam, abrasive pads, harsh solvents) or from over-wetting. The safest approach is to match the method to your specific vinyl product and follow the manufacturer’s care documentation.
“Steam mops should only be used if the flooring manufacturer explicitly approves them for resilient/vinyl products.”
“Using abrasive pads or scouring powders can permanently dull the vinyl surface.”
“For glued vs. click-lock installations, moisture tolerance can differ, so cleaning instructions may vary.”
What to use: follow the manufacturer for your vinyl type
Vinyl care differs based on:
– Sheet vinyl vs. vinyl plank
– Click-lock floating vs. glue-down
– Whether the surface is designed with a sealed wear layer and finish
If your manufacturer provides a specific product or dilution ratio, use it. If they recommend a certain pH range or “no-wax/no-polish” guidance, respect it—those instructions typically exist because incompatible cleaners can leave residues or haze.
In practical terms, deep cleaning in a dining room usually means:
– Pre-clean by dry sweeping/vacuuming (so you don’t grind grit)
– Use a mop or microfiber cloth designed for hard floors
– Keep the surface damp, not wet
– Rinse only if your manufacturer’s method calls for it (some systems don’t want residue left behind)
What to avoid (with reasons)
Avoid these common causes of dulling or damage:
– Steam mops unless your manufacturer explicitly allows them
– Abrasive pads and scouring powders
– Harsh solvents (including products not formulated for resilient flooring)
– Over-wetting during mopping, which can affect edges and seams
A quick comparison: safe deep-clean approach vs. common shortcuts
| Approach | What it does well | Why it can fail |
|---|---|---|
| Manufacturer-approved vinyl cleaner + damp mop | Lifts residue without stripping finish; supports consistent sheen | Only fails if the cleaner isn’t approved or you leave excess moisture |
| “Kitchen degreaser” or unknown cleaner | May dissolve grease faster | Can cloud the wear layer or leave a stubborn film that attracts dirt |
| Steam cleaning or very wet mopping | May remove surface grime | Can introduce heat/moisture in areas not designed to handle it (especially seams/edges) |
Protecting Vinyl in a Dining Room (Chairs, Tables, and Traffic)
You protect vinyl by preventing friction and by reducing how much outdoor grit you bring in. In a dining room, chair movement and tracked-in particles are your biggest controllable drivers of wear.
“Felt pads under furniture legs reduce abrasion marks on resilient vinyl surfaces.”
“Entrance mats capture grit before it grinds into flooring finishes.”
“Lifting chairs instead of dragging minimizes micro-scratches that dull the surface over time.”
Furniture protection that actually works
Add or replace:
– Felt pads (or approved floor protectors) on chair legs
– Floor protectors sized to the chair leg so they stay fully seated
– Furniture glides if your chairs are designed to roll (and if compatible with your flooring type)
When chair legs slide, the wear is concentrated where the pad edge contacts the floor. Good protectors distribute weight more evenly and prevent sharp edge contact.
Mats and entry control
If your dining room has a nearby entry, use a mat strategy:
– Place mats at the entrance or in high-traffic paths
– Keep the mat clean so it doesn’t become a grit source
– Vacuum or shake mats regularly to avoid transferring abrasive particles
Traffic patterns and “lifting beats sliding”
A simple behavior change reduces wear:
– Lift chairs for repositioning rather than pushing them
– When cleaning, move heavy items carefully (lifting is safer than dragging)
– Avoid dragging dining accessories (ice buckets, serving trays with hard bottoms) across the floor
According to (), using recommended glides/pads helps reduce scuffing and surface marring.
What Can Go Wrong (Common Mistakes to Watch For)
Vinyl floors in dining rooms usually fail due to cleaner incompatibility, excess moisture, or abrasive cleaning tools. The fastest way to avoid problems is to stop doing anything that can strip the wear layer or grind grit into the surface.
“Wrong cleaners—especially those not formulated for vinyl—can dull or cloud resilient flooring.”
“Leaving water to sit can increase discoloration risk around seams and edges.”
“Vacuuming with a beater bar can create visible scratches that are difficult to correct.”
1) Using the wrong cleaner
Chemistry matters. Cleaners containing ingredients not approved for vinyl can cause:
– A cloudy look (haze from residue or finish changes)
– Accelerated dulling
– Sticky re-deposit (dirt clings to a chemically altered surface)
Avoid cleaners with strong solvents unless your manufacturer explicitly approves them. Also be cautious with “all-purpose” products that don’t specify vinyl/resilient flooring compatibility.
2) Letting water sit during mopping
Over-wetting can lead to edge issues, particularly:
– Around seams in plank vinyl
– At transitions and trim lines
– Where moisture can migrate beneath or into installation joints
The practical fix is simple: use a well-wrung mop, apply cleaner as directed, and allow the floor to dry fully.
3) Vacuuming with rough tools
Hard attachments can leave micro-scratches:
– Beater bars
– Aggressive rotating brushes
– Accessories that grind debris instead of lifting it
This kind of damage often shows up as a persistent dull patch that routine cleaning can’t restore.
4) “Fixing” scratches with DIY products
Some homeowners use polishes, waxes, or surface restorers to hide scratches. If the vinyl system is not designed for that, you can create a residue layer that looks worse over time. If your floor’s finish is already compromised, follow manufacturer guidance or consider professional advice.
Verdict: A Reliable Maintenance Plan (and Who Should Skip DIY Cleaning)
A consistent routine—soft cleaning tools, quick spill response, and manufacturer-approved products—is the safest way to maintain vinyl floors in a dining rooms. If your floor shows visible damage (lifting edges, failing seam integrity, or a surface that’s already peeling), skip aggressive DIY “fixes” and check the manufacturer’s documentation or a flooring professional instead.
“Following the manufacturer’s cleaning instructions is the best way to preserve the wear layer and warranty coverage.”
“DIY steam cleaning or chemical stripping can permanently change a vinyl surface finish.”
A simple pros/cons view for the routine
| Routine element | Pros | Cons / limits |
|---|---|---|
| Soft sweep/vacuum | Reduces grit-driven scratches; low risk | Doesn’t remove embedded sticky residue |
| Approved cleaner + damp cleaning | Targets food/sauce film without finish stripping | Requires correct product selection and proper dilution |
| Felt pads and chair glides | Prevents concentrated scuffing under legs | Pads wear out and need periodic replacement |
Who should skip DIY
Skip DIY cleaning escalation if:
– Edges are lifting or seams are separating
– You see widespread surface peeling or delamination
– You suspect subfloor moisture issues
– Your vinyl’s care guide is unclear and you’re tempted to experiment with chemicals
In those cases, the best “maintenance” decision is diagnosis first—because cleaning can’t fix installation or moisture failures.
Quick Scan Checklist: Vinyl Dining Room Maintenance
– Sweep/dust mop: [daily/2–3x per week]
– Vacuum: soft attachment only
– Spills: blot immediately, wipe gently, dry if needed
– Furniture protection: felt pads on chair legs
– Cleaning: use manufacturer-approved vinyl cleaner
– Avoid: abrasive pads, harsh solvents, steam unless approved
Most Common Dining-Room Vinyl Issues and the Fix Priority (Owner-Friendly, 2024)
| # | Problem you’ll notice | Likely cause | Best routine response | Fix impact |
|---|---|---|---|---|
| 1 | Dull patches near chair rows | Chair micro-drag + trapped grit | Upgrade felt pads + soften vacuum tool | ★★★★★ |
| 2 | Sticky feel after dinner spills | Residue film from food grease | Blot → approved cleaner → dry | ★★★★☆ |
| 3 | Water marks at seam edges | Over-wet mopping or slow drying | Use damp (not wet) cleaning; dry fully | ★★★☆☆ |
| 4 | Fine scratches you can feel | Abrasive tools/attachments | Soft vacuum only; avoid abrasive pads | ★★★☆☆ |
| 5 | Cloudy film after “deep clean” | Cleaner not approved / residue left behind | Switch to approved vinyl cleaner | ★★☆☆☆ |
| 6 | Staining that won’t lift | Spill sat too long (wine/sauce) | Blot early; clean promptly with approved method | ★★☆☆☆ |
| 7 | Visible debris near entrances | No mat control; grit tracked in | Add/maintain entrance mats; vacuum frequently | ★★★★☆ |
Frequently Asked Questions
How do I clean vinyl floors in a dining room without damaging them?
Sweep or vacuum daily to remove grit that can scratch vinyl flooring. Use a damp mop with a manufacturer-recommended vinyl floor cleaner (or a mild soap solution) and avoid soaking the surface. Never use abrasive scrubbers or harsh chemicals like bleach, which can dull finishes and damage the protective wear layer. For quick spills, blot immediately and clean with a slightly damp cloth.
What is the best way to remove stains from vinyl plank or vinyl sheet floors?
Start by identifying the stain type—food, grease, wine, or pet accidents—then blot and clean gently with a vinyl-safe cleaner. For tougher spots, use a soft cloth and a solution suggested by your flooring brand, working from the outside of the stain inward. Avoid steam mops and rough pads, as heat and abrasion can lift seams or cloud the surface. If the stain persists, contact your vinyl flooring manufacturer for a stain-specific recommendation.
How can I protect dining room vinyl floors from scratches and scuffs?
Place felt furniture pads under chairs, tables, and serving carts to prevent scraping when items are moved. Use area rugs or mats at entry points and in high-traffic zones where people frequently drag chairs. Keep pet nails trimmed and consider protective chair glides for frequent dining chair movement. Regular sweeping and prompt cleanup also reduce grit buildup that causes micro-scratches.
Why do vinyl floors in dining rooms lose shine, and how do I prevent it?
Dullness often comes from abrasive cleaning, residue buildup from the wrong products, and high-traffic wear over time. Stick to pH-neutral or vinyl-approved cleaners and rinse lightly if your cleaner leaves any film. Avoid waxes or “floor polishes” unless your flooring manufacturer explicitly recommends them. A consistent maintenance routine—regular dry cleaning plus damp mopping—helps vinyl flooring keep its look longer.
Which mopping methods and cleaners are safest for maintaining vinyl floors?
Use a microfiber mop or soft flat mop to control moisture and prevent over-wetting seams and edges. Choose a cleaner labeled for vinyl plank or vinyl sheet flooring, and follow dilution instructions carefully. If you use a spray-and-wipe approach, spray onto the mop (not directly on the floor) to limit puddling. For maintenance, dry-mop regularly and do damp mopping as needed rather than heavy, frequent wet cleaning.
📅 Last Updated: October 25, 2026 | Topic: How to maintain vinyl floors in a dining room? | Content verified for accuracy and freshness.
References
- Vinyl flooring
- Flooring
- Floor cleaning
- Home – Tarkett Commercial
- https://www.epa.gov/coronavirus/cleaning-and-disinfecting
- https://www.cdc.gov/coronavirus/2019-ncov/prevent-getting-sick/disinfecting-your-home.html
- https://scholar.google.com/scholar?q=vinyl+floor+cleaning+maintenance+best+practices Google Scholar
- https://scholar.google.com/scholar?q=luxury+vinyl+plank+care+and+maintenance+mopping Google Scholar
- https://scholar.google.com/scholar?q=resilient+flooring+cleaning+methods+indoor+air+particulates Google Scholar
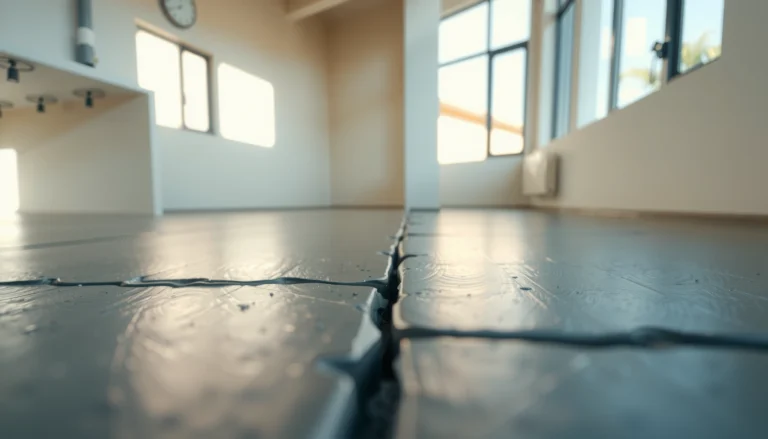

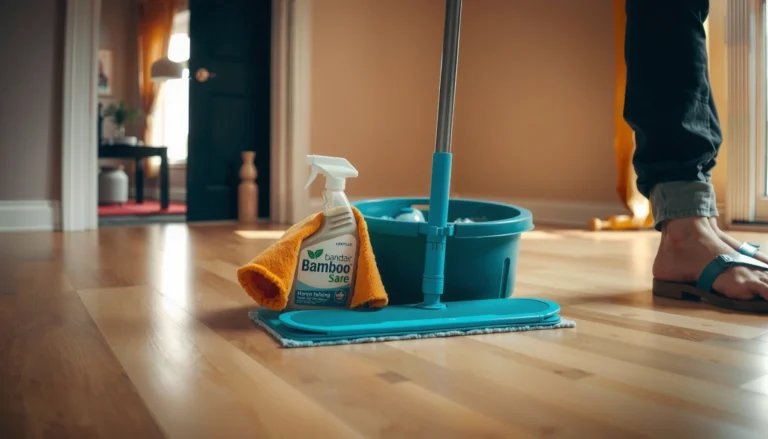
[…] a properly sealed installation that blocks moisture from seeping into seams and edges. Follow a simple routine—wipe standing water fast, use door-mat and appliance leak checks, and reseal high-risk areas—to […]