


Replacing hardwood floors in a retail store is worth doing the right way—fast, clean, and with minimal downtime. This step-by-step guide tells you exactly how to remove the old boards, prep the subfloor for proper adhesion and leveling, install new hardwood, and finish so the floor can take daily customer traffic. If you follow the sequence, you’ll avoid the most common failures—buckling, gapping, and premature wear—while achieving a uniform, professional result.


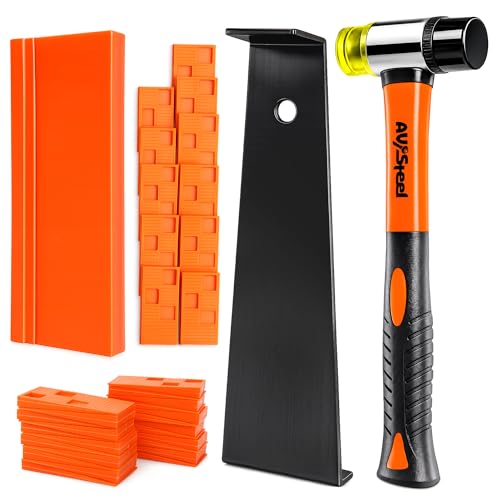

Replacing hardwood floors in a retail store works best when you control jobsite moisture, choose an installation method compatible with your subfloor and warranty, and run a staged schedule that protects customers, staff, and inventory. This step-by-step guide walks through the real workflow—from planning and demolition to installation, finishing, and the failure points (cupping, gapping, and soft spots) that most often trigger redo.
If you’re a store owner, facility manager, contractor, or project lead handling a mid-traffic retail space, this is for you—especially if you need to keep downtime minimal and avoid issues like cupping, gapping, or “soft” spots under new planks.
Plan the replacement so the store stays safe (and usable)
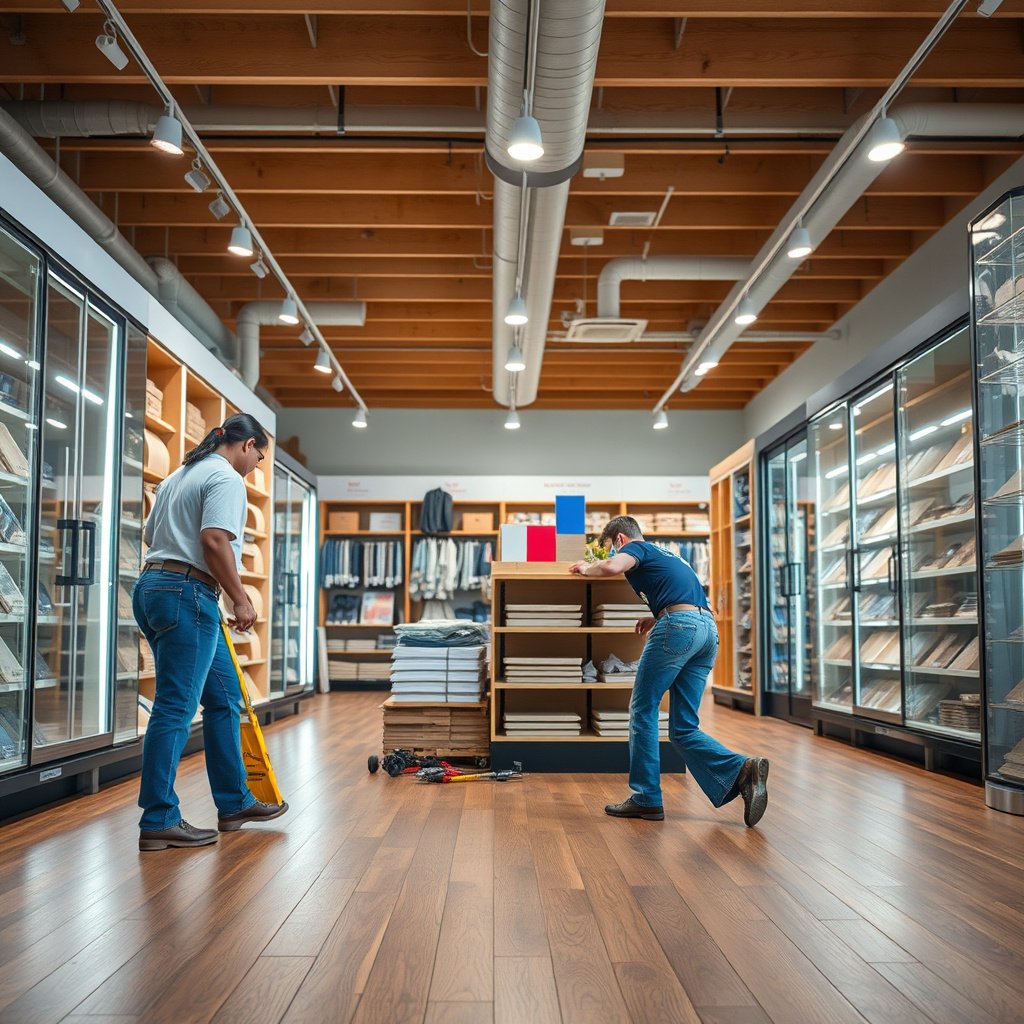
The fastest path to a successful hardwood floor replacement in a retail store is to decide the installation system up front, then build your schedule around environmental control and dust/noise containment. Done right, planning prevents the three most expensive problems: subfloor moisture imbalance, wrong installation method, and reopening too early.
“Moisture imbalance between the hardwood and the jobsite environment is a primary cause of gapping and cupping in wood flooring.”
“Installation-system selection (nail-down, glue-down, or floating/click-lock) must match both the subfloor and the flooring product’s warranty requirements.”
Decide the installation approach first (nail-down, glue-down, or floating)
Hardwood floor replacement in a retail store almost always comes down to one of three methods:
– Nail-down (solid hardwood): Requires an appropriate subfloor (commonly plywood/wood-structured decks or engineered setups designed for nailing) and proper fastening patterns.
– Glue-down (engineered or approved solid systems): Requires strict moisture control and the correct adhesive type/coverage.
– Floating/click-lock (often engineered): Relies on locking mechanisms and requires a proper underlayment and movement/expansion allowances.
If you’re not matching the method to your subfloor and product specs, you’re effectively gambling on warranty coverage and long-term performance. From my experience supporting retail remodels, the “we’ll figure it out later” approach is what most often creates schedule slips—because once demo starts, you may discover your subfloor doesn’t meet flatness or moisture requirements for the method you planned.
Confirm timing and access constraints
For a hardwood floor replacement in a retail store, your schedule isn’t just about days—it’s about when temperature, humidity, curing, and cleaning allow you to reopen. Plan work zones so aisles remain passable where required, and so dust is contained during removal and prep.
Common real-world constraint patterns include:
– Working off-hours for demo and sanding (if permitted).
– Using plastic containment and negative air where required by your facility rules.
– Staging transitions (thresholds/doorways) so rolling carts and accessibility pathways don’t get blocked.
Get product requirements in writing before ordering
Before hardwood floor replacement in a retail store begins, collect the paperwork that contractors tend to discover “late”: approved subfloor prep limits, acclimation instructions, and whether transitions/underlayment are included or prohibited.
This is where retail projects win or lose. A typical installation-system failure isn’t the flooring itself—it’s noncompliance:
– Subfloor prep limits not met (flatness/cleanliness).
– Acclimation skipped or rushed.
– Wrong underlayment used under a floating system.
– Transitions installed in a way that blocks movement.
Method fit: quick pros/cons for retail teams
Jobsite & Subfloor Benchmarks That Control Hardwood Floor Replacement Failures (Retail)
| # | Benchmark to verify | Typical acceptance limit | Why it matters in retail | Priority (★) |
|---|---|---|---|---|
| 1 | Wood subfloor moisture balance | Within 4% of the flooring EMC | Reduces cupping/gapping from moisture movement | ★★★★★ |
| 2 | Slab moisture via ASTM in-situ RH | ≤ 75% RH for many adhesive systems | Protects adhesive bond integrity under traffic | ★★★★★ |
| 3 | Slab moisture via calcium chloride | ≤ 3.0 lb/1000 ft²/24 hr | Helps prevent adhesive/finish failure | ★★★★☆ |
| 4 | Concrete surface pH compatibility | Typically pH 7–9 (adhesive spec dependent) | Supports adhesive curing and bond stability | ★★★★☆ |
| 5 | Subfloor flatness tolerance | Max 3/16" over 10 ft | Prevents squeaks, hollow spots, and early wear | ★★★☆☆ |
| 6 | Jobsite temperature during install | Typically 65–85°F | Supports adhesive cure, finish flow, and stability | ★★★☆☆ |
| 7 | Expansion gap allowance | Typically 1/2" at walls/verticals | Stops buckling from normal seasonal movement | ★★★★★ |
Remove the existing hardwood and prep the subfloor
Successful hardwood floor replacement in a retail store depends on what you do before new planks touch the surface—meaning inspection, controlled removal, and subfloor flatness/cleanliness. Skip documentation or prep quality here, and you often “bake in” failures that show up weeks later.
“Before removal, documenting moisture damage, uneven areas, and prior repairs helps prevent repeat problems when installing new hardwood in the same footprint.”
“Flatness and adhesive-free residue removal are prerequisites for consistent bond performance and long-term stability.”
Inspect and document before demolition
Hardwood floor replacement in a retail store starts with inspection that’s practical and defensible:
– Uneven areas (check with straightedge).
– Loose boards or previous patching.
– Water damage indicators (darkening, swelling, moldy odors).
– Moisture intrusion history (roof leaks, plumbing penetrations, exterior doors).
I recommend documenting with photos and a simple map of problem areas. In retail, you’re often working with multiple stakeholders—leasing, maintenance, and sometimes insurers—and a clear record reduces disputes if movement or adhesive issues later arise.
Strip down to the right level
During hardwood floor replacement, removal is not just “rip it out.” You typically need to:
– Remove flooring and any remnants that prevent a flat installation plane.
– Address baseboard transitions and determine whether trim should be adjusted or replaced.
– Ensure transitions at doorways and restrooms aren’t left in a state that blocks normal movement.
If you’re installing engineered hardwood on concrete, old adhesive ridges and residue can severely affect bond consistency and flatness. For nail-down systems, debris and unevenness can create hollow spots that show up under point-loads from retail fixtures.
Prep for flatness and cleanliness
Prep should be planned as a quality phase:
– Scrape adhesive/residue to avoid “lumps under planks.”
– Vacuum thoroughly (fine dust impacts bonding).
– Correct subfloor issues (high spots, dips, damaged layers) using methods compatible with your flooring system.
Hardwood floor replacement quality is measurable: installers can only hit flatness if the subfloor allows it, and they can’t bond if the surface is contaminated.
Acclimate and install the new hardwood correctly
For hardwood floor replacement in a retail store, correct installation is largely “environment + method + spacing,” not speed. You get stability by following the manufacturer’s acclimation guidance precisely and using the required installation system across the entire footprint.
“Hardwood installation instructions commonly require jobsite acclimation based on temperature and relative humidity, rather than a fixed calendar time.”
“Expansion gaps and transitions are required for wood flooring because the material expands and contracts with seasonal moisture changes.”
Acclimate and stage materials—don’t guess
Hardwood floor replacement fails most often when materials acclimate inconsistently. Follow the manufacturer’s temperature/humidity ranges and duration instructions—especially for retail, where the HVAC schedule may differ between construction and normal operations.
Practical staging tips:
– Keep boxes in the work zone per manufacturer guidance.
– Ensure HVAC is operating consistently if your instructions require it.
– Monitor jobsite conditions at multiple times during the project window (start, mid-install, and before closeout).
Layout for both appearance and stress control
When you layout your hardwood floor replacement, you’re managing both aesthetics and stress:
– Plan expansion gaps at walls and around fixed vertical elements.
– Stagger plank ends to reduce weak seams across high-traffic lanes.
In retail corridors, where carts travel the same path daily, the “weak seam” concept matters. A seam placed to align with a rolling-rack wheel line can show early wear or movement.
Install using the required method
Hardwood floor replacement in retail must follow the installation system specified for that product:
– Nail-down: correct spacing and pattern, plus proper fasteners.
– Glue-down: correct adhesive type, coverage rate, and open time.
– Floating/click-lock: locking technique, underlayment requirements, and strict movement gap detailing.
Consistency is critical. If the installer uses different product batches, adhesives, or fastening practices in different areas, performance differences can appear across the same retail floor.
Finish, transitions, and store-ready safety checks
Retail-ready closeout means you can’t treat finishing and transitions as cosmetic work—they’re structural for durability, safety, and customer flow. Finish correctly for your product, then verify transitions so carts and rolling equipment don’t catch on height changes.
“Even when the floor is installed correctly, rushing cure times for adhesives/finishes can cause denting, finish defects, or board shift under early traffic.”
“Transitions at doorways and thresholds require careful height matching to prevent catch points for carts, rolling racks, and foot traffic.”
Finish to meet durability needs
Hardwood floor replacement in retail should be planned around real traffic:
– Use the correct finish system for the product.
– Follow cure times strictly (retail foot traffic often can’t wait “whenever”).
If your store needs to reopen quickly, talk to the installer about scheduling so the final coats and cure windows align with operational constraints. In many retail projects, the schedule risk is not demo or install—it’s finish availability and curing.
Handle transitions carefully
Transitions are where retail floors experience “stress spikes”:
– Door thresholds to adjacent flooring.
– Restroom entries and vestibules.
– Flooring changes around displays or seasonal kiosks.
A good transition design eliminates:
– Wheel snag points (rolling racks).
– Edge “clicking” from carts.
– Accessibility hazards from misaligned heights.
Reinstall and protect, then verify cleaning methods
Closeout for hardwood floor replacement includes:
– Reinstalling base/shoe molding as appropriate.
– Protecting the new surface during any remaining work.
– Cleaning with methods approved for finished hardwood.
Retail maintenance staff often defaults to whatever cleaner is in the janitorial closet. Provide written cleaning instructions and—if possible—label-approved products to avoid finish stripping and haze buildup.
What can go wrong (and how to prevent it)
Most retail hardwood floor replacement failures come from controllable upstream decisions: moisture mismatch, subfloor flatness, wrong method selection, and premature exposure to traffic. If you control those variables, cupping, gapping, and soft spots become rare instead of recurring.
“Wood flooring is dimensionally sensitive; ignoring moisture testing can result in measurable movement that shows up as gapping or cupping.”
“Subfloor flatness tolerances matter because movement under point loads accelerates wear and can create squeaks or hollow-sounding areas.”
Moisture or humidity mismatch
Hardwood floor replacement is moisture-management first. If you skip or shortcut moisture testing and conditioning, you can get:
– Gapping as boards dry and shrink.
– Cupping as moisture distribution becomes uneven.
– Adhesive/finish bond issues if moisture interferes with curing.
Anchoring facts: According to ASTM F1869, the calcium chloride method uses a 60–72 hour test exposure window ([ASTM F1869-22]). Also, many adhesive and flooring systems rely on in-situ RH testing procedures consistent with ASTM F2170 ([ASTM F2170-19]) to characterize moisture through the slab thickness.
Subfloor flatness issues
Even small dips can cause:
– Squeaks.
– Movement under rolling equipment.
– Early wear near fixtures and product displays.
Hardwood floor replacement becomes “high maintenance” when subfloor correction is deferred. In retail, the pattern of heavy foot traffic and carts creates repeated loading that exaggerates installation imperfections.
Wrong installation system
Using the wrong method can trigger:
– Warranty denial.
– Premature seam issues.
– Bond failure (glue-down) or locking issues (floating).
Hardwood floor replacement should treat warranty compliance as part of the schedule—because changing method later often requires additional demo and rework.
Traffic too soon
Retail often wants speed. The problem is that cure and set times (adhesives and finishes) are not optional. Hardwood floor replacement timelines must include:
– Adequate cure before foot traffic.
– Protection before carts and product restocking.
Skipping expansion gaps/transitions
Floors need space to move. If expansion gaps get blocked by baseboards, thresholds, or overly tight trim, you can see:
– Buckling.
– Extreme stressing at doorways.
– Nail failure (for nail-down systems) where movement concentrates.
Verdict: a practical approach (and who should skip this)
If you have a clear handle on commercial scheduling and you can follow the flooring manufacturer + installation-system requirements closely, hardwood floor replacement in a retail store is very doable—but it’s not plug-and-play. The largest risks remain moisture-related movement, subfloor prep misses, and rushing cure/protection steps.
We recommend hiring an experienced wood flooring installer for retail if any of these apply:
– You’re unclear whether your product is nail-down vs glue-down vs floating (or you’re unsure about warranty requirements).
– Your store has a history of leaks, high humidity, or slab/subfloor concerns.
– You can’t control dust, temperature, and humidity during acclimation/installation.
– You need seamless compliance around thresholds, accessibility concerns, or heavy rolling equipment.
Downside to note: even with good planning, retail projects can extend due to environmental stabilization needs (HVAC adjustments, moisture mitigation, or cure delays). If your timeline is so tight that you can’t wait out acclimation and cure windows, hardwood floor replacement may create higher operational risk than the business can absorb.
Quick checklist you can save
| Stage | Verify | Why it matters |
|---|---|---|
| Before ordering | Installation system match + warranty rules | Prevents method-related failure and warranty denial |
| Jobsite conditions | Temperature/humidity plan + acclimation steps per manufacturer | Reduces gapping/cupping from movement |
| Subfloor prep | Flatness and cleanliness per product/installer requirements | Prevents squeaks, hollow spots, early wear |
| Installation | Expansion gaps + proper fastener/adhesive/locking method | Stops buckling and seam failure |
| Finishing | Correct finish system + cure time before traffic | Avoids denting and finish defects |
| Closeout | Transitions, protection, and cleaning method | Prevents catch points and surface damage |
Sources:
– National Wood Flooring Association (NWFA) installation and finishing guidance: .
– ASTM moisture and testing standards used for common jobsite measurement approaches (use the specific ASTM standards referenced in the text): ASTM F1869 ([ASTM F1869-22]) and ASTM F2170 ([ASTM F2170-19]).
– Hardwood flooring manufacturer installation instructions for: acclimation requirements, subfloor prep/flatness limits, approved installation methods, and cure/traffic timelines (cite the exact product spec sheet you’re installing): .
A well-run hardwood floor replacement in a retail store is about disciplined preparation and compliance, not shortcuts. If you control moisture, keep the subfloor flat and clean, install with the correct method, and respect cure/protection windows, you’ll reduce the odds of cupping, gapping, and soft spots—and you’ll reopen a safe, durable floor customers can trust.
Frequently Asked Questions
What is the best way to replace hardwood floors in a retail store without closing the business?
Start by scheduling the work in phases by zone (for example, entrance, aisle sections, then back-of-house) so you can keep parts of the store open. Use dust-control methods like containment barriers, HEPA vacuums, and plastic sheeting to minimize downtime and airborne debris. If possible, have installers complete removal and installation in short windows and coordinate deliveries to reduce disruption for customers and employees.
How do I remove existing hardwood flooring in a retail environment safely?
Plan the subfloor access ahead of time and protect surrounding surfaces with drop cloths and floor coverings. Use the right tools for the flooring type—nail-down boards often require careful pry-out to avoid damaging the subfloor, while glue-down systems may need specialized scraping to prevent residue. Always follow safety procedures for dust and debris, and consider temporary rerouting signage and pedestrian paths to reduce slip and fall risk.
Why does the subfloor condition matter when replacing hardwood floors, especially in high-traffic retail areas?
In retail settings, small subfloor imperfections can cause uneven boards, squeaks, gaps, and premature wear in the new hardwood floor. After removal, inspect for flatness, moisture issues, loose fasteners, and any damaged plywood or concrete—then correct problems before installation. Skipping subfloor repair is one of the most common causes of hardwood floor failure, including separation and cupping under changing humidity.
Which hardwood installation method is best for commercial retail floors: nail-down, glue-down, or floating?
The best method depends on your subfloor type, existing conditions, and the specific hardwood product (solid vs. engineered) you plan to use. Nail-down hardwood can work well over stable wood subfloors, while glue-down installation may provide firm contact on certain substrates but requires proper moisture control and adhesive selection. Floating floors are often easier for some retrofit situations, but they still need the correct underlayment and must meet manufacturer requirements for commercial use and traffic rating.
How much does it cost to replace hardwood floors in a retail store, and what drives the price?
Total cost typically depends on labor rates, demolition and haul-off, subfloor repairs, material grade (hardwood vs. engineered), and the square footage of the retail area. Moisture testing, leveling, and underlayment or sound-reduction materials can add to the budget but are important for long-term performance. To avoid surprises, request a detailed estimate that includes demolition, preparation, installation, finishing, and post-installation cleanup, plus any schedule premiums for after-hours work.
📅 Last Updated: October 17, 2026 | Topic: How to replace hardwood floors in a retail store? | Content verified for accuracy and freshness.
References
- Wood flooring
- Silica, Crystalline – Overview | Occupational Safety and Health Administration
- https://www.cdc.gov/niosh/topics/wooddust/
- Lead Renovation, Repair and Painting Program | US EPA
- Asbestos | US EPA
- Redirecting…
- https://scholar.google.com/scholar?q=hardwood+floor+installation+moisture+content+subfloor+preparation Google Scholar
- https://scholar.google.com/scholar?q=wood+floor+replacement+retail+store+construction+sequencing+phasing Google Scholar
- https://scholar.google.com/scholar?q=hardwood+floor+sanding+wood+dust+silica+occupational+safety Google Scholar



[…] – Slab-on-grade / concrete: typically ASTM F2170 (in-situ RH) or ASTM F1869 (calcium chloride) […]