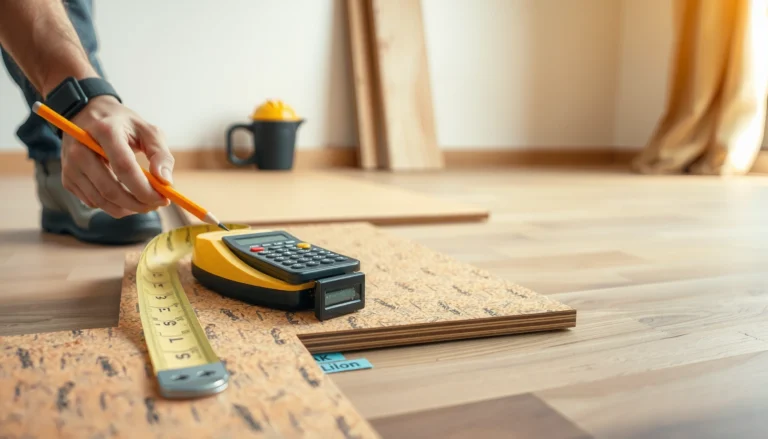
Yes—you can install hardwood floors in your living room if you measure carefully, prep the subfloor properly, and follow the manufacturer’s fastening (nail-down), glue-down, or floating/click-lock instructions. This step-by-step guide shows how to plan the layout, verify subfloor readiness, install row-by-row, and finish so the floor stays stable and looks straight.




A living room is often a large, open space with noticeable foot traffic, so small errors (like poor flatness, missing expansion gaps, or rushing acclimation) show up faster. This guide also helps you choose the right approach—nail-down, glue-down, or floating—based on your hardwood type and job-site conditions.
Prep the room and choose your installation method

You’ll get the smoothest, longest-lasting hardwood floor when you confirm the installation method first and then prep the room to match that method’s requirements. In other words, you don’t “wing it” with hardwood flooring—you align product-specific instructions, humidity conditions, and transition details before the first board goes down.
According to the National Wood Flooring Association (NWFA), hardwood flooring performance depends on matching installation method and site conditions—especially moisture and acclimation—before fastening or gluing.
According to NWFA guidance, leaving correct perimeter expansion space is essential to prevent buckling as wood flooring moves with seasonal humidity.
– Confirm your hardwood type (nail-down, glue-down, or floating/click-lock), since the steps and tools differ.
– Plan around doorways, vents, and transitions so your seams land where they’ll look intentional.
– Acclimate the flooring per the manufacturer’s guidance before installation (details vary by product).
Confirm the hardwood type before you buy tools (and time)
Nail-down and glue-down hardwood flooring require different subfloor conditions and different “failure modes,” so start by identifying what you actually have:
– Nail-down hardwood (solid hardwood in many cases): boards are fastened through the tongue/groove using approved nails/staples and a method-specific nailing schedule.
– Glue-down hardwood (engineered or solid depending on product): boards are bonded to the subfloor with a manufacturer-approved adhesive and spread rate.
– Floating/click-lock hardwood: boards interlock over an underlayment system; they should not be rigidly fastened to the subfloor.
If your living room has a lot of furniture movement, wide temperature swings (big windows), or a hallway transition, floating/click-lock is often easier to execute precisely—provided you use the correct underlayment and vapor barrier where required.
Acclimate the hardwood flooring to the living room climate
Acclimation is not just “letting boards sit in the room.” It’s about bringing the hardwood flooring to job-site conditions (temperature and indoor relative humidity) so expansion/contraction is minimized after installation.
For anchorable, documented numbers, NWFA commonly references:
– ~72 hours of acclimation for many installations, while still requiring you to follow the *exact* manufacturer requirements for your specific product.
– Keeping indoor conditions within a controlled range (often ~35–55% relative humidity in wood flooring guidance) helps stabilize hardwood flooring after the living room is occupied.
According to NWFA wood flooring installation guidance, job-site moisture conditions and acclimation directly affect how much hardwood flooring moves after installation.
According to NWFA, indoor relative humidity control supports dimensional stability of wood flooring across seasons.
Plan transitions before the first row
In a living room, your hardwood flooring usually meets at least one of these:
– door thresholds
– HVAC vents
– adjacent hallways or bedrooms
– tile or stone floors
Transitions aren’t aesthetic details—they’re how you manage movement. If you plan seams and thresholds too late, you can end up with a “tight” fit that blocks expansion, or a seam placed where it will flex under traffic.
Check and prepare the subfloor
You’ll avoid the majority of hardwood flooring problems by treating subfloor readiness as the main project, not the finishing step. For nail-down and glue-down installations, a weak or out-of-flat subfloor can lead to squeaks, joint separation, and adhesive or fastener stress.
According to NWFA, a structurally sound and clean subfloor is required for stable hardwood flooring installation.
According to NWFA guidance, flatness affects whether hardwood flooring locks properly (floating) or bonds/fastens without gaps and stress.
– Ensure the subfloor is clean, dry, and structurally sound—repair any loose boards or weak spots first.
– Verify flatness; uneven areas cause gaps, squeaks, or telegraphing through the boards.
– Address moisture issues early; hardwood failures commonly trace back to subfloor moisture problems.
Clean, secure, and repair before you measure twice
Start with the basics:
– Remove paint overspray, adhesive residue, drywall dust, and loose debris.
– Tighten or replace squeaky or springy boards (wood subfloors).
– For concrete slabs, verify the surface is properly cured and free of contaminants.
If you’re installing floating/click-lock hardwood, debris under underlayment can still cause point pressure, which translates into noise and joint stress.
Check flatness (this is where “straight” becomes real)
Hardwood flooring needs a flat surface to sit and perform correctly. A commonly referenced target is:
– Maximum 3/16″ variation over 10 feet for wood subfloors in many NWFA-aligned installation practices.
According to NWFA-aligned installation practices, subfloor flatness around **3/16 inch over 10 feet** helps prevent hardwood flooring gaps and noise.
In my experience, the best “trick” is not re-checking flatness at random—it’s focusing on areas you’ll later cover (under doorways, around vents, and near furniture load paths). Once hardwood flooring is down, correcting those spots is far more disruptive.
Control moisture before hardwood flooring touches anything
Moisture is the silent killer for hardwood flooring, especially in living rooms where seasonal HVAC changes can be significant. For concrete slabs, professionals typically use moisture testing methods such as:
– ASTM F2170 (in-situ relative humidity probes), or
– ASTM F1869 (calcium chloride method, when appropriate)
Many adhesive systems have a maximum acceptable slab moisture limit—often referenced around 75% RH in industry applications when using ASTM F2170, but you must follow your adhesive and flooring manufacturer limits.
According to ASTM F2170 and NWFA-aligned guidance, in-situ relative humidity testing is used to determine whether concrete moisture levels are compatible with installing hardwood flooring.
Plan the layout and establish reference lines
You’ll get the cleanest look when you plan board direction, seam placement, and perimeter expansion space before cutting. Layout planning also reduces waste and prevents narrow “sliver” pieces that look off in a living room.
According to NWFA guidance, expansion gaps around the perimeter protect hardwood flooring as it expands and contracts.
According to NWFA-aligned layout practices, reference lines help keep hardwood flooring straight and reduce cumulative errors row-by-row.
– Determine your board direction (usually toward the longest sight line) to minimize visual seams.
– Use a chalk line and layout measurements to keep rows straight and reduce narrow sliver boards at the walls.
– Maintain required expansion space around the perimeter and at fixed objects (base cabinets, posts, fireplace trim).
Choose the board direction for the way people see the room
A living room is typically viewed from entry points and common seating areas. Most installers run hardwood flooring in the direction of the longest, uninterrupted sight line so seams are less noticeable.
Use reference lines to control the “drift”
Even when the room is square-ish, walls can be out of alignment. Using:
– a tape measure and consistent starting dimension
– a chalk line for the first reference row
– a “dry fit” or test cuts for the first few rows
…prevents drift—where row lines slowly skew farther away from your starting point.
Leave the right expansion gap everywhere it matters
Hardwood flooring needs room to move. Expansion gaps should exist:
– around the perimeter
– at pipes and fixed protrusions
– at transitions (doorways, thresholds, tile interfaces)
For documented guidance, many installation instructions align with expansion gaps commonly around:
– ~1/2 inch for solid hardwood and
– ~1/4 inch for engineered hardwood
…but always follow your exact manufacturer specification because products vary by construction and width.
According to NWFA guidance and common manufacturer instructions, solid and engineered hardwood flooring typically require different perimeter expansion gap sizes to maintain dimensional stability.
Visual planning data table: job-site checks that prevent failures
7 Job-Site Checks That Protect Hardwood Floors (Field-Ready Targets)
| # | Check | Acceptance target | Typical method | If skipped |
|---|---|---|---|---|
| 1 | Acclimate hardwood flooring | Follow manufacturer conditions; NWFA often cites ~72 hours for many installs | Time + controlled indoor HVAC | Excess movement, gapping, or cupping later |
| 2 | Control indoor humidity | Aim for typical wood-floor targets (~35–55% RH guidance) | Hygrometer + HVAC settings | Seasonal swelling/shrinking stress |
| 3 | Verify subfloor flatness | Common target: ≤3/16 in over 10 ft (NWFA-aligned) | Straightedge/level + tape checks | Gaps, squeaks, joint stress |
| 4 | Confirm subfloor dryness (wood) | Moisture content close to flooring (NWFA-aligned concept: within ~2%) | Moisture meter (pins/probes) per spec | Dimensional instability and failure risk |
| 5 | Test concrete moisture (if applicable) | Use ASTM F2170; follow adhesive limits (often ~75% RH referenced) | RH probes per ASTM F2170 | Adhesive breakdown, warping, failures |
| 6 | Maintain perimeter expansion gap | Common guidance: ~1/2 in solid, ~1/4 in engineered (follow product) | Spacer blocks + manufacturer diagram | Buckling at walls/pipes |
| 7 | Use correct underlayment (floating) | Vapor barrier + thickness/ratings matched to product and flooring | Underlayment per spec; seams taped | Lock failure, noise, moisture intrusion |
Install the hardwood flooring (row-by-row)
The install goes smoothly when you follow your hardwood’s fastening method rules and keep every row aligned from the start. Row-by-row checking prevents tiny misalignments from turning into visible “waves” across a living room.
According to NWFA guidance, maintaining installation method compliance (nail spacing, adhesive type, and locking technique) is necessary for hardwood flooring to perform as designed.
According to NWFA, checking alignment and spacing during installation reduces cumulative errors that later appear as uneven boards or gaps.
– Follow your method’s fastening rules: nail-down uses correct nailing angles/spacing; glue-down uses the right adhesive and spread pattern; floating relies on proper underlayment and locking technique.
– Keep boards aligned as you go—check spacing and straightness every few rows rather than at the end.
– Cut accurately around door jambs and obstacles, and stagger end joints to avoid repeating patterns.
Nail-down: fasten correctly and don’t damage tongues
Nail-down hardwood flooring success depends on:
– using approved nails/staples and the right nail angle
– sticking to spacing/schedule in the product instructions
– nailing through the engineered fastening zone (often the tongue)
Common causes of nail-down issues include overdriving nails (damaging the tongue), undernailing (loose boards), and skipping around high spots instead of addressing subfloor flatness.Glue-down: adhere to adhesive cure and coverage requirements
Glue-down hardwood flooring is sensitive to:
– adhesive type (manufacturer-approved)
– spread rate and trowel notch (coverage)
– open time and cure time
If adhesive skins over or doesn’t transfer properly, you can get hollow spots and later joint problems. In a living room, those hollow areas often get noticed quickly under foot traffic.
Floating/click-lock: underlayment matters as much as the boards
Floating hardwood flooring should “float,” meaning it must not be rigidly pinned to the subfloor. That’s why:
– underlayment thickness and vapor barrier placement are critical
– the locking system must engage cleanly (especially along end joints)
When end joints don’t lock tightly, you can see separations and “click” noise during normal movement.
Manage patterning and cuts with intention
In a large living room, repeated end-joint patterns can look like marching bands. Staggering end joints and using accurate templates around door jambs keeps hardwood flooring visually consistent.
Finishing touches and protection
You finish well when you complete trim after the floor is fully installed and you protect the surface immediately. For hardwood flooring, final steps (baseboards, cleaning, and traffic control) directly affect how the floor settles and whether it stays scratch-free.
According to NWFA-aligned practices, baseboards/trim typically cover perimeter expansion gaps, which must remain in place during the flooring install.
According to manufacturer installation guidance for many hardwood products, protecting the floor during curing/settling time helps prevent damage before the surface stabilizes.
– Install baseboards/quarter round after flooring is in place (this is where expansion gaps are covered).
– Clean and inspect for debris in joints before finishing steps like sanding (if your product allows) or final touch-ups.
– Protect the new floor immediately—use felt pads, control grit, and avoid heavy traffic during curing/settling time.
Baseboards, quarter round, and the “don’t trap movement” rule
Trim typically hides the expansion gap. What you don’t want is trim that pins the hardwood flooring to the wall in a way that blocks seasonal movement. Follow product details for nailing/fastening trim locations.
Cleaning and debris removal before final touches
In click-lock systems especially, debris in joints can prevent proper locking. Before any final sanding (only if your product allows) or touch-ups, inspect every row line and remove dust from seams.
Protection plan for a living room’s daily reality
Living rooms usually become active spaces fast—kids, pets, moving furniture, guests. Create a short-term protection routine:
– felt pads under furniture legs
– mats at entrances to reduce grit
– controlled traffic until adhesives cure or the floor acclimates fully
What can go wrong (and how to avoid it)
Most hardwood flooring failures come from moisture, flatness, or movement control mistakes—not from cutting boards poorly. When you avoid the common traps below, your living room floor is far more likely to stay tight, quiet, and visually even.
According to NWFA guidance, many hardwood flooring failures trace back to subfloor moisture or inadequate moisture control.
According to NWFA-aligned recommendations, skipping expansion gaps is a major cause of buckling and separation in wood flooring.
– Skipping acclimation can lead to excessive movement—watch for cupping/gapping that shows up after the room stabilizes.
– Failing to keep expansion gaps can cause buckling; don’t “tight fit” the floor to walls or pipes.
– Installing over an out-of-flat subfloor often creates squeaks and separations—recheck flatness before you start nailing/gluing.
– Mistakes around transitions (hallways, adjoining rooms, tile) can trap movement—plan the transition details before the first row.
– Using the wrong adhesive or fastening schedule for your specific hardwood type can void performance expectations—verify by the manufacturer.
Quick pros/cons: choosing your hardwood installation method
If you’re weighing nail-down vs glue-down vs floating, use these practical tradeoffs:
| Method | Pros | Cons / risks |
|---|---|---|
| Nail-down | Good longevity when subfloor is flat; no adhesive cure window | Requires correct nail pattern and a solid, stable subfloor |
| Glue-down | Often reduces squeaks when moisture and adhesive coverage are handled correctly | More sensitive to slab moisture, adhesive open time, and spread rate |
| Floating/click-lock | Typically more DIY-friendly; fewer method-specific fastener/adhesive variables | Still demands flat underlayment; improper underlayment can lead to lock failure/noise |
Verdict / tip
For most DIYers, installing a floating/click-lock hardwood is the most forgiving path—fewer variables around nail spacing and adhesive timing. Nail-down and glue-down can produce excellent results, but they’re less forgiving if your subfloor prep or method-specific rules aren’t spot-on.
That said, if your living room has questionable flatness, suspected moisture issues, or you can’t confidently meet manufacturer acclimation/moisture requirements, it’s smarter to pause and have a flooring contractor assess the substrate first.
Quick scan checklist: verify hardwood type, acclimate as required, confirm subfloor flatness/dryness, plan the layout to avoid tiny cuts, and keep the perimeter expansion gap.
NWFA guidance emphasizes that substrate preparation and moisture control are the foundation for durable hardwood flooring, regardless of install method.
According to NWFA, method compliance (fasteners/adhesives/underlayment) determines whether hardwood flooring behaves as designed after installation.
Hardwood installation checklist (save this)
– [ ] Hardwood type confirmed (nail-down / glue-down / floating)
– [ ] Flooring acclimated per manufacturer instructions
– [ ] Subfloor clean, dry, stable; flatness checked
– [ ] Expansion gap planned around walls and fixed objects
– [ ] Layout lines drawn before cutting
– [ ] Seams staggered; rows kept straight as you install
– [ ] Transitions planned for doorways/adjacent rooms
– [ ] Final cleanup and protection plan in place
Sources
– National Wood Flooring Association (NWFA), Wood Flooring Installation Guidelines (latest edition).
– ASTM F2170, Standard Test Method for Determining Relative Humidity in Concrete Floor Slabs Using In Situ Probes.
– ASTM F1869, Standard Test Method for Measuring Moisture Vapor Emission Rate of Concrete Subfloor Using Anhydrous Calcium Chloride.
– ASTM E1745 (if using specific vapor barrier/underlayment rating references), Standard Practice for Specifying a Flame Spread Rating and Smoke Developed Rating for Insulation.
If you keep the job-site conditions controlled, the subfloor flat and dry, and the installation method tightly matched to your product instructions, your living room hardwood floor should look straight, feel solid underfoot, and stay stable through seasonal changes. When any one of those variables is questionable, it’s usually cheaper (and less frustrating) to verify or get substrate guidance before the first board is installed.
Frequently Asked Questions
What prep work is needed before installing hardwood floors in a living room?
Start by removing all existing flooring, baseboards, and tack strips, then inspect the subfloor for damage, rot, or uneven spots. Check moisture levels and acclimate your hardwood planks to your living room’s temperature and humidity for several days to reduce cupping or gapping. Finally, address subfloor flatness (often within 3/16 in. over 10 ft) by sanding high spots or leveling low areas before you install hardwood flooring.
How do I install hardwood floors if I’m using a nail-down method in my living room?
For nail-down hardwood, confirm you have a suitable wood subfloor (typically plywood or OSB) and underlayment that matches your flooring manufacturer’s instructions. Lay a starter row along your longest straight wall, using spacers for the expansion gap, then nail or staple through the nail tongue/groove according to the plank thickness. Stagger end joints (often 6–8 in. minimum) and keep the rows straight with a chalk line, finishing by reinstalling baseboards to cover the expansion gap.
Why is moisture control important when installing hardwood floors?
Hardwood is sensitive to moisture, and excess moisture can lead to cupping, buckling, or moldy subfloor issues that ruin your new floor. Use a moisture meter (and follow any industry testing standards your installer recommends) before installation, especially in basements or over concrete. Pair this with proper acclimation and—if needed—an appropriate vapor barrier underlay so your hardwood floors stay stable in a living room’s changing humidity.
Which hardwood floor installation method is best for a living room: glue-down, floating, or nail-down?
Nail-down is often best for living rooms with a wood subfloor, offering strong performance and long-term stability. Glue-down works well over certain subfloors and can reduce movement, but it requires careful adhesive selection and installation technique. Floating engineered hardwood is a popular choice for concrete slabs or when you want easier installation, as it uses an attached click-lock system over an underlayment—just ensure you follow the manufacturer’s requirements for expansion gaps.
What’s the best way to handle transitions, trim, and expansion gaps when installing hardwood floors?
Always leave the recommended expansion gap around walls, door frames, and pipes to allow the hardwood floor to move seasonally without buckling. Use transition strips or reducers where the hardwood meets tile, carpet, or other flooring types to create a clean, safe edge and consistent height. For a polished look in your living room, reinstall baseboards or shoe molding to cover the gap, and plan your first rows carefully so seams and plank ends align nicely with the room’s layout.
📅 Last Updated: October 16, 2026 | Topic: How to install hardwood floors in a living room? | Content verified for accuracy and freshness.