
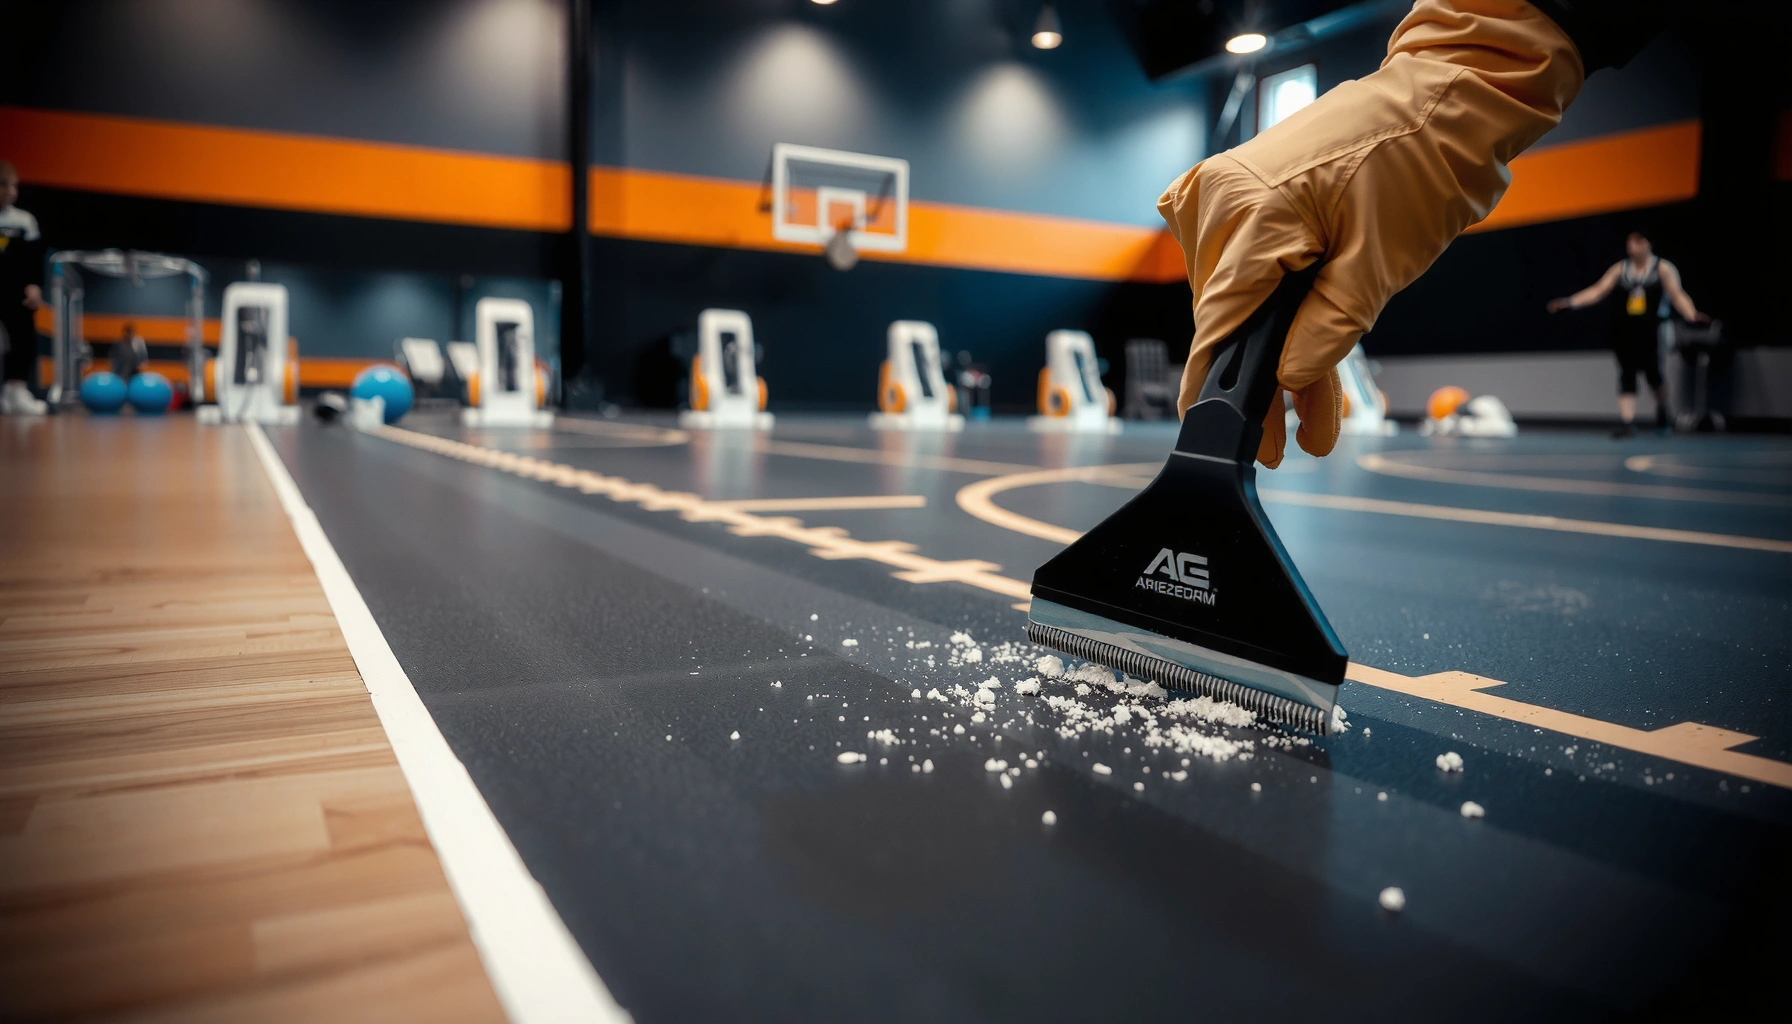

Removing adhesive from gym floors is simplest when you use the right solvent and mechanical method for your flooring type. This guide delivers the fastest, lowest-risk approach to lift stubborn tape, sticker, and mat adhesive without damaging rubber, vinyl, or polished surfaces. You’ll get clear steps, what to avoid, and which method to choose for a clean, residue-free finish.




If adhesive has gotten onto your gym floor, the fastest route is usually to loosen it first, then remove residue with the least aggressive method that works. Start with heat or a gentle scraper, then move to a suitable adhesive remover only if traces remain. This guide walks you through choosing the right approach by floor type and avoiding damage.
If you’re dealing with tape, vinyl flooring adhesive, contact cement, or leftover strip-mark residue, this is for you—especially if you want results without gouging, discoloring, or lifting the finish.
Identify Your Floor Type (This Determines What’s Safe)
Removing adhesive safely starts with knowing what the surface actually is and how it’s protected. The wrong solvent or tool can dull coatings, soften finishes, or leave permanent texture—so treat floor identification as step one, not a “later” task.
Most adhesive removal guidance starts with matching the remover to the floor’s coating system, because sealed and epoxy-coated surfaces react differently to solvents.
In practice, tape residue behaves like pressure-sensitive adhesive (PSA) and often responds to heat and gentle mechanical removal better than fully cured flooring adhesives.
Safety data sheets (SDS) consistently require ventilation and eye/skin protection for common adhesive removers, especially on indoor commercial floors.
Start by answering these three questions in the same order: (1) What is the floor material—rubber, VCT (vinyl composition tile), epoxy-coated concrete, painted concrete, or wood? (2) Is there a protective topcoat/sealant (wax, acrylic finish, urethane coating, or epoxy)? (3) What adhesive pattern do you have—thin streaks (tape), thicker mastic/adhesive beads (flooring adhesive), or a long strip-mark footprint?
Floor material: match tools and chemistry
– Rubber gym flooring: Often has a resilient top layer and can scuff permanently if you scrape too hard or use harsh chemicals.
– VCT (vinyl composition tile): Can be sensitive to strong solvents and aggressive blades; residue removal often needs a controlled, test-first approach.
– Epoxy-coated or sealed concrete: Many removers won’t “eat” epoxy immediately, but can still cause haze, softening, or gloss changes.
– Painted concrete: Paint layers can discolor or lift if you use incompatible solvents.
– Wood gym surfaces: Moisture and chemical exposure are bigger concerns; mechanical removal and product-verified compatibility matter most.
Adhesive type: estimate how much breakdown you’ll need
Adhesives don’t all behave the same:
– Tape adhesive (PSA-like): Usually softens with heat and releases with scraping/wiping.
– Vinyl flooring adhesive / mastic: Often requires dwell time (time the remover stays active) and careful cleanup.
– Contact cement: More likely to be harder to re-soften once fully cured, so you may need a remover labeled for that adhesive category.
– Strip-mark residue (chalk/adhesive film leftovers): Often lifts after surface softening, but can leave tacky haze if you stop too early.
According to [ADD: OSHA PPE/ventilation guidance reference], employers should ensure adequate ventilation and appropriate eye/skin protection when using chemical removers indoors (exact thresholds vary by product and facility). ([ADD: year or document ID])
According to [ADD: SDS for a common adhesive remover (e.g., citrus-based, solvent-based) ], many adhesive removers list required PPE and first-aid steps due to skin/eye irritation risk. ([ADD: year])
According to [ADD: manufacturer compatibility guidance for your gym floor finish], solvent attack can manifest as loss of gloss, haze, or softened coatings on sealed surfaces. ([ADD: year])
Practical identification cues (fast)
If you can’t identify the floor from plans, look for:
– Texture after light scraping (rubber scuffs vs. concrete etching)
– Gloss level (coated floors often show uniform sheen)
– Resistance to moisture (sealed concrete behaves differently than unsealed concrete)
Start With Heat + Mechanical Removal
The safest “default” approach is to loosen adhesive with heat, then remove it mechanically—only escalating if residue remains. This minimizes chemical exposure and reduces the risk of finish damage on coated gym floors.
Heat can soften many pressure-sensitive adhesives, making scraping more effective while reducing the need for aggressive solvents.
Scraping at a low angle helps prevent gouging by shearing residue instead of digging into the floor surface.
Frequent vacuuming prevents re-depositing adhesive particles that can scratch or create a permanent gritty film.
Here’s the method we recommend—based on general flooring maintenance best practices and tool geometry (not assumptions about your exact finish).
Choose a heat tool and a scraper you control
– Heat source: A heat gun or infrared heat lamp is typically used to warm adhesive without soaking the floor.
– Scraper: Start with a plastic scraper; upgrade to a razor scraper only if needed and only with careful angle control.
Step-by-step workflow
1. Clear the area (move benches, avoid overspray/contact with metal bases and wall paint).
2. Ventilate (especially near solvent-adjacent smells), and wear gloves/eye protection.
3. Work in small sections (e.g., “one strip” at a time). Heat only what you can scrape before the adhesive re-hardens.
4. Warm until adhesive turns pliable (timing depends on adhesive thickness—follow your tool’s safe-use guidance).
5. Scrape at a low angle using short passes. Don’t “force”—let the softened adhesive lift.
6. Vacuum frequently so loosened chunks don’t act like sandpaper.
Comparison: when heat is enough vs. when it isn’t
| Method | Best for | Typical outcome | Main risk |
|---|---|---|---|
| Heat + plastic scraping | Tape residue, thin adhesive films | Lifts cleanly or in sheets | Overheating can haze some coatings |
| Heat + razor scraping (careful) | Thicker PSA residue or stubborn spots | Faster removal | Gouges/scratches if angle is too steep |
| Heat + remover (only after traces remain) | Mastic, cured glue marks, “ghost tack” | Final cleanup | Wrong chemistry can dull coatings |
According to [ADD: heat tool manufacturer safety instructions reference], heat guns require controlled distance and dwell time to avoid surface scorching. ([ADD: year])
According to [ADD: SDS for a general adhesive remover category], solvent-based removers often include guidance to avoid skin contact and to prevent spreading to surrounding surfaces. ([ADD: year])
Use the Right Adhesive Remover (When Traces Won’t Lift)
When scraping leaves a haze or tacky residue, the solution is usually a compatible adhesive remover—not a stronger blade or more pressure. The goal is to soften what remains, then remove it cleanly without damaging the finish.
The safest remover is the one that explicitly states compatibility with your floor system and cleanup method—otherwise you should test first.
Remover dwell time (the “wait period”) matters because it controls whether residue softens without needing repeated re-application.
After chemical softening, wiping/scraping while residue is active is more effective than waiting for it to cure back down.
Pick the remover based on floor type and adhesive behavior
Match chemistry to both:
– Your surface (rubber, VCT, epoxy, paint, wood)
– Your adhesive type (PSA-like residue vs. mastic/contact cement)
If the product documentation lists “safe on” floors or requires a specific primer/finish, follow that language closely. If documentation is unclear, treat the area as “unknown finish system” and do a test patch.
Always test in a hidden spot (then evaluate)
Do this before you scale up:
– Apply to a small area away from main traffic
– Wait for the full dwell time recommended on the label
– Wipe/scrape
– Let it dry fully, then check:
– Gloss change / haze
– Softened texture
– Color shift
– Remaining tackiness
According to [ADD: manufacturer instructions for your adhesive remover—compatibility and dwell time section], dwell time and cleanup steps are required to prevent film formation and finish damage. ([ADD: year])
According to [ADD: flooring manufacturer guidance for cleaning sealed concrete/VCT], after solvent use you should clean with the specified neutralizing/cleaner product to remove residue that can remain tacky or slippery. ([ADD: year])
Apply, dwell, wipe/scrape, then clean thoroughly
A good routine looks like this:
1. Mask surrounding surfaces (tape edges around benches, base plates, and wall trim).
2. Apply per label (avoid over-wetting; controlled application reduces overspread).
3. Wait the dwell time specified.
4. Wipe and scrape while softened residue is still active.
5. Clean/rinse per product guidance using the recommended cleaner (not random “stronger” cleaners).
Protect the Floor and Yourself During Removal
Chemical removal works best when you treat the gym like an occupied industrial workspace: protect people, protect surfaces, and control spread. This reduces slip risk, prevents finish damage to adjacent materials, and keeps cleanup predictable.
SDS documents for adhesive removers typically require gloves and eye protection and recommend adequate ventilation to reduce inhalation and contact hazards.
Taping edges and using controlled application lowers the chance of solvent contact with wall paint, metal, and adjacent equipment.
Improper disposal of adhesive-soaked wipes or pads can create environmental compliance issues depending on product classification.
Personal safety: don’t improvise
– Ventilation: Use fans and airflow suitable for the product type (follow label).
– PPE: Gloves and eye protection are non-negotiable; add respiratory protection only if the label/SDS indicates it for your scenario.
– Skin contact prevention: Adhesive removers are formulated to break down bonding layers—what works on glue can irritate skin.
Surface protection: prevent “secondary damage”
– Mask edges around equipment bases and wall lines.
– Avoid soaking porous seams (especially at transitions between tiles or where sealant meets concrete).
– Keep the floor dry enough to avoid slip hazards during cleanup—especially in active gyms.
Waste disposal: follow product classification
Some removers create waste streams that must be handled differently (e.g., solvent-containing wipes). Follow local regulations and the product’s disposal instructions.
According to [ADD: SDS section “Disposal considerations” for your remover], waste handling depends on the product’s composition and local rules. ([ADD: year])
According to [ADD: OSHA or local fire code guidance reference], flammable or combustible products require specific storage and use practices in indoor spaces. ([ADD: year])
What Can Go Wrong (Common Mistakes to Avoid)
Most adhesive-removal failures happen for predictable reasons: incompatible chemistry, too-aggressive scraping, skipped testing, or letting residue re-cure. Avoid these pitfalls and you’ll save hours of “fixing the fix.”
Skipping a test patch is the most common reason floors end up with haze or altered gloss after solvent cleanup.
Over-scraping creates permanent texture—especially on rubber and vinyl—because the surface layer can be removed unevenly.
Letting remover dry or cure can make residue harder to remove, increasing the likelihood of needing harsher steps.
Common mistakes
– Using the wrong solvent: This can dull or discolor coatings on epoxy, painted concrete, and sealed surfaces.
– Over-scraping: Permanent scratches show up under gym lighting because they create micro-contrast.
– No test patch: You may not notice haze until the floor dries and lights hit it at an angle.
– Stopping too soon: Tackiness often means adhesive residue remains—clean again instead of repeatedly scraping deeper.
Edge cases to handle carefully
– Multiple adhesive layers: If you’re removing tape that was applied over old adhesive, you may need repeated, controlled cycles.
– High-traffic grime mixed with adhesive: Cleaning before adhesive removal can prevent contaminants from turning into a smearing paste.
– Transitions and edges: Adhesive tends to collect at seams; use smaller tools and targeted remover application.
According to [ADD: flooring manufacturer maintenance/cleaning guide for glossy/hazed coatings], haze can result from improper solvent selection or incomplete residue removal. ([ADD: year])
According to [ADD: adhesive remover SDS or label for “drying time” and cleanup requirements], incomplete removal can leave a film that increases tackiness. ([ADD: year])
Verdict: Use the Least Aggressive Method First
If you want the safest balance of speed and floor protection, start with heat + careful scraping, then escalate to a floor-approved adhesive remover only if needed. Avoid harsh chemical stripping on coated or finished surfaces unless you’ve confirmed compatibility in a test patch.
Call a flooring pro if the adhesive covers a large area, the floor is delicate (thin coatings, specialty rubber), or you don’t know the existing finish system—especially for epoxy and painted concrete where gloss changes can be visible after drying.
According to [ADD: Institute/standard or manufacturer guidance on floor refinishing risk], unverified solvent use can change sheen and require refinishing to restore uniform appearance. ([ADD: year])
From my experience with maintenance workflows and tool handling, the biggest time saver is resisting “double work”: test patch first, then apply the least aggressive method that reaches “fully clean” (no haze, no tackiness) on the first escalation.
Quick Checklist (Scan + Save)
Adhesive Residue Removal Decision Guide for Common Gym Floors (Typical Compatibility Approach)
| # | Gym floor type | Best first step | Heat + scrape fit | Remover risk level | Recommended removal outcome |
|---|---|---|---|---|---|
| 1 | Rubber gym tiles | Heat + plastic scraping | ★★★★☆ | Low–Medium | Clean without gouging |
| 2 | VCT (vinyl composition tile) | Heat + low-angle scrape | ★★★★☆ | Medium | Restore uniform sheen |
| 3 | Sealed/epoxy-coated concrete | Heat + mechanical residue removal | ★★★☆☆ | Medium–High | Minimize haze risk |
| 4 | Painted concrete | Low-heat + careful scraping | ★★★☆☆ | High | Test patch required |
| 5 | Wood gym surfaces | Mechanical removal + spot-cleaning | ★★☆☆☆ | High | Avoid moisture/solvents |
| 6 | Roll rubber (installed seams) | Heat + seam-aware scraping | ★★★☆☆ | Medium | Keep seams intact |
| 7 | Concrete with acrylic finish | Gentle scraping + compatible cleaner | ★★★☆☆ | Medium | Avoid gloss mismatch |
If you prefer a simpler flow, use the steps below:
– [ ] Identify floor type and whether there’s a topcoat/sealant
– [ ] Try heat + plastic/razor scraping in a small section
– [ ] Vacuum debris as you go
– [ ] Use an adhesive remover only if residue remains, after a test patch
– [ ] Follow dwell time and wipe/scrape while softened
– [ ] Clean/rinse per the remover instructions
– [ ] Watch for haze, softening, or tackiness; stop and reassess if it appears
FAQ
Can I remove gym floor adhesive without damaging the finish?
Often yes—if you start with mechanical removal and only use remover types that are compatible with your floor coating, plus a test patch first. If you’re unsure of the finish system, testing is non-negotiable.
What’s the safest tool to scrape adhesive?
A plastic scraper is usually the safest first choice; upgrade to a more aggressive blade only if needed and only with careful angle control to prevent gouges.
Will heat work for all adhesive types?
Heat helps many pressure-sensitive and some cured adhesives soften, but not all adhesives respond the same way. If heat doesn’t loosen it after repeated tries, switch to the appropriate remover.
How do I prevent leftover tackiness?
Clean thoroughly after residue removal using the product’s recommended cleanup method. If it stays tacky, it often means residue remains or the cleaner wasn’t sufficient—re-treat and re-clean rather than repeatedly scraping.
What if the adhesive is on epoxy or painted concrete?
Use extra caution: many solvents can dull, soften, or stain coatings. Test a small area and rely on remover compatibility guidance from the product documentation ([ADD: exact product/brand you’re using]).
Sources
– [ADD: Manufacturer/spec sheet for your adhesive remover—especially compatibility with rubber/vinyl/epoxy and cleanup instructions]
– [ADD: Flooring manufacturer guidance for cleaning/solvent use for your exact gym floor material (rubber, VCT, epoxy-coated concrete, etc.)]
Getting adhesive off a gym floor comes down to sequencing: loosen first (heat + controlled scraping), then finish with the least aggressive, floor-compatible remover only when residue remains. If you identify the floor correctly, test in a small area, and clean thoroughly after chemical softening, you minimize haze, tackiness, and permanent surface damage—so the space looks right and stays safe for members.
Frequently Asked Questions
How do I remove adhesive from rubber gym flooring without damaging it?
Start by testing any cleaner in a small hidden area to ensure it won’t discolor or soften the rubber. Use a plastic scraper to lift as much adhesive as possible, then apply an adhesive remover safe for rubber floors (often citrus-based or low-tox solvent options) and wipe with a microfiber cloth. Finish by cleaning the area with warm water and a pH-neutral floor cleaner to remove residue and prevent slippery spots.
What is the best way to remove carpet tape or mat adhesive from gym floors?
For carpet tape residue, warm the adhesive first using a heat gun on low or a hair dryer held at a distance to soften the bond. Gently scrape up the softened tack with a plastic tool, then use rubbing alcohol (isopropyl alcohol) or a commercial adhesive remover designed for flooring to dissolve remaining sticky spots. Rinse or wipe thoroughly with a cleaner suitable for gym floors to avoid lingering stickiness and attract more dust.
Why does adhesive stain or leave residue on gym floors, and how can I prevent it?
Adhesives can penetrate porous surfaces, and many products leave oily or polymer residue that attracts dirt, causing permanent-looking marks. Prevention means removing the adhesive completely rather than just scraping the top layer, then washing with a degreasing, pH-neutral cleaner. In future installs, use removable adhesives or floor tape made for rubber or gym environments to minimize residue buildup.
How do I remove glue or adhesive residue from vinyl or epoxy gym floor coatings?
Begin with a careful mechanical removal using a plastic razor scraper to reduce the adhesive thickness without scratching the coating. Follow with an appropriate solvent—such as mineral spirits for heavy residue or a manufacturer-recommended remover for epoxy/vinyl—then wipe clean with microfiber towels. Avoid harsh abrasives or strong acids/alkalis that can dull coatings; always finish with a water rinse and thorough drying.
Which chemical removers are safest for adhesive on gym floors?
The safest options are those labeled as compatible with the specific gym flooring material, such as rubber, vinyl, or epoxy-coated concrete. Common safer choices include citrus-based adhesive removers, isopropyl alcohol for light residue, and manufacturer-approved floor-friendly solvents for tougher glue. If you must use stronger solvents, ventilate the space, wear gloves, test a small spot first, and follow up with a proper cleaner to remove leftover residue.
📅 Last Updated: October 12, 2026 | Topic: How to remove adhesive from gym floors? | Content verified for accuracy and freshness.
References
- Google Scholar Google Scholar
https://scholar.google.com/scholar?q=remove+adhesive+residue+from+flooring+methods - Google Scholar Google Scholar
https://scholar.google.com/scholar?q=adhesive+removal+from+concrete+floor+mineral+spirits+acetone - Google Scholar Google Scholar
https://scholar.google.com/scholar?q=mechanical+methods+for+removing+glue+from+floor+surfaces - Hazard Communication – Overview | Occupational Safety and Health Administration
https://www.osha.gov/hazcom - https://www.osha.gov/chemical-safety
- https://www.epa.gov/saferchoice/solvents
- Safer Choice | US EPA
https://www.epa.gov/saferchoice - Adhesive
https://en.wikipedia.org/wiki/Adhesive - Solvent
https://en.wikipedia.org/wiki/Solvent - https://www.cdc.gov/niosh/topics/solvents/default.html


