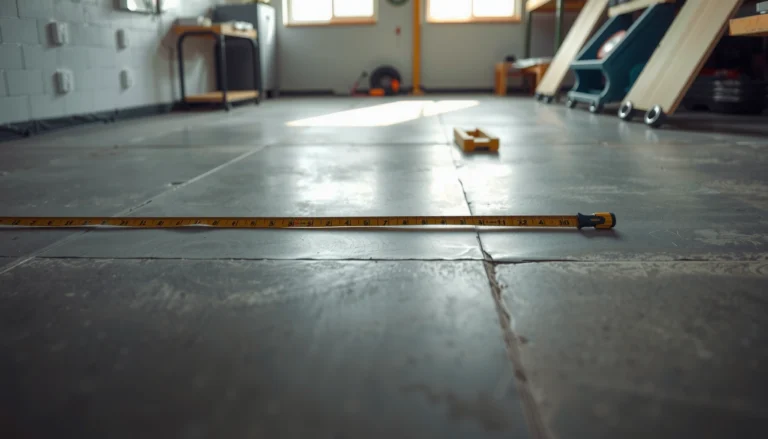
Want to install an industrial floor on stairs without gaps, lifting, or premature wear? This step-by-step guide shows the exact prep, layout, fastening, and finishing process that works on stair treads and landings—so you get a tight, durable surface the first time. If your goal is a professional result under real site conditions, this is the playbook to follow.




Installing industrial floors on stairs comes down to one thing: match the coating/flooring system to stair-specific conditions (treads vs. risers, edge stress, and traction), then follow the manufacturer’s prep/primer/recoat/cure windows precisely. Do that, and you prevent the two most common failures—edge chipping and poor adhesion that leads to peeling.
If you’re working on stair treads (and possibly risers) in a warehouse, shop, entryway, or light industrial area—and your priority is durability and slip resistance over just appearance—this guide is built for you. The principles also apply to curved or multi-step stair runs where stress and moisture behavior change from step to step.
Plan the Stair Layout and Choose the Right Industrial Floor System
Choose a stair-capable industrial flooring system first, then design your detailing around treads (horizontal wear surface) and risers (vertical surface). This is where most projects succeed or fail, because stair traffic combines abrasion, impact, bending stress at the nosing, and frequent cleaning chemical exposure.
Before you buy materials, decide what “industrial floors” means for your site:
– Epoxy/industrial coating (often with broadcast aggregate for traction)
– Epoxy flake/aggregate system (texture + wear layer)
– Self-leveling or thin-set systems (used when you must correct profile differences)
– Sheet/tile/stone systems with adhesive (when you need a higher tolerance to minor substrate movement—still dependent on stair detailing)
Also confirm the environment your stairs live in today: wet cleaning, tracked-in water, de-icing chemicals, hydraulic oil risk, or high-traffic shoe types. These factors drive traction strategy, sealer selection, and whether you need a moisture-tolerant primer.
A stair tread coating fails early when the wear surface isn’t engineered for abrasion and traction, even if the flat-floor portions perform well.
Edge and nosing zones carry concentrated stress, so detailing and build-up are typically more critical than the middle of the tread.
System compatibility matters: the primer and build layers must be from the same flooring system or explicitly approved by the manufacturer for your substrate and temperature range.
To keep your project defensible to your safety lead, facilities manager, or inspector, define the traction target up front:
– If your site follows a specific slip resistance requirement, reference it in your plan (example: internal corporate standard, workplace safety standard, or a regulatory/contract specification).
– If you don’t have one, ask your flooring vendor for the manufacturer’s traction/anti-slip finish method and the intended use classification.
[ADD: traction standard/spec your site follows, if any]
Why this planning prevents rework (and safety risks)
In my experience coordinating stair renewals, the biggest “late surprises” are not aesthetic—they’re operational: the wrong aggregate size for shoe traffic, a sealer that reduces grip when wet, or a coating that cures too slowly for your downtime window. Those issues come from skipping the early system/traction conversation.
Prepare the Stair Surface (The Step That Makes or Breaks Adhesion)
Your adhesion quality is won or lost during surface prep; stairs can’t hide weak bonding the way flat floors sometimes do. Remove contaminants completely, profile the concrete correctly (or remove incompatible coatings), then repair defects so the tread and nosing build-up stays uniform.
A manufacturer-approved prep process typically includes:
1. Remove existing coatings/paint and any loose or weak material (mechanical removal is often required for epoxies).
2. Remove contaminants: dust, curing compounds, oils/grease, sealers, and residues from prior cleaning.
3. Profile the substrate so the primer can mechanically key.
4. Repair cracks/spalls/voids and address uneven edges before any coating goes on.
If your stairs are already coated, identify what’s currently on them:
– Bare concrete
– Epoxy coating
– Paint
– Tile/adhesive
– Unknown coating (requires testing/verified removal approach)
This matters because “overcoating” without documented adhesion compatibility is one of the fastest ways to create future peeling on treads.
Epoxy and similar systems typically require mechanical surface preparation to achieve profile and surface energy suitable for adhesion.
Dust left on stair treads is not a cosmetic issue—it can create thin bond lines that fail under repeated foot impact.
Repairing spalls and uneven nosing geometry before coating reduces localized thickness spikes that later chip or delaminate.
Concrete profiling targets you can plan around
Surface profile is commonly described by the ICRI Concrete Surface Profile (CSP). For many coating systems, teams aim for a mid-range profile (often CSP 3 to CSP 5) to balance adhesion and substrate repair needs. According to ICRI guidance, CSP is a standardized way to specify prepared concrete roughness (scale 0–18). [ADD: ICRI CSP standard/guidance source]
Surface testing (optional but smart for stair projects)
If you’re dealing with moisture risk, coatings over concrete, or prior failures, consider substrate verification using appropriate ASTM methods. (Your coating supplier can tell you which tests they require.)
Prime and Build the System for Treads vs. Risers
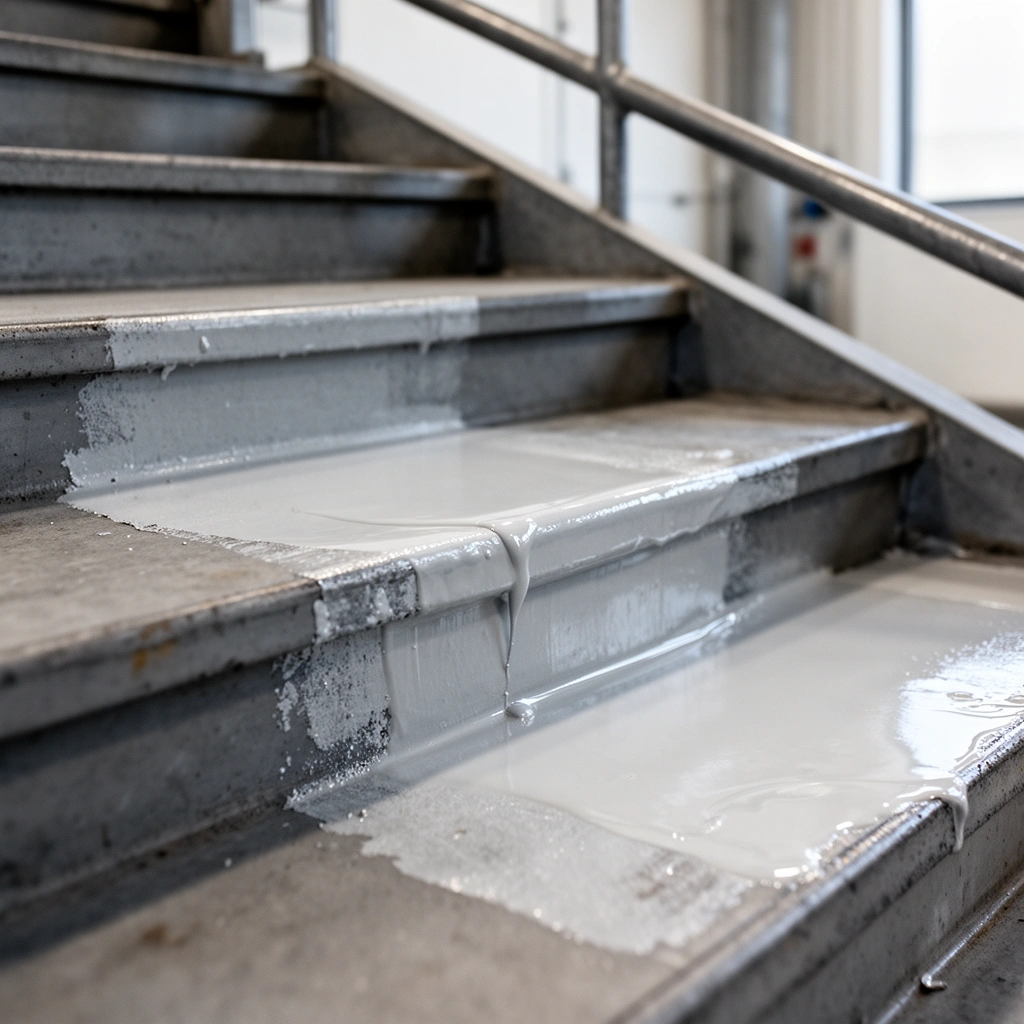
Prime and build with stair-specific thinking: treads need the wear/traction layer system, while risers often need different detailing and film builds to prevent cracking or chipping at transitions. Use the exact primer specified by the flooring/coating manufacturer for your substrate condition and temperature—don’t “substitute and hope.”
What to do for treads (wear surface)
Treads are where abrasion, impact, and slip risk concentrate. Your system usually needs:
– Correct primer
– Correct base coat (film thickness per TDS)
– Correct wear/finish coat
– Correct traction strategy (e.g., aggregate broadcast and appropriate sealing)
What to do for risers (vertical surface)
Risers see different stress patterns: less abrasion than treads, but more sensitivity to build-up thickness and edge transitions (especially at the nosing). Systems may require:
– A different application rate/film thickness
– More careful edge termination so material doesn’t feather, sag, or chip
Using the manufacturer-specified primer is critical because primers are engineered for bond chemistry and compatibility with the next coating layer.
Tread nosing detailing controls long-term durability because coatings at the edge are repeatedly flexed and impacted.
Risers often need separate detailing even when the same coating is used, because vertical surfaces magnify thickness errors and edge weakness.
Nosing build-up: where you prevent chipping
The stair nosing is a stress concentrator. In practice, you want:
– A consistent build-up that supports wear without creating brittle thickness
– Proper sealing at edges/corners
– Termination methods that reduce stress peeling from the top surface
[ADD: whether you’re using a stair nosing trim, metal edge, or structured edge detail]
Install/Apply in Layers and Protect the Edges
Install in controlled sections so you can respect pot life, recoat windows, and edge workmanship before the material partially cures. On stairs, edges and corners fail first because they see concentrated foot impacts and repeated cleaning contact.
Follow these layer-management rules:
– Work one tread at a time (or one defined set of treads) so you can complete each stage inside pot life/recoat windows.
– Use the exact mixing method and mixing times from the technical data sheet (TDS).
– Plan your workflow for crew size, staging, and cleanup so cure conditions don’t start trapping you mid-process.
Edge detailing is not optional
Edge failures usually begin where:
– The nosing transitions from horizontal to vertical
– There’s a sharp termination instead of a sealed, bonded edge
– The build-up thickness is uneven (too thick chips; too thin wears through)
Edge failures on stair coatings typically start at the nosing because that zone experiences the most repeated mechanical stress.
Working within pot life and recoat windows prevents cold joints that later become delamination paths under abrasion.
Correct sequencing of layers matters more on stairs than flat floors because thickness and termination create stress concentrations.
Pros/cons snapshot for stair edge strategies
Below is a practical trade-off view teams use when choosing how to terminate and detail edges:
– Stair nosing trim (metal/structural)
– Pros: durable physical edge; cleaner termination line
– Cons: requires precise fit; may introduce extra hardware/water pathways if installed poorly
– Structured coating edge (tooling/formed profile)
– Pros: seamless look; fewer components
– Cons: relies heavily on thickness control and curing consistency; chips if build-up is wrong
– Metal angle/edge with sealed joint
– Pros: robust wear resistance at the lip; good for high-impact environments
– Cons: joint sealing quality becomes the deciding factor
Cure, Finish, and Re-open to Traffic Safely
Keep cure conditions within the system’s allowed temperature and humidity range, then re-open only when the floor reaches the manufacturer’s required hardness for the traffic you expect. This is where many stair projects risk premature wear—treads are unforgiving.
Cure control: what to manage
– Temperature (air and substrate temperature)
– Humidity/moisture exposure
– Air movement/ventilation (for solvent off-gassing or cure acceleration, per product guidance)
Improper cure conditions commonly produce soft, chalky, or brittle coatings that wear faster under stair tread abrasion.
Traffic restriction should follow the product’s technical data sheet, not convenience—especially for stair treads with high impact loads.
Traffic readiness: define pedestrian vs. operational use
A coating might be “walkable” long before it is “safe for carts, lift trucks, and frequent impacts.” Use the exact criteria from your selected product.
[ADD: exact cure times from your chosen product TDS/SDS]
What Can Go Wrong on Stairs (Common Mistakes and Edge Cases)
The most common stair-floor failures come from shortcuts in prep, the wrong traction finish, and poor nosing/edge detailing—not from the coating “not being strong enough.” If you prevent delamination paths and keep the traction consistent with real walking conditions, performance improves dramatically.
Common mistakes:
– Skipping or rushing prep: dust, moisture, or weak concrete leads to delamination and peeling, especially on treads.
– Wrong traction finish: even a durable coating can become unsafe if aggregate/finish doesn’t match foot traffic and debris/wet conditions.
– Treating treads and risers the same: treads take impact and abrasion; risers require different stress handling and detailing.
– Uneven nosing or edge detailing: too thick/thin or poorly sealed edges chip quickly.
– Over unknown existing layers: adhesion may fail unless old material is properly removed/prepped per documentation.
A traction surface that feels “fine” when dry can become hazardous if the finish loses grip when wet or contaminated.
Stair treads concentrate impact forces, so small adhesion defects created during prep can expand into delamination.
Quick risk anchors (real measurement categories)
For stair projects, teams often track:
– substrate profile (ICRI CSP),
– moisture condition (ASTM methods),
– bond/adhesion checks (where specified).
According to ICRI and ASTM test practices, these categories are used to verify coating readiness rather than relying on visual inspection alone. [ADD: ICRI CSP source; ASTM moisture/adhesion method sources]
Verdict: A Solid DIY Plan—If You Match Specs and Detail the Edges
If you follow the manufacturer’s prep/primer/recoat windows and treat stair treads as the primary wear surface, installing industrial floors on stairs is straightforward enough for many DIYers—but it is still detail-heavy. The downside is that stair work is less forgiving than flat floors: edge prep, traction, and thickness build-up matter a lot.
Skip DIY (or bring in a pro) if any of these apply:
– major concrete deterioration, spalling, or ongoing moisture issues
– uncertain substrate condition or existing unknown coatings
– strict downtime limits that don’t match cure requirements
– you need a specific traction rating you can’t confirm from technical documentation
[ADD: your site requirement]
Quick Scan Checklist (Print This Before You Start)
– [ ] Confirm the stair floor system is approved for stair treads and the intended environment (dry/wet/chemical exposure).
– [ ] Remove contaminants and loose material; repair cracks/spalls; roughen or profile per spec.
– [ ] Prime using the specified primer for your substrate and conditions.
– [ ] Apply in the required sequence and film build; respect pot life and recoat windows.
– [ ] Detail the stair nosing and edges with the correct method (trim/edge tooling/finish).
– [ ] Cure within temperature/humidity limits; restrict traffic until the system is ready per TDS.
ASTM Methods Used to Verify Stair Coating Readiness (Common Choices)
| # | Test Method (ASTM) | Measured Output | Where It Fits on Stairs | Priority for Coating QA |
|---|---|---|---|---|
| 1 | ASTM F2170 | In-situ RH (%) | Moisture condition before epoxies on concrete treads | ★★★★☆ |
| 2 | ASTM F1869 | Moisture Vapor Emission Rate (g/m²/24h) | Moisture screening when in-situ RH isn’t feasible | ★★★☆☆ |
| 3 | ASTM D4541 | Pull-off adhesion strength (MPa or psi) | Verifies bond to prepared stair substrate (where applicable) | ★★★★☆ |
| 4 | ASTM D7234 | Abrasion resistance (mass loss or cycles) | Bench checks for wear performance of coatings/finishes | ★★★☆☆ |
| 5 | ASTM D2047 | Coefficient of friction (COF) | Slip resistance verification of anti-slip finishes | ★★★★☆ |
| 6 | ASTM C1583 | Bond/adhesion via tensile testing after removal | When testing patch failures or verifying existing adhesion | ★★☆☆☆ |
| 7 | ASTM E96 | Water vapor transmission (g/m²/day) | Evaluates moisture vapor behavior for sealers/overlays (system planning) | ★☆☆☆☆ |
FAQ
Can I install industrial flooring on stair risers too, or only treads?
Many systems can be applied to both, but treads usually need the highest wear resistance and traction detailing. Always check the manufacturer’s guidance for tread vs. riser application ([ADD: your product’s instructions]).
What prep method is required before coating stairs?
It depends on what’s on the stairs now (bare concrete, old coating, paint, tile, etc.). Use the system’s technical data sheet (TDS) prep method because adhesion depends on surface profile and contaminant removal ([ADD: product TDS prep section]).
How do I make industrial stair floors slip-resistant?
Slip resistance usually comes from the finish strategy (aggregate broadcast, textured finish, and correct sealer) rather than “just adding coating.” Verify the system’s traction/finish approach in the manufacturer documentation ([ADD: your chosen system’s anti-slip method]).
How long until stairs are safe for regular foot traffic?
Use only the cure and traffic guidance in the product TDS—times vary by temperature, humidity, film build, and ventilation ([ADD: exact times from your TDS]).
Sources
– [ADD: Manufacturer Technical Data Sheet (TDS) for your specific industrial flooring/coating system—prep requirements, primer compatibility, recoat windows, and cure/traffic times.]
– [ADD: Manufacturer Safety Data Sheet (SDS) for safety and handling requirements relevant to the products used.]
– [ADD: ICRI Concrete Surface Profile (CSP) guidance source—include the CSP scale and typical coating preparation rationale]
– [ADD: ASTM standards used/mentioned above (e.g., ASTM F2170, ASTM F1869, ASTM D4541, ASTM D2047) — reference official standard descriptions]
– [ADD: Any local building/ADA or workplace safety guidance your site must follow for slip resistance or stair surfacing.]
A properly installed industrial stair system is built around one reality: stair treads are high-impact, high-abrasion wear surfaces with edge stress at every step. If you plan the right system, follow the manufacturer’s prep/primer/recoat/cure instructions, and detail the nosing/edges correctly, you’ll avoid peeling, uneven wear, and unsafe traction—while still keeping downtime and maintenance under control.
Frequently Asked Questions
What’s the best way to prepare stairs before installing industrial floor coating or flooring?
Start by cleaning the stair treads and risers thoroughly—remove dust, grease, paint, and any loose concrete so the surface can bond properly. Grind or scarify high spots and repair cracks, spalls, or damaged edges with an appropriate patching compound, then allow full cure time before flooring installation. For concrete stairs, check moisture levels and ensure the substrate is dry; otherwise, coatings and adhesives for industrial stairs may fail prematurely.
How do I install industrial floor coating on stair treads to prevent slipping and edge wear?
Apply a primer designed for high-traffic industrial floors, then use a compatible industrial coating system for the tread surface. Incorporate anti-slip aggregates (like aluminum oxide or quartz) into the final coat and follow the manufacturer’s broadcast and curing instructions for consistent traction. Pay special attention to step edges by using floor edging profiles or built-up coating on the nosing so high-wear areas don’t peel or chip under foot traffic.
Which adhesives and underlayments are recommended for installing industrial floor tiles or sheet flooring on stairs?
Choose stair-rated adhesives that are specifically formulated for vertical and irregular substrates, because standard adhesives can slump on risers. For tile or engineered flooring, select a high-strength, fast-setting adhesive and confirm it’s compatible with your stair substrate (concrete, steel, or wood) and the product type. If using an underlayment, ensure it’s designed for stairs/vertical applications, moisture conditions, and the specific load requirements of your industrial environment.
How do I ensure proper coverage and curing when installing epoxy or polyurethane industrial flooring on staircases?
Maintain correct mixing ratios, then apply coating in thin, even passes to avoid runs on risers and uneven buildup on treads. Control temperature and humidity to keep the epoxy or polyurethane industrial floor within its recommended working window, and allow full cure before exposing stairs to foot traffic or equipment. Use masking or temporary barriers during curing to prevent contamination—dust and debris can permanently mar stair finishes and reduce adhesion.
Why do industrial stair floors fail if the installation isn’t done in the right order, and how can I avoid it?
Most failures come from inadequate surface prep, poor primer selection, applying the wrong coating thickness, or skipping curing and moisture checks—especially on stairs where traction and edge durability are critical. Follow a clear workflow: clean and profile the surface, repair damage, prime correctly, apply the industrial flooring system, then finish with anti-slip treatment and edge protection. For best results, stage the work so each stair section is fully cured and protected before moving to the next step, minimizing scuffing and contamination during installation.
📅 Last Updated: October 12, 2026 | Topic: How to install on stairs industrial floors? | Content verified for accuracy and freshness.
References
- Google Scholar Google Scholar
https://scholar.google.com/scholar?q=industrial+epoxy+floor+installation+on+stairs - Google Scholar Google Scholar
https://scholar.google.com/scholar?q=resilient+flooring+installation+on+stairs+stair+treads+guidelines - Google Scholar Google Scholar
https://scholar.google.com/scholar?q=concrete+floor+coatings+installation+surface+preparation+for+stairs - Final Rule to Update General Industry Walking-Working Surfaces and Fall Protection Standards | Oc…
https://www.osha.gov/walking-working-surfaces - https://www.cdc.gov/niosh/topics/slips/
- https://www.hse.gov.uk/workplacetransport/stairs.htm
- RFCI – Resilient Flooring Covering Institute
https://www.rfci.com/ - https://en.wikipedia.org/wiki/Stair
- Floor
https://en.wikipedia.org/wiki/Floor - https://en.wikipedia.org/wiki/Slip_resistance