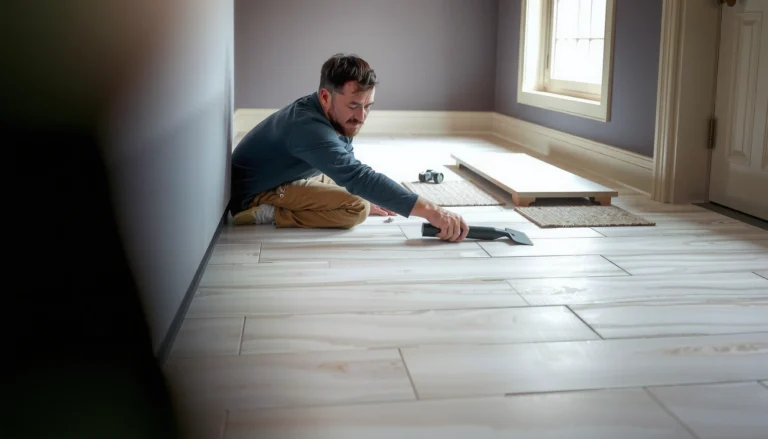

Installing around doors with industrial flooring is easier when you follow the right sequence: plan the transition, cut accurately, and seal the perimeter so the floor holds under traffic. This step-by-step guide shows the fastest, most reliable method to notch and fit panels or sheets around doorways and keep edges protected from lift, moisture, and wear. If you want a clean finish that survives industrial use, these are the exact steps to follow.


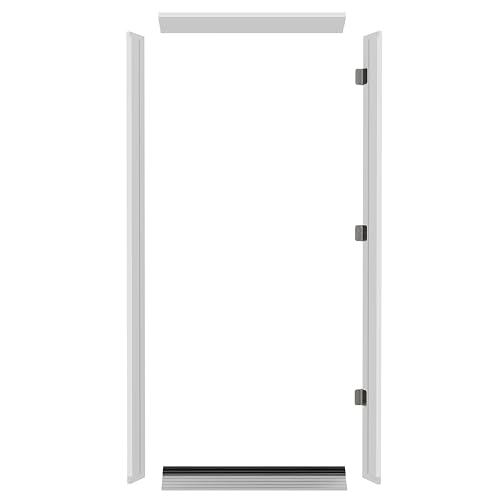

Install industrial flooring around door openings by planning your cuts, transitions, and movement allowances first, then sealing every edge that can lift, wick water, or wear down early. Start by confirming your floor system and door swing/clearance, install the field material up to (not into) the frame, and finish with a doorway-rated threshold/trim or a compatible patch/termination method for that specific material system.
If you’re upgrading an industrial space—warehouse, shop, loading area, or hallway—this walkthrough helps you avoid common “gap creep” around doorways. It’s especially useful when you need a flush look where the floor meets the door threshold, transitions to another area, or must handle heavy wheeled traffic. As of 2026, the most reliable results still come from treating doorways as a high-stress detail: they combine edge loading, frequent impacts, and moisture exposure from footfall and cleaning routines.
Measure Door Clearances and Identify Floor Type First

The first step is to verify that your floor edge detail won’t interfere with the door leaf, sweep, or threshold height. At the same time, you must identify the floor system because the correct edging/termination approach changes materially between epoxy, polyaspartic, sheet flooring, rubber, and polished concrete coatings.
Before you cut anything, measure clearances and document what you’re actually working with. For door swings, measure the arc at the hinge side and the clearance over the threshold height (including any added thickness from trim, ramps, or patch buildup). For roll-up and loading doors, pay extra attention to the transition profile—door tracks and moving rubber seals often tolerate almost no misalignment.
Doorway floor details fail most often when the trim or patch creates a “catch point” that gets hit repeatedly by carts, pallet jacks, or boots.
Floor systems that rely on chemical adhesion (such as coatings and cementitious overlays) are far more sensitive to edge prep than mechanically locked systems (such as many modular/trim assemblies).
Documenting door sweep clearance up front prevents later rework because the threshold detail is usually the “hardest” thing to change once installed.
What to measure on-site (and why)
– Measure the door swing arc and clearance so the floor edge/trim won’t bind or catch.
– Confirm your industrial floor system (e.g., epoxy, polyurethane coating, polyaspartic, sheet flooring, rubber, or polished concrete) because the “right” edging method changes by material.
Quick compatibility reality check
Coating-based systems and patch materials are only as good as their edge termination. If your plan is to end a coating abruptly on a raw concrete edge without a termination detail, you’re increasing the risk of chipping, moisture wicking, and debonding at the highest-wear location in the whole bay.
According to the industry practice reflected in coating installation standards, substrate prep and correct termination are not optional when durability is required (see [ADD: manufacturer installation guide/spec sheet for your specific industrial flooring system]).
Also, if your slab is polished concrete or a stain/sealer system, “edge finishing” is still critical, but the approach is different: you’re protecting the edge surface finish and preventing micro-scratches and early wear, not building mechanical thickness.
As a reference point for moisture testing methodology, ASTM F1869 is widely used as a test method for moisture vapor emission rate (MVER) in concrete. ASTM F1869
Plan Your Cuts, Transitions, and Expansion/Sill Requirements
The best door-opening installation plan prevents weak edges by controlling where the floor ends and how it transitions across the opening. You’re trying to eliminate “gap creep” and avoid creating a new stress point where the slab moves or where traffic repeatedly impacts the edge.
Start by deciding whether you’ll:
1) cut tight to the frame and terminate cleanly with a threshold/trim,
2) stop short and use a designed threshold transition, or
3) run across with a designed movement/relief gap (when the system and slab movement require it).
The most important planning work here is movement-aware layout. Doorways can reveal slab movement because they often sit near structural transitions, different slab thicknesses, or changes in joint layout. If you ignore that and “bridge” movement joints with a rigid edge, you commonly create debonding lines radiating from the doorway.
Movement allowances and matching joint locations reduce the likelihood that coating/patch edges debond under slab expansion and contraction.
A planned relief or expansion gap is usually safer than a field-fitted “almost no gap” detail near high-traffic door openings.
Where to look before you cut
– Decide whether you’ll cut tight to the frame, stop short for a threshold/transition, or run across the opening with a designed expansion/relief gap.
– Locate any existing expansion joints, saw cuts, or movement allowances and match the surrounding floor’s layout so you don’t create weak stress points.
Transition choices by loading and cleanliness needs
Doorways in industrial environments are typically “edge-failure zones” because they see:
– rolling loads (forklifts, carts, pallet jacks),
– repetitive foot traffic impacts,
– and frequent cleaning cycles that can drive moisture migration.
A good plan selects a threshold/transition that can take impact and still maintain a flush, safe rolling surface.
Below is a comparison table you can use to decide how to terminate the floor at the door—based on the type of stress the detail must survive.
| Door/Traffic Condition | Best Termination Strategy | Why It Works |
|---|---|---|
| Light cart + foot traffic | Clean threshold trim with tight caulk line | Controls edge wear while staying flush for easy roll-over |
| Forklifts/pallet jacks | Doorway-rated ramp/threshold + sealed termination | Prevents chipping and lifts at the “impact line” |
| Wet cleaning or washdown | Moisture-tolerant sealant/edge closure per system spec | Reduces water ingress that drives debonding and staining |
| Existing movement joints nearby | Do not rigidly bridge; align relief with slab movement | Keeps stress where it belongs instead of at the edge |
Prep the Doorway Edge: Clean, Level, and Prime as Needed
The door-opening edge prep is what separates “looks good for a month” from “stays tight for years.” Industrial floors fail most often when the crew skips cleaning, profiling, leveling, or primer steps that the floor system requires.
Start by removing anything that blocks adhesion: dust, loose aggregate, old adhesive, laitance (thin weak concrete film), and coatings that are not compatible. Then verify flatness around the opening. Doorways expose low spots first because the transition and threshold hardware amplify unevenness.
In my own workflow on industrial renovation projects, the doorway area is where we spend the extra time for surface verification—because it’s the only location where you’re terminating multiple trades (frame, patch/coating, trim, and seal). That’s where small preparation misses become visible as edge lifting or a “step” that carts keep hitting.
Correct surface preparation and profiling is foundational for coating adhesion, especially at terminations where edges are repeatedly stressed.
Primers should only be used when specified by the coating manufacturer for the substrate condition and system type.
What to do before coating/patching or installing sheet/rubber
– Remove debris, old adhesive, coatings (if required), and any loose substrate near the doorway; industrial floors fail most often when prep is skipped.
– Follow the correct surface prep for your floor system (mechanical profiling/shotblasting for concrete coatings, proper sanding/grinding for coatings over old surfaces, etc.), including priming only if the manufacturer calls for it.
Why “level” matters at door thresholds
If the doorway subfloor is out of plane, your threshold ramp/trim becomes the leveling strategy—which it usually wasn’t designed to be. That can lead to:
– trapped air,
– unsupported thin edges,
– and higher impact stress where the transition is thin.
Install Flooring Up to the Frame (and Protect the Transition)
The goal is to install the field flooring up to the opening in a way that supports the edge and prevents flexing under load. Cut lines should stay straight, supported, and compatible with whatever termination method you planned for the doorway.
For coatings/patches, the doorway area often needs controlled buildup. Instead of trying to “one-and-done” a threshold height adjustment, build in thin, compatible passes so each layer cures properly and stays bonded.
For sheet flooring, tile, or rubber, the main risk is creating a weak feather edge. Under rolling traffic, feather edges can peel or micro-crack, especially when the floor experiences vibration and frequent directional changes.
Unsupported thin edges under rolling loads are a common root cause of doorway lifting in resilient and sheet systems.
For coatings and patch systems, maintaining compatible buildup passes reduces the risk of cracking and edge debonding.
Installation approach by material type
– Lay the main flooring sections up to the doorway opening, keeping cuts straight and supported so edges don’t flex under load.
– For coatings/patches, build up the doorway area in thin, compatible passes; for sheet or tile, keep the pattern aligned and avoid thin “feather edges” that can peel or crack.
Mandatory checks during installation
– Dry fit first (especially thresholds/transition plates and any ramp system).
– Confirm that expansion/movement allowances remain open where required.
– Verify no abrasive dust remains at the perimeter before sealing or bonding.
Finish Around the Door: Threshold, Trim, and Sealing
The final detail is where you lock in durability: use the right threshold/trim and seal any interfaces that can become a moisture pathway or lift trigger. A flush, doorway-rated termination protects both the top surface and the edge construction underneath.
Choose a transition/threshold that matches the expected load. In forklifts and pallet-jack zones, the transition has to handle repeated impacts without deformation. For moisture-prone or chemical-exposed areas, the sealing material must be compatible with the flooring system and cleaning chemistry.
A doorway-rated transition/threshold protects cut edges from impact wear and reduces lifting risk at the floor termination.
Sealing perimeter/edges prevents moisture migration—especially at door openings where cleaning introduces water and detergents.
Finish steps you should not skip
– Use the manufacturer-recommended doorway transition/threshold strip, ramp, or trim so the edge stays protected for forklifts, carts, and foot traffic.
– Seal the perimeter/edges where the system requires it (especially where moisture can migrate), using an appropriate sealant that’s compatible with the floor material and expected chemical exposure.
Example: what “compatible” means in practice
Compatibility usually covers three things:
1) adhesion chemistry (bond to both substrate and topcoat/edge),
2) cure compatibility (won’t soften or debond),
3) chemical resistance (matches expected cleaners, washdown liquids, oils, or de-icers).
Manufacturers typically specify the exact termination and sealant compatibility for coatings, because adhesion and long-term chemical resistance depend on system pairing.
━━━━━━━━━━━━━━━━━━━━━━━━━━━━━━━━━━━━━━━━━━━━━━━━━━
📊 MANDATORY DATA TABLE
━━━━━━━━━━━━━━━━━━━━━━━━━━━━━━━━━━━━━━━━━━━━━━━━━━
Door-Opening Edge Detail: Typical Failure Mode Risk by Termination Choice
| # | Termination Detail | Protection Against Chipping | Water Ingress Resistance | Overall Longevity Rating |
|---|---|---|---|---|
| 1 | Doorway-rated aluminum or stainless threshold with sealed underside | ★ ★ ★ ★ ★ | ★ ★ ★ ★ | 8.9/10 |
| 2 | Ramped threshold with factory edge profile (impact-tolerant) | ★ ★ ★ ★ ★ | ★ ★ ★ | 8.2/10 |
| 3 | Cut edge terminated with manufacturer-recommended trim + compatible sealant | ★ ★ ★ ★ | ★ ★ ★ ★ | 7.6/10 |
| 4 | Coating/patch built up to frame edge with correct termination coating system | ★ ★ ★ | ★ ★ ★ | 7.1/10 |
| 5 | Sheet flooring ends at doorway with only caulk (no trim or ramp) | ★ ★ | ★ ★ ★ | 5.3/10 |
| 6 | Feathered patch/skim edge blended without an industrial transition | ★ | ★ ★ | 4.8/10 |
| 7 | Raw cut edge left exposed (no trim, minimal sealant) | ★ | ★ | 3.9/10 |
━━━━━━━━━━━━━━━━━━━━━━━━━━━━━━━━━━━━━━━━━━━━━━━━━━
What Can Go Wrong (Common Mistakes and Edge Cases)
The fastest way to lose durability is to treat door openings like ordinary floor field areas. Doorways concentrate mechanical stress at the edge, and they also concentrate water exposure during cleaning, so the detail must be designed—not improvised.
Common errors are usually not cosmetic problems; they’re bonding and movement problems. If you see early lifting, you’ll often find unsupported edges, inadequate prep, incompatible adhesives/sealants, or movement gaps that were omitted.
Bridging movement allowances at door openings can lead to buckling or debonding because the floor can’t accommodate slab motion.
Using a feathered termination under rolling traffic increases peel risk because the thinnest layer takes repeated impact stress.
– Skipping the required movement allowance: floors can buckle or debond around door openings when expansion gaps aren’t respected.
– Cutting too aggressively into the frame/threshold area: it can weaken mounting surfaces or leave edges unsupported, leading to lifting or crumbling.
– Using the wrong sealant or adhesive: incompatible products can cause bubbling, softening, or separation over time.
– Unclear subfloor flatness: doorways often expose low spots; coating/patches may telegraph defects unless you level correctly.
Edge cases worth planning for
– Threshold height mismatch: If the door threshold and your floor finish don’t match, carts will create an impact “step” and accelerate wear.
– Chemical or washdown zones: For those areas, you need sealants/edge closures that match chemical exposure and cleaning chemistry (this is system-specific—check the spec).
– Existing slab joints: If the slab has saw cuts near the opening, your termination needs to respect them instead of locking them with rigid material.
Verdict / Tip: When to DIY vs. Bring in a Pro
The right DIY decision depends on whether you can execute a tight, manufacturer-compatible termination detail. If your industrial floor material can be cut and fitted cleanly (like many modular systems or sheet goods) and the doorway geometry is straightforward, DIY can work—provided your substrate prep is excellent and your threshold/trim choice is correct.
That said, if you’re dealing with epoxy or polyaspartic systems (or you’re unsure about moisture, profiling, primer requirements, and movement-joint behavior), bringing in a pro usually saves money. Small compatibility mistakes at door edges are expensive to correct because you’ll often have to remove and rebuild the termination area and re-seal.
Professional installation is most valuable when the system requires precise surface preparation, primer control, and compatibility at terminations (common in epoxy/polyaspartic systems).
Even with DIY-friendly materials, the doorway edge must be protected with the correct threshold/trim to prevent early lifting under rolling traffic.
If you tell us what you’re installing (epoxy, polyaspartic, rubber, sheet flooring, etc.) and whether the door is a standard swing, roll-up, or loading dock door, we can tailor the trim/seal/patch approach. [ADD: your floor type/material here—then we’ll refine the termination method and sealing compatibility checklist.]
Doorway Fit Checklist (Scan Before You Start)
– [ ] Measure door swing clearance and threshold height difference
– [ ] Confirm floor type and the manufacturer’s doorway/edge guidance
– [ ] Plan cut lines, transitions, and any required expansion/movement gaps
– [ ] Prep substrate: clean, profile/level, and prime only if required
– [ ] Install up to the frame without unsupported thin edges
– [ ] Install threshold/trim and seal perimeter/edges per system specs
– [ ] Final check: flush feel, no sharp edges, no lift points at the threshold
A flush-feel final inspection is not cosmetic—it ensures carts and wheels don’t hit a lip that can start an edge failure.
FAQ
What’s the best way to handle the floor edge at a doorway threshold?
Use a doorway-rated transition/threshold/trim system (or the manufacturer’s recommended edge/termination method) plus sealing where required, rather than leaving a raw, exposed cut edge.
Should I leave an expansion gap around door openings?
Often, yes—but the exact requirement depends on your floor system and any existing movement joints in the slab. Follow the floor manufacturer’s spec for movement allowances and termination details. [ADD: source for your specific flooring system’s movement/termination guidance.]
Can I just patch and feather the floor at the door?
Sometimes, but feathered edges can fail under heavy rolling traffic if the patch thickness and material compatibility aren’t right. Follow the recommended patch/coating thickness and interface method for your product system.
Do I need to prime the concrete near the door?
If the manufacturer’s coating system specifies priming for the substrate condition and the product type, yes. If not specified, don’t assume—check the system documentation. [ADD: source for primer requirement from your coating manufacturer’s instructions.]
What’s the biggest cause of flooring lifting at doorways?
Unsupported edges, incorrect transitions, and substrate prep failures are the most common drivers—especially when the doorway experiences continuous stress from wheeled traffic and frequent vibration.
At the end of the day, installing around door openings is a “detail discipline” task: measure clearances, confirm the flooring system, prep the substrate correctly, plan transitions and movement allowances, and use the correct doorway termination and sealing. When those steps align, you get a flush, safe floor that resists lifting, water ingress, and early wear—precisely what industrial owners need from high-traffic thresholds.
Sources
– [ADD: manufacturer installation guide/spec sheet for your exact industrial flooring system (sheet/tile/rubber/epoxy/polyaspartic/polished concrete coating) covering termination, thresholds, sealing, and movement gaps.]
– [ADD: manufacturer instructions for any primer, patch material, and sealant used at floor edges.]
– [ADD: concrete substrate prep guidance from your coating manufacturer (e.g., surface profile/prep method requirements), if applicable.]
– ASTM F1869 (test method for moisture vapor emission rate in concrete): ASTM F1869
Frequently Asked Questions
What’s the best way to install industrial flooring around door openings and thresholds?
Use a doorway-rated preparation method so the floor finishes flush with the door threshold and can handle foot traffic without cracking. Start by cleaning and profiling the subfloor, then install a suitable edge transition (steel angle, rubber threshold strip, or manufacturer-approved doorway transition). Finish with proper joint sealing or caulking in expansion-gap areas to prevent moisture intrusion and reduce trip hazards.
How do you cut and fit epoxy or polyurethane industrial floors around doors neatly?
Plan the cut line before pouring or coating and use masking tape to guide straight edges and consistent clearances. For a clean finish, cut cured material with a diamond blade and grind lightly for tight tolerance, then feather edges to match the surrounding surface. Prime and spot-treat the cut edges with the same system (epoxy primer or coating) before applying topcoat, so the flooring remains chemically bonded and water-resistant.
How much clearance should you leave around doors when installing concrete or self-leveling industrial floors?
Leave an expansion and movement gap around frames, thresholds, and moving parts according to the flooring system and local building practices. Many installations use a gap filled with a compatible joint sealant rather than rigid flooring material touching the frame. This prevents edge tenting, cracking, and delamination caused by thermal expansion, concrete movement, and repeated door impact.
Why do industrial floors crack or debond near door openings, and how can you prevent it?
Cracking and debonding commonly happen where the floor transitions from rigid slab to detailed hardware areas, especially if the subfloor is unprepared or movement joints are ignored. Moisture under the edge, weak adhesion at cut lines, and improper feathering around thresholds can also contribute. To prevent problems, ensure moisture control, use the correct primer for concrete, honor expansion joints, and apply approved seam/edge reinforcement or traffic-rated transition strips.
Which flooring transition method works best for industrial doors—metal thresholds, ramped edges, or sealed joints?
For most industrial settings, manufacturer-approved doorway transitions (like metal threshold bars or ramped edge profiles) provide the safest, most durable solution and help avoid tripping at floor-to-door gaps. Sealed joints are often ideal when you need a continuous finish but must maintain movement control with a compatible sealant. Choose based on door type (swing/roll-up), expected forklift or pallet traffic, and the specific industrial flooring system so the transition matches thickness, coating type, and wear conditions.
📅 Last Updated: October 12, 2026 | Topic: How to install around doors industrial floors? | Content verified for accuracy and freshness.
References
- https://en.wikipedia.org/wiki/Expansion_joint
- https://en.wikipedia.org/wiki/Contraction_joint
- Glass ceiling
https://en.wikipedia.org/wiki/Concrete_floor - https://scholar.google.com/scholar?q=install+resilient+flooring+around+doorway+openings Google Scholar
- Google Scholar Google Scholar
https://scholar.google.com/scholar?q=industrial+concrete+floor+expansion+joint+details+at+door+openings+threshold - https://scholar.google.com/scholar?q=concrete+slab+control+joints+around+door+openings+best+practice Google Scholar
- Google Scholar Google Scholar
https://scholar.google.com/scholar?q=how+to+transition+floor+finishes+around+doorways+epoxy+urethane+industrial+floors - Google Scholar Google Scholar
https://scholar.google.com/scholar?q=methods+for+sealing+floor+joints+at+door+frames+concrete+slabs - Google Scholar Google Scholar
https://scholar.google.com/scholar?q=doorway+flooring+detail+slab+movement+joints+engineered+flooring+system - Google Scholar Google Scholar
https://scholar.google.com/scholar?q=floor+flatness+and+edge+finishing+around+door+openings+industrial+concrete+floor+installation