
Want to install new outdoor flooring over existing tile—without losing stability or creating lippage? This step-by-step guide tells you exactly when it’s the right move (sound, well-bonded tile and proper prep) and how to do it, from surface cleaning and leveling to fastening and sealing for weatherproof performance. Follow these instructions and you’ll get a durable finish that can take freeze-thaw cycles, foot traffic, and standing water.




You can install new outdoor flooring over existing tile, but only if the tile is firmly bonded, cleaned and mechanically prepped for adhesion, and then set with an exterior-rated mortar/adhesive system designed for tile-to-tile or tile-over-tile conditions. The real differentiator is substrate stability—fix any loose/rocking tiles and flatten high/low spots before you ever spread thin-set, so moisture and movement don’t break the new install.
If your outdoor tile is solid but you want a fresh surface (new patio floor, balcony, walkway, or entry), this is for you. It’s also helpful when you’re trying to avoid full tile removal—just note that not all tile situations are suitable for going over the top.
Check Tile Condition First (Flatness + Soundness)
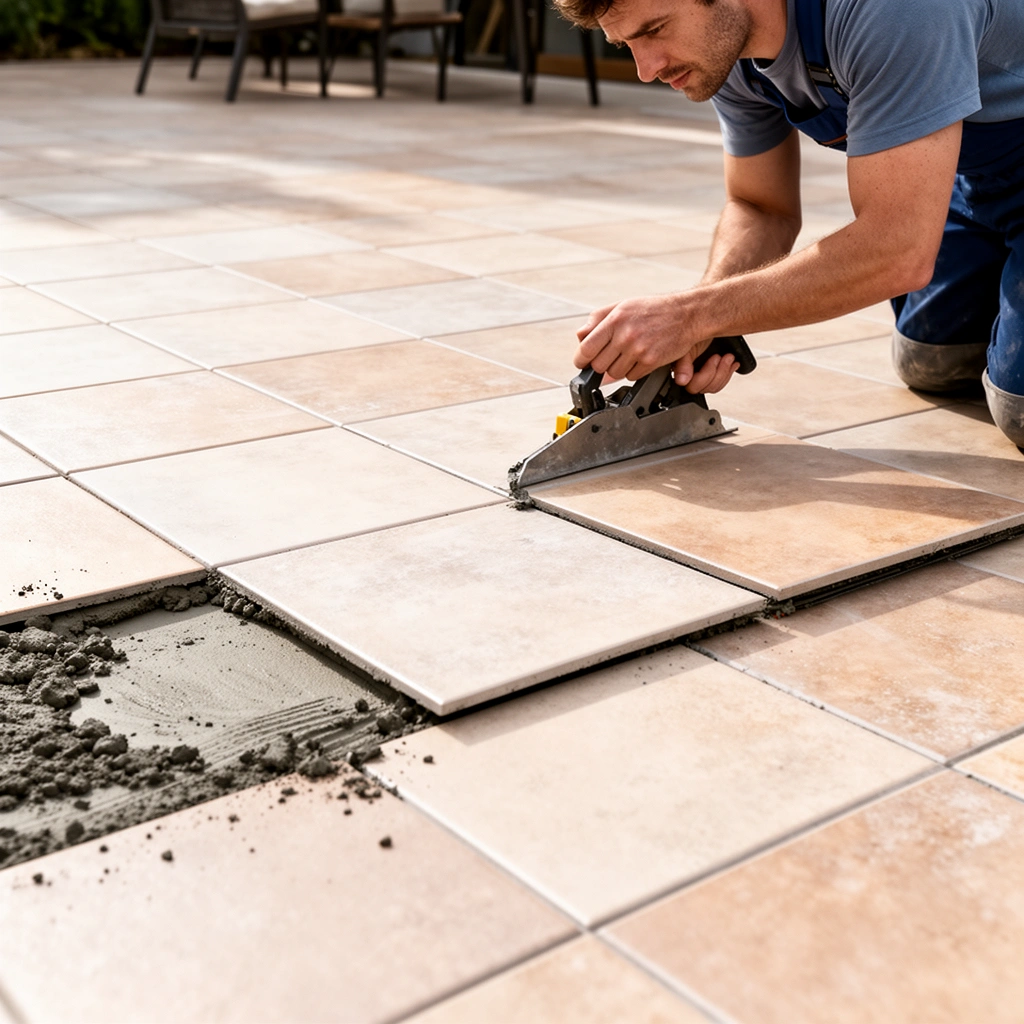
Doing this check first prevents you from bonding new work to old movement. If the existing tile is loose or uneven, the new surface can crack grout, break adhesion, and “telegraph” the problem through the finish.
Before any cleanup or mortar selection, you want to know whether the current tile acts like a stable substrate or a loose skin. In my experience planning many overlay jobs (and reviewing project failures), the most expensive surprises usually come from skipping the “tap-test” and the flatness check. We’re not trying to be cautious—we’re trying to be predictive.
A loose or hollow tile is a mechanical failure waiting to happen because the overlay can’t bond to a moving substrate.
Outdoor tile work requires a substrate that is structurally stable and sufficiently flat so mortar can transfer stress without voids.
Movement in the base layer often shows up as cracked grout lines or debonding in the overlay within the first freeze/thaw or heavy wet season.
Confirm bonding with a tap test
Tap around individual tiles with the handle of a screwdriver or a rubber mallet. Tiles that sound hollow or shift when pressed should be removed and replaced (or you’ll be building on a defect).
Verify flatness with a straightedge
Use a long straightedge (commonly 4 ft / 1.2 m or longer). If you can rock it across the tile, flattening is required before installing over tile outdoor floors. “Reasonably flat” is not the same as “looks flat” to the eye—outdoor tiles often have crowned highs, especially at traffic paths.
Watch for water-saturated, cracked, or degrading zones
– Cracked tiles: repair/replace rather than assuming “it’s fine because it’s not moving.”
– Loose grout: if grout is crumbling or washing out, there’s often deeper movement or poor bonding beneath.
– Evidence of moisture issues: efflorescence (white salts), recurring darkening, or soft spots suggest water is getting into the assembly and that your overlay needs a moisture strategy—not just new tile.
Clean, Degrease, and Mechanically Prep the Surface
You can’t rely on “good-looking tile” for adhesion—mortar needs a surface it can grip. Cleaning removes bond inhibitors (dirt, mildew, sealers), and mechanical prep increases surface profile so mortar can form a reliable bond.
This is where tile-to-tile compatibility becomes real. Many tiles have factory-glazed surfaces that are dense and slick; many patio tiles have sealers that make them even more chemically resistant. If the old surface is slick, you should plan on mechanical preparation (e.g., abrasion/etching only if the product system allows it), not just washing.
Cleaning for overlay installs must remove dirt, mildew, coatings, and sealers that can act as bond breakers.
If the tile surface is glossy or has an applied sealer, many exterior mortar/adhesive systems require mechanical profiling or specific primer/prep steps.
Following the adhesive or mortar manufacturer’s surface-prep instructions is critical for outdoor tile-to-tile compatibility.
Clean first with the right method for outdoor tile
Thoroughly remove:
– dirt and grime that reduce wetting of mortar
– mildew/organic growth
– paint overspray or residue
– patio residue (old sealers, wax-like protectants)
Use cleaning steps that match the tile type and the existing finishes. If you’re unsure what’s on the tile (especially sealers), test a small area or plan to mechanically prep.
Degrease when needed
If there are common outdoor greases (grill areas) or oily residue, degrease before you attempt adhesion. Residual oils can prevent mortar from properly wetting the substrate.
Mechanically prep “slick” surfaces
If the tile glaze (or a sealer) is slick, you typically need mechanical prep to improve adhesion—only in the ways permitted by your chosen exterior-rated mortar/adhesive system. “Aggressive” sanding or grinding can be fine for some products and wrong for others, especially if it compromises bond surfaces or leaves dust that isn’t fully removed.
Repair and Level: Build a Stable Base
Your overlay succeeds or fails based on whether the substrate is continuous, solid, and flat enough for the setting system. Repair missing/cracked tiles, stabilize grout, and flatten high/low areas so the thin-set layer can do its job.
This is the stage where you create an even “platform” for the new floor. Exterior overlay failures often come from thin-set being asked to bridge extreme differences or from existing voids becoming expansion “hinges” during wetting, drying, and freeze/thaw.
Mortar and adhesives work best when they aren’t forced to span large substrate irregularities.
Leveling compound used outdoors should be exterior-rated and compatible with the tile-setting system you plan to use.
Rechecking flatness after leveling is essential because overlay thickness alone rarely fixes an uneven substrate.
Replace missing and cracked tiles
– Replace tiles that are missing, badly cracked, or confirmed loose.
– Repoint/regrout where grout is failing, so you’re not bonding to unstable joints or hollow pockets.
Level uneven tile with an exterior-rated patch/compound
Use a patch or leveling compound rated for exterior use and compatible with your thin-set/mortar system. Feather edges where possible to reduce ridges. After leveling, re-check flatness—this single step prevents many cracked-grout and bond-failure callouts.
Confirm slope and drainage paths
Outdoor floors aren’t just “level” or “flat”—they must also drain correctly. If your deck or patio relies on a slope to move water away from the structure, keep that slope during patching.
*Data point to anchor planning:* For exterior ceramic tile, a common drainage target is at least 1/4 in per 12 in (≈2%) slope (confirm the exact target for your assembly/method). TCNA Handbook / exterior drainage recommendations ([ADD: specify the exact TCNA method you’re following])
Choose the Right Exterior System (Adhesive/Underlayment)
The correct system is what allows tile-to-tile bonding to survive outdoor moisture cycles. Pick an exterior-rated thin-set/mortar or adhesive that explicitly permits installing over existing tile, then pair it with the right membrane/waterproofing or drainage approach for your conditions.
This decision is not one product—it’s a compatible assembly. You’re building a system that must handle UV exposure, water intrusion risk, freeze/thaw, and movement. The “right” underlayment depends on whether your design needs waterproofing, crack isolation, improved drainage, or all of the above.
Use an exterior-rated thin-set/mortar or adhesive system that specifically allows bonding to existing tile for outdoor installations.
Outdoor assemblies often require a waterproofing and/or crack isolation strategy depending on climate, tile condition, and drainage details.
Open time, cure time, and trowel/notch size requirements are part of the system design—deviating from them can reduce bond strength.
Reference the standards that govern “system” installs
For bond performance and installation method guidance, many pros align to ANSI and TCNA methodologies. At a practical level, that means:
– using the mortar with the right performance category
– following the mixing and coverage instructions
– respecting movement joint rules
*Data point to anchor movement design:* Perimeter movement joints are commonly detailed as not less than 1/4 in (6 mm) for tilework movement accommodation (confirm with your project method and local code). ANSI / movement joint guidance commonly referenced in tile installation standards ([ADD: specify exact ANSI/TCNA guidance for your method])
Decide: waterproofing vs drainage-first vs hybrid
Ask three questions:
1. Is the existing tile assembly already keeping water out (or is it letting water in)?
2. Do you have reliable drainage below the floor?
3. Is your climate prone to freeze/thaw (where trapped water creates destructive expansion)?
Then choose a membrane/waterproofing approach that matches your risk. If you’re unsure, get a spec from the waterproofing/membrane manufacturer and confirm it works with your tile-setting system.
System compatibility at a glance (tile-setting standards)
Below are key standards to reference when choosing mortars/adhesives for tile-over-tile and exterior use.
Key Tile-Setting Standards Commonly Cited for Exterior, Over-Tile Prep
| # | Standard / Guidance | What It Helps You Verify | Practical Use in Over-Tile Outdoors | Relevance Rating |
|---|---|---|---|---|
| 1 | ANSI A108.5 | Mortar installation method rules | Tells you about coverage, back-buttering expectations, and good practice for tile setting | ★★★★★ |
| 2 | ANSI A108.1B | Substrate & environmental requirements | Helps set expectations for temperature, curing, and substrate conditions before bonding | ★★★★☆ |
| 3 | ANSI A118.4 | Mortar performance category (polymer-modified) | Commonly used for improved bond performance versus unmodified mortars | ★★★★☆ |
| 4 | ANSI A118.15 | Cement mortar for exterior/immersed environments | Often considered when exposure conditions are more severe (confirm the specific product listing) | ★★★☆☆ |
| 5 | ANSI A118.3 | Unmodified mortar category (general reference) | Sometimes used indoors; verify exterior suitability and over-tile permissions for your specific system | ★★☆☆☆ |
| 6 | TCNA Handbook (Exterior methods) | System assemblies and method matching | Helps you pick a method that matches your drainage and movement-joint design | ★★★★★ |
| 7 | ASTM C627 (Freeze-Thaw exposure context) | Freeze-thaw test framing | Useful when evaluating how materials may behave with freeze/thaw; match to product data | ★★★☆☆ |
(Note: Always prioritize your mortar/adhesive manufacturer’s “over existing tile” instructions; the standards above guide expectations, but product-specific compatibility is decisive.)
Install the New Outdoor Flooring Over Tile
Now you’re ready to set the new finish, but you still need discipline in layout, coverage, and movement accommodation. This is where you translate your prep and product choices into a properly bonded, properly vented/water-managed assembly.
Start with a dry layout so you can plan cuts at edges, align grout joints, and respect slopes to drains or door thresholds. Outdoor jobs often include interruptions—doorways, stairs, scuppers—so your layout should prevent tiny slivers that are hard to keep uniform outdoors.
Dry layout helps you align grout/board joints and maintain functional slope and drainage paths before any mortar is mixed.
Exterior tile overlays should maintain expansion gaps at perimeter edges and around interruptions to allow normal substrate movement.
Outdoor adhesives/mortars are system products—mix ratios, trowel size, and open time affect bond strength as much as brand selection.
Set with the system’s specified method
– Use the recommended mortar/adhesive type and mixing procedure (by weight/volume as specified).
– Use the correct trowel notch size and spread technique (often including full-thin-set coverage or other coverage requirements dictated by the system).
– Follow open time—don’t try to “re-temper” mortar once it starts to skin.
Use exterior-rated grout/adhesive and correct joint spacing
Joints handle movement and water management. Use an exterior-rated grout or joint filler designed for outdoor conditions and freeze/thaw exposure where applicable.
Maintain expansion gaps at perimeters and transitions
Perimeter expansion gaps prevent the overlay from cracking as the base expands and contracts. That’s especially important outdoors where thermal cycling is relentless.
Data point to anchor movement exposure: Outdoor surfaces experience repeated wet/dry cycles and temperature swings; freeze/thaw is a primary driver of early failure when water is trapped in assemblies.
What Can Go Wrong (And How to Avoid It)
Over-tile outdoor installs fail for a few repeat reasons, and most are predictable if you test early and follow the specified system. The fastest way to reduce failure risk is to avoid bonding to loose tiles, avoid trapping water, and avoid using the wrong materials for freeze/thaw and UV exposure.
Here’s a practical comparison of the most common failure paths.
| Failure Mode | What You’ll Notice | Best Prevention |
|---|---|---|
| Loose/hollow tiles under the overlay | Cracked grout lines, sound hollow spots, tile movement | Replace or remove unstable tiles; don’t bridge voids |
| Bond breakers (sealers, slick glaze, coatings) | Debonding or hollow bond “drumming” after curing | Clean/degrease and mechanically prep only as allowed by product instructions |
| Wrong exterior-rated products | Grout erosion, adhesive breakdown, efflorescence | Use systems explicitly rated for exterior + freeze/thaw when relevant |
| Trapped water behind the assembly | Efflorescence, substrate softening, recurring dark staining | Design drainage and waterproofing correctly; maintain slopes and movement joints |
If the old tile assembly can move, the overlay tends to crack—thin-set can’t compensate for structural instability.
Even well-set overlay tile can fail early if water gets trapped and repeatedly freezes where it can’t evaporate.
Interior-only mortar or underlayment often lacks the exterior performance needed for UV, moisture cycling, and freeze/thaw.
Verdict: When This Approach Works (and When to Skip)
Going over tile outdoor floors can be a reliable option when the existing tile is solid, adequately flat, properly cleaned/prepped, and you use an exterior-rated bonding system that is explicitly compatible with installing over tile. The downside is that overlays inherit whatever hidden problems exist below—so the prep phase matters more than most DIYers expect.
Skip (or plan full removal) if:
– you find tiles that are loose/hollow across multiple areas
– the surface is significantly uneven and can’t be flattened within the system’s limits
– the tile base shows ongoing moisture intrusion behind it (persistent efflorescence or soft substrate areas)
– you suspect the current assembly is already failing internally
If you’re unsure about your current tile’s bond or what your new system requires, [ADD: consult the flooring/adhesive manufacturer’s installation instructions or a qualified installer for compatibility checks].
Over-tile outdoor installs are most successful when the existing tile is stable and the chosen mortar/adhesive system explicitly permits bonding to that surface.
When repeated moisture signs are present, removing the existing tile may be the safer path than building a new surface over an unstable assembly.
Quick Checklist Before You Start
– [ ] Existing tile is firmly bonded (no hollow/moving tiles)
– [ ] Surface is clean, degreased, and mechanically prepped as required
– [ ] Cracks/missing tiles are repaired; grout is stable
– [ ] Surface is level enough for your new flooring system
– [ ] Exterior-rated adhesive/mortar (compatible with installing over tile)
– [ ] Waterproofing/drainage strategy chosen for outdoor conditions
– [ ] Correct curing time followed; expansion gaps maintained
FAQ
Can I install directly over outdoor tile with no prep?
Usually no. Most exterior mortar/adhesive systems require cleaning and often mechanical prep so the new thin-set/mortar can bond to the existing tile surface.
What if my existing tile is cracked but still solid?
You should repair or replace cracked tiles and verify the substrate is stable. Small cracks may be manageable only if your chosen patching/leveling and bonding system allows it and you address movement and water management.
Do I need waterproofing when installing over tile outdoors?
Often you should, but it depends on your flooring type, drainage design, and the specific instructions of the products you’re using. Follow the waterproofing system’s outdoor installation requirements.
Will the new floor match the height of my doors and steps?
Usually there’s added build-up from leveling, thin-set/mortar, and underlayment (if used). Measure your clearances before committing—[ADD: estimate for your exact system thickness once you choose products].
Sources
– [ADD: manufacturer installation instructions/spec sheets for the specific exterior adhesive/mortar or tile-setting system you plan to use—these are the primary source for “installing over tile outdoors” compatibility requirements.]
– [ADD: manufacturer installation instructions/spec sheets for the outdoor flooring product (tile/porcelain, pavers, or boards) regarding substrate requirements, expansion gaps, and exterior use.]
– ANSI tile installation standards (commonly referenced categories such as ANSI A108/A118 guidance) ([ADD: specify the exact document numbers you rely on])
– TCNA Handbook for Ceramic, Natural Stone, and Tile Installation (exterior methods) ([ADD: specify the exact method numbers for your assembly])
Installing over existing outdoor tile is doable, but only when you treat the project like a system build: verify soundness and flatness, prep the surface so mortar can actually bond, then use an exterior-rated tile-setting/movement strategy that matches your climate. If the existing tile is stable and you follow the specified mortar and drainage/waterproofing instructions, you can refresh patios, balconies, walkways, and entries without the full tear-out—just don’t skip the checks that prevent hidden failures.
Frequently Asked Questions
What prep work is required before installing tile over existing outdoor tile floors?
Start by cleaning the outdoor tile thoroughly, removing dirt, algae, and any existing sealers or coatings that could prevent adhesion. Check for loose or cracked tiles and repair them with an appropriate exterior patch or mortar. Then roughen the surface (mechanical abrasion is best) and address any dips so the new thinset can bond evenly. Finally, let everything dry completely before you begin installing the new outdoor floor tile.
How do you install outdoor tile over tile using the right thinset and waterproofing system?
Use an exterior-rated thinset mortar designed for tile-over-tile applications and confirm it’s compatible with your tile type (porcelain, ceramic, or natural stone). Apply a waterproofing membrane or crack isolation system made for outdoor installations, especially in freeze/thaw or rainy climates. Work in small sections, back-butter where needed, and fully key the mortar to both the substrate and the tile for good coverage. Finish with exterior-grade grout and follow manufacturer curing times to keep the floor durable.
Why does tile fail when installed over outdoor tile, and how can I prevent it?
Tile often fails due to poor bond, trapped moisture, or movement that cracks grout and loosens tiles. If the existing tile surface is sealed, glossy, or uneven, thinset won’t adhere reliably, leading to debonding. Outdoor conditions also create expansion and contraction, so using an exterior membrane, proper movement joints, and the correct mortar for tile-over-tile reduces the risk of failure. Always follow the water-management plan—slight slope away from structures and waterproofing at vulnerable edges.
What is the best underlayment or membrane for outdoor tile floors installed over tile?
For outdoor floors, choose a waterproofing membrane rated for exterior use and tile installations, ideally a system that includes seam treatment and proper overlap at transitions. A crack isolation membrane can be especially helpful if the old tile substrate has hairline cracking or if the slab is prone to movement. Make sure the membrane is compatible with your chosen thinset and grout and that you install it per instructions around drains, edges, and penetrations. This helps protect the substrate from moisture intrusion and improves long-term performance of outdoor floor tile.
Which grout and caulk should I use for tile over tile on outdoor patios or walkways?
Use an exterior-rated grout suitable for your installation environment, such as an anti-efflorescence or polymer-modified grout that resists water absorption and freeze/thaw damage. For movement joints, use 100% silicone or a polyurethane exterior caulk rather than grout, since grout is not designed for expansion and contraction. Sealers may be recommended depending on the grout and tile type, but verify compatibility and whether sealing is needed for your specific outdoor tile. Proper sealing and joint filling help reduce cracking, water penetration, and surface wear over time.
📅 Last Updated: October 12, 2026 | Topic: How to install over tile outdoor floors? | Content verified for accuracy and freshness.
References
- Tile
https://en.wikipedia.org/wiki/Ceramic_tile - https://en.wikipedia.org/wiki/Tile
- https://en.wikipedia.org/wiki/Thin-set_mortar
- https://en.wikipedia.org/wiki/Backer_board
- https://en.wikipedia.org/wiki/Waterproofing
- https://en.wikipedia.org/wiki/Grout
- Mortar
https://en.wikipedia.org/wiki/Mortar - Google Scholar Google Scholar
https://scholar.google.com/scholar?q=installing+tile+over+existing+tile+outdoor+floor+surface+preparation - Google Scholar Google Scholar
https://scholar.google.com/scholar?q=exterior+tile+installation+waterproofing+membrane+best+practices - Google Scholar Google Scholar
https://scholar.google.com/scholar?q=tile+over+tile+exterior+freeze+thaw+water+ingress+failure+mortar+thinset