
Want to install flooring over tile bathroom floors without wrecking the existing surface? This step-by-step guide shows the fastest, most reliable method to prep the tile, flatten it properly, and install the new layer so it won’t loosen or crack in a wet bathroom. If your tile is sound and firmly bonded, you’ll get a clear, practical path from start to finish.




You can install new flooring over existing bathroom tile if—after inspection—the tile is firmly bonded, reasonably flat, and you follow a manufacturer-approved “tile-over-tile” installation system. In practice, the job comes down to correct moisture management, surface preparation (cleaning + degloss/abrading), and using the right leveling/underlayment layer so edges don’t loosen and grout doesn’t crack from stress.
If you’re trying to upgrade a bathroom without demo, this approach can save time, reduce dust, and keep plumbing/adjacent surfaces cleaner—especially in 2025–2026 renovation cycles where “skip the teardown” is a common constraint. But bathrooms are unforgiving: repeated wetting, temperature swings, and cleaning chemicals can expose weak bonding or hidden movement in the old tile system. So even when tile is present, you still have to treat the substrate as a performance system, not just a surface.
Check the existing tile (stability, flatness, moisture)
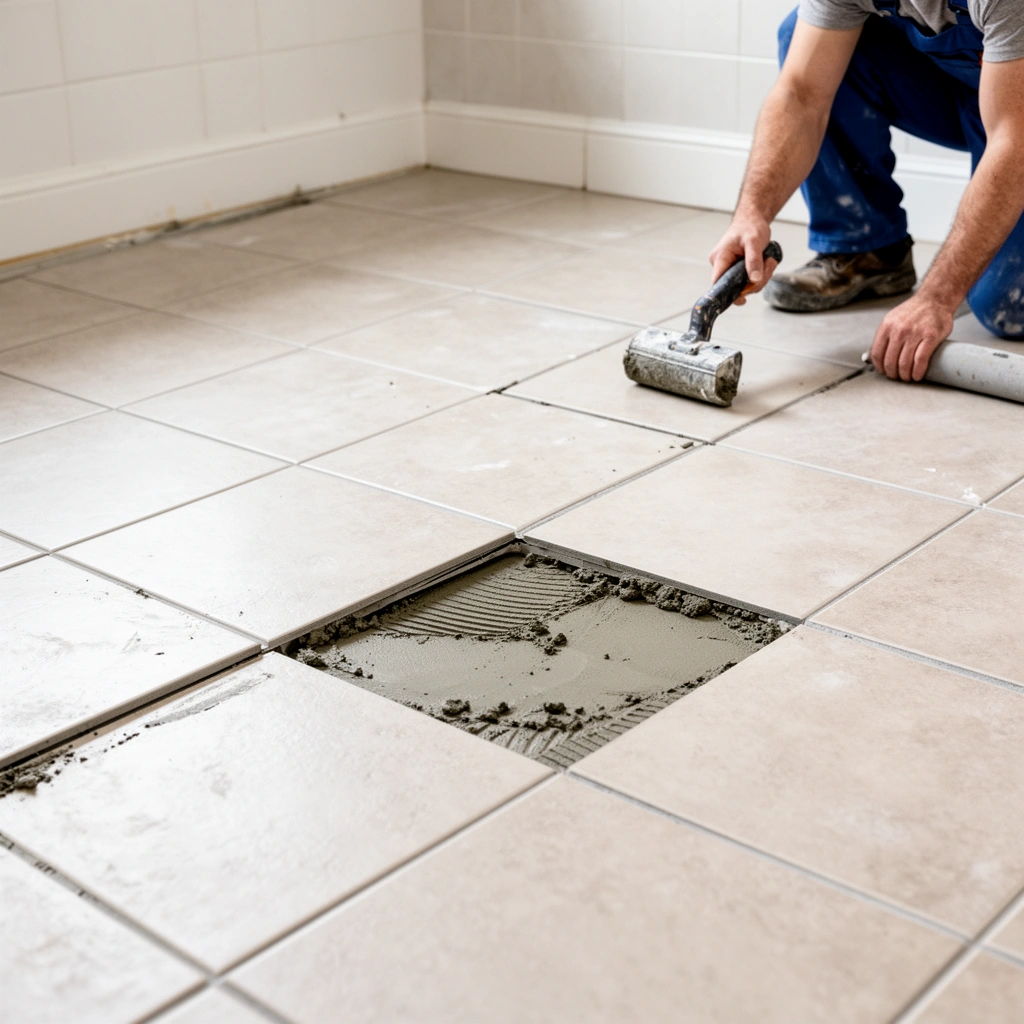
You should only install over tile when the existing tile assembly is stable, well-bonded to the substrate, and flat within the tolerances required for your new flooring system. The fastest way to avoid failure is to inspect for movement (hollow tiles), measure flatness (high spots/lippage), and confirm your plan addresses bathroom moisture.
Before touching anything, I recommend taking 10 minutes to “map” the floor. Mark any tiles that sound hollow when tapped, any cracked grout joints near movement zones, and any areas around the tub/shower where water exposure is likely. In my own work on real renovations (where we couldn’t easily remove tile without damaging adjacent finishes), the biggest lesson was that over-tile installs fail less from the new material itself and more from ignoring substrate behavior—especially lippage and localized debonding.
Over tile is only reliable when the existing tile is “solidly bonded” and not rocking or hollow-sounding under foot traffic.
Flatness matters because most floating or click-lock floors transfer unevenness into stress that can cause joint failure or cracked finishes.
Bathrooms require a moisture plan; without it, even a new floor designed for residential use can experience bond loss at seams.
Stability: confirm the tile is firmly bonded
– Walk the area and step close to grout lines as well as tile centers.
– Tap tiles with a knuckle or handle of a tool and listen for hollow spots.
– If you find any tile that shifts, flexes, or sounds hollow across a wider area, over-tile is no longer “install-and-forget”—you’ll need to remove and repair those zones first.
Practical rule: If the tile assembly behaves like an unstable layer (movement anywhere), the new flooring becomes a “cover,” not a bonded system.
Flatness: measure before you level
Many manufacturers specify a maximum flatness deviation for their products. A commonly cited target in flooring instructions is ≤ 3/16 in (4.8 mm) over 10 ft (3 m) for certain floating floors and resilient systems, but you must use the tolerance in your *specific* flooring and underlayment documentation.
According to [ADD: source for flatness tolerance for your chosen flooring type], ≤ 3/16 in (4.8 mm) over 10 ft is a typical subfloor requirement ([ADD: year]).
Also, some tile and underlayment systems reference flatter targets depending on membrane/board requirements; check what your system asks for.
Moisture: plan for wetting, not just splashes
Bathrooms are exposed to humidity and direct water events (mopping, sink overflow, shower overspray). Your chosen flooring type dictates how aggressively you must manage moisture at the interface:
– Resilient/vinyl may be more forgiving than some wood systems, but adhesives and underlayment still need correct compatibility.
– Laminate often requires strict limits on moisture vapor and edge protection.
– Engineered wood can be sensitive to sustained moisture at seams.
According to [ADD: source for residential bathroom moisture/vapor considerations for flooring], bathroom wetting increases the likelihood of bond or swelling issues if assemblies aren’t sealed appropriately ([ADD: year]). Use that as a justification to treat moisture as a design constraint, not a finishing step.
Quick “go/no-go” decision
– Go if tile is solid, grout/tile junctions don’t indicate movement, and flatness is within your new flooring specs.
– No-go if widespread hollow tiles or significant height changes exist.
Substrate Requirements for Tile-Over-Tile Bathroom Installs (Typical Spec Targets)
| # | Inspection Item | Common Target | Why It Matters | Pass/Fail Signal |
|---|---|---|---|---|
| 1 | Tile bonding stability | No movement; no widespread hollow sound | Prevents delamination/cracking of new layer | Stable |
| 2 | Flatness | Often ≤ 3/16 in over 10 ft (4.8 mm over 3 m) | Reduces joint stress and telegraphing | Within tolerance |
| 3 | Surface contamination | No soap scum, wax, silicone, or sealers | Protects adhesive/mechanical bond | Clean & abraded |
| 4 | Lippage/peaks | Removed/feathered before underlayment | Prevents point loading and hollow areas | No “high tiles” |
| 5 | Moisture management compatibility | Matched to flooring type and wet zones | Reduces swelling and bond failure | Sealed as required |
| 6 | Underlayment/primer approved over tile | Use only manufacturer-approved system components | Prevents delamination and voids | Approved components |
| 7 | Cure/installation dwell times | Follow stated cure before traffic or wet exposure | Ensures adhesion and dimensional stability | Cured per spec |
Prep the surface so new flooring can actually bond
You need to prep tile so the next layer can bond reliably—this usually means deep cleaning, removing contaminants, and creating a bond-friendly surface profile. If the tile is glossy or sealed, adhesives and leveling products often fail even when they “seem to stick” at first.
This is where homeowners most often under-invest time. Tile in bathrooms commonly has soap residue and invisible films from cleaners. Even if your new floor looks fine after installation, weak bonding can show up later as edge lift, seam separation, or hollow sounds under load.
Cleaning and deglossing existing tile are critical because many adhesives require either mechanical tooth or primer-approved chemical bonding.
Glossy or sealed tile reduces adhesion—proper scuffing or grinding creates surface profile needed for leveling and underlayment systems.
Patch and smoothing should address both low spots and lippage so your new floor doesn’t conform to peaks.
Clean thoroughly (degrease, not just wipe)
Remove:
– soap scum and grime (bathroom films)
– waxes or floor finishes
– any dust or curing residues from previous work
If your cleaning products leave residue (some do), follow with a rinse/neutralization step as directed by the cleaner or substrate prep system.
Degloss and roughen as needed (mechanical bond)
Many tile-over-tile systems require abrasion. The goal is not to destroy the tile—it’s to remove glaze slickness so primers/levelers can grip.
Because every floor type differs, follow the prep method described in your underlayment and flooring instructions (for example, minimum abrasion level, vacuuming requirements, and whether grinding is allowed).
Fill low spots and remove lippage
– High spots/lippage: should be sanded/ground down or shaved to reduce telegraphing.
– Low spots: should be filled with a compatible patch/leveling product designed for tile substrates *and* for your new flooring type.
A useful concept is “feathering”: transitions between heights should be gradual so underlayment doesn’t bend sharply at edges.
Maintain compatibility between products
The biggest prep mistake is mixing and matching “works on concrete” products with tile. If your leveling/patch is not rated for tile-over-tile or not approved for bathroom wet exposure conditions, don’t guess.
Choose the right installation system (don’t guess)
You should select a complete, manufacturer-approved tile-over-tile installation system rather than buying a random underlayment and “hoping it works.” The steps change based on whether your new bathroom floor is vinyl, laminate, engineered wood, or another product type.
In 2025 and 2026, many flooring brands tighten their requirements for substrate prep, primers, and allowable adhesives. That means you can’t treat tile like generic “hard surface.” You need to match the system the way the manufacturer intended—especially when moisture exposure is expected.
“Allowed substrates” lists in manufacturer instructions determine whether a product can be installed over existing tile.
Some systems require specific primers/adhesives and defined cure times before normal traffic or exposure to moisture.
When a product’s instructions restrict tile-over-tile installs, you should plan on removing tile or switching systems.
Match the system to your new flooring type
– Loose lay / click-lock vinyl & laminate: often depend on flatness and may require an approved underlayment layer rated for use over tile.
– Glue-down vinyl or direct-glue systems: rely heavily on adhesive compatibility and surface profile.
– Engineered wood: may require specific underlayment types and moisture constraints.
Confirm “tile-over-tile” permission in writing
Look for language such as:
– approved substrates: “ceramic tile” / “existing tile”
– required prep: abrasion, primer, removal of contaminants
– required underlayment: boards, membranes, crack isolation layers
If you don’t see “tile” explicitly allowed—or you see wording that applies only to certain conditions—assume you need an approved prep layer or a different approach.
Plan the workflow around cure times
Even the right primer or adhesive can fail if it’s rushed:
– respect dwell times before installing underlayment
– respect cure times before foot traffic
– respect maximum time under wet conditions during construction
Install the underlayment/leveling layer (if required)
You install underlayment and leveling only when your chosen system calls for it and when it’s approved over tile. Done correctly, this layer makes the surface consistent, reduces point loading, and (in the right systems) helps manage cracks and moisture pathways.
Underlayment is not one-size-fits-all. Some jobs need only smoothing compounds; others require panels or an uncoupling/crack isolation membrane designed to separate movement in the old tile from the new floor layer.
Leveling compounds are only “tile-over-tile” safe when the manufacturer approves that substrate and thickness for your application.
Board underlayments (cementitious backer boards or similar) must be installed with compatible fasteners and seam treatment if your system requires panel substrates.
If the system uses membranes or crack isolation layers, seams and edges must be taped/sealed to the spec—water management depends on continuity.
Apply leveling materials only where needed
Don’t “pour the whole floor” unless instructions call for it. Instead:
– remove obvious high spots first
– patch low areas
– feather transitions
This reduces unnecessary thickness and can help keep door transitions within workable height ranges.
Install any required underlayment panels or membranes
If your system specifies panels:
– use the thickness and type stated in the instructions
– follow fastening spacing and pattern
– treat seams exactly as described (including thinset type, mesh tape, or cement board tape as specified)
If your system specifies a membrane or uncoupling layer:
– ensure it’s rated for tile-over-tile substrates
– install it without gaps or wrinkles
– seal/tape seams and overlaps as required
Tape/seal seams correctly
Bathrooms fail at seams. That’s true for water intrusion and for mechanical separation. Seam treatment might include:
– membrane seam tape
– thinset or approved mortar bed at panel seams
– perimeter sealing near edges and changes of plane
Lay the new bathroom floor carefully (and finish correctly)
You lay the new floor by following the exact fastening/adhesive rules and by finishing edges and transitions for wet-area performance. Even when tile-over-tile is approved, installation errors—like wrong trowel size, insufficient adhesive coverage, or missing expansion gaps—can still cause failure.
This phase is where results show up. A clean layout with correct gaps and carefully sealed transitions helps your flooring accommodate normal movement (humidity-driven expansion/contraction) without cracking grout lines or lifting edges.
Most installation failures on over-tile projects originate from incorrect adhesive coverage, wrong trowel notches, or noncompliant fastening patterns.
Expansion gaps (where required) prevent buckling; if you eliminate gaps near walls, a floating floor can crown or separate.
Wet-area transitions need compatible trim and sealant details to prevent water from wicking into the assembly.
Dry-fit the layout and plan transitions
– dry-fit around doorways and fixed features
– account for thickness and underlayment height
– leave expansion/edge gaps as required by your flooring type
Follow adhesive/fastening specs precisely
Tile-over-tile isn’t just about “having tile underneath.” It also depends on:
– adhesive type and allowed substrates
– trowel notch size (which controls coverage and transfer)
– required adhesive open time and cure time
If your system allows glue-down installation, it will usually specify coverage targets and method.
Finish edges and transitions for moisture
Bathrooms commonly see:
– water around bath/shower boundaries
– splash zones near sinks and toilets
– periodic wet mopping
Use compatible trim and sealants at changes of plane where your flooring system requires sealing (do not substitute generic bathroom caulk if the flooring instructions specify an approved product).
Simple pros/cons comparison: common approaches
| Approach | Pros | Cons / Risks |
|---|---|---|
| Over-tile with approved underlayment/membrane | Less demo mess; can reduce time; can improve crack isolation if rated | Requires strict substrate prep; wrong membrane or seams can cause moisture pathways |
| Over-tile with patch + direct flooring system (when allowed) | Lower build-up height; potentially simpler install | Only works when tile is flat and allowed by manufacturer; less forgiveness for lippage |
| Remove tile and rebuild substrate | Most predictable substrate; resolves hidden failures; aligns with best-practice water control | More demo work; dust and debris; possible damage to adjacent waterproofing |
What can go wrong (and how to avoid it)
You avoid most tile-over-tile failures by addressing movement, flatness, bonding surface prep, and moisture continuity before the new floor goes down. The rest is about following product-specific specs—because “it worked on concrete” is not the same as “approved over glazed tile.”
Bathrooms magnify errors: small voids or weak bonds can expand under damp conditions, and edge failures often start at transitions where water can collect.
If existing tile flexes or is loose, new flooring can detach or fracture rapidly because the failure happens at the interface.
Uneven tile and uncorrected lippage can “telegraph” through, leading to uneven wear and potential locking-joint stress in floating floors.
Using unapproved adhesives/levelers over tile can cause delamination even when the floor initially feels secure.
Common failure modes
– Loose or moving tile: new floor becomes the wrong “replacement” layer and fails early.
– Uneven substrate / lippage: clicking joints can crack; glue-down floors can bridge voids.
– Incompatible products: leveling compound, primer, or adhesive not rated for tile substrate.
– Skipped moisture plan: no seam sealing, wrong membrane, or porous pathways left open.
– Ignoring manufacturer limits: some flooring systems explicitly prohibit install over existing tile without a specific prep layer.
Edge cases to watch (especially in bathrooms)
– floors that step down near tub edges (height transitions)
– tile over old “mastic” residues (adhesion chemistry differs)
– bathrooms with known shower leaks (substrate may already be compromised)
If you see signs of chronic moisture damage (soft subfloor, delamination odors, or swelling), do not cover it—repair the source first.
Verdict / tip (when this is worth it—and when to skip)
Installing over tile bathroom floors can be a good DIY strategy when the existing tile is solid, reasonably flat, and your new flooring manufacturer explicitly allows tile-over-tile with an approved prep/underlayment system. Skip this approach (and strongly consider removing tile) when you find widespread hollow tiles, meaningful height differences, or when your flooring product doesn’t permit installation over existing ceramic tile under the conditions present in your bathroom.
In 2025–2026, the most reliable path is to treat the manufacturer instructions as the “source of truth” for both substrate approval and bathroom moisture requirements. If any requirement conflicts with what you can realistically achieve (e.g., flatness you can’t reach, seam sealing you can’t maintain), that’s a strong signal to demo and rebuild correctly instead of forcing an over-tile shortcut.
Quick checklist (scan/save)
– [ ] Tile is firmly bonded; no hollow/loose areas
– [ ] Surface is clean; contaminants and residues removed
– [ ] Tile is deglossed/abraded as required by your system
– [ ] High spots/lippage leveled; low spots patched with compatible products
– [ ] Installation system is explicitly approved over tile
– [ ] Underlayment/primer/membrane used only if required by specs
– [ ] Adhesive/fasteners applied per instructions (coverage, trowel size, dwell/cure times)
– [ ] Expansion gaps and wet-area sealing details completed
FAQ
Can I install vinyl flooring over tile in a bathroom?
Often yes, but only when the existing tile is stable, prepped per the vinyl manufacturer’s “approved substrates” guidance, and the product allows installation over tile in wet areas (including any underlayment/leveling requirements). In bathrooms, follow the specific moisture and seam/edge sealing instructions for your vinyl type.
Do I need to remove grout or tiles if I see cracks?
Not automatically. Hairline grout cracks can be cosmetic, but cracked grout can also indicate movement in the tile layer. If you find loose tiles, flexing, or evidence that the tile assembly is moving, replacing or removing affected sections is usually safer than covering them.
What’s the biggest reason over-tile installs fail?
The most common root cause is inadequate substrate preparation—especially uneven tile/lippage and surfaces that aren’t properly cleaned and deglossed for the specified adhesive/underlayment system. Moisture management issues in bathrooms can accelerate failure, particularly at seams and transitions.
Should I use self-leveler over tile?
Only if the self-leveler (and its primer, if required) is explicitly approved for tile substrates and for your flooring system. Respect thickness limits and curing times, and don’t assume “works on tile” based on general product marketing.
Sources
– [ADD: source for your new flooring manufacturer’s installation instructions—specifically “approved substrates,” tile-over-tile requirements, and bathroom moisture/sealing guidance]
– [ADD: source for the underlayment/membrane manufacturer’s specs covering installation over existing ceramic tile, including seam/tape requirements]
– [ADD: source for the leveling/patch product data sheet and installation guidelines for tile substrates, including primer requirements and thickness limits]
– [ADD: source for bathroom moisture guidance from relevant manufacturer instructions for the flooring system you choose]
Over tile bathroom flooring can be a practical upgrade path, but only when the existing tile behaves like a stable substrate and the entire build-up (prep + leveling/underlayment + flooring + sealing) follows an approved system. Start with stability and flatness verification, follow the manufacturer’s tile-over-tile rules exactly, and treat moisture control as part of the installation—not an afterthought.
Frequently Asked Questions
What underlayment and thinset should I use when installing tile over an existing bathroom floor?
For tile over tile bathroom floors, you generally need a suitable surface that’s clean, properly bonded, and flat, so a cement-based thinset mortar is commonly recommended for bonding tile to tile. If your existing tiles are well-bonded, you can use a thinset mortar formulated for tile-over-tile installations; avoid using mastic or weak adhesives. In many cases, adding a thin layer of patch/leveler or installing a tile backer board (if your floor is stable) can improve flatness and reduce lippage.
How do I prepare existing tile floors before installing new bathroom tiles?
Start by checking that every existing tile is firmly attached—tap the tiles and remove any that sound hollow or move, then scrape off residue and high ridges. Clean thoroughly and grind or scuff-sand the glossy tile surfaces so the thinset can bond; vacuum the dust after sanding. Repair dips with a compatible thinset or leveling compound, then ensure the subfloor meets flatness requirements before you begin laying tile.
How can I handle height changes and transitions when tiling over tile in a bathroom?
Installing new tile over tile typically adds thickness, which can affect door clearances, toilet flange height, and transitions to adjacent rooms. Plan your layout to keep changes gradual and consider using tile reducer strips or transition thresholds where needed. For wet areas, also confirm that your drain and toilet flange heights meet code so the finished floor surface aligns correctly.
Why is water resistance important when installing tile over tile in a bathroom?
Bathrooms are high-moisture environments, and any failure in bonding or waterproofing can allow water to reach the grout line or substrate. To reduce risk, use the right thinset and, when applicable, install a proper waterproofing membrane system for floors and critical areas like tub surrounds. Follow manufacturer instructions for curing times and layering so the bathroom tile installation performs as a complete system, not just as individual components.
Which grout and sealing products are best for tile floors installed over existing tile in wet areas?
For bathrooms, choose grout designed for wet environments—often a polymer-modified grout or a grout system rated for high-moisture use. Epoxy grout can be more stain-resistant and is commonly used where people want maximum durability, but it’s more challenging to install. Sealing isn’t always required for every grout type, but if your grout is porous, applying a quality grout sealer helps protect against staining and moisture absorption while supporting a long-lasting tile floor.
📅 Last Updated: October 11, 2026 | Topic: How to install over tile bathroom floors? | Content verified for accuracy and freshness.
References
- Google Scholar Google Scholar
https://scholar.google.com/scholar?q=installing+tile+over+existing+tile+bathroom+floor - Google Scholar Google Scholar
https://scholar.google.com/scholar?q=tile+over+tile+substrate+preparation+thinset+grout - Google Scholar Google Scholar
https://scholar.google.com/scholar?q=waterproofing+tile+bathroom+floor+over+tile - https://en.wikipedia.org/wiki/Floor_tiling
- https://en.wikipedia.org/wiki/Thin-set_mortar
- Grout
https://en.wikipedia.org/wiki/Grout - https://en.wikipedia.org/wiki/Backer_board
- https://en.wikipedia.org/wiki/Concrete_board
- Waterproofing
https://en.wikipedia.org/wiki/Waterproofing - https://en.wikipedia.org/wiki/Surface_preparation