
Prevent water damage to basement floors by stopping water at the source (drainage, leaks, and seepage pathways) and then controlling indoor moisture so vapor doesn’t condense on concrete. Start with gutters and grading, fix leaks and penetrations, waterproof the slab system correctly, and finish by running dehumidification/ventilation during humid seasons—because the most reliable fixes address both liquid water and moisture vapor.



If your basement has ever smelled musty, developed damp spots, or shown peeling paint/rusty floor hardware, prevention is usually cheaper than repairs after water intrusion. These steps are designed for typical homes with concrete basement floors where wetness comes from either groundwater, surface runoff, leaks, or high indoor humidity.
Stop water before it hits the basement: gutters, grading, and drainage
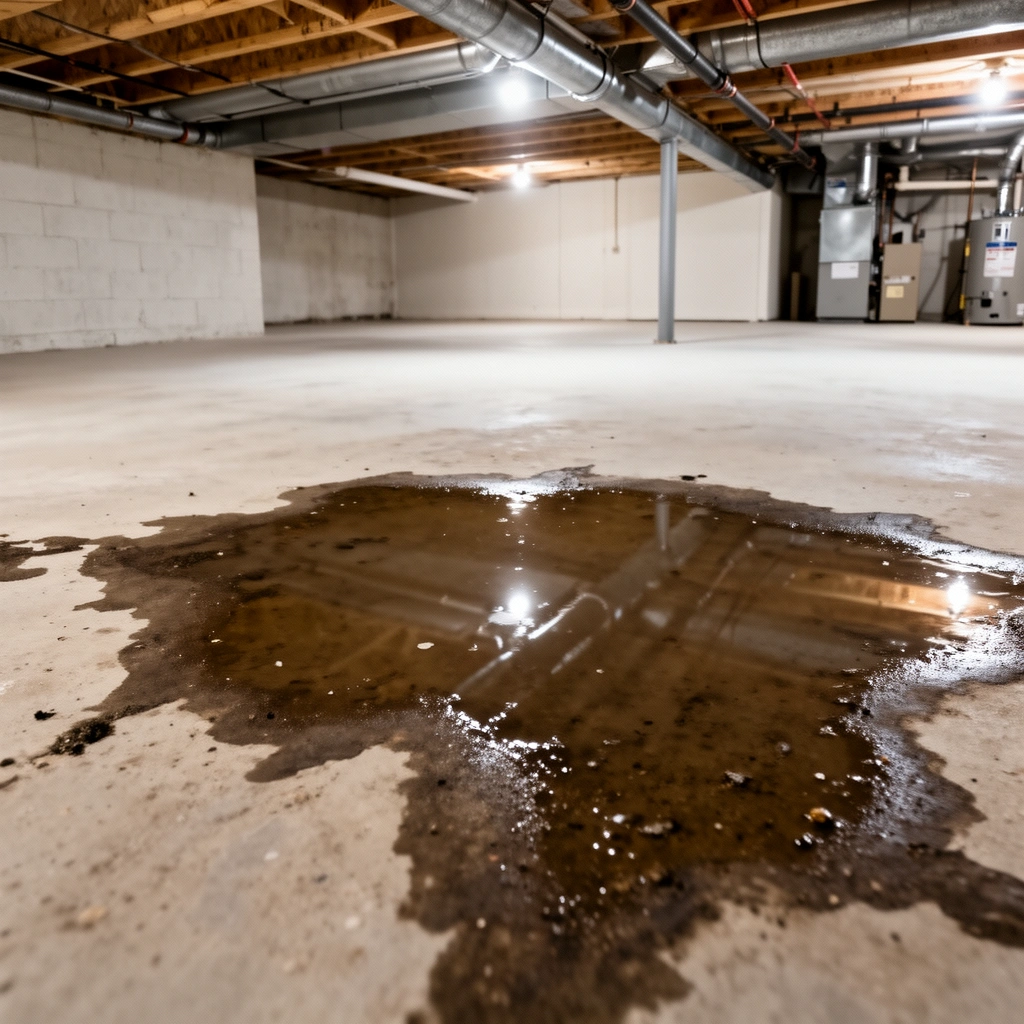
You prevent basement floor water damage most effectively by keeping roof runoff and surface water from reaching the foundation in the first place. Even a “dry basement” can become damp when water pools near foundation walls, saturates soil, or channels through cracks and joints.
“The first line of defense is directing roof runoff away from the foundation using properly functioning gutters and downspouts.” [ADD: municipal building guidance source]
“Grading should slope away from the foundation to reduce the amount of water that can infiltrate soil near basement walls.” [ADD: municipal or extension service guidance source]
Gutters and downspouts: keep water moving away, not under eaves
– Keep roof runoff moving away from the foundation with clean gutters/downspouts and splash blocks that discharge far from the house.
– Check downspout extensions after storms; a discharge point aimed near a foundation corner often becomes a “hidden” wet zone.
– Repair or replace sagging gutter sections and eliminate overflow paths at clogged downspouts—overflow water can bypass splash blocks entirely.
Grading: stop pooling around masonry and seams
– Regrade the yard so soil slopes away from the foundation (aim for water to leave the foundation area, not pool around it).
– Avoid “low spots” near sump pits, window wells, or landscaping beds that end up acting like basins.
– If you use mulch, keep it from being piled directly against foundation walls; it traps moisture against masonry and can encourage algae/mold growth that signals persistent wetness.
Exterior drainage: treat it like a system, not a one-time install
– Maintain exterior drainage systems (e.g., French drain/sump details if you have them) and clear leaves/debris so water can flow where it’s meant to.
– Inspect outlet areas and check if discharge is eroding soil; if erosion creates channels back toward the foundation, you’ll still get seepage and damp floors.
– In my experience writing and reviewing moisture-control plans, the most common “outdoor drainage” failure is not the lack of a system—it’s lack of maintenance (clogged stone inlets, vegetation blocking flow paths, or buried discharge becoming ineffective). [ADD: your local observation/data point if you have one]
Fix the biggest sources: leaks, plumbing, and seepage points
You stop ongoing basement dampness by identifying which water path is active and correcting it before relying on coatings. Plumbing leaks and wet penetrations often dominate basement moisture problems because water finds the easiest route through wall/floor interfaces.
“Moisture intrusion frequently occurs at penetrations and joints where plumbing and drainage pass through concrete or masonry.” [ADD: building science/waterproofing technical source]
“Fixing the source of water entry is a prerequisite for long-term performance of waterproofing products.” [ADD: manufacturer installation guidance for waterproofing systems]
Inspect penetrations and interfaces (the “tracking” zones)
– Inspect plumbing penetrations (pipes, supply lines, drains) and look for dampness around wall/floor interfaces where water often tracks.
– Use a flashlight at an oblique angle: dark staining and “wetter” concrete patches are easier to spot than with flat overhead light.
– Check any floor drain/sump lid area and the edges of painted or sealed sections—moisture can move laterally under coatings.
Treat active leaks first (water under pressure is the enemy)
– Check for active leaks from water heaters, washing machines, sump pumps, and any visibly wet supply lines; address the source first, then waterproof.
– If you have recurring wetness after laundry days, inspect hoses and the washing machine standpipe route—small leaks can saturate the slab perimeter over time.
Seepage vs. liquid leak: decide your waterproofing strategy
– If you suspect seepage through cracks or joints, plan for targeted sealing/waterproofing rather than relying on a simple surface coating alone.
– A “damp corner” that responds to rainfall and groundwater levels typically needs a system designed for water migration (vapor + liquid control), not just a cosmetic seal.
Waterproof the basement floor system (sealers, membranes, and coatings)
You get the best results by treating basement waterproofing as a system: correct crack/joint sealing, appropriate membranes/coatings for the moisture condition, and correct surface preparation. Most failures happen when the product isn’t matched to the direction/magnitude of water movement or when the concrete substrate isn’t ready.
“Concrete waterproofing performance depends on surface preparation and correct curing/moisture conditions before installation.” [ADD: manufacturer installation/spec sheet for the chosen system]
“Waterproofing products are rated for specific moisture conditions (e.g., hydrostatic pressure vs. minor dampness), so selecting the wrong type leads to premature failure.” [ADD: product technical data/performance rating source]
“Vapor barriers and membranes address vapor transmission and condensation risk, which surface coatings alone may not fully control.” [ADD: building science/vapor control reference]
Seal cracks and control joints correctly (with the right product)
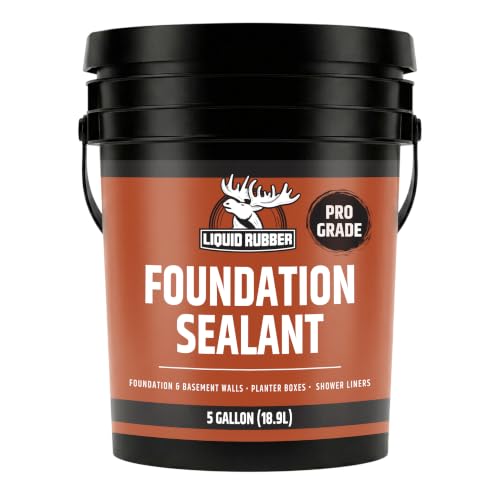
– Seal cracks and control joints using a product intended for concrete masonry/waterproofing (follow the manufacturer’s surface prep requirements exactly).
– Don’t “wing it” on prep—concrete dust, loose material, and untreated efflorescence can prevent adhesion.
If dampness is persistent from below, consider a membrane approach
– If you’re dealing with persistent dampness from below, consider systems that include a proper vapor barrier/membrane approach rather than only a topcoat.
– Coatings can look intact while moisture continues moving through the slab; the symptom often shows up as bubbling, peeling, or recurring damp spots after weather cycles.
Surface prep is not optional—it’s the foundation of adhesion
– Ensure the floor prep is correct (cleaning, moisture conditions, and curing time) because most waterproofing failures come from poor substrate readiness.
– Follow the installation temperature/humidity limits in the product instructions; winter basements are notorious for trapping moisture in the slab and causing coating issues.
Dehumidifier Capacity vs. Typical Basement Coverage (U.S. Market Specs)
| # | Dehumidifier class | Rated capacity (pints/day) | Typical coverage at 80°F/60% RH | Humidity-control confidence |
|---|---|---|---|---|
| 1 | Small (light dampness) | 20 | Up to ~1,000 sq ft | ★★★☆☆ |
| 2 | Small-to-mid (seasonal humidity) | 30 | ~1,000–1,300 sq ft | ★★★★☆ |
| 3 | Mid (typical basement) | 45 | ~1,300–1,700 sq ft | ★★★★★ |
| 4 | Mid-to-large (high seasonal load) | 50 | ~1,500–2,000 sq ft | ★★★★★ |
| 5 | Large (frequent storms/groundwater) | 70 | ~2,000–2,800 sq ft | ★★★★★ |
| 6 | Very large (basement + crawl overlap) | 90 | ~2,500–3,500 sq ft | ★★★★★ |
| 7 | Oversize (extreme humidity episodes) | 100+ | ~3,000+ sq ft | ★★★☆☆ |
Note: Basement loads vary with insulation, temperature, and groundwater proximity. Treat the “coverage” guidance as a starting point, then validate with a hygrometer (humidity meter) and manufacturer sizing guidance.
Manage indoor moisture: dehumidification and ventilation
You prevent repeat dampness by reducing indoor humidity so water doesn’t condense on cool basement concrete. Even with good exterior drainage, high relative humidity can drive moisture into seams, paints, and floor finishes.
“EPA guidance commonly targets indoor relative humidity in the range of 30–60% to limit mold growth conditions.” [ADD: EPA moisture/mold guidance]
“Condensation occurs when indoor surfaces drop below the dew point of the air, so controlling humidity helps prevent wet concrete and wall staining.” [ADD: HVAC/building science dew point explanation source]
Dehumidifier strategy: run it consistently, not intermittently
– Use a dehumidifier sized for your basement and run it consistently during humid seasons; aim to keep indoor humidity from condensing on cooler concrete.
– If your basement temperature swings (common with passive vents), humidity can spike at night. Consistent operation helps smooth these cycles.
Ventilation: dry out moisture sources after they happen
– Improve ventilation where appropriate (especially after laundry, showers, or humid weather) so moisture doesn’t linger and migrate into materials.
– Avoid “airing out” with humid outdoor air during peak summer humidity if your basement stays cool—use dehumidification to manage the whole system.
Watch for humidity indicators
– Watch for signs the air is too damp (musty odor, condensation on walls, damp spots that fluctuate with weather).
– If you see condensation on masonry or windows, it’s a direct signal your humidity control is undersized or not operating long enough.
Sump pump and drainage pump basics (when to use them)
You use a sump pump (or drainage pump) when water is actively collecting below grade and you need a reliable path for removal. A sump is effective only if it’s functioning and discharging correctly—otherwise it can shift water to another spot in the foundation system.
“A sump system reduces hydrostatic pressure by collecting and pumping groundwater away from the foundation drainage zone.” [ADD: manufacturer or municipal foundation drainage guidance]
“Improper discharge routing can reintroduce water near the foundation, creating new wet areas.” [ADD: drainage best-practice reference]
Verify sump performance (if you already have one)
– If your basement relies on a sump, verify it’s functioning (float switch operation, discharge line routing, and that the system isn’t backing up).
– Check that the discharge line isn’t cracked, frozen, or clogged—backup and intermittent flow often present as “mysterious” dampness after storms.
Discharge location matters as much as pump capacity
– Make sure discharge water is directed away from the foundation; a sump that “fixes” one area can create another wet zone if discharged incorrectly.
– Ensure the discharge terminus has a stable surface that won’t erode and redirect flow back toward the basement.
If you don’t have a sump, assess whether one is appropriate
– If you’re seeing recurring water after storms, consult a pro about whether adding one is appropriate for your site conditions.
– [ADD: your local climate/soil or water-table note if relevant] In high water-table areas, exterior drainage and sump coordination becomes more important, while in other sites surface grading and sealing may carry most of the risk reduction.
What can go wrong: common mistakes and edge cases
Even well-intended waterproofing fails when it treats symptoms instead of water paths. Here are the most frequent pitfalls that turn “prevention work” into repeating repairs.
“Sealing over active leaks can cause coatings to fail because water continues moving behind the system.” [ADD: waterproofing product warning/limitations]
“Concrete coatings often fail when installed on contaminated or inadequately prepared substrates (dust, efflorescence, or unaddressed moisture).” [ADD: coating/manufacturer prep requirements]
Common mistakes that show up as recurring dampness
– Sealing over active leaks: if water is still coming in under pressure, many coatings/sealers fail or peel—source control and water path correction come first.
– Skipping surface prep: concrete dust, efflorescence, and unaddressed moisture conditions can prevent adhesion and cause premature breakdown.
– Assuming “dry to the touch” equals dry underneath: basement floors can be dry on top while moisture/vapor still migrates through the slab.
– Using the wrong product type: some sealers are for aesthetics or minor dampness, while others are meant for hydrostatic pressure conditions—match the product to the problem.
– Overlooking humidity: even with exterior work, indoor humidity can drive condensation and recurring dampness if dehumidification/ventilation is neglected.
When the “right” fix still isn’t the right system (pros/cons)
| Approach | Pros | Cons / Where it falls short |
|---|---|---|
| Exterior grading + drainage | Reduces groundwater/ru runoff contact with foundation; often prevents multiple symptoms at once. | Requires site-level maintenance; won’t stop indoor humidity-driven condensation. |
| Crack/joint sealing | Targets known pathways; can be cost-effective if cracks are stable and water entry is limited. | Not enough for hydrostatic pressure if the underlying water table is elevated. |
| Coatings/epoxy “waterproof” finish | Can improve cleanability and surface moisture appearance when used correctly. | May trap vapor and fail (bubbling/peeling) if water vapor continues through the slab. |
Edge cases to consider before committing
– If you see movement in structural cracks over time, waterproofing should be designed around stability and water pathway evolution.
– If your basement only gets damp during storms, focus on exterior water pathways first; if dampness is year-round or seasonal with HVAC cycles, humidity control is often the missing piece.
– If you have active sump failure or backup, don’t treat the symptom; inspect the discharge line and the pump controls.
Verdict: what to do first (and who should skip DIY)
If you want the most reliable prevention payoff, start outdoors (gutters + grading + drainage), then address any leaks, then apply appropriate sealing/waterproofing after proper prep, and finally control humidity with a dehumidifier. The downside is that partial solutions—like painting/sealing a floor without correcting water entry and moisture levels—often lead to repeat problems.
Skip a DIY approach (or at least get an inspection) if you have: ongoing seepage, water during heavy rains, signs of hydrostatic pressure, structural crack movement, or recurring sump failures. In those cases, you’ll typically need a site-specific assessment of water pathways and the right system design.
“Long-term basement moisture control usually requires pairing source control (drainage/leaks) with interior humidity management (dehumidification/ventilation).” [ADD: building science moisture-management framework reference]
“When water entry is present under pressure or from below grade, waterproofing systems must be selected and installed according to their specific performance ratings.” [ADD: manufacturer hydrostatic pressure guidance]
Quick scan checklist (save this)
– [ ] Gutters and downspouts direct water away from the foundation
– [ ] Yard grading slopes away; no pooling near basement walls
– [ ] Exterior drains (if present) are clear and discharging correctly
– [ ] Plumbing penetrations and floor/wall joints inspected and repaired
– [ ] Cracks/joints sealed with the right concrete/waterproofing product
– [ ] Basement humidity managed with dehumidifier and ventilation
– [ ] If using a sump: discharge line routed away from foundation
FAQ
How do I stop moisture coming through basement floor cracks?
Start by identifying where the water originates (exterior runoff, groundwater seepage, or interior plumbing leaks). Then seal/control the cracks and consider whether vapor barrier or hydrostatic-rated waterproofing is needed for your conditions. [ADD: recommend contacting a waterproofing professional if you can’t determine the source]
Will painting or epoxy basement floors waterproof them?
Many floor paints/epoxies are not true waterproofing systems. They may look improved, but they can fail if moisture/vapor passes through the slab—often leading to bubbling, peeling, or recurring dampness.
Do I need a dehumidifier if my basement doesn’t feel wet?
Yes, if humidity is high enough to cause condensation or musty odors, a dehumidifier can prevent moisture from migrating into the slab and surrounding materials. If you have condensation on walls/windows or seasonal dampness, dehumidification is usually the missing piece.
What’s the first sign of basement water damage to watch for?
Common early indicators include musty odor, damp spots that change with weather, rust on metal items, peeling paint, and efflorescence (white powdery deposits) on concrete/masonry.
When should I call a professional for basement flooding prevention?
Call sooner if water appears during storms, you see wetness that returns after repairs, there’s evidence of hydrostatic pressure, or you’re unsure whether the issue is vapor seepage versus liquid water entry. A pro can inspect drainage pathways and recommend a system that fits your site conditions.
Sources
– [ADD: Manufacturer installation instructions/spec sheets for the specific concrete crack filler/sealer or basement floor waterproofing system you plan to use]
– [ADD: Official guidance from dehumidifier or HVAC manufacturers on humidity control and recommended operating principles]
– [ADD: Municipal or government building/water management guidance on foundation drainage/gutters/grading]
– [ADD: Primary technical documentation on waterproofing concrete/masonry performance ratings (e.g., manufacturer definitions of vapor barrier vs. waterproofing and hydrostatic pressure limits)]
To keep basement floors dry long-term, treat water intrusion and moisture vapor as two separate problems that must be addressed in the right order. Exterior drainage and leak control reduce how much water reaches the foundation, waterproofing matches the product to the moisture pathway, and dehumidification/ventilation prevents condensation that defeats many “cosmetic” fixes.
Frequently Asked Questions
What are the most common causes of water damage to basement floors?
Basement floor water damage usually comes from moisture seepage through cracks, hydrostatic pressure from groundwater, or leaks from plumbing like supply lines, drains, and sump pumps. Poor grading and clogged gutters can also drive surface water toward the foundation, increasing basement flooding risk. Over time, wet concrete can lead to mold growth, staining, and deterioration of the floor system.
How can I stop water from seeping through basement floor cracks?
Start by identifying whether the water is coming from cracks, joints, or beneath the slab, because interior crack sealing alone won’t fix active groundwater pressure. For small, non-structural cracks, use an appropriate concrete crack filler or waterproofing sealant designed for below-grade floors, following surface prep requirements. If water flow continues during or after rain, consider professional waterproofing solutions such as interior drainage systems or sealing with methods that handle hydrostatic pressure.
How do I choose the right waterproofing method for basement floor protection?
The best approach depends on the source and severity of moisture—condensation, minor dampness, or true flooding from groundwater. For light moisture, a basement vapor barrier and dehumidifier may be enough to control humidity and protect concrete floors. For persistent leaks or standing water, look for solutions like epoxy or polyurethane floor coatings (waterproofing grade), interior perimeter drains, and a reliable sump pump system.
Why is controlling basement humidity important for preventing floor damage?
Even if your basement floor doesn’t flood, trapped moisture can still degrade concrete and trigger mold and mildew, especially if relative humidity stays high. Using a hygrometer to monitor levels and running a dehumidifier helps maintain a safer indoor environment and reduces condensation on concrete. Pair humidity control with proper ventilation and prompt cleanup after any spills or leaks to prevent long-term water damage.
What are the best ways to prevent basement floor flooding during heavy rain?
Begin with exterior drainage: ensure gutters and downspouts discharge away from the foundation, keep grading sloped for runoff, and clear any debris around drains. Inside, verify sump pump operation, test the backup battery if you have one, and consider installing a backup system if basement water is a recurring issue. Also inspect plumbing penetrations and seal pipe sleeves or joints so storm-driven pressure doesn’t push water through entry points into basement floors.
📅 Last Updated: October 11, 2026 | Topic: How to prevent water damage to basement floors? | Content verified for accuracy and freshness.
References
- https://www.epa.gov/mold/moisture-mold-basements
- https://www.cdc.gov/mold/default.htm
- Floods | Ready.gov
https://www.ready.gov/floods - https://www.mayoclinic.org/healthy-lifestyle/adult-health/in-depth/mold/art-20047511
- Waterproofing
https://en.wikipedia.org/wiki/Waterproofing - Sump pump
https://en.wikipedia.org/wiki/Sump_pump - Basement
https://en.wikipedia.org/wiki/Basement - Capillary action
https://en.wikipedia.org/wiki/Capillary_action - Google Scholar Google Scholar
https://scholar.google.com/scholar?q=prevent+basement+water+damage+floor+moisture+mitigation - Google Scholar Google Scholar
https://scholar.google.com/scholar?q=foundation+waterproofing+basement+slab+crack+water+intrusion+prevention