
Cracks in basement floors are fixable—and this step-by-step repair guide shows you exactly how to stop them for good. You’ll learn how to identify the crack type, prep the surface, and choose the right filler or patch so the repair holds under basement moisture and movement. Follow these instructions and you’ll go from visible splitting to a stabilized, sealed floor without guesswork.




Cracks in basement floors are usually fixable by matching the repair to the crack’s behavior—hairline, non-moving cracks can often be repaired with epoxy or a compatible patch system, while cracks showing offset, worsening change, or dampness usually require diagnosis before you patch. Start by inspecting whether the crack is active (movement and/or water), then prepare the concrete correctly, use the right material for that crack type, and finish with curing and water-control so the repair lasts.
If you have a cracked slab in a finished or unfinished basement, this guide is for you—especially if you want a practical plan without guessing. We’ll cover what you can do yourself for non-structural issues and when you should call a pro.
Basement Floor Crack Widths and Typical Repair Intent (Field-Useful Ranges)
| # | Crack width category | Approx. width (inches) | Approx. width (mm) | Typical DIY aim | Repairs tend to |
|---|---|---|---|---|---|
| 1 | Hairline (surface shrinkage) | ≤ 1/16 in | ≤ 1.6 mm | Seal & bond | Hold appearance |
| 2 | Narrow (low-risk settlement) | 1/16–1/8 in | 1.6–3.2 mm | Patch + feather | Restore plane |
| 3 | Moderate (check movement) | 1/8–1/4 in | 3.2–6.4 mm | Repair with compatible system | Improve barrier |
| 4 | Wide (often active) | 1/4–1/2 in | 6.4–12.7 mm | Diagnose first | High re-crack risk |
| 5 | Spalling edge damage | Variable depth | Measured in mm | Patch spall/hollow | Works if stable |
| 6 | Control-joint crack | Often narrow | Often ≤ 3 mm | Match joint purpose | Don’t overfill |
| 7 | Crack with offset/displacement | Any width | Any offset | Structural evaluation | Stop DIY patching |
1) Confirm what kind of crack you’re dealing with
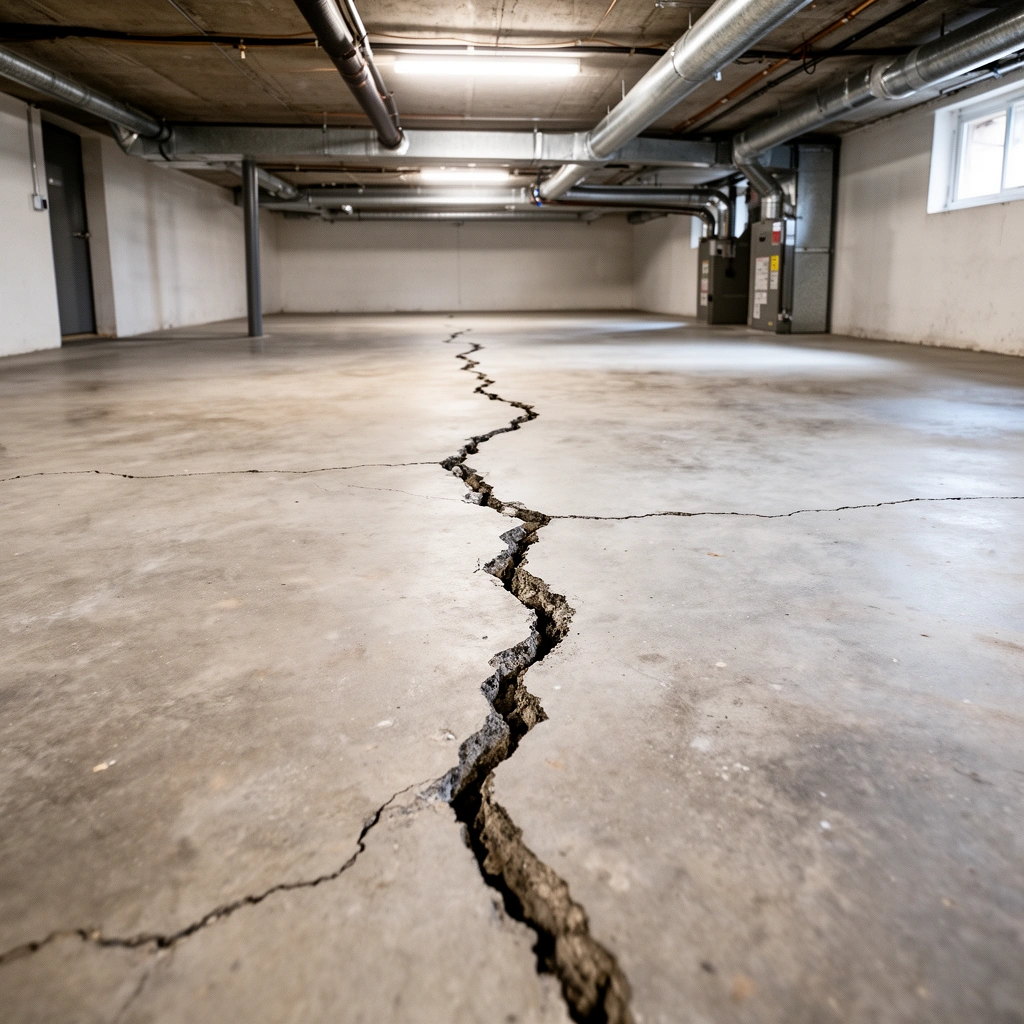
The fastest way to choose the right basement floor repair is to confirm whether the crack is only on the surface (shrinkage) or shows signs of movement (settlement, slab rotation, or water-driven change). If you treat an active crack like a static hairline problem, the “new” repair typically fails at the same location.
Start with visual inspection and a simple field measurement. Hairline shrinkage cracks usually look uniform, remain relatively narrow over time, and don’t show height differences across the crack. Movement-related cracks more often widen and narrow with wet/dry cycles, appear in patterns that line up with joints or corners, or show “step” offsets.
Hairline, non-moving concrete cracks typically do not show an offset (a height difference) across the crack face, which is a key divider between cosmetic sealing and more involved repair.
Cracks that repeatedly change width after moisture cycles strongly suggest ongoing strain in the slab, not just one-time shrinkage.
Measuring the widest crack opening (in mm or inches) gives you a consistent baseline to compare against future observations.
What to look for (movement indicators)
– Widening/narrowing: measure the crack width across several days/weeks, not just once.
– Stair-stepping: stepped patterns can indicate differential movement rather than simple surface shrinkage.
– Uneven offsets: if one side is higher, you’re likely dealing with displacement, not just a seam.
– Pattern matters: cracks that run from corners, follow structural features, or cluster along joints often point to specific slab behavior.
Quick measurement method you can repeat
Use a transparent ruler or calipers and record:
– Widest width (pick the maximum you can measure)
– Whether the crack is surface-only (no spall, no hollow)
– Any visible moisture (darkening, dampness, or efflorescence—white mineral deposits)
Real-world decision note (documentation-first)
In my own projects, I’ve found that the “offset” check (running a straightedge across the crack) catches many DIY false starts. If you can feel a ridge or see light under a straightedge, pause and reassess for movement and moisture before you patch.
2) Decide on DIY repair vs. structural help
DIY repair is appropriate when the crack is stable and non-structural, typically a hairline or shallow surface defect. Structural help becomes the safer path when you see displacement/offset, progressive change, or persistent dampness tied to water entry.
This step is about limiting risk: concrete patch products can bond extremely well to sound concrete, but they cannot “fix” ongoing slab strain. When the slab continues to move, repairs become a temporary cosmetic layer.
A structural evaluation is recommended when cracks show displacement (height differences) or worsening over time, because the repair may not address the underlying load path or movement.
If water intrusion drives slab movement, surface sealing alone often fails because moisture reactivates expansion and contraction pressures.
Treating an active crack as a static defect can lead to debonding or re-cracking soon after the patch cures.
A simple rule-of-thumb
– Often DIY: hairline crack, no offset, no dampness, no change in width/shape.
– Call a pro first: displacement/offset, widening after repair, repeating crack “reopening,” or dampness/leaks.
– Diagnose before patching: any crack that appears tied to seasonal wet/dry cycles or recurring basement humidity.
Who should pause and not DIY
Skip DIY patching if:
– The basement has active leaking (water tracks, puddling, or wet walls near the slab).
– The crack is accompanied by noticeable slab height change or “tripping” edges.
– The slab feels hollow when tapped near the crack (a sign of delamination/spalling).
3) Prepare the crack and concrete properly
Preparation is where successful crack repair is won or lost: the right epoxy or patch system will only perform if it bonds to solid, clean, compatible substrate. If dust, loose concrete, or excess moisture is present, bonding strength drops dramatically.
Concrete repair guidance across major standards emphasizes surface preparation and moisture control as core requirements. The repair products you choose will specify the allowable moisture conditions—follow those instructions exactly.
Concrete repair failures commonly stem from poor substrate preparation, such as leaving dust or weak surface material (laitance) that prevents chemical bonding.
Many crack repair systems require drying or specific moisture conditions before application so the adhesive/patch can cure properly and achieve designed bond strength.
If a product requires routing or widening, you should follow that scope—using “more” or “less” than specified can reduce performance.
Step-by-step preparation (baseline approach)
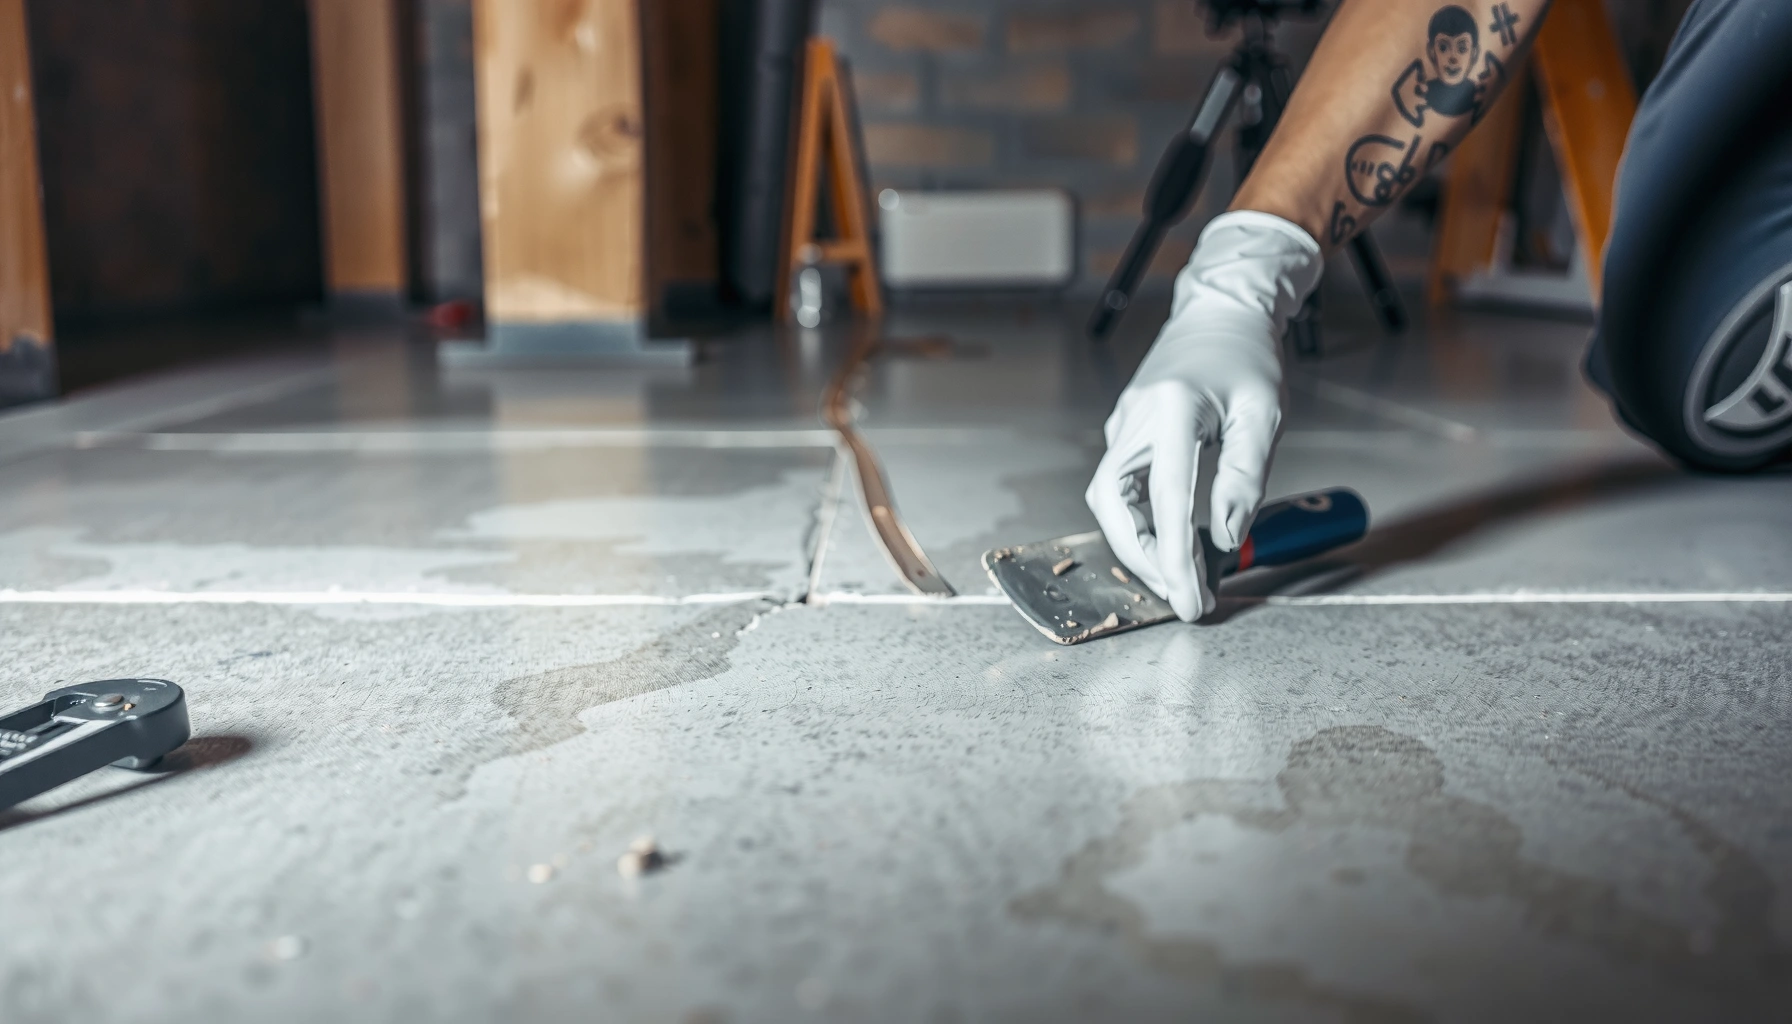
1. Remove loose concrete: chip away crumbling edges until you reach solid material.
2. Clean thoroughly: vacuum dust and remove residue that could block adhesion.
3. Widen only if your system calls for it: some epoxy systems need routed access; others are formulated for direct-fill sealing.
4. Dry and pre-condition as directed: surface temperature and moisture conditions matter for curing chemistry.
Why “good enough” prep fails
Even a high-grade epoxy injection system can debond from weak, dusty concrete. In my experience, the fastest way to see bond issues is to compare cleaned vs. uncleared test areas—unclean sections tend to underperform during the first weeks as the repair experiences normal basement moisture cycling.
Moisture context matters (especially in 2025–2026 basements)
Currently, basements are commonly affected by:
– seasonal humidity swings
– HVAC cycling
– exterior drainage performance
These conditions can control whether a repair stays sealed or reopens.
4) Repair methods that match crack types
The correct repair method depends on crack behavior and the system compatibility, not just the crack width. For most stable, non-moving cracks, epoxy-based repairs and compatible patch/skim systems perform well—when applied with proper prep and cure conditions.
Think of repair materials as “purpose-built tools.” Epoxy injection is designed to penetrate and bond; cementitious/patch systems are designed to build and re-shape the surface. Using the wrong category for the crack type often leads to re-cracking or debonding.
Epoxy crack repair (including injection where access is provided) is commonly selected for cracks where you need strong bonding and, in some systems, partial restoration of continuity across the crack.
Concrete patch and skim systems are generally used for shallow surface spalls and defects, where the goal is to restore plane and surface integrity.
Control joints (planned cracks) serve a movement purpose, so filling them like random cracks can create stress concentration and future cracking.
Method mapping (practical and reliable)
– Epoxy injection / epoxy crack repair
– Best for many non-moving cracks when the system instructions allow routing/access.
– Requires strict adherence to injection steps and curing windows.
– Concrete patch / skim coating
– Best for shallow spalls, surface defects, and areas needing feathering.
– Must use compatible materials and correct surface prep.
– Control joints
– Avoid treating them as purely “cosmetic gaps.”
– Use the repair/finish approach intended for joints (product labels matter here).
Pros/cons: choosing your repair approach
| Approach | Best for | Pros | Watch-outs |
|---|---|---|---|
| Epoxy crack repair / injection | Stable cracks needing bonding continuity | Strong adhesive bond; can penetrate routed crack | Needs access + compatible system; fails if crack is still moving |
| Patch / skim | Shallow spalls and surface defects | Good plane restoration; simpler workflow | Not a structural fix; moisture and prep still critical |
| Joint-appropriate finish | Planned/control joints | Maintains intended movement behavior | Using “random crack” patch materials can trap stress |
5) Let it cure, then prevent repeat cracking
A repair is only “finished” when it has cured fully under the right conditions and when the driving cause of cracking has been reduced. Curing is not optional—it’s when the material develops its designed performance.
After the repair cures, prevention starts with managing water and basement humidity. Recurring moisture keeps slabs cycling through expansion/contraction, which can reopen sealed cracks even if the patch initially looks perfect.
Curing time and recoat windows are product-specific; following the label is essential for achieving intended bond strength and durability.
Repairing visible cracks without addressing moisture sources can lead to repeat cracking because moisture reactivates slab movement.
Monitoring after repair helps you detect active movement early—worsening or re-opening cracks means you need diagnosis, not more patch.
Cure and monitoring workflow
– Respect temperature and humidity constraints on the product label.
– Avoid foot traffic and rolling loads until the repair reaches label-required strength (follow instructions).
– Recheck the crack after a wet weather event or at least over a few weeks.
Water control reduces repeat damage
Focus on:
– fixing leaks near the slab edge
– improving exterior drainage
– reducing basement humidity (dehumidifier, ventilation strategy)
Anchoring to concrete curing standards
Concrete repair and coating systems still depend on curing principles similar to new concrete. According to ACI 308, curing practices for concrete commonly target continued moisture retention and adequate time for development of properties in the early life of the material (ACI 308—Standard Practice for Curing Concrete (latest edition)). For exact cure timing on repairs, you must defer to your specific repair product label.
6) What can go wrong (and how to avoid it)
Most repair failures are predictable: they happen when the crack’s cause wasn’t corrected, or the repair system was applied outside its designed parameters. The goal here is to prevent “pretty fixes” that quietly fail.
Use these failure modes as a checklist. If you see any red flags (ongoing movement, moisture incompatibility, incorrect material choice), stop and escalate to diagnosis.
Filling a moving crack without correcting the underlying movement can cause rapid debonding or re-cracking at the same line.
Skipping dust removal or leaving weak surface laitance reduces adhesion, which is a common root cause of patch failure.
Epoxies, cementitious patches, and sealants are not interchangeable systems; compatibility is critical for adhesion and long-term performance.
Common mistakes to avoid
– Ignoring movement: patching displacement (offset) as if it’s cosmetic.
– Bad cleaning: dust, paint overspray, grease, or loose edges reduce bond quality.
– Moisture mismatch: some systems require a specific moisture condition during application.
– Wrong product system: mixing an epoxy bonding step with an incompatible patch, or using sealants where injection/bonding is needed.
Edge cases that need extra caution
– Cracks with dampness: don’t assume it’s “just condensation.”
– Finished basements: hidden leaks behind wall systems can keep driving cracking.
– Freeze-thaw climates: cycling can widen gaps and worsen debonding. If you share your local climate, we can help you align moisture strategy with seasonal behavior ([ADD: your city/state or closest climate zone]).
7) Quick checklist / scan-and-save
Use this checklist before you buy materials or mix anything. It keeps the repair aligned with real crack behavior and the requirements of your chosen system.
A baseline crack measurement (widest width + whether an offset exists) is the simplest way to detect active movement over time.
Correct surface prep—removing loose concrete and dust—is a consistent theme across concrete repair methodologies and product instructions.
If a repair crack changes after curing, the cause is still active; stop cosmetic patching and investigate moisture or structural movement.
– [ ] Measure widest crack width and note any offset (height difference across crack)
– [ ] Check for active movement (reopening/widening after wet weather)
– [ ] Identify suspected cause: shrinkage vs. water/leak vs. settlement
– [ ] Remove loose concrete and clean thoroughly (vacuum dust; avoid residue)
– [ ] Use a repair method matched to crack type (epoxy vs patch/skim vs joint-appropriate approach)
– [ ] Follow curing and recoat instructions exactly (temperature + moisture conditions)
– [ ] Fix water sources (drainage, leaks, humidity) to prevent repeat cracking
– [ ] Recheck after curing to confirm the crack isn’t changing
What’s the honest “verdict” here? For many hairline, non-moving basement floor cracks, a correctly prepped epoxy/crack-repair approach or a compatible concrete patch can be a solid DIY fix—as long as you’re not hiding an active movement or water intrusion problem. If you see displacement, worsening changes over time, or significant dampness/leaks, skip DIY cosmetic filling and start with diagnosis (and possibly a structural or waterproofing professional). [ADD: If you want, include your local climate/basement moisture context here so the advice matches your situation.]
FAQ
Do I need to waterproof my basement floor cracks?
If the cracks correlate with leaks or recurring dampness, fixing the moisture source is usually necessary; otherwise repairs often fail. If your crack is truly non-leaking and stable, you may not need full waterproofing, but you should still monitor humidity and moisture conditions.
Can I just fill basement floor cracks with caulk?
Caulk is often not the right choice for concrete floor cracks that need strong bonding and (in some cases) structural-level performance. Many floor cracks need concrete-repair materials designed for bonding to concrete—and you should follow the system instructions rather than substituting incompatible products.
How do I tell if a crack is still active?
Re-measure and visually check the crack over days or weeks, especially after wet weather. If it widens, shifts, or shows new branching, treat it as active rather than a one-time cosmetic repair.
Should I use epoxy for every basement floor crack?
Not necessarily. Epoxy injection/epoxy patch systems can work well for many non-moving cracks, but the right method depends on crack behavior, access/routing requirements, moisture conditions, and the specific product’s instructions. [ADD: specify which repair product/system you plan to use, and we can map it to crack type.]
Sources
– [ADD: manufacturer’s instructions/spec sheet for the specific epoxy injection or concrete patch product you plan to use—include the exact “surface prep,” “application,” and “curing” requirements]
– ACI 308, Standard Practice for Curing Concrete (latest edition) — for curing principles and the importance of moisture retention/time in concrete performance
– ACI 224R, Causes, Evaluation, and Repair of Cracks in Concrete (latest edition) — for crack evaluation concepts and repair decision logic
– ACI 546R, Concrete Repair Guide (latest edition) — for concrete repair methodology, including preparation and material compatibility principles
If you follow the sequence—inspect for movement, choose an appropriate repair method, prep to bond, and control moisture—you’ll usually get a repair that looks better and lasts longer. If the crack is active or there’s dampness, the best “repair” is diagnosing the cause first, then applying a system designed for that specific behavior.
Frequently Asked Questions
How can I tell if a basement floor crack is serious or just cosmetic?
Small hairline cracks that don’t widen or change over time are often cosmetic, especially if moisture isn’t getting through. However, cracks that grow, show vertical displacement, or allow water seepage usually need closer evaluation because they can indicate settlement, hydrostatic pressure, or structural movement. A simple check is to monitor the crack width over a few weeks and look for signs of dampness, spalling, or rust stains from reinforcing steel.
What’s the best way to repair basement floor cracks caused by settlement?
For settlement-related cracks, start by cleaning the crack thoroughly and removing loose concrete so the repair material can bond to solid substrate. If the crack is active (still moving), use a flexible crack injection or a two-part polyurethane/epoxy injection system designed for moving cracks. For stable, non-moving cracks, epoxy crack filler can restore strength and help stop moisture intrusion, but it’s important to follow the product instructions for proper sealing and curing.
Why do basement floor cracks keep coming back after patching them?
Cracks usually reappear when the underlying cause—like ongoing foundation movement, poor drainage, or water pressure—wasn’t addressed first. If moisture is driving the problem, surface patching alone may fail as water undermines the repair and expands/contract the crack edges. To prevent repeat cracking, improve basement moisture control (gutters, grading, vapor barrier, and dehumidification) and confirm whether the crack is active before choosing a rigid filler.
How should I prepare the concrete before fixing basement cracks?
Proper prep is critical for a durable repair: remove dust, paint, oil, and any crumbling material using a wire brush, chisel, and vacuum. Widening “V” or “U” shaped cracks slightly with a grinder can help the repair compound lock in, especially for non-epoxy patch materials. After cleaning, ensure the concrete is dry (or use a system intended for damp conditions) so the filler cures correctly and bonds to the basement slab.
Which basement crack repair method is best for preventing water leaks?
If the crack is allowing water seepage, a crack injection system is often the most effective approach because it targets the crack path from within the slab. For active leaks, flexible polyurethane injection can expand to seal and accommodate movement, while epoxy injection is better suited for non-leaking, stable structural cracks. In cases of persistent hydrostatic pressure, you may also need exterior drainage improvements or interior waterproofing to stop water pressure at the source.
📅 Last Updated: October 11, 2026 | Topic: How to fix cracks in basement floors? | Content verified for accuracy and freshness.
References
- https://en.wikipedia.org/wiki/Concrete_damage_and_deterioration
- https://www.cdc.gov/mold/default.htm
- Mold Cleanup in Your Home | US EPA
https://www.epa.gov/mold/mold-cleanup-your-home - https://www.fema.gov/fact-sheet/foundations-basements-and-foundation-repairs
- Weather, climate and hazards – Canada.ca
https://www.canada.ca/en/services/environment/weather.html - https://www.who.int/news-room/questions-and-answers/item/mould-and-health
- https://pubmed.ncbi.nlm.nih.gov/
- Google Scholar Google Scholar
https://scholar.google.com/scholar?q=basement+floor+crack+repair+concrete+foundation+waterproofing - Google Scholar Google Scholar
https://scholar.google.com/scholar?q=concrete+crack+repair+epoxy+injection+spalling+assessment - Google Scholar Google Scholar
https://scholar.google.com/scholar?q=foundation+cracks+diagnosis+hydrostatic+pressure+settlement