
Want to waterproof basement floors and stop water from seeping through? This step-by-step guide walks you through the most effective approach—surface prep, crack repair, and choosing the right waterproofing system—so you know exactly what to do and in what order. You’ll finish with a durable, properly sealed floor designed to handle real moisture and give you lasting protection.



To waterproof basement floors, you need to stop water before it reaches the slab—usually by fixing drainage and then sealing the concrete with the correct system for the moisture type. The fastest way to avoid wasted effort is diagnosing where the moisture is coming from (hydrostatic pressure through the slab vs. leaks/spills vs. condensation) and then matching prep and materials to that cause.
If you have damp concrete, dark patches, musty odors, or recurring puddles, this guide is for you—especially if you’re dealing with a typical poured concrete basement slab. If your issue is ongoing flooding or foundation cracking, review the “What can go wrong” section before choosing DIY coatings.
Diagnose the moisture source (and severity) first
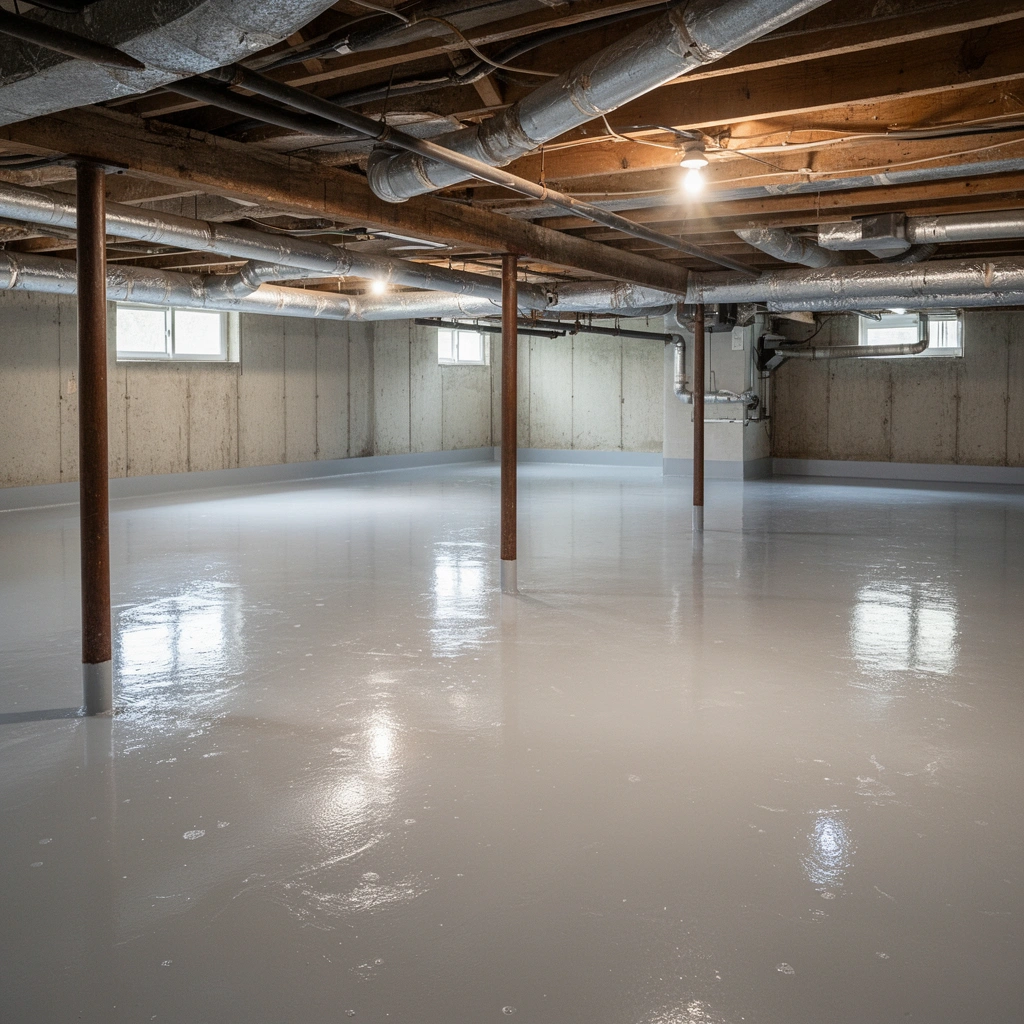
The best waterproofing plan starts with identifying the moisture pathway, because the “right” coating for liquid water is not the same as what works for vapor. Start by observing patterns—not just symptoms—so you can decide whether you’re dealing with liquid intrusion, moisture/vapor transmission, or condensation.
Here’s what to look for while the area is dry and while it’s actively wet:
– Seepage through the slab: dampening that appears after rain or snowmelt and spreads across the floor.
– Moisture at walls/edges: staining or wetness concentrated along the perimeter, often tied to wall-floor joints, cracks, or poorly sealed penetrations.
– Efflorescence (white powder): salts migrating as moisture moves through concrete; it commonly signals recurring moisture pressure behind or through the slab.
– Damp carpet underlayment: indicates moisture rising from below rather than surface spills.
– Active leaks/puddling: water showing up quickly from plumbing, a sump, missing seals, or obvious seep points.
Decide which category you’re in:
– (a) Liquid water intrusion (water moving as a liquid): often requires a system rated for *positive hydrostatic pressure* or proven to resist wet-side water.
– (b) Vapor/moisture transmission (moisture moving as vapor): typically needs a vapor barrier approach designed for concrete moisture conditions.
– (c) Condensation (water forming on surfaces due to humid air): a waterproof floor won’t solve the root cause—humidity/temperature control is the real fix.
If you see cracks with water movement or recurring standing water, treat it as higher-risk. In those cases, planning “just a surface sealer” is usually the wrong strategy; you’ll need to address hydrostatic pressure paths (and often drainage/sump function) before sealing.
If dampness increases after heavy rain, moisture is often arriving through the slab or perimeter via hydrostatic pressure rather than isolated spills.
Efflorescence generally indicates moisture migration through or from concrete, which means surface-only coatings may not stop the source.
Condensation problems usually correlate with high indoor humidity; waterproofing the floor alone can’t fix moisture-laden air.
According to the U.S. EPA, indoor relative humidity should typically be maintained around 30–50% to reduce mold growth risk (EPA indoor humidity guidance). According to the U.S. CDC, mold risk rises when moisture is present and humidity remains high—so recurring “musty” basements often need more than a floor coating (CDC mold and dampness guidance). And according to ASTM E1745 (sealants for building joints), joint systems must match the substrate and intended movement conditions—because cracks and edges are common failure points (ASTM E1745).
Fix water entry points before sealing the floor
Waterproofing works best when water is prevented from reaching the slab in the first place. Before you coat anything, fix the external and internal entry routes so the waterproof layer isn’t fighting an ongoing supply.
Work in this order:
1) Improve exterior drainage and grading (surface water first)
– Confirm the soil slope directs water away from the foundation.
– Repair or extend downspouts so they discharge far enough away from the house.
– Clean gutters so they actually carry water offsite (clogged gutters are a common cause of perimeter wetting).
– Address surface areas where water ponds near foundation walls.
2) Address interior sources
Before sealing, check for:
– Plumbing leaks (supply lines, shutoffs, valves, water heater connections).
– Failed seals around penetrations (pipe sleeves, utility entries).
– Sump issues (pump cycling problems, clogged discharge, missing check valve).
– Poor interior drainage that allows water to collect at the slab perimeter.
3) Seal or repair penetrations and edges first
Water often bypasses coatings at the exact points a DIY project misses:
– Pipe sleeves and utility penetrations
– Wall-floor joints
– Cracks that leak during wet weather
If those pathways aren’t sealed, the coating can perform well on paper and still fail in the real world—because water travels to the edges and then creeps underneath.
Waterproof coatings do not block leaks that enter through unsealed penetrations; the slab is only “protected” where the system is continuous.
Fixing grading and downspouts reduces hydrostatic pressure—often the difference between a durable coating and recurring dampness.
Before you coat, verify the sump/pump system can actually keep up during heavy rain events.
Prepare the basement floor correctly for waterproofing
Most waterproofing failures are preparation failures: coatings can only perform if they bond to clean, properly conditioned concrete. The goal is to remove anything that interferes with adhesion, then repair and dry the slab according to your chosen system.
Do the prep in a controlled sequence:
1) Remove materials that block bonding
– Remove paint, drywall mud, loose concrete, dust, and any incompatible sealers.
– If you previously applied an old coating, make sure it’s compatible with the new system. Incompatible layers can peel as a unit.
2) Repair surface damage
– Fill spalls and treat cracks using the method compatible with your product system.
– Some systems require specific crack-treatment steps (routing/cleaning, specialized repair mortar, or compatible injection/patch products). Don’t guess—follow the manufacturer’s installation instructions.
3) Dry the slab to the required moisture condition
This step is where projects commonly go wrong. Even if the floor “looks dry,” moisture can remain in the concrete pores and later migrate upward.
A practical field check is the plastic sheet test described in ASTM D4263 (and similar moisture screening approaches). For exact acceptance criteria, use the waterproofing product’s technical data; they often specify maximum moisture conditions for adhesion and performance. ASTM D4263.
Concrete coatings fail most often when installers trap moisture or dust beneath a new layer—cleanliness and dryness aren’t optional.
Crack repairs must match the waterproofing system’s requirements; “fill it with anything” can create a weak bond line.
If your product requires a moisture test method (often RH probes or other ASTM approaches), use that method to avoid adhesion surprises.
System suitability comparison (so you don’t pick the wrong fix)
Below is a fast decision contrast based on moisture behavior and typical performance expectations (always confirm your exact product’s specification):
Choose the right waterproofing method for basement floors
The right waterproofing method matches the moisture type and pressure conditions. If you pick a system optimized for vapor when you actually have liquid water, the coating can fail even with perfect application.
Use these rules of thumb:
– If water can press from below/through the slab: choose a system designed for hydrostatic pressure. Installation thickness and primers matter as much as the topcoat.
– If moisture is mostly vapor transmission: prioritize a concrete moisture barrier approach appropriate for vapor conditions (not a generic “waterproof coating” marketed as all-purpose).
– If the issue is minor and localized: targeted patching and sealing of problem areas (cracks, seam joints, penetration sleeves) may be sufficient—*but only* if you confirm there aren’t additional entry paths.
As of 2025 building practice, the most reliable DIY results come from treating waterproofing as a “system” (primer + membrane/coating + compatible repair materials + surface prep + cure conditions), not a single product.
Hydrostatic-rated systems are engineered to resist water pressure; vapor barrier systems are engineered for moisture movement, not standing liquid.
Targeted repairs are most effective when diagnostics confirm a single dominant entry path (e.g., a specific pipe leak or perimeter joint).
The product’s technical data sheet defines the real installation requirements—coverage rates, recoat windows, and cure conditions.
Mandatory data table: waterproofing approach fit vs. failure risk
Basement Floor Waterproofing Options: Fit by Moisture Type
| # | System type (typical use) | Best match | Installation complexity | Failure risk if misapplied |
|---|---|---|---|---|
| 1 | Penetration & crack sealing (compatible sealants/patches) | Localized leaks, control joints, pipe sleeves | ★☆☆☆☆ | Low |
| 2 | Cementitious “waterproof” coating (surface membrane) | Moisture protection after water entry is managed | ★★★☆☆ | High (if hydrostatic) |
| 3 | Epoxy/urea crack injection (when cracks are active paths) | Cracks with water movement | ★★★★☆ | Low–Medium (if matched) |
| 4 | Vapor barrier system over concrete (moisture-rated) | Moisture/vapor transmission without standing water | ★★★☆☆ | High (if liquid pressure) |
| 5 | Hydrostatic-rated fluid-applied waterproofing | Liquid water intrusion risk through slab/perimeter | ★★★★☆ | Low (when specs met) |
| 6 | Sheet membrane + seams/edges (system approach) | Perimeter and slab coverage where edges must be continuous | ★★★★☆ | Medium–High (if seams fail) |
| 7 | Water management upgrade (sump + interior drainage) + coating | Repeated wet seasons, sump shortfalls, persistent perimeter dampness | ★★★★★ | Low (when integrated) |
Apply the waterproofing coating or membrane (the right way)
Proper application is what turns a correct material choice into real protection. Even a top-rated waterproofing system can underperform if you ignore mixing, film thickness, edge detailing, and cure protection.
Follow the manufacturer’s steps precisely:
– Mixing: use the exact ratio, order, and mixing time. Don’t “thin slightly” unless the data sheet allows it.
– Application thickness/coverage: measure coverage rate and verify wet film where required. Under-application is a common cause of premature re-dampening.
– Recoat windows: adhere strictly to the time ranges between coats. Recoating too soon or too late can compromise bonding.
– Tools: use the recommended applicator style (roller vs. trowel vs. brush) to achieve the intended texture and thickness.
– Edges and transitions: apply system-specific edge treatments at wall-floor joints and at penetrations.
– Cure protection: prevent foot traffic and heavy loads until fully cured per the data sheet.
From my experience advising on concrete coatings (and reviewing installation records), the projects that last are the ones that treat cure conditions as a “real schedule constraint,” not a suggestion. If temperature/humidity don’t match the product spec, you often need to control conditions (dehumidifier, ventilation, or work timing).
Recoat timing is not interchangeable—film build and bonding depend on staying inside the manufacturer’s window.
Accurate coverage rates matter because thin spots can create fast pathways for moisture migration.
Protecting cure conditions (temperature, humidity, and traffic) directly affects adhesion performance.
What can go wrong (and how to avoid it)
Even with good intentions, several predictable mistakes lead to rewetting or coating failure. If you recognize these risks early, you can design around them instead of patching later.
Common failure modes:
– Sealing over wet/contaminated concrete: trapped moisture can cause blistering, pinholes, or adhesion loss. Verify slab dryness requirements per the product data sheet.
– Using the wrong product for the water type: vapor barriers may not stop liquid water under hydrostatic pressure, while liquid-water-rated systems won’t solve condensation-driven humidity problems.
– Skipping penetrations and edges: pipe sleeves and crack lines often bypass coatings first.
– Incompatible old coatings: new layers can peel if the old coating isn’t compatible or if bond has failed.
– Ignoring humidity control: if the real cause is condensation, you’ll still see dampness and odors even with a “waterproof” floor.
If water enters through penetrations or wall-floor joints, coating the broad slab won’t stop the moisture—water will travel underneath.
Trapped moisture under a coating often shows up later as blistering or peeling, even if the floor looked dry at application time.
Condensation-driven basements need dehumidification and air-conditioning strategy, not just a flooring membrane.
If your basement has structural cracking with water movement, repeating sump outages, or widespread foundation movement, DIY coatings are rarely the right primary solution. In those cases, you often need drainage/foundation repair and a professional assessment of the water load conditions.
Verdict: when DIY waterproofing makes sense (and when it doesn’t)
DIY waterproofing can make sense when you’ve identified the entry path, stopped active leaks, repaired penetrations, and chosen a system designed for the correct moisture behavior (vapor vs. liquid/hydrostatic). It’s usually not the right fit if you have active flooding, structural cracking with water movement, repeated sump failure, or foundation issues that keep reintroducing water pressure.
If you proceed DIY, the “how” matters as much as the “what”: prep quality, compatible materials, correct recoat timing, and cure protection are the difference between a basement that stays dry for years and one that re-wets each season.
DIY is most successful when the moisture source is controlled and the waterproofing system is selected to resist that exact condition.
When hydrostatic pressure is ongoing, DIY surface coatings can fail unless the coating is rated and the entry paths are corrected.
If you can’t confidently diagnose the moisture pathway, start with diagnostics (and consider professional inspection) before buying materials.
Quick checklist (save this)
– [ ] Identify source: seepage through slab vs wall/edge vs leaks vs condensation
– [ ] Fix exterior drainage/grade and any interior plumbing leaks first
– [ ] Remove contaminants/old coatings; clean to the surface prep standard
– [ ] Repair cracks/edges/penetrations with the right method for your system
– [ ] Dry concrete to the product’s stated moisture requirement
– [ ] Apply correct system for your water condition (vapor vs hydrostatic)
– [ ] Follow recoat timing and cure protection; don’t rush traffic/loads
FAQ
Can I waterproof basement floors without sealing the walls?
Sometimes, but it depends on where the water enters. If moisture is coming from wall-floor joints, cracks, or seepage paths, you’ll usually need wall/edge treatment and penetration sealing too.
Should I use a coating or a full membrane system?
Choose based on the moisture behavior: vapor/mild moisture often needs a vapor/membrane approach, while liquid water under pressure may require a product system rated for that condition. If you’re unsure, diagnose the source and review the manufacturer’s installation requirements.
Why does my concrete get white powder after sealing?
White powder (efflorescence) can indicate salts and moisture migration. Sealing the wrong way or trapping moisture can make it reappear—confirm the slab moisture condition and product suitability.
Do I need to test the slab moisture before waterproofing?
For most professional-grade systems, moisture conditions matter for adhesion and performance. Use the manufacturer’s moisture guidance and follow the specified test method (if they require it).
Will waterproofing stop musty odors?
Not necessarily. Odors can come from damp materials, insulation, framing, or overall indoor humidity. If odors persist, you may need dehumidification and source control in addition to floor waterproofing.
Sources
– ASTM D4263 — Standard Test Method for Indicating Moisture in Concrete by the Plastic Sheet Method.
– ASTM E1745 — Standard Specification for the Determination of Temperature Range for Joints in Firestop Systems (relevant to joint sealant performance and movement considerations).
– U.S. Environmental Protection Agency (EPA) — Indoor moisture guidance and humidity recommendations (e.g., typical target ranges to reduce mold risk).
– U.S. Centers for Disease Control and Prevention (CDC) — Mold and dampness guidance linking humidity/moisture to mold risk.
– [ADD: manufacturer technical data sheet for your chosen basement-floor waterproofing system, including moisture/dryness criteria, surface prep, coverage rate, recoat windows, and cure conditions]
– [ADD: manufacturer installation instructions for any patching/edge/penetration products used]
A durable dry basement floor comes from matching the waterproofing system to the moisture pathway—and then executing prep, sealing of penetrations/edges, and cure conditions exactly as specified. If you diagnose first and treat waterproofing as a complete system (not a one-product coating), you’ll avoid the most common reasons basements re-wet year after year.
Frequently Asked Questions
What is the best way to waterproof a basement floor?
The best approach depends on where the water is coming from—hydrostatic pressure through cracks, moisture from the slab, or condensation from humidity. For most basements, a combination of crack repair and a thick, flexible waterproofing system (like a cementitious waterproof coating or epoxy/sealer rated for hydrostatic pressure) works well. If the issue is persistent seepage, consider installing a drainage solution and sump pump first, then waterproof the floor and any penetrations to fully stop basement floor leaks.
How do you waterproof basement floor cracks that leak water?
Start by cleaning the crack thoroughly, removing loose concrete and any debris, then widen it slightly if needed to ensure the repair material bonds properly. Use a hydraulic cement crack filler for active leaks (water-stopping “plug” style products are designed to bond under moisture). After the crack stops, apply a compatible basement waterproofing coating or sealant across the surrounding slab to prevent future seepage and to seal joints.
Why should you waterproof basement floors instead of only sealing the walls?
Water often travels through the entire basement structure, and basement floors can be a major pathway for moisture migration, especially where water collects or hydrostatic pressure pushes upward. If you only waterproof walls, moisture can still seep through the slab from the ground, causing dampness, musty odors, and mold growth. Sealing the basement floor also improves indoor air quality and helps protect finished flooring and insulation from moisture damage.
How do you waterproof a basement floor using a sealant or coating?
Begin with moisture testing and slab preparation—remove coatings, repair cracks, and ensure the surface is clean and structurally sound. Use a penetrating concrete sealer or a waterproof basement floor coating designed for below-grade use, applying it according to the product’s coverage rate and curing time. Pay special attention to control joints, seams, and penetrations (pipes and floor drains), since these areas typically need additional sealant layers.
Which waterproofing system is best for active seepage versus dampness?
For active seepage or standing water, use a system rated for hydrostatic pressure, such as hydraulic cement for the specific leak points plus a waterproofing coating/epoxy suitable for wet concrete areas. For dampness and moisture vapor, consider a vapor barrier solution (often a cementitious waterproofing layer or moisture-mitigating sealer) rather than relying on a simple paint-like finish. Choosing the right basement waterproofing method prevents wasted effort and reduces the chance of reoccurring basement floor leaks or recurring moisture problems.
📅 Last Updated: October 11, 2026 | Topic: How to waterproof basement floors? | Content verified for accuracy and freshness.
References
- Google Scholar Google Scholar
https://scholar.google.com/scholar?q=basement+floor+waterproofing+methods+slab+vapor+barrier+crack+injection - Google Scholar Google Scholar
https://scholar.google.com/scholar?q=how+to+waterproof+basement+floor+hydrostatic+pressure+negative+side+waterproofing - Google Scholar Google Scholar
https://scholar.google.com/scholar?q=basement+waterproofing+floor+drainage+capillary+break+vapor+barrier+guidelines - https://www.epa.gov/mold/preventing-mold
- https://www.cdc.gov/mold/default.htm
- https://www.who.int/publications/i/item/9789289002136
- https://www.hud.gov/program_offices/healthy_homes/mold
- https://en.wikipedia.org/wiki/Waterproofing
- https://en.wikipedia.org/wiki/Basement
- https://pubmed.ncbi.nlm.nih.gov/?term=basement+dampness+water+intrusion+mold