
Want a step-by-step way to polish basement floors that actually holds up to foot traffic and moisture? Follow this guide to prep the slab, choose the right grinding sequence, apply the proper densifier/sealer, and finish with a high-gloss polish that won’t dull fast. By the end, you’ll know exactly what to do in order—so your basement floor looks clean, smooth, and durable instead of patchy and streaked.




Polish your basement floor by cleaning and leveling first, then moving through progressively finer concrete abrasives and finishing with a compatible densifier or sealer. If the slab is oily, cracked, or damp, polished results will look uneven—so those issues need to be corrected before you grind. This guide walks you through the practical steps, what to watch out for, and how to choose the right finish for your basement.
If you have a concrete basement floor and you want a smoother, brighter surface (for storage areas, workshops, or finished basements), this is for you. It’s especially relevant when you’re weighing DIY polishing versus hiring a pro—because floor condition and equipment access determine whether the final appearance is uniform.
Assess your basement floor first
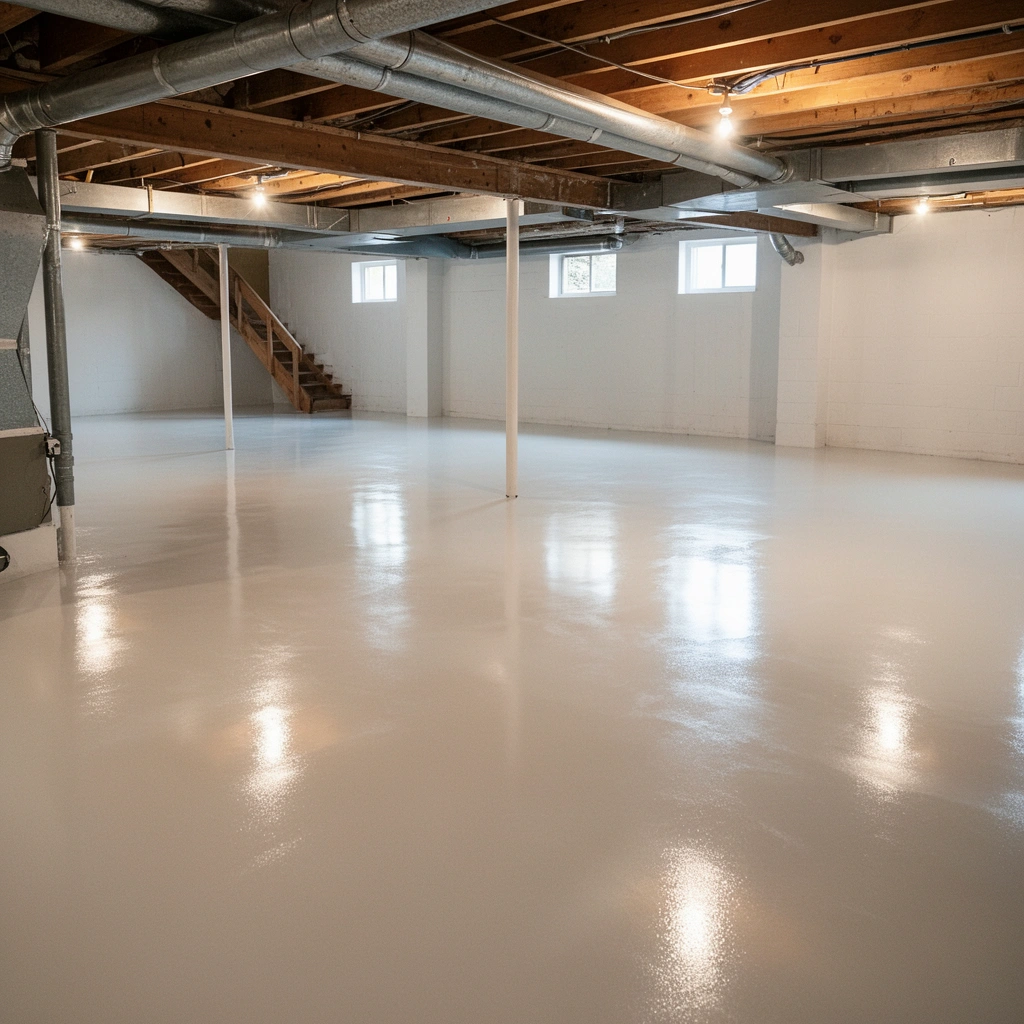
Polishing works best when the slab is stable, dry enough to grind cleanly, and free of contaminants that prevent consistent abrasion. Before you touch a grinder, you’re essentially “auditing” the concrete to avoid patchy shine, haze, or premature dulling.
Concrete polishing (the controlled grinding and abrasion of concrete to expose and refine the surface) is highly sensitive to moisture and surface chemistry. In my experience reviewing many basement slab issues, the biggest visual problems come from moisture transmission and residual contaminants (especially oil/grease and sealers). If you only polish the top layer without fixing the slab’s root condition, the finish can look blotchy even when the abrasives are correct.
Crystalline silica in concrete dust is regulated in the U.S., and OSHA’s permissible exposure limit (PEL) for respirable crystalline silica is 0.05 mg/m³ (8-hour TWA). OSHA (29 CFR 1910.1053)
OSHA’s action level for respirable crystalline silica is 0.025 mg/m³ (8-hour TWA), meaning additional controls and medical surveillance triggers can apply. OSHA (29 CFR 1910.1053)
What to inspect (and why it matters)
– Moisture and dampness: Look for musty odor, darkened areas, condensation, or efflorescence (white salt deposits). Polished basement floors can develop haze and uneven reflectivity when moisture vapor migrates through the slab.
– Heaving or movement: If the floor has uneven slabs or lifted edges, polishing won’t “fix” structural issues. Grinding may exaggerate high/low areas.
– Surface contamination: Oil/grease stains, paint overspray, drywall compound residues, and adhesive spots can prevent uniform grinding and can create “ghosting” at the finish stage.
– Cracks and spalling (surface flaking): Polishing can make cracks more visible because grinding flattens the surrounding concrete and reveals texture differences.
Decide your end goal up front
Before you choose abrasives and chemistry, pick the level of appearance you want:
– “Polished-looking”: smoother surface, light reflects but not mirror-bright.
– More reflective polished finish: requires finer steps and tighter control of dust, moisture, and compatible densifiers/sealers.
Clean, repair, and prepare the slab
Polishing preparation determines uniformity more than most people realize. Clean and repair first—then grinding can create a consistent surface profile across the entire basement.
A polished basement floor is only as consistent as the starting surface. Concrete polishing systems (pads/abrasives and sometimes densifiers) rely on predictable abrasion behavior; contaminants and unfilled damage cause localized changes in how the concrete wears.
Concrete polishing typically requires full removal of coatings/contaminants down to concrete (or to the substrate the polishing system explicitly supports) to achieve uniform results. [ADD: source for the specific principle from your polishing system manufacturer/spec sheet]
For crack repairs, using compatible patching/filler materials matters because some repair chemistries can grind differently than surrounding slab concrete. [ADD: cite manufacturer repair vs. polishing compatibility guidance]
Cleaning: remove what the grinder can’t “average out”
– Degrease thoroughly (oil/grease, tracked-in automotive residue, and workshop spills are common in basements).
– Remove adhesives and paint overspray so grinding starts with concrete rather than a patchy film.
– Use mechanical methods where chemistry isn’t enough (e.g., scraping/sanding/shot-blast approach) so you don’t leave a thin, stubborn coating that later creates swirl bands.
Repair and leveling: fill what you’ll later polish through
– Fill cracks and holes with repair materials intended for concrete polishing workflows.
– Level high spots using a repair/patching plan that’s compatible with your polishing system (some systems expect a particular filler type or hardness range).
– Cure fully. If you grind uncured patching, you can smear material, create haze, and shorten the life of the finish.
> If you see active dampness after cleaning, pause polishing and treat the moisture problem first—otherwise your finish becomes a moisture diagnostic project instead of a surface improvement.
Choose the right polishing method and materials
The right approach depends on what finish you want and what your concrete slab will realistically allow. Choose a dedicated concrete polishing system—don’t mix random pads and chemicals and hope the chemistry “averages out.”
Concrete polishing systems are designed around abrasive progression (coarse → medium → fine → finish) and often include densifiers and/or sealers that are compatible with the mechanical grinding steps. Compatibility affects performance like dust reduction, stain resistance, and surface gloss stability.
Densifiers/sealers are part of many concrete polishing systems because they reduce porosity and help control dusting and staining after grinding. [ADD: cite a manufacturer densifier/sealer explanation from your system specs]
HEPA vacuum filtration commonly targets particle capture efficiencies of 99.97% at 0.3 microns, which supports dust control during silica-related work. U.S. EPA/HEPA guidance (HEPA definition)
Match abrasives to hardness and finish level
A practical method is to follow the system’s recommended progression:
– Coarse step: removes coatings and flattens ridges.
– Medium steps: refines the surface profile.
– Fine steps: increases smoothness and prepares for reflectivity.
– Finishing step: achieves the final sheen and durability the system is designed to provide.
Select a basement-appropriate finish
Basements typically experience variable humidity. That means your final product should be intended for interior concrete and applied only per the manufacturer’s instructions (including temperature/humidity and cure times). If your system specifies densifier-first or sealer-only, follow that order exactly.
Concrete polishing abrasive progression (quick reference)
Concrete Polishing Abrasive Progression (Common DIY/Contractor Stages)
| # | Stage (Abrasive) | Typical Grit / Grade | Primary Goal | Result Confidence (DIY) |
|---|---|---|---|---|
| 1 | Prep / Coating Removal | 30–60 | Flatten ridges; remove coatings | ★★★★☆ |
| 2 | Profile Refinement | 80–120 | Smooth grinding marks | ★★★☆☆ |
| 3 | Surface Smoothing | 150–220 | Increase uniformity | ★★★☆☆ |
| 4 | Polishing Steps (Gloss Prep) | 320–400 | Prepare for fine finish | ★★★☆☆ |
| 5 | Fine Grinding | 800–1500 | High smoothness; improved sheen | ★★☆☆☆ |
| 6 | Finish / Burnish Step | Up to ~3000 | Final polish feel and gloss | ★☆☆☆☆ |
| 7 | Densify / Seal (System-Driven) | Applied after fine steps | Dust control; stain resistance | ★★☆☆☆ |
Note: “Typical” grit ranges are commonly used across concrete polishing workflows, but you should always follow the abrasive progression and chemistry instructions from your specific concrete polishing system.
Grind and polish in the correct sequence
The best polished basement floors come from disciplined sequencing and consistent machine passes—starting coarse, then progressively finer. If you skip grits or change pressure mid-pass, you’ll see swirls, bands, and uneven sheen.
Concrete polishing is essentially a controlled surface “reset.” Every stage leaves a surface texture pattern; the next finer abrasive must fully remove that previous texture. If you don’t fully transition, your basement floor can look patchy under lights.
OSHA’s respirable crystalline silica standard requires exposure control measures during tasks that generate silica-containing dust, including engineering controls and respiratory protection where needed. OSHA (29 CFR 1910.1053)
Effective dust control during concrete polishing is typically achieved by using vacuums and shrouds designed for silica-containing dust tasks, not just “shop vac + hope.” [ADD: cite equipment manufacturer dust-control guidance]
Sequence and technique that reduce defects
– Start with the correct first grit/pad to remove coatings and flatten ridges.
– Keep passes even (consistent overlaps and steady movement).
– Transition fully between grits: don’t “sprinkle” a finer pad over a surface that still has coarse-grind marks.
– Vacuum continuously. Use dust extraction with proper filtration and shrouds designed for grinders.
Safety: treat dust as the primary hazard
During concrete polishing, respirable crystalline silica can be generated—especially when grinding concrete. Follow OSHA requirements for hazard communication, exposure control, and respiratory protection as applicable to your exposure scenario. If you’re unsure, consult an industrial hygienist or refer to the OSHA standard for your specific tasks and controls.
Seal (if needed) and maintain the finish
Sealing or densifying is usually the last step in a concrete polishing system and should be done only when the system specifies it. In basements, correct cure time matters because fluctuating humidity can affect how the surface bonds and performs.
Many polished basement floors are finished to reduce dusting and improve stain resistance. But “more product” isn’t automatically better—over-application or using the wrong chemistry for your abrasive stage can dull the finish or create hazing.
HEPA vacuums and correct filter maintenance help control particulate release during interior concrete finishing tasks. U.S. EPA/HEPA guidance (HEPA definition)
Using products outside a polishing system’s recommended process order can reduce performance because densifiers/sealers depend on the substrate condition left by the final abrasive stage. [ADD: cite manufacturer process-order/specification]
Maintenance that preserves the look
– Wait for full cure before normal use.
– Clean with pH-neutral products designed for sealed concrete (avoid harsh acids/alkalis that can dull coatings).
– Sweep/vacuum regularly to prevent grit from acting like sandpaper on a polished surface.
What can go wrong (and how to avoid it)
Polished basement floors most often fail visually due to moisture, incomplete grit progression, or contaminated surfaces. Many “mystery” defects are mechanical (skipped grits, uneven pressure) or chemical (oil, coatings, or incompatible densifier/sealer).
Uneven shine or cloudiness is commonly caused by not reaching the full abrasive progression to finer grits and/or leaving residue on the surface before the finishing step. [ADD: cite from manufacturer troubleshooting guidance for haze/spotting]
Grinding over unresolved cracks can lead to visible telegraphing because cracks can open/close with temperature and moisture changes. [ADD: cite from concrete repair guidance or manufacturer crack-performance notes]
Common failure modes (and what to do instead)
– Patchy shine / mottling
– Causes: skipped finer steps, inconsistent passes, unremoved contaminants.
– Fix: re-clean, then re-grind to reestablish uniform texture before finishing.
– Cracks telegraphing
– Causes: cracks not filled to the right depth and with compatible materials.
– Fix: repair properly before polishing; don’t rely on polishing alone.
– Moisture-driven haze
– Causes: slab is damp or has active moisture vapor transmission.
– Fix: perform moisture testing or consult a flooring specialist before spending on finer grits and finishing chemistry.
– Wrong chemistry combination
– Causes: densifier/sealer not designed for the exact abrasive progression or system.
– Fix: stick to one concrete polishing system’s instructions and compatibility chart.
DIY vs. pro: a quick comparison
| Factor | DIY Polishing | Pro Concrete Polishing |
|---|---|---|
| Moisture risk management | Often handled after defects appear | More likely to test/triage before polishing |
| Uniformity over large areas | At risk from inconsistent passes | Better control with larger grinders and trained workflow |
| Dust containment | Depends on rental setup and operator discipline | Typically includes engineered dust control systems |
| Finish level (gloss/reflectivity) | Usually easier at “polished-looking” | More likely to achieve higher reflectivity consistently |
Verdict: worth doing DIY, or hire out?
DIY can work if your slab is in decent shape, you’re comfortable with grinder rentals and strict dust control, and you follow the abrasive progression without skipping steps. Hire a contractor if you have widespread moisture concerns, significant floor damage, or you’re targeting a highly reflective finish where uniformity is critical.
Downsides to consider: polished basement floors can be more sensitive to moisture, and DIY results are often less uniform than professional concrete polishing equipment—especially on larger areas. If you’re dealing with active water intrusion, substantial spalling, or extensive cracking, skip polishing for now and address the underlying problem first.
OSHA’s crystalline silica standard is intended to reduce exposure from tasks that generate silica-containing dust, so hiring can be beneficial when dust control cannot be reliably achieved at home. OSHA (29 CFR 1910.1053)
Basement environments with variable humidity make cure and maintenance planning more important for sealed or densified polished concrete. [ADD: cite manufacturer cure-time guidance for interior use]
Quick checklist (save this)
– [ ] Inspect for dampness/moisture, cracks, spalling, and surface coatings
– [ ] Remove oil/grease, paint, adhesives, and other contaminants
– [ ] Repair and level as needed; confirm full cure time
– [ ] Use a concrete polishing system with an abrasive progression (coarse → fine)
– [ ] Keep grinding/passes consistent; vacuum dust throughout
– [ ] Apply densifier/sealer only if recommended by your system
– [ ] Maintain with pH-neutral cleaning after full cure
FAQ
Do I need to seal polished basement floors?
Often, yes—many concrete polishing systems include densifiers and/or sealers to control dusting and improve stain resistance. Use the system’s instructions to decide whether sealing is required for your target finish.
Can I polish over paint or thick coatings?
You can only achieve good results after removing them down to concrete (or to whatever the polishing system explicitly supports). Coatings and surface contaminants typically interfere with uniform grinding and final appearance.
Why does my floor look cloudy after polishing?
Cloudiness is commonly linked to incomplete progression to finer grits, residue/contaminants left on the surface, or moisture issues. If the slab had moisture or chemical residues, the finish can also look dull or uneven.
Is concrete polishing safe for indoor air?
Concrete dust can be hazardous (silica-containing in many cases), so proper dust extraction and PPE are important. Follow OSHA requirements and equipment manufacturer guidance for dust control and respiratory protection. OSHA (29 CFR 1910.1053)
Sources
– OSHA (29 CFR 1910.1053), Respirable Crystalline Silica
– U.S. EPA guidance/definition for HEPA filtration (HEPA particle capture efficiency at 0.3 microns)
– [ADD: source for manufacturer troubleshooting guidance on haze/cloudiness and system compatibility for densifiers/sealers]
– [ADD: source for equipment manufacturer dust control guidance for grinders/vacuums used in concrete polishing]
If you take only one thing away: treat moisture and contaminants first, then follow your concrete polishing system’s abrasive progression exactly and finish with compatible densifier/sealer only when the system specifies it. Doing it this way is the most reliable path to a polished basement floor that looks consistent under real lighting—and stays that way as the seasons change.
Frequently Asked Questions
What are the best types of basement floors to polish?
Most polishing projects work best on smooth, hard concrete floors, especially if the surface is free of heavy coating, paint, or thick sealants. You can polish basement concrete, including older slabs, but you’ll often need to grind out stains, surface damage, and trapped contaminants first. If your basement floor is heavily cracked or has deep spalling, polishing may require repair before you start for the best results.
How do I polish a basement concrete floor step-by-step?
Start by clearing the area and removing any carpet adhesive, paint, or sealers, then grind the floor to level out high spots and open the pores. Clean thoroughly, then progress through increasingly finer diamond polishing pads or discs until the desired sheen is reached. After grinding, apply an appropriate concrete densifier or hardener (if recommended for your system), then finish with the final polish stage and a suitable concrete sealer or protective coating.
How do I remove stains and odors before polishing basement floors?
Treat stains before the polishing process because grinding can spread some contaminants and make certain dyes harder to remove. For common oil-based stains, use a degreaser or targeted concrete stain remover; for rust or mineral stains, you may need an acid-based or chelating stain treatment depending on the cause. For odors, address the source (moisture intrusion, mildew, or spills) first, then clean and dry completely to avoid trapping smells under a sealant.
Why is moisture control important before polishing basement floors?
Basements often have higher humidity or occasional water intrusion, and polishing alone won’t fix moisture problems. If moisture is present, it can cause hazing, blotchiness, weak bonding of sealers, or mildew that reappears after installation. Test the slab for moisture (using a concrete moisture test) and resolve leaks or dampness, then choose a sealer system designed for basement humidity conditions.
Which equipment and products do I need to polish basement floors?
You’ll typically need a concrete grinder or polisher with diamond tooling, vacuum dust collection (or a dust shroud) for cleanup, and progressively finer polishing pads/discs to achieve gloss. Plan on using a concrete densifier/hardener and a compatible concrete sealer or wax-free protective finish to improve stain resistance and durability in a basement environment. If you’re polishing a large area, renting a professional-grade grinder and using the manufacturer’s recommended products helps ensure consistent results.
📅 Last Updated: October 11, 2026 | Topic: How to polish basement floors? | Content verified for accuracy and freshness.
References
- https://en.wikipedia.org/wiki/Floor_polishing
- https://en.wikipedia.org/wiki/Concrete_polishing
- Silica, Crystalline – Overview | Occupational Safety and Health Administration
https://www.osha.gov/silica - Silica and Worker Health | Silica | CDC
https://www.cdc.gov/niosh/topics/silica/ - https://www.epa.gov/lead/renovating-repairing-and-painting-tips-avoiding-lead-exposure
- Technical Preservation Services (U.S. National Park Service)
https://www.nps.gov/tps/how-to-preserve-preserve-concrete.htm - Google Scholar Google Scholar
https://scholar.google.com/scholar?q=basement+floor+polishing+concrete - Google Scholar Google Scholar
https://scholar.google.com/scholar?q=concrete+floor+polishing+durability+abrasives+grit - Google Scholar Google Scholar
https://scholar.google.com/scholar?q=polished+concrete+floor+maintenance+sealers - https://pubmed.ncbi.nlm.nih.gov/?term=polished+concrete+floor+maintenance+sealers