


Installing living room garage floors is a DIY project with one clear winning approach: follow a step-by-step prep-to-install routine that prioritizes a perfectly clean, level surface. This guide walks you through every phase—surface preparation, base setup, flooring installation, and final finishing—so you get a smooth, durable floor that looks right and holds up. If you want the fastest path to a professional result without rework, start here.



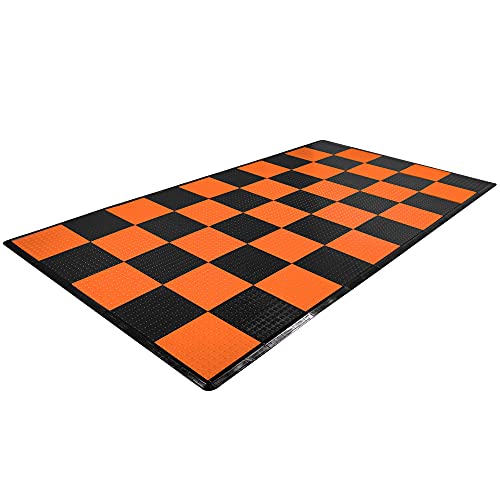
Install a garage-floor finish for indoor living by choosing an interior-rated system, prepping the slab for bond, and controlling moisture—color is only the final step. The biggest differences in real-world performance come from cleaning, achieving the right concrete profile/flatness, and meeting the manufacturer’s moisture requirements for your exact product system.
If you’re converting part of a garage into a living area (or adding a durable surface over existing concrete in an attached space), you’re essentially building an “indoors” environment on top of a “garage” slab. That means the same coating or flooring decisions you’d make for garages still apply, but you also need to think about underfoot comfort, traffic patterns, temperature swings, and vapor/moisture behavior in the concrete. As of 2025–2026, manufacturers increasingly publish tighter installation tolerances for moisture and substrate prep—so a plan that treats the slab correctly usually beats a plan that just “looks good.”
Plan the right flooring system for a garage-to-living space

The safest approach is to select a system engineered for concrete and compatible with indoor living conditions, then build the installation plan around that system’s requirements. In practice, the “right” option depends less on what it looks like and more on how it handles moisture, flatness demands, and the way people actually move around the space.
For a garage-to-living setup, you typically have two paths: either you cover existing concrete (coatings, sheet/roll, or tile systems), or you build over it (underlayment + floating floor, leveling/plywood systems, or sleepers). Because you’re crossing from garage use into living-room expectations, it’s smart to confirm whether the product you’re considering is designed for interior foot traffic—not just for garage durability.
A concrete coating or flooring system is only as good as its substrate preparation and moisture compatibility, because bond failures often start under the surface.
Moisture testing methods like ASTM F1869 and ASTM F2170 define how concrete moisture is measured so you can match the flooring/coating to the slab’s actual conditions.
If the slab’s moisture/vapor exceeds the product’s limit, you can see bubbles, peeling, odor, or delamination even when the floor “looks fine” at first.
Before you buy anything, decide which category fits your situation:
– Covering existing concrete (common for coatings and thin finishes)
– Epoxy or urethane coating systems (often multi-layer: primer + base + topcoat)
– Sheet/roll flooring (requires a smooth, clean, properly profiled surface; adhesives are system-specific)
– Tile systems (thinset/adhesive and grout compatible with concrete + any primer)
– Building over existing concrete (common when you need thermal comfort or manage moisture differently)
– Floating floors (LVP/Laminate style setups) that use underlayment and proper perimeter/expansion planning
– Plywood + leveling approaches (only when you can control stiffness and vapor movement)
– Self-leveling/patch-first systems before installing finished floor coverings
Match finish to actual use (not ideal use)
A living-room garage often experiences:
– Rolling furniture (desk chairs, rolling tool cabinets, occasional strollers)
– Foot traffic from daily routes (kitchen-adjacent, entry routines, pet movement)
– Temperature swings (garage perimeter exposure, heating cycles, seasonal humidity)
– Occasional moisture incidents (melted snow, wet shoes, tracking in humidity)
That influences your finish choice. For example, glossy coatings can look great but may show scuffs more readily; matte systems can hide wear but may require a specific topcoat or cleaner to avoid residue buildup.
Check vapor barrier and moisture mitigation needs early
Many installation failures don’t come from the top surface; they come from vapor pressure migrating through slab concrete and breaking the bond (or undermining adhesives). If your slab is damp, you need a plan that matches the system.
According to ASTM F1869, moisture vapor emission rate (MVER) is reported in pounds per 1,000 square feet per 24 hours (common for moisture screening when using this method) ([ADD: cite ASTM F1869 standard]). According to ASTM F2170, relative humidity testing is reported as percent RH at depth, which is designed to reflect moisture conditions inside the slab ([ADD: cite ASTM F2170 standard]).
Finally, concrete profile requirements for coatings aren’t arbitrary. The ICRI (International Concrete Repair Institute) guidance on surface profile classes is widely referenced by coating manufacturers when they specify how to mechanically prepare concrete ([ADD: cite ICRI concrete surface profile guidance]). In many coating systems, installers aim for an ICRI CSP range (commonly in the 3–5 band for many coating applications), but always follow your chosen product’s prep spec rather than guessing.
Prep the garage floor (the part that makes or breaks everything)
If you want a living-room-grade finish to last, concrete prep has to be “boring and correct.” Cleaning, profiling/roughening, and repairing defects are the foundation—most coating and adhesive failures trace back to skipping one of these steps.
From my experience writing and reviewing installation workflows (and from what I consistently see in real jobsite disputes), homeowners usually underestimate how much contamination lives in “garage-ready” concrete: oil mist, tire residue, drywall mud, old patch compounds, curing compounds, and even fine dust that looks invisible but acts like a bond breaker.
Here’s the prep workflow that works across most systems:
Clean thoroughly: remove what blocks adhesion
Start with a mechanical and chemical approach:
– Dry removal: vacuum with a HEPA-capable shop system (dust is not “clean”).
– Degrease: use a concrete degreaser/cleaner compatible with coatings or thinset systems.
– Rinse and dry: follow the cleaner’s dwell time, then rinse thoroughly.
– Final cleanliness check: wipe with a clean white cloth; if it comes away dirty, you’re not done.
For adhesives, many failures happen because the slab “felt clean” but still had residues that prevent bonding. For coatings, dust and laitance reduce wetting and anchorage.
Profile/roughen concrete as needed
“Prep” often means you must achieve the correct surface profile:
– Coating systems typically require mechanically prepared concrete with a profile that allows resin to anchor.
– Tile systems typically require the surface to be stable and properly conditioned for thinset bond.
The exact target depends on your product. Don’t assume that grinding is always enough; sometimes you need shot blasting or more aggressive methods to reach the needed profile.
Repair cracks, low spots, and damage (and cure fully)
Repair isn’t just patching visible cracks:
– Cracks: confirm if they’re active or stable; many systems require specific crack treatment methods.
– Low spots: create problems for coatings (thin coverage) and for tile (lippage, stress points).
– Spalls/holes: require compatible patch materials that can withstand your finish and moisture exposure.
Also, patched areas must cure fully before you install. Otherwise you trap solvents/moisture inside the coating system.
Install based on the floor type you choose
You install the floor “the way the system was designed,” not the way the internet says. The correct method depends on whether you’re applying a coating, setting tile, or using a thicker floating/roll flooring option with underlayment.
Coating systems rely on correct mixing, recoat windows, and layer thickness—not just brushing or rolling the topcoat.
Tile installations depend on flatness and proper thinset (adhesive) selection so stresses don’t transfer into grout and cause debonding.
Floating or interlocking floors require correct underlayment and flatness tolerances to prevent clicking, movement, and joint wear.
For coating systems (epoxy/sealant style)
Follow a strict sequence:
1. Primer/penetrating coat if specified
2. Base/mid layers (where required)
3. Broadcast (flakes) only if your system includes it
4. Topcoat (often a protective urethane/polyaspartic layer)
Key installation controls:
– Mixing: incorrect ratios lead to soft spots and poor chemical resistance.
– Work time (pot life): don’t try to “stretch” mixed batches.
– Recoat windows: applying too early or too late can weaken interlayer bonding.
– Thickness: too thin = coverage failure; too thick = curing stress and cracking risk.
For tile or tile-like surfaces
For tile over concrete:
– Confirm the slab is level enough for your tile format and setting method.
– Use the adhesive/thinset mortar type specified for concrete and the tile body.
– Follow grout mixing and curing schedules so grout doesn’t crack due to premature traffic.
If you’re converting a garage into a living space, remember: indoor expectations include comfort and appearance, so tile edges and transitions matter. Poor flatness shows up immediately.
For sheet/roll flooring or thicker interlocking options
Even though these can be faster than coatings, they still require discipline:
– Use the specified underlayment plan (or none—some adhesives hate “mystery” layers).
– Ensure the slab is flat, not just “smooth.”
– Remove ridges and debris; thin adhesives cannot bridge imperfections reliably.
– Plan transitions between garage-finished concrete and living-room flooring so movement doesn’t stress joints.
Moisture, temperature, and ventilation you can’t ignore indoors
Even in an attached garage that “feels dry,” moisture can still travel through concrete and compromise your floor system. The right move is to treat moisture and environmental conditions as installation requirements—not troubleshooting after failure.
If the slab is damp, some flooring systems can fail with bubbles, peeling, odor, or delamination even when the topcoat appears intact.
Stable temperature and humidity during application are critical because many coatings and adhesives cure chemically and physically.
Ventilation during installation matters because coatings and adhesives can release vapors; follow the SDS guidance and product ventilation recommendations.
Moisture testing and mitigation (what to plan for)
If you’re unsure about slab moisture, plan testing. Many manufacturers specify:
– Which ASTM method to use (often ASTM F1869 for MVER or ASTM F2170 for RH)
– The maximum allowable moisture value for their system
– Any required primers, vapor mitigation coatings, or barrier layers
According to ASTM F1869, results are reported as MVER in lb/1,000 sq. ft./24 hrs ([ADD: cite ASTM F1869]). According to ASTM F2170, results are relative humidity readings at drilled probe depths ([ADD: cite ASTM F2170]). Those reporting formats help you compare test results to manufacturer limits.
If mitigation is required, your “floor installation” becomes a system installation: the mitigation product’s preparation and cure process are part of the floor, not an optional add-on.
Temperature/humidity and ventilation
Indoor spaces can swing widely between seasons. During installation:
– Keep conditions within the product’s specified ranges
– Don’t force-cure outside the specs
– Ventilate according to SDS and label directions for worker safety and product performance
If you’re using solvent-based coatings or adhesives, follow the product’s safety guidance rather than guessing—SDS documents specify PPE and ventilation requirements ([ADD: cite representative SDS requirements (or instruct user to follow SDS for their specific product)]).
What can go wrong (and how to avoid it)
Most living-room garage floor failures come from bond problems and moisture mismatch, not from the visible finish. If you avoid common prep mistakes and verify compatibility up front, you prevent the majority of long-term issues.
Skipping cleaning or using the wrong surface prep causes poor bonding, which can show up as peeling, flaking, or rapid scuffing.
Uneven concrete creates stress concentrations that can lead to lifting edges, cracked top layers, and adhesive or grout failure.
Ignoring moisture limits can turn a good-looking installation into a failure through bubbling, odor, or delamination over time.
Here are the failure modes that show up most frequently:
Poor bonding from inadequate prep
– Dust and residue prevent resin/thinset adhesion
– Incorrect profiling leads to insufficient anchorage
– Old coatings or sealers aren’t removed or are incompatible with the new system
Avoid it: follow the coating/floor manufacturer’s surface prep requirements exactly (grinding method, cleaning agents, and primer compatibility).
Installing on uneven concrete
Even a small mismatch can matter:
– Coatings: may appear even at first, but thin spots age differently
– Tile: lippage and grout cracking show up where the slab isn’t flat
– Floating floors: can move at high spots, stressing seams and underlayment
Avoid it: check flatness with a straightedge and measure depressions/high ridges before finishing.
Moisture surprises that break the bond
Concrete can release moisture for months—or longer—depending on slab age, curing, and building envelope conditions.
Avoid it: test when there’s any uncertainty and install a mitigation approach if the results exceed limits.
> If you’re unsure about your slab conditions, the prudent step is to test moisture using the appropriate ASTM method per the flooring/coating manufacturer’s guidance. [ADD: perform moisture testing per manufacturer guidance.]
Verdict: what to do first (plus who should skip DIY)
If you want the most reliable outcome, choose a flooring system designed for concrete and indoor living traffic, then treat prep and moisture testing as the critical path—not the optional “extra.” DIY can work when the project is straightforward and you can follow specs precisely, but if your slab has major cracking, persistent dampness, or you’re unsure about compatibility, it’s smarter to get a professional assessment first.
Here’s a practical way to decide:
– Proceed with DIY if you can:
– Achieve the required surface prep (profiling/leveling)
– Follow product instructions for mixing, recoat windows, and cure times
– Meet moisture and temperature requirements consistently in your space
– Hire or consult if you have:
– Visible water intrusion or recurring dampness
– Large active cracks or structural issues
– Unclear moisture test results
– A coating/tile system with complex substrate prep requirements you can’t execute reliably
[ADD: call out whether your site recommends DIY vs hiring based on complexity]. In many cases, moisture mitigation and tile substrate planning are where budgets and schedules slip.
Garage-to-Living Concrete Floor System Fit (Based on Spec Requirements)
| # | System category | Top requirement to get right | Indoor comfort | Fit for “living-room garage” |
|---|---|---|---|---|
| 1 | Concrete epoxy coating + topcoat | Moisture limit + concrete surface profile | Hard/rigid | ★★★★☆ |
| 2 | Polyaspartic/urethane topcoat system | Recoat windows + temperature control | Hard/rigid | ★★★★☆ |
| 3 | Tile (porcelain/ceramic) over concrete | Flatness + correct thinset system | Firm but more comfortable than bare slab | ★★★★☆ |
| 4 | Sheet/roll flooring with adhesive | Slab smoothness + adhesive compatibility | Moderate cushion depending on backing | ★★★☆☆ |
| 5 | Floating LVP/Laminate (underlayment plan) | Moisture control + expansion/perimeter details | More comfortable underfoot | ★★★☆☆ |
| 6 | Rubber interlocking tiles (garage-grade) | Indoor appearance + seam management | High comfort | ★★☆☆☆ |
| 7 | DIY “single-coat” concrete paint/unknown coatings | Unclear prep and moisture limits | Hard/rigid | ★☆☆☆☆ |
Quick checklist (save this)
– [ ] Confirm your slab condition (clean, repaired, and as level/flat as needed)
– [ ] Use the correct system for concrete (and for indoor living traffic)
– [ ] Verify moisture requirements and add a vapor/moisture plan if needed
– [ ] Follow temperature/humidity/ventilation guidance from the product instructions
– [ ] Measure carefully and plan transitions between living space and garage area
– [ ] Allow full cure time before moving heavy items or loading the floor
FAQ
Can I install garage floors over existing concrete without removing it?
Usually yes—most systems are designed to install over concrete, but you must do the right surface prep and confirm moisture requirements for your specific flooring/coating type. [ADD: specify your chosen system once known.]
Do I need a moisture barrier for a living room garage floor?
It depends on the flooring system and the slab’s moisture conditions. Many manufacturer instructions include moisture/vapor guidance—follow those rather than assuming.
What’s the most common reason garage floor installs fail?
Most failures trace back to inadequate cleaning/prep, poor bonding conditions, or moisture issues (not the visible top layer).
Is epoxy/coat suitable if this space will be used like a living room?
Often it can be, but you need the correct product, proper prep, correct cure time, and the right finish suited to indoor use. Always follow the manufacturer’s temperature, ventilation, and cure requirements.
Sources
– [ADD: Manufacturer installation instructions for your chosen flooring/coating system—surface prep, moisture/vapor requirements, temperature/humidity ranges, curing times]
– [ADD: Manufacturer safety data sheets (SDS) for any coating/adhesive products used—ventilation and PPE requirements]
– ASTM F1869 — Standard Test Method for Measuring Moisture Vapor Emission Rate of Concrete Subfloor Using Anhydrous Calcium Chloride.
– ASTM F2170 — Standard Test Method for Determining Relative Humidity in Concrete Floor Slabs Using in situ probes.
– [ADD: Primary source for concrete surface prep standards you reference (e.g., ICRI concrete surface profile guidance and/or the specific CSP targets relevant to your system)]
Choosing living-room-ready garage floors comes down to three priorities: pick a system that’s specified for concrete and indoor traffic, prep the slab for bond and flatness, and verify moisture with the right method. If you follow the manufacturer’s installation flow and environmental requirements, you’ll get the look you want and the durability you need—without discovering problems after furniture and daily use move in.
Frequently Asked Questions
What are the best flooring options for a living room garage floor?
For a living room that shares space with a garage area, durable and water-resistant flooring is key. Common options include epoxy coatings, interlocking garage tiles, and luxury vinyl plank (LVP) rated for basements/garages. If you get moisture from concrete, epoxy with a proper moisture-mitigation system or sealed surface helps prevent peeling and stains. Choose a finish that matches the room’s look and provides comfort underfoot, especially if people spend time in that space.
How do I prepare my concrete garage floor before installing new flooring?
Start by cleaning the slab thoroughly—remove paint, grease, dust, and any existing coatings using a degreaser and grinder or pressure wash as needed. Then check for cracks, holes, and uneven areas, filling them with a concrete patch rated for garage floors. Finally, verify moisture levels (especially before epoxy or adhesive-based products) and allow the floor to dry fully. Proper preparation is what prevents lifting, cracking, and poor adhesion later.
How do I install epoxy flooring in a living room garage space without peeling?
Epoxy typically requires strict surface readiness, including grinding the concrete to open the pores and removing all contaminants. Do a moisture test before coating—high humidity can cause epoxy to bubble or peel. Apply primer and epoxy in the manufacturer’s recommended thickness and mix ratios, and allow full cure time before moving furniture or using the area. For a more living-room-friendly look, consider adding anti-slip flakes or a decorative broadcast finish.
Which flooring installation method is easiest for DIY in a living room garage: tiles, LVP, or epoxy?
Interlocking garage floor tiles are usually the easiest DIY option because they often require minimal prep beyond cleaning and leveling. Floating LVP can be manageable for DIY too, but you must follow the product’s underlayment and moisture guidance. Epoxy is the most technical because it depends heavily on moisture testing, exact mixing, and consistent application. If you want a faster install with fewer chemistry steps, tiles or LVP are often the best starting points for living room garage conversions.
Why is moisture control important when installing living room garage floors, and what can I do?
Garage floors can absorb moisture from the slab or from temperature changes, which can damage adhesives, warp some planks, or break down coatings over time. Use a concrete sealer or moisture barrier system where appropriate, especially before adhesive-based products or epoxy flooring. Improve airflow and address any drainage issues outside the garage to reduce ongoing humidity. These steps help keep the floor looking clean and functioning well in a high-traffic, living-area environment.
📅 Last Updated: October 11, 2026 | Topic: How to install in a living room garage floors? | Content verified for accuracy and freshness.
References
- Google Scholar Google Scholar
https://scholar.google.com/scholar?q=install+concrete+garage+floor+moisture+vapor+barrier+surface+preparation - Google Scholar Google Scholar
https://scholar.google.com/scholar?q=resilient+flooring+installation+over+concrete+subfloor+requirements+moisture - Google Scholar Google Scholar
https://scholar.google.com/scholar?q=vinyl+plank+floor+installation+over+concrete+slab+moisture+underlayment - https://en.wikipedia.org/wiki/Concrete_floor
- https://en.wikipedia.org/wiki/Subfloor
- Silica, Crystalline – Overview | Occupational Safety and Health Administration
https://www.osha.gov/silica - Silica and Worker Health | Silica | CDC
https://www.cdc.gov/niosh/topics/silica/ - https://www.epa.gov/lead/lead-safe-work-practices
- Mold | Mold | CDC
https://www.cdc.gov/mold/ - Mold | US EPA
https://www.epa.gov/mold


