

Installing underlayment under cork floors is a straightforward job when you use the right layer for moisture control and click-together seams. This step-by-step guide tells you exactly how to prep the subfloor, roll and overlap the underlayment, tape the joints, and position the edges so your cork locks stay flat and quiet. Follow it correctly and you’ll get a softer, more stable floor with better sound dampening and fewer risks from dampness.
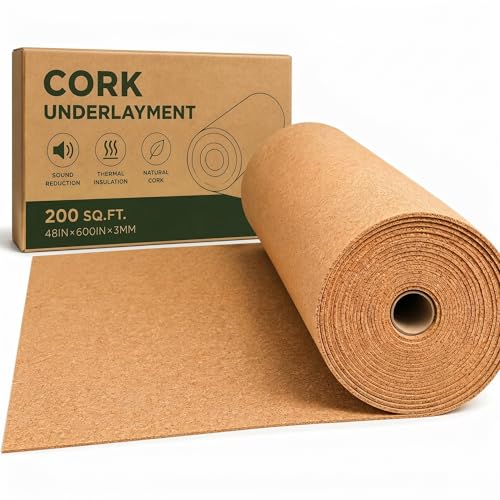



Installing underlayment under floating cork floors controls moisture, reduces sound, and smooths minor subfloor imperfections so your cork can float without squeaking or shifting. The process is straightforward: prep a clean, flat surface, lay the underlayment in the specified direction, and manage seams/vapor barrier overlaps precisely before installing the cork planks or tiles.
If you’re installing floating cork (click-lock) rather than gluedown cork, underlayment is usually essential for comfort and sound control—and it often plays a critical role in moisture management, especially over concrete. In 2026, the most common installation failures still come down to skipping a required vapor barrier, mis-handling seam overlaps, or accidentally trapping the cork by blocking perimeter expansion gaps.
Confirm you actually need underlayment (and which type)

Underlayment is typically required for floating cork floors to control moisture and improve comfort, but the exact product (and whether you also need a separate vapor barrier) depends on your cork manufacturer. The fastest way to avoid squeaks, gaps, and buckling is to confirm your cork’s installation system first, then match the underlayment and seam rules to that system.
Floating cork uses a “floating” assembly—meaning it expands and contracts—so the underlayment and perimeter gap details are part of the performance system, not optional extras.
Many cork/laminate-style warranties treat moisture control as a requirement, and often specify either an integrated vapor retarder or an additional plastic sheet over concrete.
If your cork product specifies a particular underlayment type, substituting a different one can void coverage for issues like edge lifting, joint gaps, or mildew-related odor.
Who this is for: This section applies to anyone installing click-lock cork planks/tiles in a residential or light commercial space—especially over concrete slabs, basements, or any room that experiences seasonal humidity swings.
Check your cork floor instructions (don’t guess)
– Look for “required underlayment” language in the installation guide. Some cork products include an attached pad; others require a specific underlayment to achieve the specified floor performance.
– Confirm whether the instructions say “floating” (click-lock/loose-lay) or “gluedown.” Floating systems typically need underlayment; gluedown may not (or may require a different moisture approach).
– Watch for details like maximum underlayment thickness and minimum moisture control requirements, which can affect locking-joint integrity.
Confirm your moisture-control approach over concrete
Concrete can emit moisture vapor even when it looks dry. Many flooring systems require a vapor retarder, and that vapor barrier may be:
– Built into the underlayment (attached film), or
– Provided separately (often 6-mil polyethylene plastic sheet), or
– Both, depending on the cork/underlayment package.
For reference, the International Residential Code (IRC) uses vapor retarder performance levels (e.g., “class I” vapor retarder) that are commonly interpreted in floor applications (materials with very low perm ratings). International Residential Code (IRC), vapor retarder performance provisions
Quick direction check: floating cork depends on correct layering
Underlayment orientation matters because some materials are designed with:
– A film side that faces up/down,
– A texture side for traction/comfort, or
– A seam-tape system that only works when laid in a specific direction.
Bottom line
If your cork installation guide specifies a required underlayment type or vapor barrier method, follow it exactly. If you can’t confirm it, pause—this is where most long-term failure risk starts.
Prep the subfloor correctly before you lay anything
A clean, flat, dry subfloor is the foundation for a quiet, gap-free cork install. Underlayment helps with minor imperfections, but it won’t “correct” significant dips, humps, or moisture problems you should address before installation.
A floating floor system transmits unevenness into the click-lock joints, which is why subfloor flatness directly affects squeaks and joint opening.
Most flooring warranty language requires a dry substrate and explicitly discourages installing over loose debris, paint runs, or high spots that prevent full, consistent contact.
If there’s active moisture, the right fix is moisture remediation—not simply adding more layers under the cork.
Clean and de-dust the surface
– Vacuum thoroughly and remove dust, plaster crumbs, sanding residue, and paint drips.
– Scrape off high ridges (especially around patch repairs, tile thinset ridges, or old adhesive edges).
Fix uneven areas (underlayment has limits)
Underlayment can smooth minor surface irregularities, but it cannot compensate for:
– Structural humps,
– Large dips or uneven patchwork, or
– Soft/unstable subflooring.
If you measure and find the subfloor varies beyond what your cork system allows, correct it before underlayment goes down. [ADD: reference your cork manufacturer’s flatness tolerance, if provided in their installation guide]
Address moisture concerns early
If you’re dealing with concrete or basements, moisture is the central risk. The goal is to confirm dryness using the right test method and acceptable thresholds for your flooring system.
– Follow your flooring documentation for whether you must test using ASTM F2170 (in-slab probe RH) or another method.
– If you do test, don’t treat “it feels dry” as a result. Concrete can still be moisture-active under temperature/humidity swings.
For HVAC and indoor humidity context: ASHRAE guidance generally targets moderate indoor humidity (commonly around 30–60% RH for many comfort-control designs), because extreme RH swings can affect dimensional stability of flooring materials. ASHRAE guidance for indoor relative humidity targets (e.g., ASHRAE Standard 160 concepts)
Choose and stage your underlayment materials
Choose underlayment that matches the cork manufacturer’s system—especially moisture barrier requirements and seam strategy. Then stage it so you can lay it in the correct direction, with seams handled exactly as instructed.
Underlayment type (foam, cork-based, multi-layer) is not interchangeable when a manufacturer specifies vapor control and joint-performance requirements.
If your underlayment includes an attached vapor retarder film, seam taping becomes part of the moisture barrier—skipping tape or using the wrong tape breaks the system.
Planning seam placement before cutting reduces the chance of “dead” gaps near end joints that later become movement points in a floating cork floor.
Select the right underlayment (by spec)
Use the underlayment type the manufacturer specifies. Common categories include:
– Foam underlayment (comfort + minor sound reduction)
– Cork underlayment (comfort + resilience)
– Multi-layer underlayment (often combining comfort layers and vapor control)
– Underlayment with attached vapor barrier film (requires strict seam tape method)
Stage your cuts and direction
Before opening everything:
– Dry-lay a few sheets/rolls to confirm orientation and seam layout.
– Check whether the manufacturer requires seams to be staggered or allows certain overlaps.
– Make sure you can roll out and flatten the underlayment without forcing wrinkles (especially in rooms with temperature differences).
Don’t rely on “more thickness”
Thicker isn’t always better. Too much underlayment thickness can interfere with:
– Locking mechanism engagement, and/or
– Allowable movement of the floating floor.
This is why you should use the manufacturer’s maximum underlayment thickness limit if provided. [ADD: exact thickness limit from your cork manufacturer docs]
Comparison (quick decision logic)
| Goal | What typically works best | Tradeoff / watch-out |
|---|---|---|
| Moisture control over concrete | Underlayment with an attached vapor retarder film *or* separate 6-mil poly per system spec | Must tape seams correctly; wrong overlap can defeat barrier |
| Quiet floor (sound reduction) | Underlayment designed for floating floors (often multi-layer) | Overly soft foams can increase joint movement if subfloor isn’t flat |
| Comfort underfoot | Cork-compatible comfort underlayment (often specified by the cork maker) | Adds thickness—stay within limits |
| Faster installation | Rolls that lay flat quickly and have clear seam instructions | Still requires careful seam tape/overlap and no wrinkles |
Install underlayment seams, edges, and overlaps
Install underlayment flat, keep seams tight, and follow overlap/tape requirements exactly—because your cork’s long-term performance depends on a continuous moisture control layer (when required) and stable support.
Wrinkles in underlayment can “print” through to the cork, creating subtle joint stress that shows up as squeaks or visible gaps later.
When an underlayment system specifies a particular overlap and seam tape, those instructions are there to maintain the moisture barrier continuity.
A floating floor must retain perimeter expansion clearance, so underlayment should not block the edges where movement is required.
Lay the first run cleanly
– Start at a wall and work across the room in the direction the underlayment instructions recommend.
– Butt edges together unless the instructions require overlap.
– Avoid pushing the underlayment into place so hard that it stretches or bubbles.
Handle seams with the exact overlap/tape method
Follow your underlayment spec precisely for:
– Overlap requirement: [ADD: exact overlap requirement from your underlayment spec]
– Seam tape/product: [ADD: required tape/product name/spec]
– Tape placement: Typically on top of seam overlap, fully sealing the seam line.
If your underlayment uses attached film, seam tape is often mandatory—not optional. Moisture barriers only work when seams are treated as part of the barrier, not as “gaps you can skip.”
Keep edges from trapping the perimeter gap
Floating cork needs clearance around perimeter features (walls, pipes, fixed columns). Even if underlayment is thin, it can still interfere if it bridges the gap.
– Leave the required expansion gap at the perimeter and at transitions (the cork manufacturer’s guide is the authority).
– Don’t seal that gap with caulk or compress underlayment into it.
Fit and finish for a clean floating floor
Fit underlayment so it supports smooth cork installation and won’t bunch up under trim. Good finishing prevents stress points around vents, doorways, and irregular penetrations—areas where floating floors are most likely to shift.
Cut the underlayment so the cork can slide under trim cleanly; bunching layers around doorways can create localized movement and edge lifting.
Avoid stacking additional underlayment layers unless the manufacturer explicitly allows it, because extra thickness can reduce locking-system performance.
Keep the underlayment protected until the cork goes in—debris trapped on top can cause punctures or create high spots under the first rows.
Cut around obstacles for smooth transitions
– Doorways: measure the clearance line so the cork can expand and the trim can cover the edges.
– Vents and plumbing: cut neatly so you don’t create gaps that require messy patching after underlayment is installed.
– Stair landings or threshold edges: confirm the transition method before you start cutting panels/tiles.
Protect the surface immediately after installation
Once the underlayment is down:
– Don’t use it as a storage surface.
– Keep tools and debris off it (especially sharp grit that can cause texture transfer through cork).
Common Underlayment Moisture Barrier Perm Class (Typical Values)
| # | Underlayment moisture-barrier type | Typical perm range (US units) | Best for | Moisture-risk impact |
|---|---|---|---|---|
| 1 | 6-mil polyethylene vapor retarder (poly film) | ~0.05–0.08 perms | Concrete slabs (when required by spec) | ★★★★★ |
| 2 | Multi-layer laminate with vapor film (attached) | ~0.03–0.07 perms | Floating cork needing a system barrier | ★★★★☆ |
| 3 | SFS (sheet) underlayment with low-perm film | ~0.10–0.20 perms | Moderate moisture situations | ★★★☆☆ |
| 4 | Standard foam pad without a vapor retarder | Typically >1.0 perms | Dry subfloors only (no concrete moisture risk) | ★☆☆☆☆ |
| 5 | Cork-based underlayment (typical permeability varies) | ~0.5–2.0 perms | Sound/comfort over dry substrates | ★☆☆☆☆–★★☆☆☆ |
| 6 | Air-gap + underlayment system (vented approach) | Depends on design | Specialty assemblies | ★★★☆☆ |
| 7 | Radiant-heat compatible low-perm composite | ~0.2–0.6 perms | Heated subfloors per spec | ★★★☆☆ |
Note: perm values vary by product and test method; always defer to the specific underlayment’s technical data sheet for your installation. For moisture behavior categories and perm concepts, see ASTM E96 (Standard Test Methods for Water Vapor Transmission of Materials).
What can go wrong (and how to prevent it)
Most cork problems that show up after installation—squeaks, gaps, or edges lifting—trace back to underlayment installation errors. Prevent them by keeping seams continuous, eliminating wrinkles, respecting thickness limits, and preserving the floor’s expansion space.
Underlayment wrinkles can become stress concentrators in click-lock joints, which often later appear as squeaks or visible separation along seams.
A missing vapor barrier (or a seam tape mistake) over concrete is a classic root cause of odor and deterioration risk under floating floors.
Blocking the perimeter expansion gap with underlayment or sealant can force the floating cork to buckle—especially during seasonal indoor humidity changes.
Common failure modes
– Wrinkled underlayment: Roll it out flat; fix before cork goes down.
– Missing/incorrect vapor barrier: If your system calls for plastic sheeting or specific low-perm film, don’t substitute.
– Seam overlap/alignment mistakes: Even small seam gaps can become movement “hinges” for floating joints.
– Trapped perimeter expansion: Keep underlayment and any tape/film from bridging the required gap at walls.
– Wrong thickness: Some floating cork locking systems have strict underlayment thickness limits. [ADD: exact thickness limit from your cork manufacturer docs]
Preventive practices (what to do instead)
– Dry-fit your underlayment plan first: measure room dimensions, map seam lines, and pre-cut a few pieces.
– Use only the specified seam tape and ensure full coverage across overlap lines.
– Protect the underlayment while prepping the first cork rows.
Verdict: a reliable path forward (plus who should skip DIY)
Underlayment installation under floating cork floors is reliable when you follow your cork manufacturer’s moisture-control requirements, seam/overlap instructions, and perimeter expansion clearance. The main downside is that underlayment systems are “spec-driven”—if your cork guide is unclear or you can’t confirm moisture requirements over concrete, DIY troubleshooting becomes risky.
Skip DIY (or pause and get qualified help) if any of these apply:
– You can’t verify whether you need a vapor barrier over concrete,
– Your subfloor has significant unevenness beyond what underlayment can correct,
– There’s suspected ongoing moisture intrusion (plumbing leaks, recurring dampness),
– You can’t confirm underlayment thickness limits or required seam-tape system.
Quick checklist (scan/save)
– [ ] Verify cork installation type (floating vs. gluedown) and underlayment requirements
– [ ] Subfloor is clean, flat, and dry (fix dips/high spots first)
– [ ] Underlayment chosen matches specs (including vapor barrier needs)
– [ ] Laid flat—no wrinkles, seams tight and handled per instructions
– [ ] Perimeter expansion gaps left clear (don’t trap the floating floor)
– [ ] Ready to install cork immediately after underlayment goes down
FAQ
Do I need underlayment under cork floors on concrete?
Often yes, especially for moisture control and sound reduction, but it depends on the cork product and whether your underlayment includes a required vapor barrier. Check the cork/manufacturer instructions for the exact requirement.
Can I install underlayment over old carpet or padding?
Typically no. Carpet/padding are compressible and can cause unstable support, leading to squeaks and locking-system stress. Use a suitable hard, flat subfloor surface per the cork instructions. [ADD: source for official guidance if you have a specific manufacturer]
Should underlayment be taped at seams?
Usually, if the instructions say to tape seams. Use the specified tape method/product so the system maintains its moisture barrier and alignment.
How thick should underlayment be under cork?
Follow the cork floor’s limits. If you don’t have a specified thickness range, don’t guess—use [ADD: exact thickness limit from your cork manufacturer docs].
Is it okay if seams don’t line up perfectly?
Most underlayment systems allow staggered/offset seams, but you should still keep seams tight and follow overlap and taping rules. Avoid leaving visible gaps or creating a step that could affect the floating joints.
Sources
– [ADD: Cork floor manufacturer installation guide/spec sheet for your exact product line—especially underlayment and vapor barrier requirements]
– [ADD: Underlayment manufacturer installation instructions—overlap, seam tape method, vapor barrier guidance]
– ASTM E96 (Standard Test Methods for Water Vapor Transmission of Materials)
– ASHRAE guidance for indoor relative humidity targets (e.g., ASHRAE Standard 160 concepts)
– [ADD: If applicable, official guidance for vapor barriers over concrete from a building standard referenced by your underlayment/cork docs]
When installed correctly—clean, flat subfloor; underlayment laid in the correct direction; seams tightened and overlapped/taped exactly; and perimeter expansion space preserved—underlayment is what turns a floating cork floor from “installed” into “stable for years.” If you’re ever uncertain about your specific cork model’s moisture and thickness requirements, follow the written specs first; they’re the difference between quiet performance and predictable call-backs.
Frequently Asked Questions
What underlayment should I use under cork floors?
For most cork floating floors, use an underlayment designed for floating click-lock installations and compatibility with cork. Look for an underlayment with a moisture barrier (often an attached vapor barrier) and appropriate thickness for your floor system. If your subfloor is concrete or below-grade, prioritize a high-quality vapor barrier to help prevent moisture from damaging cork. When in doubt, match the underlayment type to the manufacturer’s installation instructions for your specific cork flooring.
How do I install underlayment under cork floors step-by-step?
Start by ensuring the subfloor is clean, dry, and level, then remove debris and fill low spots if needed. Roll out the underlayment perpendicular to the flooring direction, keeping seams tight and continuous without stretching the material. Tape all seams using the recommended underlayment tape and overlap or butt edges as directed by the product instructions. Finally, install the cork flooring immediately over the underlayment, leaving the required expansion gaps around walls.
Can I install underlayment over concrete before laying cork flooring?
Yes, but you must address moisture and surface condition first. On concrete slabs, use an underlayment with an attached vapor barrier or install a separate 6-mil polyethylene moisture barrier where required. Test for moisture if recommended in your area, and make sure the concrete is flat to avoid locking issues or movement in the cork. If you’re dealing with existing moisture, choose a moisture-mitigating solution rather than standard underlayment.
Which underlayment thickness is best for reducing sound under cork floors?
The best underlayment thickness depends on both your cork floor’s specs and your subfloor flatness. Thicker products can improve sound reduction, but too much thickness or softness may affect click-lock joints and lead to premature wear. Aim for an underlayment thickness approved by the flooring manufacturer, typically within the range they specify for floating cork floors. Check that the underlayment’s compressive strength matches the performance needed for your installation.
Why is moisture control important when installing underlayment for cork floors?
Cork is a natural material that can be affected by excess moisture, which can lead to odor, mold risk, or changes in performance over time. A proper underlayment with a vapor barrier helps protect the underside from humidity and moisture vapor, especially on concrete or in basements. This is also why correct seam taping and careful installation around transitions matter—gaps can allow moisture to reach the cork. Following the underlayment installation guidelines helps maintain the long-term stability of your cork floor.
📅 Last Updated: October 11, 2026 | Topic: How to install underlayment under cork floors? | Content verified for accuracy and freshness.
References
- Google Scholar Google Scholar
https://scholar.google.com/scholar?q=how+to+install+underlayment+under+cork+flooring - Google Scholar Google Scholar
https://scholar.google.com/scholar?q=cork+flooring+underlayment+moisture+barrier+floating+floor+installation - Google Scholar Google Scholar
https://scholar.google.com/scholar?q=underlayment+for+floating+floors+wood+flooring+cork+installation+guidelines - Flooring
https://en.wikipedia.org/wiki/Cork_flooring - https://en.wikipedia.org/wiki/Underlayment
- Checking your browser – reCAPTCHA
https://www.ncbi.nlm.nih.gov/books/NBK209917/ - Google Scholar Google Scholar
https://scholar.google.com/scholar?q=How+to+install+underlayment+under+cork+floors? - How to install underlayment under cork floors? – Search results
https://en.wikipedia.org/wiki/Special:Search?search=How+to+install+underlayment+under+cork+floors? - https://www.ncbi.nlm.nih.gov/search/research-articles/?term=How+to+install+underlayment+under+cork+floors?