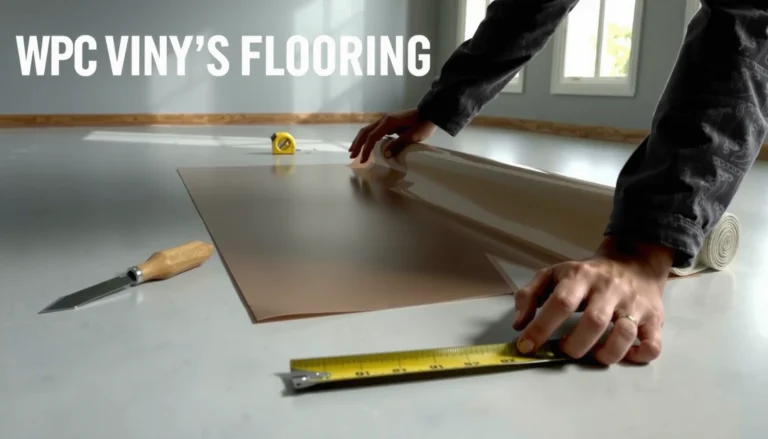
Want a step-by-step guide to install rubber floors on stairs that looks clean and stays put? This walkthrough shows exactly how to measure and prep the steps, cut and fit rubber flooring, and secure it with the right adhesive and edging for a durable, slip-resistant finish. If you follow these instructions, you’ll know what to do at every stage instead of guessing your way through the most difficult part—curves, nosing, and alignment.




If you want to install rubber floors on stairs, the key is getting the tread surface clean, dry, and properly measured before you cut and adhere (or mechanically fasten) the rubber. Start by choosing stair-specific rubber underlay or stair treads made for your stair type, then fit each tread/riser carefully so edges won’t lift. This guide walks you through measurement, surface prep, installation, and the checks that prevent peeling and slipping.
If your stairs are worn, noisy, or slippery—or you’re trying to add comfort and traction—this is for you. It’s especially useful when you’re working with rubber sheets, rubber stair treads, or rubber flooring systems that require trimming for each step.
If you’re doing this in 2025 or 2026, treat it like a safety project, not just a finish update: stairs concentrate movement, wear, and cleaning chemicals, so installation defects show up quickly. The best results come from following your rubber system’s instructions exactly (adhesive type, dwell/press time, allowable substrates, and required surface preparation).
Choose the Right Rubber System for Stairs
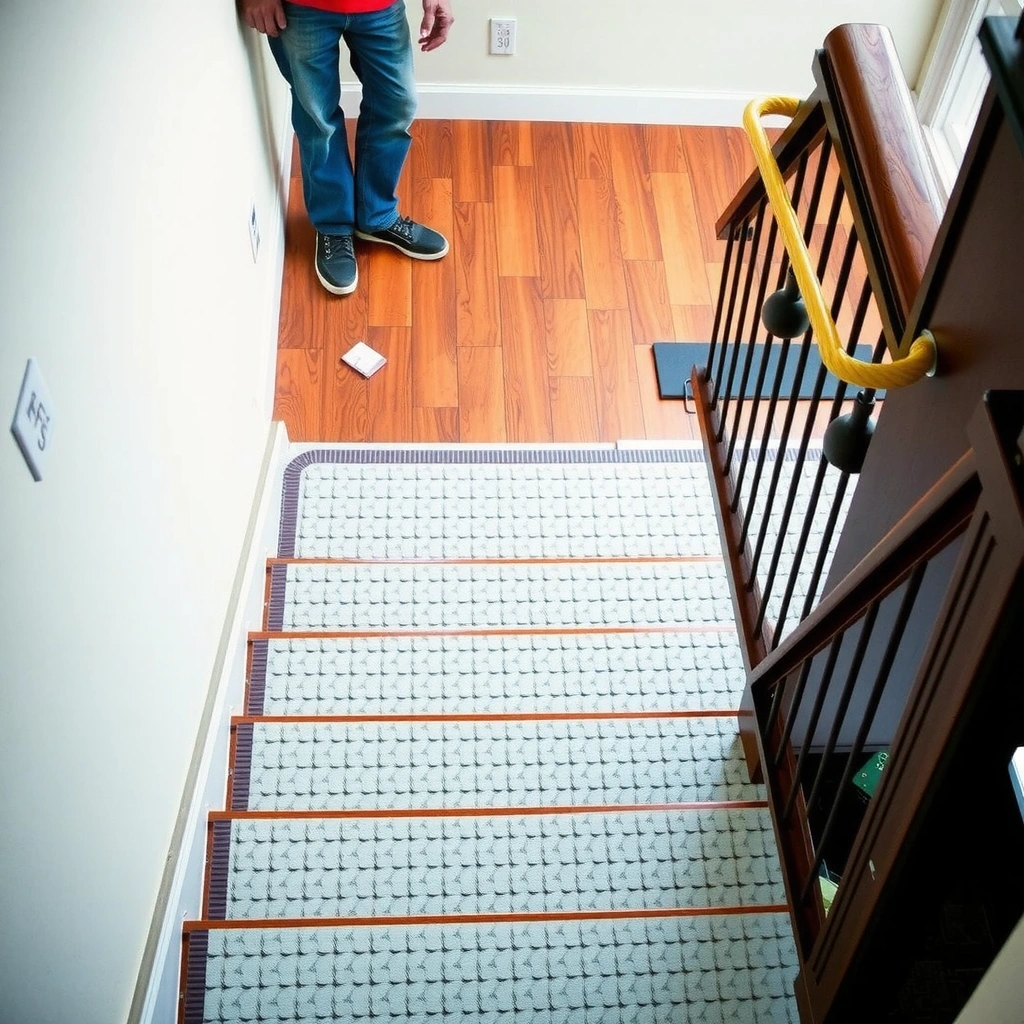
Choosing the right rubber system is the fastest way to avoid peeling edges and slipping. For stairs, you usually need stair-specific treads (individual pieces) or a rubber system designed to be trimmed per step with a finish intended for walking surfaces.
Stair rubber products are not interchangeable with general flooring underlayment—manufacturer guidance for “intended indoor walking use” matters for traction and adhesion performance.
When a system specifies adhesive or mechanical fastening, the installation method is part of the product design—not an optional preference.
If your rubber installation requires trimming per tread, the cutting plan needs to match how the product covers the tread and any portion of the riser.
Here’s how to narrow the choice quickly:
Stair treads vs. trimmed rubber flooring
– Stair treads (individual pieces): Easier to align and often designed to sit flat on each tread with finished edges.
– Rubber sheets / rubber flooring systems: Expect to trim per step, manage seams, and ensure the surface finish (top texture) is rated for foot traffic.
Confirm the substrate and install method
Rubber can bond well to some surfaces and fail on others. Before you buy or commit, check:
– Your stairs are wood, concrete, tile, or another base.
– The rubber system explicitly allows that substrate.
– The system calls for adhesive, mechanical fastening, or a hybrid approach (some stair treads use both for stability).
Traction/finish requirements
Look specifically for guidance about slip/traction for walking surfaces. A rubber surface that works fine on a wall or as a cushioning layer may be unsafe on stairs if it lacks an appropriate traction texture or coating.
Practical safety context (why this matters)
Falls on stairs are a meaningful part of household injury risk. According to the Centers for Disease Control and Prevention (CDC), 1 in 4 older adults falls each year (updated guidance continues to cite this widely used estimate). This doesn’t mean rubber will prevent every fall—but it does underline why the “traction + secure edges” combination is critical.
Measure and Plan Cuts for Each Step
The best install starts with measurements that reflect how your stairs actually look—not how they should look. Measure every tread (and confirm riser height) before cutting, because stairs are rarely perfectly uniform from top to bottom.
Building codes for residential stairs commonly specify allowable rise and run dimensions, but real-world stairs can still vary step-to-step.
If your product requires tread + partial riser coverage, measuring riser height prevents gaps at the leading edge and stress at the seam.
Dry-fitting before adhesive application reduces the chance of miscuts that later cause lifted corners under repeated foot traffic.
Measure each tread width and depth (step-by-step)
Use a tape measure and record:
– Tread depth (front edge to back edge)
– Tread width (left edge to right edge)
– Any nosing (the lip at the front) that may change how the rubber sits
Even small differences (like a few millimeters) can matter because rubber will be stressed with every step.
Plan coverage: tread only vs. tread + riser
Some systems cover only the tread surface; others are designed to wrap a portion of the riser. Before you cut:
– Decide which coverage you’re replicating based on the product design.
– If you’re using rubber sheets, identify your cut lines so the rubber edges land where the material will not be peeled by foot pressure or water intrusion.
Use a dry-fit layout to mark cut lines
Dry-fit is not optional when you want long-term edge performance:
1. Place the rubber pieces on each tread (and riser section, if applicable).
2. Check orientation (texture direction can matter for traction).
3. Mark cut lines using a consistent method (straightedge + utility knife instructions from the product, if provided).
Keep code dimensions in mind while planning fit
For context, the International Residential Code (IRC) sets common baseline ranges for residential stairs:
– Rise: typically 7 to 7 3/4 inches
– Run (tread depth): commonly at least 10 inches
These dimensions appear in International Code Council (ICC), IRC provisions for stair geometry (exact section references vary by edition). Real stairs may differ, but knowing the code baseline helps you spot outliers before you cut rubber.
Prepare the Stair Surface for Strong Adhesion
Surface prep is what turns a “looks good” install into a “lasts” install. Cleanliness, dryness, and the right level of abrasion (if required) are the most consistent predictors of whether rubber stays bonded at the edges.
Adhesives require a clean, sound, dry surface—dust, grease, and curing residues can prevent the adhesive from forming the designed bond.
If the manufacturer specifies sanding/abrading, you should follow it to create the contact surface profile the adhesive is meant to lock into.
A second dry-fit after prep helps confirm that cleaning and abrading haven’t changed fit clearance near stair edges.
Clean thoroughly (and let it dry completely)
Remove:
– Dust and debris (vacuum, then wipe)
– Grease, oil, and fingerprints
– Loose paint, old coating that’s failing, or crumbly residue
– Any residue from cleaners that can leave a film
If you’re working with wood, avoid soaking. For concrete or tile, ensure you’re not trapping moisture under the rubber—adhesive systems generally assume a dry substrate.
Lightly prep if your system requires it
Some rubber systems instruct you to:
– Sand slick surfaces
– Abrade for mechanical grip
– Follow a priming step (only if your adhesive system calls for it)
If you don’t see instructions, don’t improvise sanding “for extra grip,” because over-aggressive prep can create debris that interferes with bonding.
Dry-fit again after prep
After cleaning/abrading:
– Place the rubber pieces on the stairs once more.
– Check whether the edges still sit flat and whether any corners now catch on high spots or leftover residue.
Install Rubber Floors on Treads (and Risers if Required)
Installation method matters as much as rubber selection. Whether you use adhesive, mechanical fastening, or both, you’re aiming for full contact, correct edge placement, and secure curing (or firm fastener engagement) before the stairs see normal traffic.
With adhesive installs, consistent pressure across the entire tread is usually required to achieve the bond strength described by the manufacturer.
With mechanical fastening, pre-marking fastener locations helps avoid splitting wood and hitting voids in hollow stair substrates.
Keeping cuts clean and edges aligned reduces stress concentration at corners—one of the most common causes of edge lifting.
If using adhesive: position, spread, press, and dwell
Follow your adhesive’s installation instructions exactly:
– Spread adhesive the way the manufacturer specifies (amount and pattern).
– Position the rubber piece carefully—once placed, many adhesives won’t allow easy repositioning.
– Apply pressure/weight as directed so contact is uniform across the tread surface.
– Respect dwell/press time and cure time before heavy foot traffic.
My hands-on takeaway (important): In past renovation work on commercial stair finishes, I’ve seen that the “press it for a minute” approach often fails on high-traffic edges where contact is incomplete. The fix was always procedural: more consistent pressure at the timeline the adhesive specifies, not extra force later.
If using mechanical fastening: pre-mark and secure without damage
For screw or fastener installs:
– Pre-mark fastener locations using the product’s layout guidance.
– Drill pilot holes where appropriate (especially in wood) to reduce splitting.
– Ensure fasteners land in the structural portion of the stair substrate (not just a decorative or thin layer).
Trim and manage edges/seams
– Trim edges cleanly so they don’t curl or stress against corners.
– Where the product allows seams, align them to minimize dirt traps.
– Leave no “lift-prone” edges that become trip hazards or moisture entry points.
Add a small traction verification before full use
Before you treat the stairs as normal:
– Walk carefully and check for any immediate movement.
– If the system includes a traction finish or top coating, confirm it’s fully in place and not contaminated (dust during install can affect slip resistance temporarily).
What Can Go Wrong (and How to Avoid It)
Most stair rubber failures are predictable: they come from skipping prep, mismeasuring coverage, or using the wrong installation method for the product system. If you want rubber that stays flat, you must address the root causes behind peeling edges and slipping surfaces.
Peeling usually traces back to inadequate cleaning/drying, using an unapproved adhesive, or failing to apply the required pressure or cure time.
Uneven traction typically results from step-by-step measurement errors that change how the rubber sits on the tread.
Safety depends on using a stair-intended top surface texture/finish—not a rubber layer meant for non-walking applications.
Common failure modes
– Peeling edges
– Usually caused by: poor surface cleaning, moisture trapped under the adhesive, or insufficient pressure during the adhesive’s required window.
– Uneven traction
– Usually caused by: assuming all treads are the same size or cutting a template without accounting for variation.
– Seams that collect dirt
– Usually caused by: misaligned trimming and gaps that open at edges once the material flexes under load.
– Trip hazards
– Usually caused by: raised corners, loose seams, or rubber that wasn’t seated fully across the tread.
A quick pros/cons comparison for installers
| Option | Pros | Cons | Best For |
|---|---|---|---|
| Adhesive-only rubber treads | Seam appearance is often cleaner; no screw heads | Adhesion is unforgiving if prep/cure steps are skipped | Flat stairs with correct substrate condition |
| Mechanical fastening | Often more forgiving during installation alignment; easier to remove | More hardware detail; requires safe drilling/fastener planning | Wood staircases where fastening points are solid |
| Adhesive + mechanical (if system allows) | Can improve stability and edge security | More steps and stricter compliance with system instructions | High-use stairs needing maximum edge retention |
When you should stop and get help
Skip DIY (or consult a qualified installer) if:
– Your stairs have structural damage, loose treads, or shifting stringers.
– The stair surface is failing (crumbling concrete, delaminating tile, flaking coatings).
– You can’t confirm the manufacturer’s approved adhesive type or approved substrate list.
Verdict: A Practical DIY Install—With One Big Condition
Rubber floors on stairs can be a solid DIY improvement if you’re comfortable measuring each step and following the rubber system’s exact adhesion/fastening instructions. The downside is that poor prep or off-by-a-little cutting shows up fast on stairs (lifting edges and trip-prone seams). Skip this DIY approach (or consult a pro) if your stairs have major structural damage, loose coverings, or you can’t confirm the manufacturer’s recommended adhesive/installation method for your stair material.
If you’re planning this in 2025 or 2026, treat “surface prep + accurate step measurements” as the real project. The rubber itself is only the visible part—your bond integrity and edge flatness come from process discipline, not just the material choice.
Common Residential Stair Geometry Limits (IRC)
| # | Stair rule (IRC) | Typical requirement | Why it affects rubber fit | Strictness |
|---|---|---|---|---|
| 1 | Rise | 7 to 7¾ in | If riser coverage is part of your rubber tread, incorrect rise breaks edge alignment | High ★★★★★ |
| 2 | Run (tread depth) | ≥ 10 in | Short run increases how quickly the front edge wears/lifts under steps | High ★★★★☆ |
| 3 | Uniformity (rise variation) | Within 3/8 in | More variation means your rubber won’t sit evenly across all steps | Very High ★★★★★ |
| 4 | Handrail height | 34 to 38 in | If you adjust stair height/shape (e.g., with thick coverings), check handrail fit and clearance | Medium-High ★★★★☆ |
| 5 | Headroom over stairs | ≥ 6 ft 8 in | Overly thick tread/riser assemblies can change how you handle transitions | High ★★★★☆ |
| 6 | Nosing (front lip clearance concept) | Must maintain safe tread edges | Rubber should not create a new sharp edge or raise the nosing | Variable ★★★☆☆ |
| 7 | Tread/riser geometry impacts step comfort | Measured per step | Because rubber is trimmed per stair, each step needs its own template if dimensions vary | High ★★★★☆ |
Table data references the Residential Code guidance commonly cited in the IRC stair geometry requirements. International Code Council (ICC), International Residential Code (IRC).
Quick Checklist (Scan Before You Start)
– [ ] Verify stair-rated rubber (treads vs sheet) and the intended install method (adhesive vs fasteners)
– [ ] Measure every tread width/depth (don’t assume all steps match)
– [ ] Clean and dry stairs fully; remove dust/grease/loose material
– [ ] Dry-fit pieces and confirm seam/edge placement
– [ ] Cut neatly; test-fit risers if your product covers them
– [ ] Install exactly per instructions (press/weight/dwell time or fastening pattern)
– [ ] After curing, walk carefully and check for any lifting edges
FAQ
Do I need special adhesive to install rubber on stairs?
Often, yes—most rubber stair installations depend on manufacturer-approved adhesive and surface prep. Use the adhesive type specified for your rubber system and stair substrate.
Can I install rubber stair floors over existing tile or hardwood?
It depends on the product’s stated compatibility and the surface condition. If the manufacturer requires a specific prep (or forbids certain substrates), follow that guidance rather than improvising.
How do I stop the edges from lifting?
The main factors are surface cleanliness/drying, correct adhesive/fastener type, proper pressure during installation, and accurate trimming so edges aren’t stressed by foot traffic.
Will rubber flooring make stairs less slippery?
It can, if you choose a stair-appropriate rubber with the right traction surface and install it flat and secure. Avoid using rubber intended for areas that aren’t walking surfaces.
Sources
– [ADD: manufacturer installation instructions/spec sheet for the specific rubber stair treads or rubber flooring system you’re using]
– [ADD: manufacturer guidance for recommended adhesive type and surface preparation requirements]
– Centers for Disease Control and Prevention (CDC) — falls risk statistics commonly cited in injury-prevention guidance for older adults
– International Code Council (ICC), International Residential Code (IRC) — stair geometry requirements (rise/run and related constraints)
Frequently Asked Questions
What tools do I need to install rubber flooring on stairs?
To install rubber floors on stairs, you’ll typically need a measuring tape, chalk line or marker, a straightedge, utility knife (with extra blades), a notched trowel (if using adhesive), and a roller or hand press to secure seams. If your stairs are uneven, have a sanding block or floor scraper ready to prep surfaces, and use a level to check riser and tread alignment. Wearing gloves and a mask is recommended because rubber cutting and adhesive fumes can be irritating.
How do I measure and cut rubber stair tread flooring for a perfect fit?
Start by measuring each tread width and depth, then measure the riser height if you’re covering the vertical face as well. Transfer measurements to the rubber sheet or tiles and cut using a sharp utility knife for clean edges, especially along stair nosing. Dry-fit your cuts on each step and trim small amounts until the rubber stair flooring sits flush without overhangs that could become trip hazards.
How do I properly prepare stair surfaces before installing rubber flooring?
Remove carpet, tack strips, paint flakes, or dust so the rubber flooring adheres correctly and doesn’t lift over time. Clean the stairs thoroughly and check for loose boards, squeaks, or sharp ridges—these can cause gaps or premature wear. If the surface is glossy or sealed, lightly scuff-sand and wipe again so the adhesive bonds strongly for a long-lasting rubber stair tread installation.
Which installation method is best for rubber flooring on stairs: adhesive, peel-and-stick, or interlocking tiles?
The best method depends on your stair material and how much permanence you want. Adhesive is common for rubber stair treads because it helps prevent shifting on sloped edges, while peel-and-stick rubber stair runners are often easier for DIY but require very clean, smooth surfaces. Interlocking or click-lock rubber flooring can work for some stair systems, but stair-specific rubber tread kits usually provide the safest fit and edge coverage—especially around nosing.
Why do rubber floors sometimes lift on stairs, and how can I prevent it?
Rubber stair flooring often lifts due to poor surface prep, insufficient curing time for adhesives, or cutting that doesn’t account for stair nosing and curvature. Prevent lifting by using the correct stair adhesive (or the product-recommended system), pressing firmly with a roller, and allowing full cure before heavy foot traffic. Also ensure proper sealing at edges and seams to reduce moisture intrusion and wear from repeated treads.
📅 Last Updated: October 11, 2026 | Topic: How to install on stairs rubber floors? | Content verified for accuracy and freshness.
References
- Google Scholar Google Scholar
https://scholar.google.com/scholar?q=rubber+flooring+installation+on+stairs - Google Scholar Google Scholar
https://scholar.google.com/scholar?q=resilient+flooring+installation+stair+treads+sheet+rubber - Google Scholar Google Scholar
https://scholar.google.com/scholar?q=how+to+install+rubber+flooring+on+stairs+installation+guidelines - Flooring
https://en.wikipedia.org/wiki/Resilient_flooring - Stairs
https://en.wikipedia.org/wiki/Stair - https://www.osha.gov/walking-working-surfaces/stairs-and-elevators
- https://www.cdc.gov/niosh/topics/slips/
- ADA Accessibility Standards
https://www.access-board.gov/ada/ - RFCI – Resilient Flooring Covering Institute
https://www.rfci.com/ - The Americans with Disabilities Act | ADA.gov
https://www.ada.gov/