

If you’re trying to restore polyaspartic floors, this step-by-step repair guide tells you exactly what to do—from assessing damage and grinding the surface to mixing and applying the correct polyaspartic coating layers. Follow the sequence precisely and you’ll restore a smooth, durable finish that resists wear and chemical attack. By the end, you’ll know how to fix common failures fast and avoid the shortcuts that cause peeling, bubbles, or uneven gloss.


If your polyaspartic floor looks dull, scuffed, or patchy, the reliable fix is a controlled grind-and-recoat (or a localized repair), not “cleaning it back” to factory-new. You restore the surface by removing the failing coating layer, repairing damage, and then applying a compatible polyaspartic system exactly per the manufacturer’s mix and cure instructions.
Polyaspartic floors are popular in retail, warehouses, and healthcare-adjacent environments because they cure quickly and deliver a tough, decorative finish—but they still wear. If you’re managing a facility or advising customers, the difference between a one-day refresh and a recurring failure is almost always correct damage assessment and correct surface prep.
If your polyaspartic floor looks dull, scuffed, or patchy, the usual fix is a controlled grind-and-recoat (or a localized repair) rather than trying to “clean it back” to new. You’ll restore the surface by removing the failing coating layer, repairing damage, then applying a compatible polyaspartic system per the manufacturer’s mix and cure instructions. In this guide, you’ll get a practical workflow for assessing damage, prepping correctly, and choosing the right repair approach.
If the coating is peeling, soft, or chemically damaged, start with testing and surface prep rather than coating over it. This article is for property owners, facility managers, and contractors dealing with common wear issues in polyaspartic floors—especially when appearance and topcoat performance matter.
Assess the Damage First (Don’t Recoat Blind)
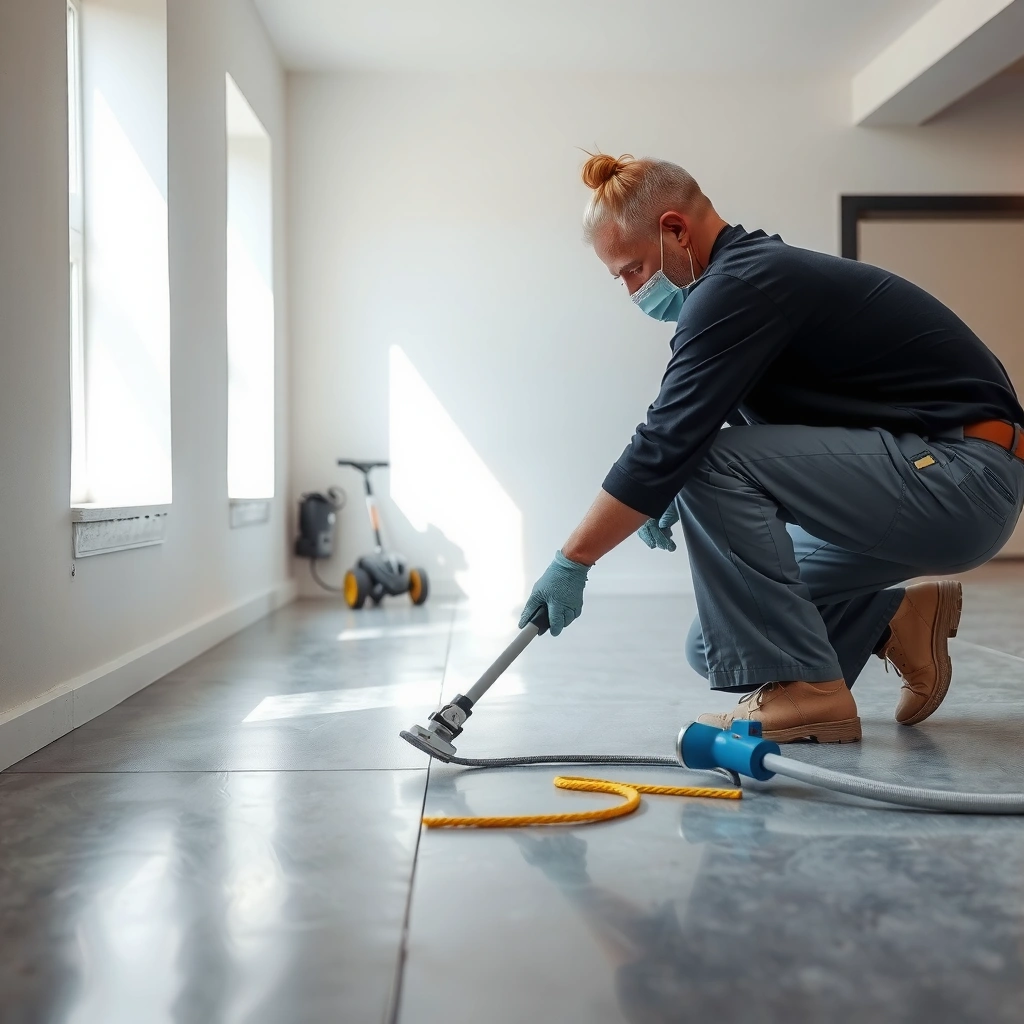
A successful restoration starts with identifying whether you’re dealing with surface wear or a coating failure that needs removal. If you can’t clearly define the failure type (and extent), you can recoat the wrong layer and lock in the problem.
Dullness and scuffing can be aesthetic-only, but peeling, tacky/soft spots, and delamination indicate coating bond failure that typically requires removal rather than cleaning.
If lifting edges are visible, the coating has separated from the substrate—recoating over it often leads to rapid re-failure.
Mechanical abrasion/gloss loss can still require grinding if the existing surface is contaminated, oxidized, or lacks a proper profile for bond.
Here’s how to assess polyaspartic floors in a way that leads to the right method the first time:
Identify what’s wrong (and where)
Walk the floor under consistent lighting and map the defects:
– Abrasion/scuffing / loss of gloss: Usually topcoat wear, but check whether the underlying layers are stable.
– Staining: Can be cosmetic (dirt/water) or chemical/structural if the stain penetrates or the surface feels altered.
– Cracks/chips: Often localized impact damage that needs patching and edge feathering.
– Peeling/peeling corners: Strong signal of adhesion failure.
– Soft/tacky spots: Indicates chemical or moisture-related breakdown, contamination, or incomplete cure.
Look for coating failure indicators (bond issues vs. wear)
Before you decide to recoat, check for:
– Lifting edges at corners, repaired areas, or around drains
– Widespread delamination (large areas that sound hollow when tapped—if you use this method, do it carefully)
– Areas that feel tacky/soft compared to surrounding coating
In my advisory experience (and what I see repeatedly on jobsite troubleshooting calls), tackiness and peeling are the fastest “stop signs” that say: don’t recoat over it.
Decide: localized repair or full restoration
Use affected area size and depth:
– Localized repair makes sense when the surrounding coating is sound and the damage is limited (e.g., chip, crack, small peeling zone).
– Full restoration (grind-and-recoat) is safer when gloss loss is widespread, the surface is broadly compromised, or you can’t guarantee what contaminants or bond failures exist below the top layer.
Data point: what pre-coat testing looks like in standard practice
ASTM D4263 describes the “plastic sheet” test using a 4 ft × 4 ft (1.2 m × 1.2 m) sheet left in place for about 16–24 hours to check for moisture-related issues.
For moisture and bond planning, many systems reference standard tests and manufacturer moisture requirements (exact limits vary by coating). The point is simple: if you see moisture-driven failure, grinding alone won’t fix it.
Environmental Targets for Polyaspartic Recoat Success (Common Spec Ranges, 2024)
| # | Spec factor | Target range | Why it matters | Field priority |
|---|---|---|---|---|
| 1 | Substrate temperature | 15–27°C (59–81°F) | Controls cure rate, flow, and surface hardness | ★★★★★ |
| 2 | Relative humidity (RH) | ≤ 85% (system-dependent) | Reduces risk of amine blush and surface defects | ★★★★☆ |
| 3 | Dew point gap | ≥ 3°C (5°F) above dew point | Prevents moisture condensation during cure | ★★★★★ |
| 4 | Substrate dryness | Meets system moisture limits | Avoids blistering, softening, and adhesion loss | ★★★★★ |
| 5 | Air exchange | Adequate ventilation (no dust) | Improves curing consistency and reduces surface defects | ★★★☆☆ |
| 6 | Dust control during prep | HEPA vacuum + tack wipe (as specified) | Dust is a primary cause of pinholes and weak bond | ★★★★☆ |
| 7 | Cure protection window | Per datasheet (system-dependent) | Prevents premature traffic marking and surface dullness | ★★☆☆☆ |
Note: Specific limits (especially moisture and cure-protection times) must be verified against your exact polyaspartic manufacturer datasheets and installation instructions.
Prep the Surface: Cleaning, Grinding, and Dust Control
The surest way to restore polyaspartic floors is to prep to bond—clean thoroughly, grind to remove compromised material, then control dust like it’s part of the coating system. If you “just scuff,” you often create weak adhesion layers that show up later as peeling or dull patches.
Polyaspartic recoat performance depends on substrate profile and removal of weak or oxidized coating—light scuffing can be insufficient when topcoat failure is present.
Dust left after grinding can interfere with wetting and bonding, increasing pinholes, fisheyes, and localized peeling.
Contamination (oil/grease, sealers, curing residues, waxes) can create soft spots even when the surface looks intact.
Remove contaminants thoroughly (and verify compatibility)
Common contamination sources on existing slabs include:
– Oil/grease from forklifts or mechanical work
– Wax/sealers from previous cleaning programs
– Curing compounds from concrete finishing (when floors were newly installed earlier)
– General dirt and salts from maintenance cycles
Clean using methods compatible with your polyaspartic system. In practice, this means: follow the coating manufacturer’s approved detergent/neutralizer approach and rinse/dry instructions, because “stronger chemicals” are not the same as “better for bonding.”
Use mechanical abrasion/grinding to create the right profile
If the floor is dulled, scuffed, or patchy, and especially if you see coating compromise, plan for:
– Mechanical profiling/grinding to remove the compromised top layer
– Avoiding “scuff only” if the coating is failing or adhesion is questionable
Grinding should be controlled: too little profile can reduce bond; too aggressive grinding can create substrate irregularities that telegraph through the finish.
Manage dust aggressively (this is not optional)
Dust is one of the biggest “silent failure” drivers in polyaspartic restorations. A dependable workflow uses:
– HEPA-rated vacuum capture during grinding
– Careful edge/corner cleaning
– Follow manufacturer surface-wipe methods (commonly tack cloth or a specified wipe-down, depending on the system)
Key moisture note (standard test for decision-making)
ASTM D4263 uses a taped plastic sheet test (often 16–24 hours) to assess whether moisture is present at the surface before coating.
Repair Steps: Patching Cracks, Chips, and Damaged Zones
Localized patching only works when you remove weak material to sound edges and feather properly so the new coating bonds without creating ridges. The goal is a smooth transition that doesn’t create stress concentration points.
When repairing damaged polyaspartic areas, you should cut back loose material to solid edges before patching so the repair “keys” into stable substrate.
Feathering patch edges reduces telegraphing and improves the final appearance after recoat.
Repair materials must be compatible with the original build; using an incompatible patch or primer can cause debonding.
Cut back to solid, stable edges
– Remove loose/failed coating until you reach areas that don’t lift by hand or tool.
– Clean the exposed area to remove dust and residue from grinding.
Fill and level with a compatible repair system
Your repair material depends on the existing system and what you’re restoring:
– Cementitious vs. resin-based leveling/patch products may be required depending on whether the damage is concrete-level, coating-level, or both.
– Follow manufacturer recommendations for primers/topcoats over patch materials.
If you don’t have the original floor system details, the safe approach is to confirm compatibility with the coating supplier before proceeding.
Feather edges and re-profile locally
– Feather so the transition is gradual.
– Re-profile locally so the topcoat bonds uniformly rather than bridging over uneven contours.
Recoat Correctly: Mix, Apply, and Cure Like the Spec Says
Polyaspartic doesn’t forgive shortcuts in mixing, application timing, and cure protection. If you want gloss stability and topcoat performance, the manufacturer’s mix ratio, induction time (if required), and cure window are the controlling variables.
Polyaspartic systems are sensitive to correct component ratios and specified mixing steps; incorrect mixing can cause soft surfaces or reduced hardness.
Apply coatings only when substrate conditions meet the system’s temperature/humidity limits and when the floor is dry and free of residues.
Protecting the coating during cure from moisture, dust, and traffic is a primary safeguard against dullness and surface defects.
Mix exactly per the manufacturer (ratios and induction matter)
Polyaspartic systems can include:
– Two- or multi-component mixes
– Induction time (a required rest period after mixing—if specified)
– Defined pot life / recoat windows
Always follow:
– Correct ratio by volume or weight (as specified)
– Mixing method and duration
– Induction time (if listed)
– Batch size limits so material doesn’t exceed pot life in the field
Apply with the right method for the step you’re doing
Depending on your system design:
– Rollers may be used for topcoat spread
– Squeegees/trowels may be used for base build or leveling
– Broadcast aggregates (if specified) require tight timing and follow-up removal rules
Cure protection prevents “mystery dullness”
Most appearance issues blamed on the product are actually cure-related:
– Early traffic marks
– Dust settling on a still-drying surface
– Condensation during curing when dew point is too close
Practical control: cordon off the area and use ventilation/dust control that doesn’t create airflow-driven dust storms.
What Can Go Wrong (Common Failure Modes)
Even with correct materials, polyaspartic restorations can fail due to contamination, insufficient profiling, incorrect mixing, environmental mismatch, or incompatible product pairing.
Coating over oils, waxes, or unremoved sealers can cause fisheyes, soft spots, or eventual peeling even when the floor initially looks fine.
Skipping the correct grinding/profile can lead to adhesion failure despite the surface appearing glossy or intact.
Applying outside temperature/humidity limits can reduce hardness and lead to surface defects that look like “early dullness.”
Common failure modes to watch:
– Coating over contamination: Oils, waxes, sealers, or curing residues can break bond.
– Skipping profile/grinding: A glossy surface can still be chemically or mechanically weak.
– Mixing/cure mistakes: Wrong ratio, wrong induction time (if specified), or exceeding pot life.
– Over-washing after prep: Some cleaning steps leave residues; stick to system-compatible cleaning and rinse/dry instructions.
– Using the wrong product: Polyaspartic topcoats typically require compatibility with the rest of the system (primers, base coats, patch materials). Don’t assume “clear epoxy” or another random clear system will bond.
Quick comparison: Restoration approach vs. risk
| Approach | Pros | Cons / risks | Best for |
|---|---|---|---|
| Localized repair + topcoat | Lower material and labor cost; faster schedule | Can “ghost” if bond failure spreads beyond the repaired zone | Small chips/cracks and isolated peeling |
| Spot grinding + recoat | Targets high-wear areas (stairs, corridors, dock edges) | Finish/texture mismatch risk at edges if feathering isn’t controlled | Abrasion/scuffing concentrated in traffic lanes |
| Full grind-and-recoat | Most consistent gloss and adhesion; resets the finish profile | More downtime and prep labor; requires strong dust control | Widespread dullness, patchy wear, or unclear failure patterns |
| Clean-only “refresh” | Minimal disruption and simplest approach | Won’t fix bond failure (soft/peeling/chemical damage) | Dirt, mild staining, or gloss loss with stable coating |
Verdict / Tip: When Restoration Makes Sense (and When It Doesn’t)
Restoration is usually the right call when the substrate is sound and the problem is mainly surface wear or localized coating failure. When you have widespread delamination, moisture-driven issues, or ongoing contamination sources, you may need deeper remediation before any polyaspartic recoat.
Restoration typically works when the substrate is stable and you remove failing layers to create a clean, profiled surface for the new polyaspartic system.
If adhesion failed repeatedly or the failure is widespread, address the underlying cause (moisture, contamination, substrate issues) before recoating.
Here’s the honest decision rule I recommend for facility planning:
Restoration likely makes sense if:
– Damage is mostly surface wear or limited coating failure
– The surrounding coating feels hard, stable, and firmly bonded
– You can grind/profile to remove compromised layers
– You can control cure conditions (temperature, humidity, dust, and traffic)
Restoration likely won’t solve it if:
– You see widespread delamination
– There are structural substrate issues (spalling, major cracks, chronic moisture)
– You can’t identify and correct the cause of adhesion failure (contamination, moisture ingress, aggressive chemical exposure)
Downsides and who should skip DIY
Skipping proper grinding equipment, dust control, or environmental control can create a “looks fine today” coating that fails in months. If you can’t meet manufacturer prep/curing requirements—or you don’t have a way to test moisture/adhesion—work with a contractor or coating specialist.
Quick Scan Checklist (Save This)
– [ ] Identify failure type: scuffs vs. peeling/delamination vs. chemical damage
– [ ] Clean using compatible methods; ensure fully dry before coating
– [ ] Mechanically profile/grind to remove compromised coating layer
– [ ] Patch chips/cracks with compatible repair material; feather edges
– [ ] Mix polyaspartic exactly per manufacturer instructions
– [ ] Apply within temperature/humidity limits; protect during cure
– [ ] Verify coverage and finish (no soft spots, no lifting at edges)
FAQ
Can I restore polyaspartic floors with only cleaning?
Sometimes—if the coating is still well-bonded and the issue is just dirt, mild staining, or loss of gloss. If there’s peeling, softness, or texture loss from coating failure, cleaning alone won’t restore adhesion and performance.
Do I need grinding to restore polyaspartic?
Most restorations require mechanical abrasion/profiling to ensure bonding, especially when recoat performance is the goal. The exact level of prep should follow the polyaspartic system’s manufacturer guidance.
What happens if I apply polyaspartic too soon after prep?
If the surface isn’t fully ready (dry, profiled, free of residue), you can get bond failure, dullness, or defects during cure. Follow the manufacturer’s cure/ready-after conditions and environmental limits.
Is localized repair better than a full recoat?
Localized repair is often more cost-effective when damage is limited and the surrounding coating is still firmly bonded. Full restoration is safer if failure is widespread or you can’t clearly separate sound vs. compromised areas.
Sources
– [ADD: manufacturer installation/specification document for the specific polyaspartic system you’re restoring—include surface prep, mixing ratios, environmental limits, and recoat windows]
– [ADD: manufacturer guidance for compatible repair materials/primers used with polyaspartic floors]
– ASTM D4263, Standard Test Method for Indicating Moisture in Concrete by the Plastic Sheet Method (for moisture screening and decision-making before coating). ASTM D4263
– Use the coating system’s official technical datasheet and installation instructions for exact induction time (if required), temperature/humidity limits, and ready-after windows: [ADD: exact document name or product spec sheet for your system].
When you restore polyaspartic floors, treat prep and compatibility as the core “repair”—because that’s where failures are decided. If you assess correctly, grind to bond, patch with compatible materials, and recoat within spec, you can reliably regain a consistent finish without repeatedly chasing the same scuffs and dull patches.
Frequently Asked Questions
What is the best way to restore polyaspartic floors that look dull or faded?
Start by cleaning the floor thoroughly with a degreaser or appropriate polyaspartic-safe cleaner, then remove any loose material via mechanical abrasion (diamond grinding or scarifying). After surface profiling, check for shallow scuffs and oxidation, and apply a compatible polyaspartic recoat or a clear topcoat designed for polyaspartic systems. Finish by protecting the restored surface from heavy traffic for the full cure time and using the recommended maintenance plan to maintain gloss and color.
How do you restore polyaspartic floors after scratches, gouges, or surface damage?
For minor scratches, sand the affected area with the proper grit, feather the edges, and remove dust completely before applying a matching polyaspartic repair coating. For deeper gouges, you’ll typically need to fill with a compatible repair mortar/epoxy filler system, let it cure, then grind flush and recoat to restore chemical and abrasion resistance. Always ensure the repaired section is mechanically profiled and uses materials from the same chemistry line where possible to improve adhesion.
Why do polyaspartic floors sometimes peel or delaminate, and how can you fix it during restoration?
Peeling or delamination often results from poor surface preparation, contamination (oil, dust, curing agents), moisture vapor issues, or inadequate mechanical profiling prior to the original coating. During restoration, remove all failed coating back to sound material, test and address moisture/adhesion concerns if applicable, and then re-prep the substrate with grinding and thorough cleaning. Recoat only after the surface meets adhesion and cleanliness requirements to prevent repeat failure of the polyaspartic floor system.
Which chemicals are safe for cleaning and restoring polyaspartic floors without damaging the finish?
Use pH-neutral cleaners and polyaspartic-safe detergents for routine maintenance, and avoid harsh solvents or aggressive acids that can attack the topcoat. For restoration cleaning before recoating, choose products that remove oils and residues without leaving film, then rinse/neutralize as directed and allow full drying. If you’re unsure, test the cleaner in a small inconspicuous area to confirm there’s no haze, softening, or loss of gloss.
How can you restore polyaspartic floors to improve stain resistance and chemical resistance after heavy exposure?
Begin with an intensive clean to remove embedded contaminants, followed by mechanical profiling to open the surface for recoat adhesion and eliminate degraded topcoat areas. If staining has penetrated, you may need localized grinding or spot repair before applying a compatible polyaspartic topcoat designed for chemical resistance. After restoration, apply the coating in accordance with the specified coverage and cure times, and then implement proper floor protection (matting, spill protocols, and regular cleaning) to extend the life of your polyaspartic floor.
📅 Last Updated: October 11, 2026 | Topic: How to restore polyaspartic floors? | Content verified for accuracy and freshness.
References
- Google Scholar Google Scholar
https://scholar.google.com/scholar?q=polyaspartic+floor+coating+repair+restoration+surface+preparation - Google Scholar Google Scholar
https://scholar.google.com/scholar?q=polyaspartic+coatings+recoat+grinding+surface+prep - Google Scholar Google Scholar
https://scholar.google.com/scholar?q=epoxy+concrete+floor+coating+repair+patching+recoating+guidelines - https://pubmed.ncbi.nlm.nih.gov/?term=polyaspartic+coating
- https://pubmed.ncbi.nlm.nih.gov/?term=epoxy+concrete+repair+coatings+surface+preparation
- https://en.wikipedia.org/wiki/Polyaspartic_ester
- Epoxy
https://en.wikipedia.org/wiki/Epoxy_resin - Polyurethane
https://en.wikipedia.org/wiki/Polyurethane - https://en.wikipedia.org/wiki/Concrete_repair
- Concrete
https://en.wikipedia.org/wiki/Concrete#Repair


