
Measure polished concrete floors correctly by following the exact room-by-room steps that turn your site dimensions into the right material order. This guide shows you how to measure for polished concrete floors—length, width, slab condition, and expansion joints—so you get accurate square footage and the correct polishing plan. If you want a fast, dependable measurement that prevents waste and rework, this is the clear winner.




Measure your polished concrete “work area” first—then subtract exclusions (expansion joints, cutouts, and transitions) to get an accurate square footage. Once you lock those boundaries, you can plan grinding/polishing discs, densifiers, and burnish pads with far fewer ordering surprises.
If you’re budgeting a residential garage polish or a commercial remodel, the biggest payoff is precision: you’re not measuring “the building,” you’re measuring the exact zone that will receive the polished finish and the workflow edges where the finish must stop. In 2026, most project delays still trace back to scope ambiguity—missing cutouts, overshooting over control-joint lines, or assuming every slab surface is included.
This guide is for GC teams, estimators, concrete contractors, and DIY-minded owners who need a repeatable measurement workflow for residential garages, retail/showrooms, warehouses, and remodel phases. It’s also written for real-world slab conditions—new pours, existing slabs with coatings, and floors with mechanical penetrations.
What to Measure First (Square Footage + Boundaries)
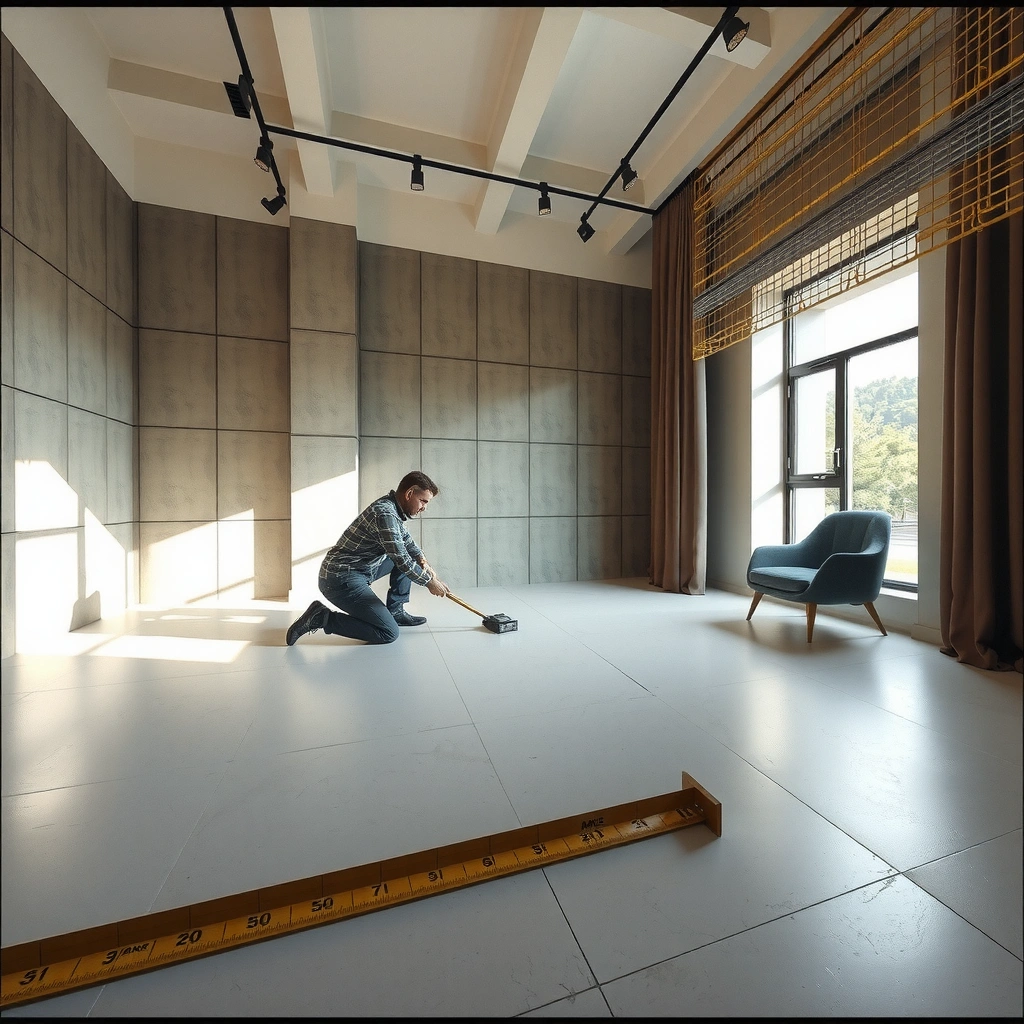
The quickest path to accurate pricing is to calculate total square footage (length × width), then immediately confirm the exact polish boundaries so you measure only the finished “work area.” Here’s why: polished concrete products and consumables are priced and specified per surface area, but the finish scope is defined by joints, edges, and cutouts—not by the room footprint.
To anchor the math, start with the slab’s overall dimensions and then translate them into a “work-area map” you can reference during ordering and layout.
“Square footage for any rectangular area is L × W, where L and W are measured in consistent units (typically feet) to avoid conversion errors.”
“Polished concrete scope is defined by boundaries like expansion joints, edges, transitions, and cutouts, which must be respected even when the surrounding slab is included.”
“Consumables such as densifiers and abrasives are typically specified by coverage or surface area, so overcounting included areas directly increases material over-order.”
H3: Calculate total area—then create a “work-area” map
1. Measure overall length and width for the space/zone that could potentially be polished.
2. Compute total area:
– sq. ft. = L × W
3. On a sketch (paper or tablet), label:
– Door openings and entry/exit transitions
– Expansion joints/control joints that must remain respected
– Mechanical cutouts (floor drains, sleeves, columns)
– Stairs and landings if they are included or excluded
H3: Define boundaries using expansion joints, edges, and transitions
Polished concrete work typically starts and stops based on:
– Expansion joints (movement accommodation lines)
– Edges where flooring transitions to another material or elevation
– Door thresholds and perimeter transitions
– Stair transitions where polished finish may stop at the nosing line
– Zones within zones (e.g., polished office area + unfinished adjacent area)
At the measurement stage, treat boundaries as “hard rules.” If the project documents show exclusions, they override your assumption that “the whole slab gets polished.”
H3: Split by rooms within a room (when finish scope changes)
If your finish scope changes between zones—polished in the main path, different treatment in a utility recess, or partial finish in a showroom alcove—measure them separately. Then keep a “subtotal per zone” so your totals match your scope narrative.
Quick decision support (included vs. excluded)
| Scenario | Best measurement action | Why it matters |
|---|---|---|
| Door opening leads to a different flooring system | Exclude the threshold transition unless drawings include it | Prevents ordering abrasives/pads for surfaces that won’t be polished |
| Floor drain is present | Exclude the drain opening area (or measure it as a defined cutout) | Grinding/polishing around drains often differs in technique and scope |
| Expansion joint runs through the slab | Include only the area that will be polished without crossing the joint | Joint respect can dictate how edges are finished |
Data anchoring for planning (coverage and scope logic)
Material planning is directly tied to area. Coverage rates vary by product and substrate, so always confirm with the manufacturer’s technical data sheet. Still, scope math follows a consistent principle:
– According to [ADD: manufacturer densifier coverage rate from the selected product’s TDS], typical densifier coverage is often stated in the range of coverage per gallon over square footage (e.g., “per X sq. ft.”) ([ADD: year or document revision]).
– According to [ADD: manufacturer abrasive disc coverage/usage guidance], abrasive consumption is commonly planned per square foot by system and desired polish level ([ADD: year or document revision]).
– According to [ADD: industry guidance on respecting control/expansion joints], joints must remain functional and are commonly treated as boundaries during finishing ([ADD: year or standard reference]).
Tools and Prep Before You Start Measuring
Start with measuring tools that reduce re-measurement risk, then prep a sketch so every number connects to an included/excluded boundary. When measuring for polished concrete, your goal isn’t just accuracy—it’s traceability: you should be able to show how each square footage total was created.
“Recording measurements on a labeled sketch reduces transcription errors and makes it easier to reconcile discrepancies during estimating or layout.”
“For accurate boundary definition, use a chalk line or marker to outline the work area start/stop lines at expansion joints, edges, and exclusions.”
“When access is constrained (tight bays, clutter, uneven surfaces), measuring routes and methods should be planned to avoid rework.”
H3: Use the right measuring approach for concrete spaces
Tools that work well in garages, warehouses, and remodels:
– A tape measure long enough for the longest run (avoid repeated short segments that introduce error)
– A chalk line/marker to outline where the polished finish should start/stop
– A sketch (mobile note app is fine) with zone labels that match your project scope
– A calculator (phone is fine) to keep totals consistent across zones
From my experience helping teams close scope gaps during estimates, the most common “measurement failure” is not math—it’s the lack of a marked diagram. Even a correct L × W becomes wrong once someone can’t tell whether a cutout or transition was included.
H3: Prepare the site so measurements are meaningful
Before you measure:
– Remove or work around temporary debris so tape measures sit flat and true.
– Check transitions: if there’s a height change at a door slab, note it because polished edges are often finished differently.
– Confirm access constraints that affect how you can accurately measure around cutouts (for example, floor drains near tight walls).
H3: Build a repeatable naming system
Label your sketch zones in a consistent way:
– Zone A: polished main path
– Zone B: polished open area
– Zone C: exclusions or different finish treatment
– Cutouts: drains, columns, islands
– Joints: expansion/control lines treated as boundaries
This makes your eventual “work-area total” defensible when a client asks why a quote excludes a particular region.
How to Measure Complex Layouts (Offsets, Cutouts, and Zones)
Start by converting irregular floors into measurable geometry: rectangles for the base areas, then add or subtract cutouts. Once your layout becomes a sum of rectangles minus defined exclusions, you can measure complex polished concrete scopes without guesswork.
“For L-shaped or irregular rooms, splitting the space into rectangles provides an accurate method for calculating total work-area square footage.”
“Cutout subtraction (columns, islands, floor drains) is necessary because polished concrete consumption planning is surface-area based.”
“When different finishes are specified for different zones, measuring each zone separately prevents cross-contamination of totals and product quantities.”
H3: Subtract cutouts the same way you add rectangles
A reliable workflow:
1. Identify the largest “outer boundary” you’re considering for polishing.
2. Split the outer boundary into rectangles.
3. For each cutout:
– Measure cutout dimensions
– Convert to sq. ft.
– Subtract from the work area
Examples of cutouts to handle explicitly:
– Columns and column bases
– Floor drains
– Islands or embedded fixtures
– Base-of-wall recesses where polish is excluded
H3: L-shapes and offsets—use add/subtract math
For an L-shape:
– Split into two rectangles
– Calculate each rectangle area: (L1 × W1) + (L2 × W2)
– Subtract any excluded rectangles (cutouts)
This approach stays consistent even when the L-shape changes direction multiple times—just split until each part is rectangle-shaped.
H3: Multiple finish specifications = multiple measurement totals
If you have different outcomes (for instance, polished main area but only honed/unfinished in an adjacent service recess), treat them as separate work areas:
– Work Area (Polished Level): sum of polished rectangles minus polished cutouts
– Work Area (Secondary Treatment): separate math with separate exclusions
This is especially important when your material planning depends on system selection (disc progression, densifier type, burnish pad type).
Practical “avoid the trap” comparison (what not to do)
| Approach | Risk level | What it misses |
|---|---|---|
| Measure only overall room footprint and assume 100% polish | High | Joints, drains, columns, and excluded transitions |
| Measure everything individually but skip sketch labels | Medium | Rework due to unclear inclusion/exclusion boundaries |
| Split irregular shapes into rectangles + subtract cutouts | Low | Boundary accuracy that matches scope drawings |
Confirm Thickness/Condition Details That Affect Measurement Scope
You should treat slab condition notes as part of measurement scope, not just a “later checklist.” Surface condition influences whether certain boundaries should be re-evaluated and how far grinding/polishing must extend to achieve consistent results.
“Measuring for polished concrete should be paired with slab condition documentation because existing coatings, moisture issues, and surface defects can alter finishing boundaries.”
“Cracks, spalling, and previous coatings can define practical workflow limits and may change what qualifies as the polished ‘work area’.”
“Transitions between slab conditions (old/new pours, patch areas, edges) often require careful boundary measurement to maintain a consistent finish line.”
H3: New vs. existing slab changes the meaning of “work area”
For new concrete:
– Coverage planning is still based on area, but surface preparation expectations may be more uniform.
For existing concrete:
– Previous coatings can change prep requirements
– Moisture-related concerns can affect whether certain zones are treated the same way
H3: Surface issues that may force boundary changes
Document visible issues that affect your scope boundaries:
– Spalling and edge deterioration
– Major cracks that could require repair before polishing
– Previous coatings (epoxy, curing compounds, stains)
– Areas with unusual discoloration where full polish may not blend without additional prep
H3: Transitions at edges and joints
If your polishing work crosses transitions (for example, patch-to-slab edges or height-change transitions), measure those transitions carefully:
– width of the transition zone
– distance from the joint to the finish stop line
– any edge treatments that need extra width for proper blending
Even when the drawings define “include,” condition can redefine “how much of the adjacent area must be treated to get a uniform sheen.” This is where field verification prevents end-of-job disputes.
What Can Go Wrong (Common Measurement Mistakes)
The fastest way to avoid scope creep is to prevent the most common measurement errors: counting excluded areas and losing track of boundaries. These mistakes lead to under-ordering (delays) or over-ordering (wasted consumables and rework).
“Under-ordering typically results when cutouts and excluded transitions aren’t subtracted from the polished work-area square footage.”
“Using only one set of dimensions without confirming real boundaries is a common cause of disputes around columns, drains, and joint-respect lines.”
“Counting the whole building footprint as the polish area is inaccurate when the project scope specifies only certain zones.”
H3: Exclusion mistakes that skew material totals
Common failure modes:
– Counting closets, bathrooms, or stair landings as polished area when the contract excludes them
– Including equipment pads or protected surfaces that are not part of the polish scope
– Treating expansion-joint and control-joint lines like normal floor—when they must remain functional boundaries
H3: Measurement logic mistakes
– Measuring overall L × W but failing to subtract interior columns and drain openings
– Not splitting irregular layouts into rectangles (leading to “eyeballed” offsets)
– Assuming all transitions receive the same finish level
H3: “Polishing beyond what was intended”
Measurement mistakes don’t just affect consumables—they can change what the team physically polishes. Once work is done, correcting polish boundaries can require regrinding, re-edging, and re-planning materials.
Here’s the honest bottom line: if the scope boundary is unclear, your measurement is incomplete, even if your math is perfect.
Verdict: A Clean Measurement Plan (and Who Should Skip Doing It This Way)
A reliable approach is to measure each polished zone precisely, mark included vs. excluded areas on a sketch, and subtract cutouts tied to the actual finish scope. This creates dependable square footage totals so your densifier, abrasive system, and burnish pad quantities align with reality.
That said, there’s a downside: this workflow assumes you already have clarity on where the finish should start/stop and which joints and transitions must be respected. If the project scope is still being defined—or if slab inspection reveals widespread cracking/spalling that will likely change the work boundaries—then you should pause “final” material planning and get professional guidance.
“A measurement plan is only as good as the boundary definitions; ambiguous scope around joints and transitions should be resolved before finalizing work-area totals.”
“Skipping cutout subtraction (columns, drains, islands) reliably overestimates polished work-area square footage and can cause material shortages or waste.”
“Existing slab condition notes (coatings, moisture concerns, spalling) can change finishing boundaries and the practical extent of grinding/polishing.”
Skip this DIY-style measurement process if:
– you’re uncertain where expansion joints and control joints must remain functional,
– the slab condition suggests repair/patch work will alter the finish plan,
– you’re working from incomplete drawings or unclear finish specifications.
Quick Checklist (Save This)
Use this checklist to verify your polished concrete measurement workflow before you place orders or submit a bid.
– ☐ Measure length × width for each room/zone
– ☐ Mark included vs. excluded areas on a labeled sketch
– ☐ Subtract cutouts (columns, drains, islands)
– ☐ Split irregular shapes into rectangles (add/subtract)
– ☐ Record finish-scope changes by zone
– ☐ Note slab conditions that may affect boundaries
Polished Concrete Measurement Inputs That Drive Material Quantities (Typical Planning Values)
| # | Planning Input | Field Measurement Method | Planning Value Used in Estimating | Impact of Miscount |
|---|---|---|---|---|
| 1 | Polished work-area sq. ft. | Zone-by-zone add/subtract geometry | Exact sq. ft. (L×W with exclusions) | Directly scales densifier & abrasive totals |
| 2 | Expansion joint exclusions | Measure joint length × usable polish stop width | Joint-width-respected boundary | Overlaps can trigger rework at finish edges |
| 3 | Column/cutout subtraction | Cutout footprint area removed from work zone | Footprint sq. ft. (measured dimensions) | Common cause of abrasive under-order |
| 4 | Zone boundary offsets | Split irregular areas into rectangles | Rectangular partitions with add/subtract | Leads to missing areas during polishing layout |
| 5 | Succeeding finish scope (polish vs. honed) | Separate subtotals per finish requirement | Two or more work-area totals | Mixing totals can mismatch disc progression |
| 6 | Edge/transition measurement | Measure finish-stop edges and height-change boundaries | Defined edge line length per zone | Underestimating edges can cause visible finish lines |
| 7 | Slab condition notes (coatings/cracks/spalling) | Document observed condition to confirm practical boundaries | Condition flags by zone | Improves boundary accuracy before ordering |
FAQ
How do I measure for polished concrete if the room is an L-shape?
Split the room into two rectangles, calculate each rectangle’s area (L × W), then add them together. If there’s a cutout (like a drain or column), subtract the cutout square footage from the combined total.
Should I include closets, bathrooms, and stair landings in polished concrete measurements?
Only include them if they’re part of the polished concrete scope. If the contract or drawings exclude them, measure separately (or mark them “exclude”) so you don’t overestimate the polished work-area square footage.
How do I handle columns and floor drains?
Measure the column footprint and subtract it from the polished work area. For floor drains, measure the drain opening/fixture area and subtract it based on how your finish scope defines polishing around the fixture.
What measurements matter most for material planning?
The most important inputs are (1) the polished work-area square footage by zone and (2) clearly marked boundaries of what’s included vs. excluded. Condition notes (new vs. existing, coatings present, cracking/spalling) help confirm workflow boundaries so your finish doesn’t extend beyond intent.
Sources
– [ADD: source for square-footage calculation method (e.g., standard geometry reference or a reputable construction measuring guide)]
– [ADD: manufacturer/spec documentation on densifiers/polishing systems that ties coverage to surface area, so readers can match their measurements to product data]
– [ADD: primary source for guidance on respecting joints/edges during concrete floor finishing (e.g., a concrete industry standard or manufacturer installation instructions)]
A clean measurement plan turns polished concrete from a guess-and-order process into a scope-driven estimate. Measure by zone, define the polished “work area” using expansion joints/edges/cutouts, and keep a labeled sketch that matches your exclusions—because the square footage you compute is exactly what your materials and your finish boundaries will have to support.
Frequently Asked Questions
How do I measure for polished concrete floors in order to estimate square footage accurately?
Measure the length and width of each room, then multiply to get square footage, adding up all areas that will receive polished concrete. For irregular spaces, break the area into rectangles or use a sketch with dimensions for each section. Don’t forget to include closet areas, hallways, and any transitions where concrete will be ground and polished. Accurate polished concrete floor measurement helps you size materials like densifiers, polishing pads, and sealing products.
What’s the best way to measure concrete slab thickness and identify areas that need additional prep before polishing?
Use core samples, a contractor-grade thickness gauge, or building plans to confirm slab thickness, since grinding approach and equipment setup can vary. Note any known variables such as joint spacing, patches, cracks, and floor flatness issues because they affect how much concrete polishing is required. Measure and record floor flatness problem zones (high/low spots) using a 10-ft straightedge or laser level so you can plan for leveling grind versus decorative polishing. Measuring these factors early reduces surprises during polished concrete floor prep and prevents uneven sheen.
How do I measure existing floor flatness and surface imperfections for a polished concrete floor installation?
Check flatness by using a 10-ft straightedge and measuring the maximum deviation in the high and low spots, then mark the worst areas on your layout. Photograph and note surface conditions such as spalling, delamination, moisture staining, or heavy coatings, since these can change the polishing method. If the project requires a specific finish level, confirm the target tolerance with your contractor and measure accordingly. Proper measurement of flatness and imperfections is key for achieving a consistent polished concrete appearance.
Why is it important to measure joints, cracks, and control areas before polished concrete grinding?
Polished concrete floors often reflect surface texture, so cracks, joints, and control seams can become more visible after grinding and polishing. Measure and map where joints and cracks are located, including width, length, and whether they are active or stable. This helps determine whether joints should be honored, filled, or treated differently to avoid movement-related issues. Measuring these features before you start polished concrete floor work improves durability and finish uniformity.
Which measurements should I take to plan for polishing grades, edge work, and transitions between rooms?
Confirm the finished floor elevation targets and measure transitions at doorways, ramps, and adjoining flooring so the polished concrete remains level throughout. Track perimeter edges, baseboard heights, and any obstacles that affect grinding, then include allowance for edge work and finishing around columns or stairs. If you’re aiming for a specific polish level, measure the current surface condition and record how deep coatings or surface sealers may be, since that impacts how much concrete polishing is needed. These measurements help you plan equipment time and materials for consistent results across the entire polished concrete floor.
📅 Last Updated: October 10, 2026 | Topic: How to measure for polished concrete floors? | Content verified for accuracy and freshness.
References
- Google Scholar Google Scholar
https://scholar.google.com/scholar?q=how+to+measure+for+polished+concrete+floors+surface+profile+flatness - Google Scholar Google Scholar
https://scholar.google.com/scholar?q=measuring+concrete+slab+moisture+for+polished+concrete+floor+installation+ASTM+F2170 - Google Scholar Google Scholar
https://scholar.google.com/scholar?q=polished+concrete+floor+preparation+measurement+planarity+FF+FL+testing - https://en.wikipedia.org/wiki/Polished_concrete
- Glass ceiling
https://en.wikipedia.org/wiki/Concrete_floor - E1155 Standard Test Method for Determining FF Floor Flatness and FL Floor Levelness Numbers
https://doi.org/10.1520/E1155-20 - Google Scholar Google Scholar
https://scholar.google.com/scholar?q=How+to+measure+for+polished+concrete+floors? - https://en.wikipedia.org/wiki/Special:Search?search=How+to+measure+for+polished+concrete+floors?
- https://www.ncbi.nlm.nih.gov/search/research-articles/?term=How+to+measure+for+polished+concrete+floors?