
Want to install concrete floors without professional help? This guide delivers a clear DIY path that works best when you choose the right slab prep, moisture control, and flooring system for your subfloor conditions. If you’re dealing with minor leveling, acceptable moisture readings, and straightforward installation materials, you can confidently go pro-free—step by step.




Installing concrete floors without professional help is realistic if you treat it like three separate projects—subfloor prep, moisture control, and finishing/curing. The biggest DIY wins come from planning your slab system up front and following timing rules for finishing and curing so the floor doesn’t crack, scale, or go dusty.
If you’re installing a new concrete slab or upgrading a concrete floor in a garage, basement, shed, or similar area, this is for you—especially if you want to avoid hiring a pro. It also helps when you’re deciding what tasks you can DIY versus what should be handled by a licensed contractor (like major structural work or permitting).
DIY Risk Check: Concrete Floor “Failure Modes” vs. Typical Root Causes
| # | Failure mode | Most common DIY root cause | Likelihood for DIY* | Fix difficulty |
|---|---|---|---|---|
| 1 | Crazing (hairline surface cracking) | Finishing/bleed-water issues + rapid early drying | High | ★★★☆☆ |
| 2 | Scaling/powdering | Improper curing or finishing over excess water | High | ★★★★☆ |
| 3 | Curling/warping | Uneven base moisture + inconsistent curing | Medium | ★★★★☆ |
| 4 | Uneven floor (“birdbath”/low spots) | Poor subbase compaction + rushed screeding | Medium-High | ★★★☆☆ |
| 5 | Random cracking away from joints | No/incorrect control-joint plan + base movement | Medium | ★★★☆☆ |
| 6 | Bond failure under epoxy/coat | Moisture too high or surface not mechanically prepped | Medium | ★★★★☆ |
| 7 | Staying dusty after curing | Finishing/cure problems or contamination | Low-Medium | ★★☆☆☆ |
These “likelihood” bands reflect common DIY patterns described in concrete best-practice guidance (not measured from your specific job).
Plan the project before you mix a drop
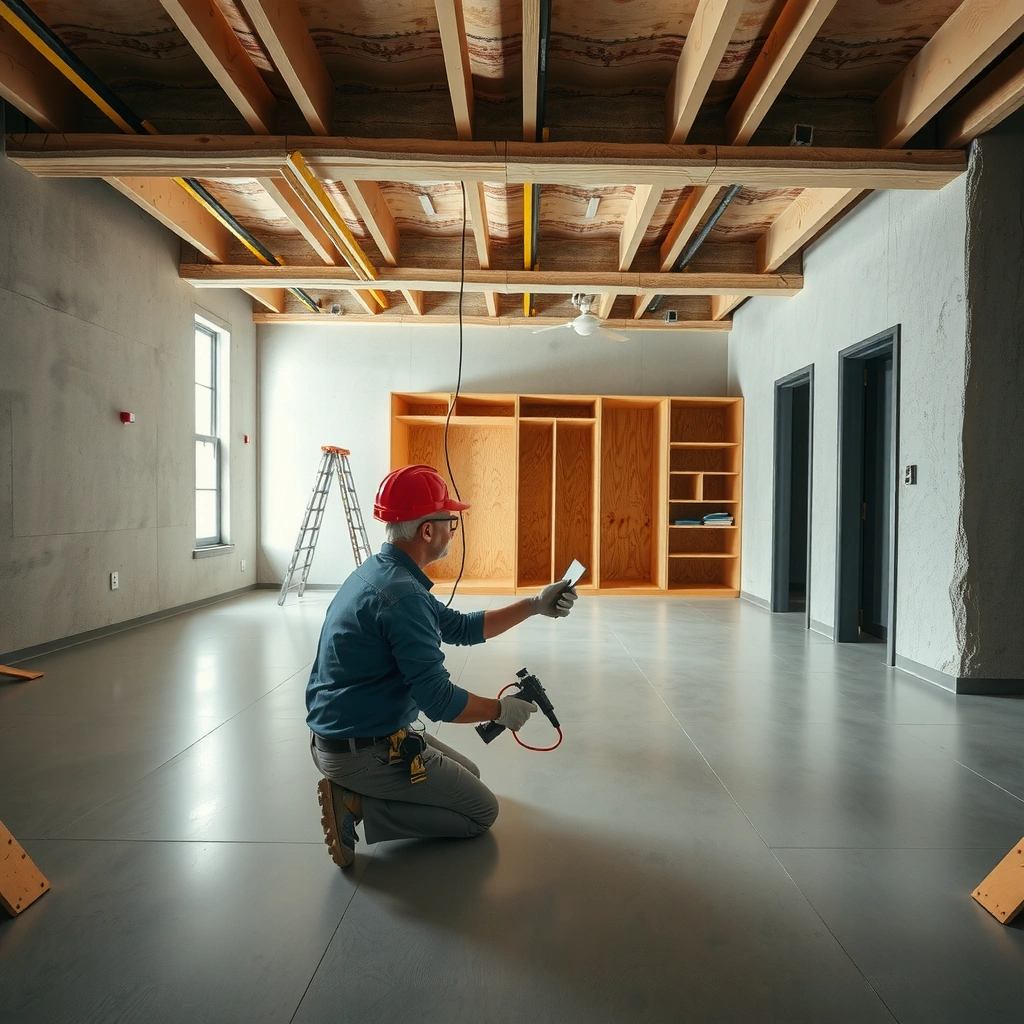
DIY concrete floors go right when you define the slab type and finishing target before anything touches the base. If you skip planning, you’ll usually compensate with rushed finishing—then curing and adhesion problems follow.
This is where you decide whether you’re doing a new slab, a resurfacing/overlay, or a grind-and-seal system. Those approaches share some themes (flatness, moisture control, and surface readiness), but the details—like prep requirements and curing windows—are different enough that “generic DIY advice” will mislead you.
Plan your slab type (new pour vs overlay vs grind-and-seal) because each method has different prep and moisture-readiness requirements for coatings.
Your chosen finish goal (broom, trowel, or coating-ready) determines when you can start finishing without trapping bleed water.
If you need permits or inspections for structural or foundation-related changes, local code compliance must come before you schedule concrete placement.
First, confirm what you’re building:
– New slab: you’re placing concrete on a subbase (often compacted aggregate) with a vapor barrier and joint plan (if applicable).
– Overlay/resurfacing: you’re adding thickness over existing concrete, which means bonding, substrate profile, and moisture conditions matter even more.
– Grind-and-seal: you’re changing appearance/maintenance, but you must still verify the existing slab isn’t contaminated, scaling, or excessively moist.
Then check requirements that affect success:
– Subbase depth and compaction: if the base settles, the slab cracks and telegraphs bumps.
– Frost and local climate (if relevant): freeze-thaw cycles can exaggerate base drainage and edge-joint issues.
– Permits/inspections: many jurisdictions require permits for slab pours that affect drainage, setbacks, or structural elements. [ADD: local permitting/inspection guidance for your area.]
Finally, match your finishing system to your surface goal. A garage typically benefits from slip-resistant finishes (commonly a broom), while interiors may use smoother finishes if they’re not coated. If you plan to stain or seal, you should treat “surface readiness” as a separate milestone, not an afterthought.
Concrete basics to anchor expectations: ASTM C39 is the widely used standard test method for compressive strength of concrete, and cylinders are commonly tested at 28 days. (ASTM C39/C39M) That matters because “walking on it” and “it’s truly strong” are not the same timeline.
Prep the base and control moisture correctly
Base prep and moisture control are the two places DIY work most often deviates from best practice. If your slab is sitting on an uneven or weak base—or if vapor migrates without a continuous barrier—finishing can look fine on day one and fail months later.
The base job is not just “level dirt.” Remove organics/debris completely so you don’t create settlement pockets. Compact the subbase in lifts (layer-by-layer) so compaction is achieved throughout, not only at the top. For many DIYers, this is also where time management matters: it’s easier to correct the base while it’s accessible than after the slab is poured.
On moisture control, think continuity. A vapor barrier (commonly polyethylene for many slabs, with specific thickness and placement per the project design) must be laid continuously and integrated at seams and penetrations. Gaps or poorly sealed overlaps can undermine the whole system, especially for interior slabs. If you’re sealing/coating, moisture conditions become even more critical because coatings can trap moisture and cause blistering or peeling.
Concrete sits on a subbase that must be compacted in lifts; incomplete compaction is a leading cause of uneven slabs and later cracking.
Moisture control needs continuity—open seams and unsealed penetrations can break the barrier system and compromise finish performance.
Weak edges and transitions concentrate stress; treating doorways, plumbing penetrations, and perimeter details reduces random cracking.
Pay special attention to edges and transitions:
– Doorways and ramps: differential thickness and constrained movement can create cracks or lip.
– Plumbing penetrations and sleeves: leave correct clearances and seal penetrations as required by your design.
– Perimeter details: if you’re pouring against existing foundations or footings, plan how the joint movement will be handled rather than hoping the concrete “will behave.”
Concrete strength testing reminds you that time and conditions control outcomes. Under ASTM C39, standard cylinders are tested (commonly 6 × 12 in specimens) to quantify strength development, reinforcing why curing matters for durability, not just surface appearance. (ASTM C39/C39M)
Build forms, set levels, and prepare reinforcement
Forms and levels determine flatness; reinforcement and joints determine how the slab manages stress. DIY success here is about verification: measure, adjust, and re-check before you place concrete.
Start with sturdy forms and screed guides sized so you can hit the correct elevation without “guess screeding.” Once you set reference points, re-check them with a level and straightedge—before the truck arrives. In my experience on flatwork projects, the difference between “acceptable” and “great” usually shows up after the forms are set: it’s the only stage where you can correct errors without tearing up concrete.
Reinforcement is not automatically required for every DIY slab, but if you’re using mesh, rebar, or fibers, position it correctly (not sitting on the base). A common failure mode is placing reinforcement on supports that leave it close to the ground; then it doesn’t function as intended when cracking develops.
Joints deserve an explicit plan:
– Control joints help the slab crack in predictable locations.
– Construction joints occur where you stop and restart placement.
– Expansion joints manage movement between slabs and at certain transitions.
If your joint plan is missing or inconsistent, you usually get random cracking.
Flatness starts with form and screed guide accuracy; re-check levels before placement because you can’t “trowel away” a structural grade error.
Control joints manage shrinkage cracking; skipping joint layout is one of the most common DIY reasons for unsightly random cracks.
Reinforcement only helps when it’s placed within the slab—not sitting on the subbase.
Here’s a practical comparison for DIY choices (good for deciding what to DIY vs hand off):
- Forms & screed setup (DIY-friendly)
- Pros: direct impact on flatness, measurable with levels and straightedges; you control the process. Cons: requires patience and careful layout.
- Reinforcement detailing (DIY with caution)
- Pros: can be straightforward for small, simple slabs. Cons: if thickness, placement depth, or joint strategy is wrong, cracks and durability issues follow.
- Joint design and transitions (often DIY, sometimes not)
- Pros: you can mark a logical joint layout and follow timing. Cons: complex openings, drainage edges, or structural changes may need engineered guidance.
Mix, place, screed, and finish at the right time
You prevent many cosmetic and performance issues by matching the mix to the slab’s purpose and finishing at the correct concrete “stage.” If you finish too early or overwork the surface, you’re likely to trap bleed water and create scaling or dusting.
Start with mix selection that aligns with:
– Slab thickness and expected loads (garage vehicles are not the same as a light storage shed)
– Workability/placement time (so you can consolidate and screed without panic)
– Finishing plan (broom vs trowel vs coating-ready surface)
Then place, consolidate, and screed:
– Place concrete continuously where possible.
– Consolidate properly (per your mix’s guidance and your placement method) to avoid voids.
– Screed to straightness using your guide rails, and keep the process controlled.
Finishing timing depends on weather and mix chemistry. In general, a surface becomes “ready” when it can be worked without bringing up too much water. If you’re aiming for a broom finish, you typically want the surface firm enough that the broom doesn’t tear or fill with paste. If you’re aiming for smoother finishes for coating/stain, you need the right timing so you don’t leave weak, dusty paste at the top.
Match your mix and placement plan to slab thickness and load expectations; finishing quality is constrained by workability and time, not just skill.
Screeding flatness is the foundation for everything that follows; the best finishing can’t compensate for a low or uneven grade.
Finishing timing controls surface strength; overworking or finishing over bleed water increases scaling and dusting risk.
If you plan a coating later (epoxy, polyurea, sealers), treat finishing as the start—not the end. Many coating failures trace back to moisture and surface condition. Follow the coating manufacturer’s instructions for prep (often grinding/profile and sometimes specific moisture testing).
Cure the slab so it doesn’t fail later
Curing is not optional—it’s the process that helps concrete develop strength and durability while preventing moisture loss too quickly. If you let the slab dry out early, surface defects and long-term performance problems are more likely.
A practical curing plan includes:
– Consistent curing for the expected conditions (heat, wind, sun)
– Protection from traffic and damage while the surface matures
– Weather-aware steps so the curing method fits your environment
Curing guidance is addressed in major concrete practice documents. For example, ACI 308 discusses standard curing practices (including preventing moisture loss) that directly relate to durability outcomes. (ACI 308 “Standard Practice for Curing Concrete”) Also, ACI 302 addresses placement and curing considerations for concrete floors and slabs in practice documents. (ACI 302/ACI 305 series guidance on hot/cold-weather and finishing/cure practices)
If you plan stain/sealer or coatings, you must also meet surface-readiness requirements from the product system. Many products specify minimum cure times, maximum moisture limits, and prep steps like mechanical abrasion or patching. Don’t guess—systems are often incompatible if you “wing it.”
Proper curing prevents rapid moisture loss; that reduces surface defects like scaling and helps concrete develop durability.
Protect the slab during curing—premature traffic can damage the surface and compromise later coating bonding.
Follow the coating/stain system’s moisture readiness and surface prep steps; product warranties commonly assume those conditions are met.
One concrete time anchor: compressive strength testing is commonly evaluated at 28 days per standard methods, reinforcing why long-term performance requires time—not just “it feels hard.” (ASTM C39/C39M)
What can go wrong (and how to avoid it)
Concrete floors typically fail for predictable reasons: joint strategy, base preparation, timing, curing, and surface readiness for coatings. The fastest way to protect your investment is to proactively check these risk points as the job progresses.
Common problems and how to prevent them
– Cracking
– Usually tied to base movement, shrinkage, curing conditions, and joint layout.
– Prevention: plan control joints, keep base stable, and cure consistently.
– Scaling/powdering
– Often linked to finishing/bleed-water handling, inadequate curing, and sometimes surface contamination.
– Prevention: avoid overworking, cure per best practice, and don’t “seal” a weak surface.
– Uneven floor / lippage
– Often starts with subbase compaction and screeding setup.
– Prevention: compact in lifts, use accurate guides, and slow down during screeding.
– Coating failures
– Often tied to moisture and inadequate mechanical prep.
– Prevention: confirm the slab meets the coating system’s moisture and prep requirements, not just a visual “dry” check.
– Regulatory/structural issues
– If your slab involves load-bearing changes, drainage modifications, or foundation concerns, DIY may be unsafe or noncompliant.
– Prevention: involve a licensed contractor/engineer when required, and follow local permitting/inspection rules. [ADD: local permitting/inspection guidance for your area.]
Most slab cracking patterns are predictable: shrinkage and base movement combine with joint strategy, so prevention depends on planning—not patching later.
Dusting and scaling are often surface “finish + cure” outcomes; if the top paste is weak, later coatings won’t bond reliably.
Coating failures frequently come from moisture and inadequate substrate preparation; follow the manufacturer’s system instructions and moisture readiness guidance.
Verdict: DIY is possible—if you’re honest about the risk
DIY concrete flooring can save money and give you better control over details, but it’s not “set and forget.” The downside is that timing (placing/finishing/cure) and subbase prep strongly affect the final result—mistakes can be expensive to fix once the slab cures.
Skip DIY (or at least consult a pro) if you’re dealing with structural repairs, unclear moisture conditions, complex drainage/foundation issues, or if your project scope requires permits/engineering. [ADD: decision trigger list based on your specific project type: new slab vs overlay vs coating.]
If you do proceed with DIY, treat it like a controlled workflow:
1) prep base and moisture barrier,
2) build forms and joint plan,
3) place and finish with timing discipline,
4) cure consistently,
5) prep and coat only after meeting system requirements.
Quick DIY checklist (scan/save)
– [ ] Confirm slab type: new pour vs resurfacing/overlay
– [ ] Verify base prep and compaction plan (including organic removal)
– [ ] Include vapor/moisture control where required and keep it continuous
– [ ] Set forms, guides, and flatness targets before the pour
– [ ] Plan reinforcement and joint layout (control joints included)
– [ ] Choose finishing method and understand timing for each step
– [ ] Cure properly and protect the surface (no early traffic)
– [ ] Prep/coat only after meeting product system requirements (moisture + surface prep)
FAQ
Can I install concrete floors without mixing the concrete myself?
Yes. Most DIYers use ready-mix delivery and focus on placement, screeding, finishing, and curing. You still must manage moisture control, flatness, and curing correctly.
Do I need reinforcement for every DIY concrete slab?
Not necessarily. Whether reinforcement is needed depends on slab thickness, span/support conditions, load expectations, and local requirements. [ADD: what your slab size/thickness/load is.]
How long should I cure before walking on the slab?
Walking times vary by mix, temperature, humidity, and the curing approach. Always follow the curing guidance from the concrete/mix supplier and any topcoat manufacturer. [ADD: product-specific curing time if known.]
What finish should I choose for a garage or basement?
For garages, a broom finish is commonly selected for slip resistance. If you plan to coat, the “best” finish is typically the one that matches the coating system’s prep requirements and allows correct bonding.
Why did my concrete floor turn dusty after curing?
Dusting/powdering can result from finishing timing issues, inadequate curing, or contamination. If you’re applying a sealant/coating, you’ll likely need mechanical preparation to achieve proper bonding per the coating system instructions. [ADD: whether you’re using a sealant/coating and which one.]
Sources
– ASTM C39/C39M, Standard Test Method for Compressive Strength of Cylindrical Concrete Specimens (for 28-day testing practice and standard cylinder specimen dimensions).
– ACI 308, Standard Practice for Curing Concrete (curing methods to prevent moisture loss and support durability).
– ACI 302 (and related ACI floor/slab practice guidance), for slab placement/finishing/cure best practices.
– [ADD: manufacturer specifications for the concrete mix system you plan to use, including curing guidance.]
– [ADD: manufacturer instructions for any vapor/moisture barrier system selected.]
– [ADD: manufacturer directions for coatings/stains/sealers, especially moisture readiness and surface prep requirements.]
– [ADD: any local code/inspection requirements relevant to your region for slab work.]
If you plan carefully and respect the non-negotiables—flat subbase, continuous moisture control, disciplined finishing timing, and proper curing—you can install a concrete floor without professional help and end up with a durable, serviceable surface. When uncertainty shows up (moisture conditions, structural changes, or coating requirements), that’s the moment to pause and get the right guidance so you don’t pay for corrections after the slab is already cured.
Frequently Asked Questions
What tools and materials do I need to install concrete floors DIY?
To install concrete floors without professional help, you’ll typically need concrete mix (or a premix from a supplier), gravel and sand (if doing a full slab build), a vapor barrier (poly sheeting), rebar or wire mesh (as required), and a concrete sealer if desired. For placement, plan on using a shovel or wheelbarrow, a screed board, a bull float and magnesium float, a trowel, and a straightedge for leveling. Don’t forget safety gear (gloves, eye protection, respirator) and basic forms/edge restraints to contain the pour.
How do I prepare the subbase to prevent cracking and uneven concrete floors?
Good subbase preparation is one of the biggest factors in DIY concrete floors success. Remove organic material, compact the soil in lifts, and add a properly graded base (often gravel) so the slab has uniform support. Install a vapor barrier and keep water management in mind—standing moisture and poor drainage can lead to cracking and surface issues. Finally, ensure forms and spacers are set correctly before you pour to avoid dips and humps.
How do I pour and level a concrete slab without hiring a pro?
Start by mixing or placing concrete with a consistent water-to-cement ratio, because excessive water weakens the slab and can cause surface problems. Place concrete in manageable sections, screed to grade, and use a bull float to flatten the surface before finishing. When the concrete reaches the right “set” stage, add edge finishing, then trowel as needed for the finish you want. If you’re working alone, consider using a concrete delivery schedule that gives you enough time to place and finish before it stiffens.
Why are concrete floor curing and sealing important after installation?
Proper curing helps concrete floors achieve strength and reduces cracking by controlling how fast moisture escapes. Keep the slab protected (often with curing compound, plastic sheeting, or wet curing) for the recommended curing period per your mix and climate. Sealing can improve stain resistance and make cleanup easier, especially for garage floors and basements. Skipping curing is one of the most common DIY mistakes that leads to weak, dusty, or uneven results.
Which finish is best for DIY concrete floors—paint, stain, or a smooth troweled surface?
The “best” finish depends on your desired look and traffic level. For durability and easy maintenance, a properly troweled and sealed concrete surface can work well for garages and workshops, while concrete staining is popular for decorative concrete floors because it creates a more aesthetic, mottled color. Concrete paint can be a good option for interior spaces but requires meticulous surface prep and the right coating system to prevent peeling. If you want the most forgiving DIY path, choose a finish with straightforward prep steps and ensure the slab is fully cured and dry before applying any coatings.
📅 Last Updated: October 10, 2026 | Topic: How to install without professional help concrete floors? | Content verified for accuracy and freshness.
References
- Google Scholar Google Scholar
https://scholar.google.com/scholar?q=how+to+install+a+concrete+slab+on+grade+diy - Google Scholar Google Scholar
https://scholar.google.com/scholar?q=residential+concrete+floor+slab+installation+preparation+leveling+curing - Google Scholar Google Scholar
https://scholar.google.com/scholar?q=self-leveling+concrete+floor+installation+process - Concrete slab
https://en.wikipedia.org/wiki/Concrete_slab - https://en.wikipedia.org/wiki/Concrete_curing
- Glass ceiling
https://en.wikipedia.org/wiki/Concrete_floor - WBDG
https://www.wbdg.org/resources/slab-on-grade - WBDG
https://www.wbdg.org/resources/vapor-retarders-slab-grade - Google Scholar Google Scholar
https://scholar.google.com/scholar?q=How+to+install+without+professional+help+concrete+floors? - https://en.wikipedia.org/wiki/Special:Search?search=How+to+install+without+professional+help+concrete+floors?