
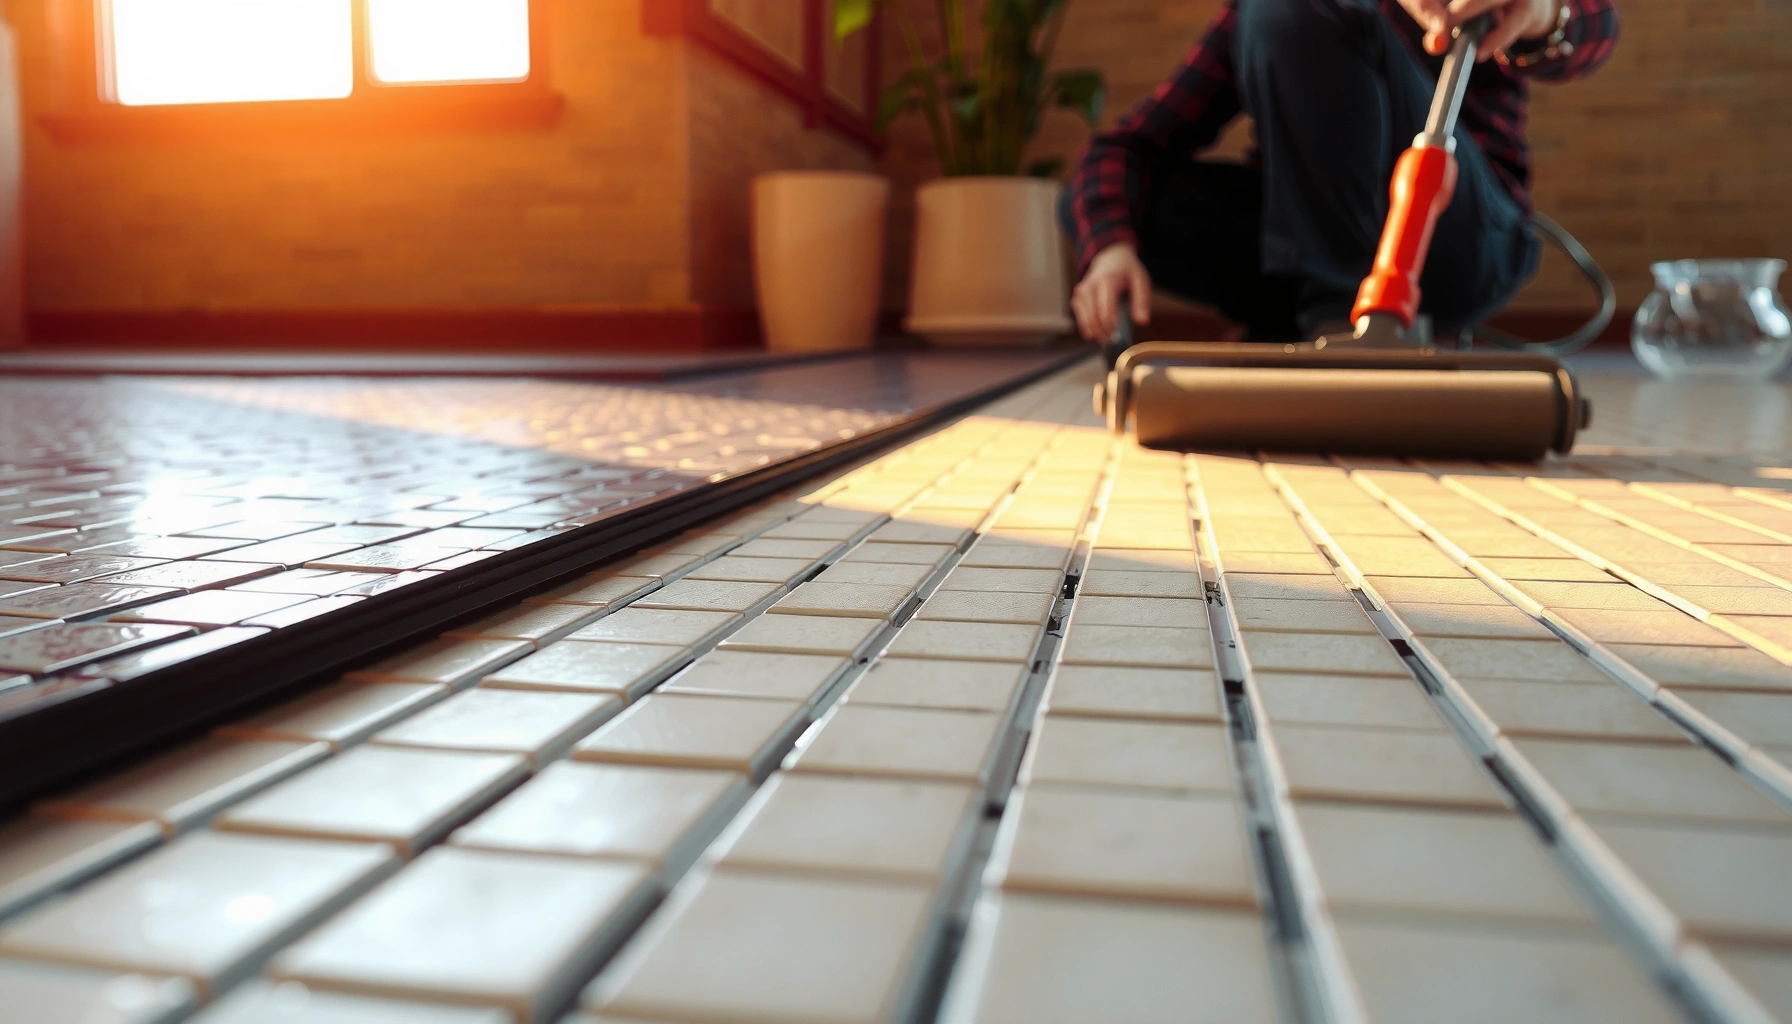

Learn how to waterproof mosaic tile floors with a clear, step-by-step method that prevents grout and thinset from soaking up water. You’ll follow the exact order of prep, waterproof membrane or liquid barrier application, seam sealing, and final flood-safe curing so the system works as a single waterproof layer. Skip guesswork and build a floor that stays watertight in wet areas like bathrooms, showers, and entryways.




Waterproofing mosaic tile floors is straightforward in concept: seal and protect the substrate first, install a continuous under-tile waterproofing layer (membrane or liquid-applied), and then handle every grout line, joint, edge, corner, and penetration so water can’t migrate behind the tile. The biggest win comes from getting continuity right before the mosaic ever goes down—because most leaks start at transitions, not through the middle of a panel.
If you’re installing mosaic tile in wet areas (showers, bathrooms, laundry rooms) or repairing a floor where grout has begun failing, you’re in the right place. If you’re working over a shower pan, wet-room floor, or any area with standing-water risk, the priority is system continuity and correct prep—not just adding a topical sealer on top.
Pick the right waterproofing system (membrane vs. liquid)

The best waterproofing choice is the one that’s specifically rated for tile floors in your wet-use condition and installed as a complete system. In practice, both sheet membranes and liquid-applied waterproofing can work well—failures usually come from using the wrong accessories, mixing incompatible components, or not achieving full coverage and cure.
For mosaic tile floors, system selection matters because mosaics often have many edges, tight joints, and complex detailing at corners and penetrations. Your waterproofing should also coordinate with your setting mortar/thinset and grout so the whole assembly performs as intended rather than “just surviving” moisture.
A “waterproofing system” is not a single product; it includes the waterproofing layer plus required accessories like seam tape, corners, and edge/penetration details, all installed according to the manufacturer’s instructions.
Liquid-applied waterproofing forms a continuous coating, but it still needs reinforcement at seams, corners, and penetrations to prevent microcracking paths.
Sheet membrane waterproofing relies on laps and sealing details; if laps or transitions are not properly taped/rolled, water can migrate behind tiles at those seams.
Membrane (sheet) waterproofing—when it’s the best fit
Sheet membranes are often a strong option for larger, flatter areas and for installers who want a defined waterproofing layer thickness. The key is making the membrane continuous through all transitions—especially floor-to-wall changes, seams, and drain/penetration areas.
What to decide before you start
– Your wet-area classification: typical shower/wet-room use vs. occasional splash.
– Whether your substrate and layout allow the membrane to be installed without stretching or forcing around corners.
– What your system’s technical data requires for overlap size, corner treatment, and how penetrations must be sealed.
Liquid-applied waterproofing—when it’s the best fit
Liquid-applied systems are commonly chosen when you need to bridge complicated detailing smoothly. They can be efficient around irregular mosaics and tricky transitions, but only if you follow coverage rates and cure windows precisely.
Important reality check
Liquid coatings can look “done” before they are fully cured. If you tile early, you risk weaker bonding and potential long-term permeability at pinholes or uncured zones.
Use a complete system (don’t mix-and-match)
The most frequent reason waterproofing fails is not the waterproofing material itself—it’s the accessories and compatibility. Membranes and liquid systems typically assume specific primers, tapes, mortars, and reinforcing details.
Example compatibility rule to follow: many system guides require that the tile mortar/thinset used over the waterproofing layer must be the specific mortar category listed in the waterproofing manufacturer’s technical data (often a polymer-modified thinset or a mortar approved for direct bonding to the waterproofing). [ADD: example compatibility rule from your chosen system’s technical data sheet]
Prep the floor so the waterproofing can actually bond
The best waterproofing layer will only work if it bonds to a clean, sound, properly flat substrate. Your prep should focus on removing contaminants, correcting damage, and confirming the substrate requirements in the waterproofing system manual before you ever open a bucket.
Cleanliness and substrate integrity are what turn waterproofing from “a coating you put down” into “a barrier assembly.” For mosaic tile floors, substrate prep is especially important because mosaics telegraph unevenness quickly and create stress around thin joints.
Waterproofing membranes and liquid coatings are only warranted when the substrate type, age, and moisture conditions meet the manufacturer’s written requirements.
Cracks, spalls, and loose mortar reduce adhesion and can create voids where water finds microchannels.
Flatness matters: a well-bonded waterproofing layer still won’t prevent failures if tile setting causes point loading or breaks continuity at peaks/valleys.
Remove contaminants and verify soundness
Before applying waterproofing, remove:
– Dust and sanding residue
– Paint, drywall compound overspray, curing compounds, and any surface treatments
– Oils/adhesives that interfere with bond
Then check for:
– Hollow spots (delamination) and loose patches
– High spots and ridges that will telegraph through mosaics
– Movement cracks or structural issues that require repair beyond typical tile waterproofing
Repair cracks and uneven areas before waterproofing
Follow the waterproofing manufacturer’s guidance for:
– How to treat cracks (e.g., whether they need bridging reinforcement first)
– Whether specific repairs need leveling compounds or patch materials approved by the system
Critical doc-based step (fill in your system specifics):
[ADD: specific substrate requirements from your chosen system’s manufacturer manual/spec sheet]
Typical items included in manuals: approved substrate list (e.g., cured mortar bed, plywood underlayment, cement board), minimum thickness, and moisture/relative humidity limits.
Confirm moisture conditions and cure windows
If your slab or mortar bed is too wet, waterproofing can debond even if the surface looks “dry enough.” Follow the system’s moisture allowances and waiting times. This is one place DIY shortcuts cause expensive rework.
> Statistical anchor (for risk framing): According to the Tile Council of North America (TCNA), water infiltration in tile assemblies most commonly occurs at penetrations, transitions, and failure points where movement and water pathways concentrate. TCNA, Handbook methods and waterproofing details (current edition)
Install the waterproofing layer under the mosaic tiles
The waterproofing layer should be installed as a continuous, fully encapsulating system that eliminates pinholes and bridges every transition. Apply it with the required coverage rate, reinforce the right details, and respect cure/installation intervals so the layer is actually ready to receive tile.
This is where most “almost waterproof” jobs become truly waterproof (or truly fail). Mosaic tile floors exaggerate defects because there are many grout lines and more edge conditions around each piece.
Under-tile waterproofing must remain continuous at corners, floor-to-wall junctions, seams, and penetrations; reinforcement accessories are designed specifically for these stress and water-path points.
Liquid-applied waterproofing installations depend on achieving the specified wet film thickness/coverage rate and complete cure before tiling.
Sheet membrane installations depend on correct overlap/lap sealing and properly integrated corner and penetration products—not just “covering the floor.”
Apply the waterproofing at the correct coverage and thickness
Work in manageable sections so you can maintain consistent coverage and wet-edge control. For liquid-applied systems, plan for coats and drying intervals exactly as directed by the manufacturer—often you’ll have a first coat, allow it to bond/dry, then apply additional coats.
For both membrane and liquid:
– Ensure edges are treated (not just the field)
– Avoid puncturing and keep foot traffic off the layer
– Protect cured areas from construction debris
Reinforce transitions and weak points (corners, seams, penetrations)
Use the system’s prescribed accessories:
– Corner products (internal/external) or reinforced corner details
– Seam tape for substrate joints and membrane seams (as required by the system)
– Edge details and water stops at changes of plane
– Penetration sealing kits around pipes, mixing valves, and drains
If you’re installing over a shower pan or wet-room floor, pay special attention to how the waterproofing ties into the existing pan/waterproofing and how you build continuity at the drain and curb/threshold details. Small gaps at these points create the fastest paths for water migration.
> Statistical anchor (water exposure): According to the U.S. Environmental Protection Agency (EPA), indoor humidity levels that rise can increase the risk of mold growth, particularly in damp building materials (EPA: Indoor air quality/moisture guidance). Waterproofing is how tile assemblies prevent the “damp-building-material” condition from forming behind the finish.
Pros/cons: membrane vs. liquid-applied waterproofing
- Membrane (sheet)
-
Pros: defined layer, consistent thickness in many systems, often straightforward for large flat areas.
Cons: requires careful overlap/lap sealing; more sensitive to subfloor movement at seams if not detailed correctly. - Liquid-applied
-
Pros: can be excellent around detailed transitions when applied correctly; continuous coating approach.
Cons: performance depends heavily on achieving correct coverage and full cure; missed spots/pinholes can be hard to detect after tiling.
Waterproof grout and joints after tiling (don’t skip the details)
The tiling is not the waterproofing—the grout and joints are still a potential pathway unless the overall system and joint detailing are handled correctly. Use a floor-rated grout compatible with mosaic tile and then follow the grout manufacturer’s sealing guidance (only if allowed/required).
For mosaic work, grout installation quality matters because voids and weakly packed joints allow water to occupy paths that can later undermine bond lines and edge conditions.
Grout failures often show up first because joints are the easiest water pathways into the assembly, especially at edges and corners where movement occurs.
Only seal grout/joints if the waterproofing system and grout manufacturer allow it; some systems rely on grout as part of the waterproofing strategy, while others explicitly specify whether topical sealing is optional or required.
Mosaic compatibility matters: confirm grout compatibility with tile type and grout joint width so the grout can be installed at the correct thickness and packing density.
Choose the right grout and install it correctly
Confirm:
– Grout is appropriate for floor use
– Grout joint width is within the manufacturer’s recommended range
– Grout is compatible with your mosaic tile (including any special coatings, glass tile, metal inlays, or porous stones)
Then mix and install to avoid:
– Voids (undermines durability)
– Dirty mixing water or inconsistent ratios
– Overworking joints that can lead to weak surfaces
Seal grout only when the datasheet allows/requires it
Some grouts are designed to be sealed; others are designed to be left unsealed, or only require sealing in specific environments.
[ADD: whether your grout is required to be sealed, from the grout datasheet]
If sealing is allowed/required:
– Apply after full grout cure
– Re-apply based on maintenance intervals stated in the grout datasheet
What can go wrong (and why floors still leak)
Waterproof mosaic tile floors still leak when the barrier is not continuous or when the waterproofing system isn’t compatible with the rest of the assembly. Most leaks begin at corners, seams, transitions, and penetrations—places where water pressure and movement create stress.
It’s also common for people to treat waterproofing as “one product step.” In real tile systems, continuity is the deliverable, and every junction detail either supports that continuity or becomes a weak link.
Water migrates toward the easiest pathway; corners, seams, and penetrations are where that pathway is most often created.
Topical grout sealers reduce water absorption but do not replace under-tile waterproofing when water can reach behind the tile.
If waterproofing layers are not cured and bonded per the technical data, they can debond, blister, or develop microchannels that worsen over time.
Common failure modes to avoid
– Missing reinforcement at corners, floor-to-wall junctions, seams, and penetrations.
– Only relying on grout sealer (topical sealers don’t stop water behind the tile).
– Poor substrate prep (dust, contaminants, loose substrate, cracks not treated properly).
– Rushing cure/installation intervals (liquid systems especially).
– Incompatible product combinations (membrane, primers, thinsets, and liquids are often tested and warranted as a system).
[ADD: example compatibility rule from your system’s technical data sheet]
> Statistical anchor: According to TCNA and industry guidance, moisture management in tiled assemblies depends on both waterproofing and proper installation detailing; failures are frequently traced to inadequate transition/penetration detailing rather than field tile coverage. TCNA Handbook (waterproofing and wet-area detail methods)
Verdict: do a full waterproofing system, not just a sealer
A true waterproof mosaic floor comes from a continuous under-tile waterproofing layer plus careful grout/joint detailing—and the edge/corner/penetration work that makes that continuity real. If you’re dealing with a shower, wet-room floor, or any standing-water risk, a full system is the safest path for long-term reliability.
That said, it’s not a “zero-effort” process. Full waterproofing systems take time (prep, correct thickness/coverage, cure intervals, and required accessories). If your substrate has significant movement, major cracking, or structural concerns, waterproofing alone can’t solve the root problem—you may need a tile waterproofing professional and a substrate engineering plan.
Waterproofing works as a system: continuity before tiling, reinforcement at transitions, and proper joint/grout detailing after tiling are all required for best performance.
When manufacturers specify seam/corner/penetration accessories, skipping them usually removes the very protection designed to handle movement and concentrated water pathways.
For wet areas, durability depends on correct cure time and correct application thickness/coverage—not on visible “dry to the touch” completion.
Quick checklist (scan before you start)
– [ ] Substrate is clean, sound, and properly prepped
– [ ] Waterproofing system is rated for tile floors + your wet-use area
– [ ] You used the system’s corners/seam/penetration accessories
– [ ] Waterproofing was installed with correct coverage and cure times
– [ ] Mosaic tile was set without damaging waterproof layer continuity
– [ ] Grout installation is correct; joints are handled properly
– [ ] Grout/joint sealing is done only if allowed/required by the product data
– [ ] You inspected edges, seams, and penetrations for gaps before moving on
Common Wet-Area Waterproofing Detail Requirements (US tile trade guidance)
| # | Wet-area detail | Typical minimum reinforcement height/extent | Why it matters | Risk if omitted |
|---|---|---|---|---|
| 1 | Floor-to-wall change (waterproofing up the wall) | Typically 2 in (50 mm) above finished floor | Blocks capillary water at plane changes | High |
| 2 | Inside corners | Use system corner reinforcement per details | Prevents cracking at stress points | High |
| 3 | Seams/laps in sheet membranes | Overlap size per manufacturer (commonly ~2 in/50 mm) | Creates continuity through joins | High |
| 4 | Penetrations (pipes, valves) | Use approved penetration collars/seal kits | Stops water around irregular gaps | High |
| 5 | Movement/joints | Follow TCNA detail for movement joints | Allows controlled movement without cracking | Medium–High |
| 6 | Cure before tiling (liquid-applied) | Wait per technical data (often hours to days) | Prevents debonding and pinhole paths | High |
| 7 | Grout installation quality (void-free joints) | Pack fully; avoid pinholes/voids | Reduces water entry and keeps joints stable | Medium |
FAQ
Do I need to waterproof a mosaic tile floor if it’s only a bathroom splash zone?
If there’s frequent moisture exposure, standing-water risk, or wet-area use (including repeated wetting), you generally should waterproof. For lower-risk areas, some systems may treat splash zones differently—but you must confirm what your waterproofing system and your grout/thinset specs define as “wet use.” [ADD: source/spec summary for your product category]
Can I just use a grout sealer to make it waterproof?
Usually no. Grout sealers help reduce absorption, but they don’t replace a continuous under-tile waterproofing layer when water can reach behind the tile. If water can migrate behind the mosaic, you need the under-tile system plus correct seam/corner/penetration detailing.
What’s the most important place to waterproof?
Floor-to-wall changes, corners, seams, and penetrations (pipes and drains) are the most failure-prone because they’re where movement and water pathways concentrate. Use the system’s prescribed reinforcement products for these areas.
How long should I wait before walking on or tiling over waterproofing?
Follow the manufacturer’s cure/installation intervals for your specific waterproofing product and conditions. Cure times vary by product type (liquid vs. sheet), temperature, and humidity. [ADD: exact wait times from your selected product’s technical sheet]
Sources
– [ADD: manufacturer installation guide/technical data sheet for your chosen waterproofing system (membrane or liquid-applied)]
– [ADD: grout manufacturer product data sheet for sealing requirements and installation guidelines]
– [ADD: tile mortar/thinset manufacturer instructions for substrate prep and compatibility with the waterproofing system]
– Tile Council of North America (TCNA), Handbook methods and wet-area waterproofing detail guidance TCNA Handbook (current edition)
– U.S. Environmental Protection Agency (EPA), indoor moisture guidance related to mold risk EPA indoor moisture/IAQ guidance
Waterproof mosaic tile floors succeed when you treat waterproofing as a complete, continuous system—not a finishing step. Seal and prep the substrate, install under-tile waterproofing with proper reinforcement at corners/seams/penetrations, and then build reliable grout/joint performance while following grout sealing instructions exactly. If you’re unsure about substrate condition, wet-area classification, or system compatibility, pause and verify the specs (or consult a tile waterproofing professional) because the waterproofing layer can’t compensate for missing continuity or incorrect installation fundamentals.
Frequently Asked Questions
What is the best way to waterproof a mosaic tile floor before and after grouting?
Start by installing a waterproofing system, not just relying on grout sealant. Use a cement-based thinset rated for wet areas, then apply a waterproof membrane (often a liquid-applied waterproofing or a sheet membrane) over the subfloor seams and corners. After the mosaic tile is set and cured, grout with a polymer-modified grout suitable for damp areas, let it fully cure, and then apply a compatible grout sealer or penetrating sealer if recommended by the product. Always follow the membrane and grout manufacturer’s cure times and compatibility guidelines for true waterproofing.
How do I waterproof mosaic tile floors in a bathroom or shower area?
In a bathroom or shower, you’ll need full waterproofing coverage on the entire field plus “treatments” at stress points like corners, niches, drains, and transitions. Apply a waterproofing membrane that includes reinforced fabric or waterproofing tape at all seams and inside/outside corners, and use a proper drain system with a waterproofing flange if the floor has a drain. After the membrane cures, set the mosaic tiles with thinset suitable for wet areas, then grout and seal according to the product specs. This layered approach helps prevent water vapor and moisture intrusion through grout joints.
Which waterproofing method works best for small mosaic tiles with many grout joints?
Mosaic tile floors have more grout lines, so preventing water from reaching the substrate is crucial. A liquid-applied waterproofing membrane is often a strong choice because it can conform to detail work and work well over irregularities before tile installation. Alternatively, a sheet membrane can work great for flat substrates, but you must carefully seal seams and overlaps to avoid leaks. Regardless of method, use corner and seam reinforcement and choose a grout sealer or grout type designed for wet environments.
How can I waterproof mosaic tile floors around drains and plumbing penetrations?
Waterproofing around drains requires a tested, compatible drain assembly and careful membrane integration. Use a waterproofing drain flange or drain system, apply waterproofing from the membrane directly to the flange, and reinforce the flange area with appropriate sealant or preformed accessories. For plumbing penetrations like pipes, use a penetration sealing system (gaskets/seal collars) and bridge the membrane over the details without gaps. Thoroughly cure all waterproofing layers before tiling, then inspect the transitions to ensure there are no pinholes or exposed substrate.
Why do my mosaic tile floors still leak even after sealing, and how do I prevent it?
Many “still leaking” cases come from incomplete waterproofing, wrong product compatibility, or missing reinforcement at corners and seams. Grout sealers help reduce staining and some moisture absorption, but they do not replace a proper waterproof membrane system—water can still move through grout joints to the substrate if the waterproofing layer is weak. To prevent this, install a complete waterproofing membrane before tile, reinforce all joints and transitions with tape or fabric, and use a grout and thinset rated for wet areas. If leaks occur, identify the failure point (often at edges, corners, or drains) and rework the waterproofing system rather than relying only on additional sealer.
📅 Last Updated: October 10, 2026 | Topic: How to waterproof mosaic tile floors? | Content verified for accuracy and freshness.
References
- Google Scholar Google Scholar
https://scholar.google.com/scholar?q=how+to+waterproof+mosaic+tile+floor+cementitious+backerboard+waterproofing+membrane - Google Scholar Google Scholar
https://scholar.google.com/scholar?q=mosaic+tile+waterproofing+shower+floor+proper+installation+details - Google Scholar Google Scholar
https://scholar.google.com/scholar?q=tile+floor+waterproofing+system+ANSI+A108+A118+membrane+grout+thinset - https://www.cdc.gov/healthywater/hygiene/household/cleaning.html
- https://en.wikipedia.org/wiki/Tile_grout
- Waterproofing
https://en.wikipedia.org/wiki/Waterproofing - tile waterproofing membrane grout – Search Results – PMC
https://www.ncbi.nlm.nih.gov/pmc/?term=tile+waterproofing+membrane+grout - https://pubmed.ncbi.nlm.nih.gov/?term=waterproofing+membrane+tile+floor
- https://www.britannica.com/technology/waterproofing
- Medical Devices | FDA
https://www.fda.gov/medical-devices


[…] path to a durable, water-resistant finish is sealing all joints and edges with a high-quality waterproofing system designed for engineered wood, then protecting traffic zones with the right coating. If your hallway […]
[…] testing and substrate prep; may involve partial […]