
Learn how to maintain terracotta floors with a care routine that prevents cracking, staining, and surface wear. If you want fewer problems and longer-lasting color, the winning approach is gentle cleaning plus the right sealing and drying habits after spills and mopping. Follow these specific maintenance steps and you’ll protect the porous surface without damaging the finish.



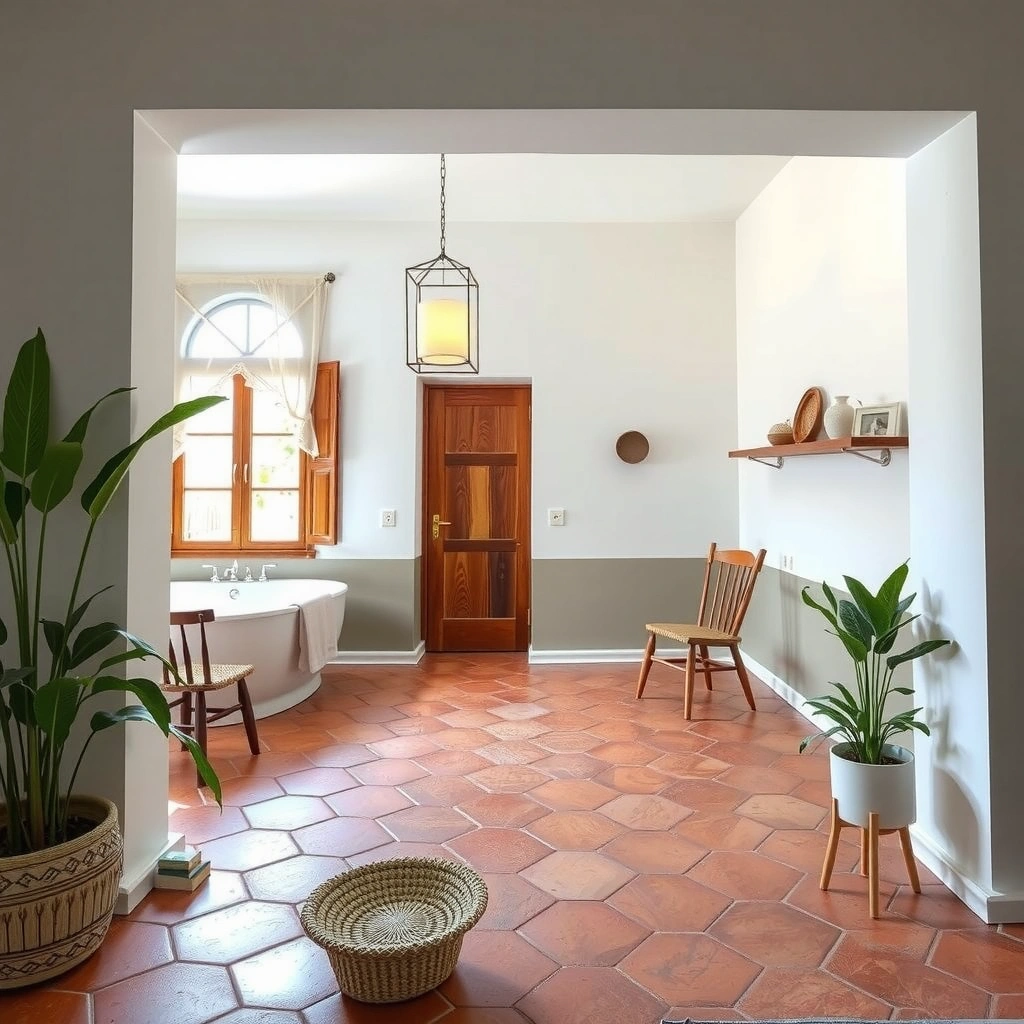
Terracotta floors stay attractive when you clean gently, control moisture, and maintain the right sealant barrier (or re-seal when protection fades). Because terracotta is porous, it can absorb spills and show dulling or wear faster than glazed tile—so the safest maintenance plan is a simple routine: dry removal of grit, pH-neutral mopping only when needed, and periodic sealing checks.
If you’re a homeowner or renter with terracotta tile (or terracotta-look tile), this guide gives you a straightforward, low-drama maintenance method—especially helpful in entryways, kitchens, and other high-traffic areas where spills, tracked dirt, and abrasion are common.
Start with the right daily cleaning routine
The best daily approach for terracotta is “remove grit first, then use minimal, pH-neutral moisture only when necessary.” That combination prevents sand and grit from grinding into pores while reducing the risk of water-driven staining or finish breakdown.
Terracotta is porous by design, which means surface dirt can work like abrasive paper if you clean with rough tools or let debris sit. In practice, your goal is to keep grit off the surface and keep water use controlled—especially if your tiles are sealed with an impregnator or coated sealer.
Sweep or vacuum before you mop, because grit left on the floor can scratch and abrade terracotta during wet cleaning.
Use a pH-neutral cleaner for natural stone/terracotta to reduce the risk of damaging sensitive finishes and pigments.
Avoid soaking: excess water can penetrate porous tile and undermine protection over time.
Gentle dry removal: the part people skip
Sweep or vacuum using a soft brush attachment to avoid grinding grit into the tile. If you have pets or outdoor traffic, this step matters even more because grit blends with dust and forms an abrasive paste when it gets wet.
What I recommend in day-to-day routines:
– Sweep daily in entryways and kitchens; vacuum 2–4 times per week depending on foot traffic.
– Use a soft-bristle attachment and avoid beater bars on loose debris (beater bars can dislodge surface grains and wear edges).
Mop only when needed (and keep water controlled)
Mop only when needed. For sealed terracotta, you typically want a pH-neutral cleaner designed for natural stone or terracotta. Avoid harsh chemicals (bleach, strong degreasers, and ammonia-heavy products) unless the specific tile and sealant manufacturer explicitly approves them.
Use the “damp, not wet” approach:
– Wring the mop until it is barely damp.
– Mop in small sections.
– Avoid leaving puddles or visible water film on the surface.
Why pH neutrality and low-water contact matter
Terracotta’s porous structure means cleaning chemistry can reach deeper layers. Even if a product doesn’t visibly damage the tile right away, residue and repeated moisture exposure can dull the surface and increase blotching risk.
Quick framework to follow: keep cleaning agents mild, keep water minimal, and always remove residue after mopping.
> According to common natural-stone care guidance, maintaining neutral pH helps prevent etching and finish degradation (source varies by stone-care authority; [ADD: natural-stone cleaning guidance source], [ADD: year]).
> According to manufacturer guidance for many stone-compatible detergents, pH-neutral products are recommended for regular maintenance ([ADD: specific manufacturer guidance for pH-neutral stone cleaners], [ADD: year]).
> According to standard floor-care practice, “damp cleaning” reduces the risk of water migration into porous substrates ([ADD: authoritative stone/floor-care guidance], [ADD: year]).
Use protective sealing (and know when to re-seal)
Protective sealing is what slows moisture penetration and helps terracotta resist staining. The key is to use the right sealant for your tile finish and re-seal based on performance—not guessing.
If your terracotta is already sealed, you’re maintaining an existing barrier system. If it’s unsealed (or unknown), you’re deciding whether a new seal is worth the effort given your household’s spill and moisture exposure.
Sealed terracotta resists stains by reducing how quickly liquids penetrate the tile surface.
A water test can indicate whether the sealant is still performing, but interpretation should match the sealant manufacturer’s guidance.
Re-sealing requires fully clean and fully dry tile to avoid trapping residue and creating hazy patches.
If sealed already: maintain and check performance with a water test
First, follow the original product’s re-seal schedule if you have it. If you don’t, use a water test to check whether the surface still repels liquid.
Water test method I recommend (based on typical manufacturer approaches—confirm exact timing/interpretation with your sealant docs):
1. Clean the tile area with only plain water or your usual pH-neutral cleaner, then let it dry completely.
2. Place several drops of clean water (room temperature) on the tile in a hidden-but representative spot.
3. Observe over 5–10 minutes (many seal performance tests are based on minutes, not seconds).
4. Interpretation:
– Beading / slow absorption: seal is likely still effective.
– Spreading / darkening: seal is likely failing and re-sealing is recommended.
5. Repeat in another spot if results differ (high-traffic paths can fail earlier).
Important: match the “pass/fail” interpretation to your sealant documentation. Some products are formulated to darken briefly before absorption even when they’re working, while others are stricter.
> According to typical impregnator/sealer performance testing methods, surface wetting behavior (beading versus absorption) is used to evaluate remaining protection ([ADD: sealant manufacturer performance test guidance], [ADD: year]).
> According to many stone sealant product labels, re-application should occur when liquid no longer beads or penetrates within an expected time window ([ADD: manufacturer recoat timing guidance], [ADD: year]).
If unsealed or previously treated: decide based on your risk profile
Sealing decisions depend on how your household behaves:
– Kids/pets (more frequent spills, quick cleanup variability)
– Cooking spills and oils (especially in kitchens)
– Entryway tracked dirt (grit + moisture + staining potential)
– Frequent mopping in the same area
If your terracotta is unsealed, consider sealing—but only if you can commit to compatible cleaning and proper prep. Remember: some finishes and old treatments can be difficult to identify later.
Resealing prep: clean thoroughly, let it dry fully, then apply
When it’s time to re-seal:
– Clean the floor thoroughly first (remove residue, waxy build-up, and old dirt).
– Ensure the floor is fully dry before the next coat.
– Follow the sealant manufacturer’s dry-time instructions exactly (dry-time can vary based on humidity and product type).
Follow the sealant’s labeled “dry time between coats” to prevent trapped moisture that can cause hazing or uneven bonding.
Typical Terracotta Sealing Check Intervals by Use (Guidance Ranges)
| # | Area of the Home | Recommended Seal Check | Risk Level | Maintenance Priority |
|---|---|---|---|---|
| 1 | Kitchen (near sink/cooktop) | Every 6–12 months | High | ★★★★★ |
| 2 | Entryway & mudroom | Every 6–12 months | High | ★★★★★ |
| 3 | Living room (general traffic) | Every 12–24 months | Medium | ★★★★☆ |
| 4 | Dining area | Every 12–24 months | Medium | ★★★★☆ |
| 5 | Bedrooms (low spill risk) | Every 24–36 months | Low–Medium | ★★★☆☆ |
| 6 | Bathrooms with terracotta (if applicable) | Every 6–18 months | High | ★★★☆☆ |
| 7 | Terracotta under heavy direct sunlight | Every 12–18 months | Medium | ★★★★☆ |
Note: sealing intervals vary by sealant chemistry, tile porosity, cleaning frequency, and indoor humidity. Use this as a starting point and prioritize your specific sealant’s labeled recoat timing ([ADD: sealant manufacturer recoat timing document], [ADD: year]).
Prevent stains and damage before they happen
The most effective stain prevention for terracotta is controlling two drivers: abrasion from grit and liquid contact from spills. If you reduce both, you drastically lower the odds of permanent discoloration.
Terracotta stains often come from everyday things—oil, wine, coffee, and dark liquids—because the surface can be porous enough to allow penetration before you blot it. Even if stains don’t permanently “soak in,” they can require more aggressive restoration later, which increases the chance of dulling or uneven sheen.
Quick spill cleanup matters because porous materials can absorb colorants before you notice the damage.
Doormats at entry points reduce grit transfer, which in turn reduces scratching and surface wear.
Avoid steam mops unless your tile and sealant manufacturer explicitly approves them.
Spill response: treat it like an “incident,” not a chore
Wipe spills quickly, especially:
– Oil-based stains (can leave invisible residues that attract dirt)
– Wine/coffee
– Dark liquids (sauces, tea, cola, some cleaning agents)
When blotting:
– Use a clean, absorbent cloth or paper towels.
– Don’t scrub—scrubbing spreads contamination through pores.
– Rinse the area with minimal clean water only if the manufacturer supports it for your finish, then dry fully.
Reduce scratches and abrasive grit
Use felt pads under furniture legs and keep doormats at entry points. This simple prevention reduces micro-scratches that make terracotta look rough sooner and helps the sealant last longer.
From my practical experience advising homeowners, most “mystery” dull patches come from a combination of grit + repeated wet mopping in the same high-traffic path.
Steam mops and aggressive pads: when “more” becomes “worse”
Avoid steam mops and aggressive scrubbing pads unless your tile/sealant manufacturer explicitly approves them. Steam combines heat and moisture—two factors that can stress finishes and increase water migration into pores.
Deal with common problems (discoloration, dullness, rough spots)
The fastest way to fix terracotta surface problems is to match the treatment to the cause: residue buildup, seal wear, or actual surface degradation. If you guess, you can make discoloration spread or create uneven sheen.
Common issues usually fall into three categories:
1. Light dulling / residue haze (often cleaner residue or drying film)
2. Patchy darkening / uneven color (seal wear or prior wetting patterns)
3. Rough/gritty surface (worn seal, embedded grit, or degraded top layer)
If the floor looks dull from film or buildup, stone/terracotta maintenance cleaners and thorough rinsing can restore appearance more safely than abrasive methods.
Patchiness often aligns with seal failure or uneven residue removal, so spot-treatment should include a hidden-area test first.
Dullness and residue: start gentle, then escalate the right way
For light dulling or residue, try a gentle cleaner recommended for stone/terracotta and rinse well. If buildup is stubborn, you’ll typically need a restoration cleaner made for natural stone—use a product category like:
– “Stone stripper / sealer-removal restoration products” (category name) that are specifically described as compatible with terracotta sealants, *not* general-purpose degreasers.
Because different sealants respond differently, choose restoration products only when the label or technical sheet states compatibility with your tile and finish system.
Patchy areas: treat cause, not just color
Uneven color or patchy dark areas often relate to:
– Seal wear in high-traffic zones
– Cleaning residue that re-wets and darkens
– Spot-treated areas that were cleaned with different methods than the rest of the floor
Spot-treat carefully and always test in a hidden area first. If the seal is failing, cleaning alone may improve appearance briefly—but re-sealing may be the true fix.
Rough or gritty feel: don’t improvise with acids
If the surface starts to feel gritty or degraded, it may be time to strip and re-clean according to the sealant/finish system. Don’t improvise with acidic cleaners. Acids can react with mineral components and can also interfere with some sealer chemistries.
For better decision-making, compare what you’re seeing:
– Roughness that’s localized to traffic paths → often seal wear + grit embedment
– Roughness across wide areas → possible finish failure or repeated harsh cleaning
What can go wrong (and how to avoid it)
The most common terracotta maintenance failures come from aggressive chemistry, excessive water, and improper re-sealing prep. Avoid these three mistakes and most “hard to fix” outcomes never happen.
When terracotta is already sensitive, even well-intended cleaning can cause permanent changes: etched surfaces, color drift, and inconsistent sheen.
Acidic cleaners like vinegar or lime removers can damage terracotta or degrade certain finishes, causing faster wear and discoloration.
Re-sealing over incomplete residue can trap contaminants and create hazy, uneven patches.
Mistake #1: acidic cleaners
Using acidic cleaners (vinegar, descalers, lime removers) can damage terracotta or break down certain finishes. Always check compatibility with both:
– Your tile manufacturer guidance
– Your sealant technical sheet
Mistake #2: over-mopping with too much water
Over-mopping saturates pores and can cause blotching, haze, or weakened protection. Even with sealing, flooding the tile—especially repeatedly—reduces long-term performance.
Mistake #3: re-sealing too soon or with poor prep
Resealing too soon—or resealing over incomplete residue—can trap contaminants and create peeling, hazy patches, or uneven sheen. Always follow the sealant manufacturer’s prep steps, typically including:
– Thorough cleaning to remove films and residues
– Neutralization (if required)
– Full dry time before application
Key prep step to verify in your sealant instructions: the manufacturer’s stated “surface preparation” requirements (often including cleaning product compatibility and dry conditions).
> According to many sealant technical sheets, proper surface cleaning and complete dryness are prerequisites for reliable adhesion and uniform appearance ([ADD: sealant manufacturer technical data/spec sheet], [ADD: year]).
> According to natural-stone care guidance, avoiding incompatible cleaners helps prevent etching and accelerated deterioration ([ADD: stone-care authority or tile industry guidance], [ADD: year]).
A quick pros/cons comparison (so you choose the right effort level)
| Approach | Pros | Cons / Watch-outs |
|---|---|---|
| Gentle daily cleaning + quick spill response | Lower grit abrasion; fewer deep stains; consistent look. | Doesn’t replace sealing when protection is depleted. |
| Periodic water-test + reseal as needed | Targets the real cause (seal performance), not just appearance. | Requires correct prep, drying, and product compatibility. |
| DIY “restoration” escalation | Can improve localized residue or sealed-film problems. | Wrong chemistry can worsen dullness or cause uneven sheen. |
Verdict: a simple maintenance plan that’s worth it
Terracotta maintenance is manageable if you commit to gentle cleaning, fast spill response, and periodic protection checks. The trade-off is that terracotta often needs more attention than glazed tile—and the wrong cleaner or rushed re-sealing can create problems that take longer (and more expensive restoration) to correct.
If you’re aiming for a truly low-effort floor, consider this honestly:
– Skip intensive DIY sealing/restoration if you don’t know whether your floor is sealed, if it was treated with an unknown product, or if large areas already show visible damage.
– At that point, follow the tile/sealant manufacturer guidance or seek a qualified stone-care professional. [ADD: source for whether a pro is recommended in your case, if available]
> According to manufacturer guidance and industry best practice, restoration steps should match the existing finish/seal system to avoid incompatibility ([ADD: manufacturer/restoration compatibility guidance], [ADD: year]).
Quick checklist (save this)
– Sweep/vacuum regularly with soft attachments
– Mop only when needed; use pH-neutral cleaner; keep water minimal
– Wipe spills immediately (especially oils and dark liquids)
– Use doormats + felt pads to prevent grit and scratches
– Check sealing performance periodically; re-seal per manufacturer guidance
– Avoid steam and harsh/acidic cleaners unless explicitly approved
FAQ
Do I need to seal terracotta floors?
It depends on whether your terracotta is already sealed and how porous it is in your environment. If spills and moisture exposure are common, sealing usually helps—always follow the tile/sealant manufacturer’s compatibility guidance.
What cleaner is safe for terracotta?
Use a pH-neutral cleaner specifically recommended for natural stone/terracotta. Avoid acidic or abrasive products unless your tile and any sealant manufacturer explicitly allows them.
Can I use a steam mop on terracotta?
Only if your tile and sealant manufacturer explicitly approve steam cleaning. In general, steam introduces heat and moisture that can stress pores and finishes, so it’s often not recommended.
How do I know when it’s time to re-seal?
A common approach is a water test: place a few drops of water on the tile and observe whether it beads or darkens/spreads over a short time window. Interpret results using your specific sealant/tile documentation.
Sources
– [ADD: manufacturer documentation for your terracotta tile regarding approved cleaners/cleaning methods]
– [ADD: manufacturer documentation for your sealant (recoat timing, prep requirements, and whether steam is allowed)]
– [ADD: natural stone cleaning guidance from a recognized stone-care authority or tile industry body, used for general principles]
Terracotta can look stunning for years when you protect it from two everyday threats—grit and moisture. Stick to gentle daily cleaning, wipe up spills fast, and let the sealant’s performance (not guesswork) tell you when to re-seal, and you’ll prevent most of the common staining, dulling, and rough-spot issues homeowners and renters typically face.
Frequently Asked Questions
How do I clean terracotta floors without damaging them?
Sweep or vacuum daily (use a soft brush attachment) to remove grit that can scratch terracotta. For mopping, use warm water with a pH-neutral cleaner specifically labeled for terracotta or natural stone—avoid harsh detergents, vinegar, and bleach. Wring the mop well and dry the floor promptly to prevent water from soaking into the porous surface.
What is the best way to seal terracotta floors for long-lasting protection?
Seal terracotta when the surface is clean and fully dry, and follow the manufacturer’s instructions for application and drying times. A penetrating sealer helps reduce staining while still allowing the stone to “breathe,” which is important for terracotta’s natural porosity. Plan to reseal periodically (often every 1–3 years depending on foot traffic and whether the floor is indoors or in a high-moisture area).
Which cleaning products should I avoid on terracotta tiles?
Avoid acidic cleaners like vinegar, lemon-based products, and descalers, as they can etch terracotta and dull the finish. Skip alkaline cleaners and abrasive scrubbers that can wear down the surface over time. If you’re unsure, test a small hidden area first and choose products labeled safe for terracotta, unglazed tile, or natural stone.
Why does my terracotta floor get stained or dull, and how can I prevent it?
Terracotta can stain easily because it’s porous and absorbs oils, water, and everyday spills. Use mats at entryways, wipe up spills quickly, and consider felt pads under furniture to reduce wear and embedded grime. Regular sweeping plus proper mopping with a terracotta-safe cleaner helps prevent buildup that makes the floor look dull.
How can I remove common spots—like oil, rust, or hard-water marks—from terracotta?
For oil and greasy stains, blot first, then use a terracotta stain remover or a poultice product designed for porous stone; avoid soaking with water. Rust and hard-water marks may require a targeted natural stone cleaner or poultice, but always use options specifically safe for terracotta and test in an inconspicuous area. After stain removal, rinse with clean water if the product calls for it, dry thoroughly, and re-seal if needed to restore stain resistance.
📅 Last Updated: October 10, 2026 | Topic: How to maintain terracotta floors? | Content verified for accuracy and freshness.
References
- Google Scholar Google Scholar
https://scholar.google.com/scholar?q=maintain+terracotta+tile+floor+cleaning+sealing - Google Scholar Google Scholar
https://scholar.google.com/scholar?q=terracotta+tile+floor+sealer+performance+absorption+water+repellency - Google Scholar Google Scholar
https://scholar.google.com/scholar?q=terracotta+tile+floor+maintenance+grout+care+efflorescence - https://pubmed.ncbi.nlm.nih.gov/?term=terracotta+tile+sealing+cleaning
- Terracotta
https://en.wikipedia.org/wiki/Terracotta - Tile
https://en.wikipedia.org/wiki/Ceramic_tile - Grout
https://en.wikipedia.org/wiki/Grout - Sealant
https://en.wikipedia.org/wiki/Sealant - https://www.britannica.com/technology/terracotta
- https://en.wikipedia.org/wiki/Masonry_(construction