
Learn how to remove scratches from limestone floors with the fastest, safest method that won’t dull the surface—starting with whether your scratch is superficial or etched into the stone. If you catch it early, simple limestone-safe polishing and filler techniques can make the damage nearly disappear. Deeper scratches may require resurfacing and professional-level honing, and this guide tells you exactly which approach to use.


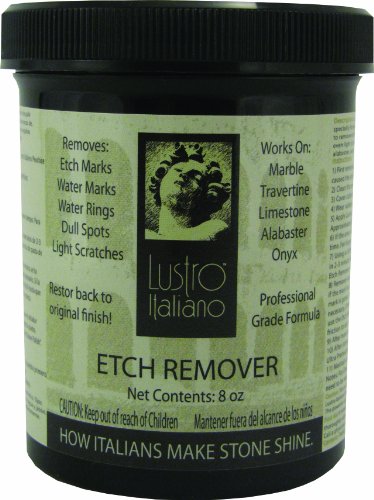

If your limestone floor is scratched, the safest approach is to start with the gentlest method (cleaning + light honing) and only move up to deeper repairs if the scratch still shows. For many surface scuffs, a properly selected stone polish or fine honing powder can reduce visibility without stripping the finish. If the scratch is gouged or etched, you’ll likely need a more involved repair (often leveling/filling followed by re-polishing).
This guide is for homeowners and facility managers dealing with cosmetic scratches on limestone, including honed or polished surfaces. It’s especially useful if you want to avoid making the floor worse with harsh abrasives or over-buffing.
Know your limestone finish and scratch type
Start by matching the repair method to the limestone finish (honed, brushed, or polished) and to how deep the damage goes. The “same scratch” can look different depending on whether you have an even matte surface or a reflective top polish.
Limestone Scratch-Care Abrasive Stages (Typical Grit Progression)
| # | Stage | Common Grit/Grade | Surface Aggressiveness | Best For |
|---|---|---|---|---|
| 1 | pH-neutral cleaning (no abrasion) | — | ★☆☆☆☆ | Dust/grit removal before any repair |
| 2 | Microcrystalline stone polish (light) | ~3000–5000 grade* | ★★☆☆☆ | Surface scuffs on polished finishes |
| 3 | Finishing hone powder (matte-safe) | ~8000 grade* | ★★★☆☆ | Honed “burnish” to blend scuffs |
| 4 | Fine diamond honing discs | ~1500 grit* | ★★★★☆ | Visible scratches on honed stone |
| 5 | Leveling hone (very light passes) | ~800–1200 grit* | ★★★★★ | Low “ridges” that catch a nail |
| 6 | Stone repair filler/patch (fill first) | — | ★★★☆☆ | Cracks/gouges needing leveling |
| 7 | Final match polish/seal (as appropriate) | — | ★★☆☆☆ | Uniform appearance after repair |
Grit/grade varies by manufacturer system (powder vs. disc). Always follow the specific product’s stated limestone/stone compatibility and application steps.
Limestone is a carbonate stone (primarily calcium carbonate), so anything acidic can change how the surface reflects and can deepen cosmetic damage. Source: USGS (carbonate minerals overview)
The Mohs hardness of calcite (limestone’s major mineral) is 3, which is why even “small” abrasives can create visible scratch halos if you polish aggressively. Source: USGS Mineral Hardness Scale
A scratch that “catches” a fingernail typically indicates a raised ridge or gouge, which often requires leveling or patching rather than simple polishing.
– Identify whether the limestone is honed/matte, brushed, or polished, since the “right” repair changes with the finish.
– Determine whether the damage is a superficial surface scratch or a deeper groove/etch that catches a fingernail.
– Do a quick water test: if water “darkens” the scratch area differently than the surrounding stone, you’re likely dealing with a texture/porosity change—not just surface dirt.
Clean first (before you attempt any scratch removal)
Start with cleaning because grit turns every polishing step into a grinding step. Remove debris first, then evaluate the scratch under normal lighting before you choose abrasives.
Most stone-care guidance emphasizes starting with pH-neutral cleaners to avoid additional dulling/etching on carbonate stones. [ADD: source for pH-neutral limestone cleaning guidance from a stone-care association or manufacturer]
Residue in pores and seams can “sparkle” under polish and make a repair look worse, which is why thorough rinsing and full drying matter before honing.
Vinegar and other acids can increase etching on limestone by reacting with carbonate minerals. [ADD: source for acid etching mechanism on calcite/carbonate stones]
– Remove grit with a pH-neutral stone cleaner and soft microfiber/damp mop—grit is what causes visible scratch trails during polishing.
– Rinse with clean water (per the cleaner’s instructions) and let the stone fully dry before you buff or hone.
– Avoid acidic cleaners (like vinegar) because limestone is carbonate-based and acids can increase etching and dullness.
What to watch in commercial settings
Facilities often have ongoing foot traffic and periodic strip-and-wax cycles nearby (even if the limestone isn’t being stripped). If you’re sharing space with other flooring systems, protect the limestone from overspray, tracking dust, and mop head cross-contamination by using dedicated tools and color-coded pads.
Light scratch reduction: honing and polishing steps
Start with the lowest-aggression method and move up only if the scratch remains obvious after inspection. For many limestone floors, a correct polish/hone blend can reduce visibility without stripping the finish or creating a shiny patch.
For honed limestone, the goal is usually to blend the surface reflection—not to “make it glossy”—because honed finishes rely on a matte microtexture.
Fine honing compounds for natural stone are designed to work by controlled abrasion; stopping frequently is what prevents “spot mismatch” in sheen.
A repair is only as consistent as your cleaning and drying—wet residue and trapped grit can create micro-scratches that look like new damage.
– Start with the lowest-aggression method: use a limestone-safe polishing compound/powder designed for natural stone, applied with a soft pad or microfiber in small sections.
– Work gradually: build only enough abrasion to even out the scratch visibility, then stop and inspect under normal lighting.
– Finish by applying a stone-specific polish/sealer if your floor’s maintenance routine includes it (follow product instructions; don’t assume every limestone is meant to be sealed).
Quick comparison: honing vs polishing (when the scratch is shallow)
When the scratch is superficial (you don’t reliably feel a ridge), you can often choose between “refining” and “blending.”
| Method | Best suited for | Main risk |
|---|---|---|
| Light honing | Honed/matte floors needing texture blending | Turning a honed area uneven if you over-work one spot |
| Stone polishing | Polished floors with surface scuffs | Creating a “shiny halo” around the repair zone |
Deeper scratches or etching: leveling, filling, and re-finish
Start by assuming that gouges and true etching are not “polish-away” problems. If the surface is lowered or chemically changed, you need leveling/filling and then a matched re-finish.
When a scratch is a gouge (a groove) rather than a superficial mark, leveling is usually required so the filler sits flush and doesn’t create a ridge.
Natural stone repair systems often require multiple small applications rather than one heavy fill, improving color/texture consistency after re-honing.
If the damage is an acid etch, abrasion alone may not restore uniform appearance because the top layer’s chemistry and sheen can remain altered. [ADD: authoritative stone-care guidance on acid etching]
– If the scratch is gouged or edges are raised, you may need careful leveling (fine honing) before any filling—otherwise the filler can look patchy.
– Use a repair system intended for natural stone (filler/patch) that matches limestone color/veining; plan on multiple small applications rather than one heavy layer.
– After the repair cures, re-polish or re-hone to match the existing finish, then clean thoroughly to remove residue from pores and seams.
A practical decision rule for depth
If the scratch:
– Does not catch a fingernail → start with honing/polishing blending.
– Catches a fingernail → treat as gouge/raised damage; consider leveling and filler.
– Looks “different” only after wetting → you may be seeing porosity/texture change, which can require more than polishing.
What can go wrong (and how to avoid it)
Start by recognizing that the most common DIY failures are finish mismatch and spot residue, not “wrong effort.” When a repair makes an area more noticeable, it’s usually because abrasion level, sheen, or cleaning wasn’t consistent.
Over-aggressive polishing on honed stone can produce a visible sheen contrast, creating a “spot” that draws the eye more than the original scratch.
Trapped grit under pads causes fresh micro-scratches; cleaning fully and using clean, dedicated pads reduces this risk substantially.
Acid etching from cleaners can persist even after abrasion because the surface’s carbonate equilibrium and reflectivity may not return to baseline. [ADD: source for acid etching repair approach]
– Using the wrong abrasive can leave a “shiny spot” on honed floors or create a halo around the repair area—test in an inconspicuous area first.
– Over-polishing a honed finish can turn it uneven (bigger shine differences), making the scratch less visible but creating a new visual problem.
– Skipping cleaning can trap dust/grit under polishing pads, creating additional micro-scratches.
– If the scratch is actually an acid etch (often from cleaners), abrasive polishing alone may not restore uniform appearance—surface chemistry may need a different approach. [ADD: source for how limestone etching is typically addressed, e.g., manufacturer or stone-care association guidance.]
Verdict: what to do first (and when to stop)
Start with gentle cleaning and light honing/polishing if the scratch is superficial and the finish is honed or polished. Stop after small passes and re-check often—this is the difference between blending and creating a new high-contrast patch.
For most cosmetic limestone scuffs, a controlled polishing/honing approach is preferred because it minimizes depth changes and finish mismatch.
If the scratch is gouged or you suspect chemical etching, DIY abrasive polishing can worsen inconsistency by removing too much of the surrounding surface.
Because calcite (limestone’s main mineral) is relatively soft (Mohs 3), avoiding aggressive abrasion reduces the chance of compounding the damage. Source: USGS Mineral Hardness Scale
Skip DIY and consider a stone restoration pro if:
– You can feel the scratch with a fingernail (deep groove).
– The floor is large/valued and appearance consistency is critical.
– The damage likely involves etching from harsh chemicals and you can’t identify the cause.
Scan-friendly checklist: removing limestone scratches
– [ ] Confirm finish (honed vs polished) and scratch depth (surface vs gouge).
– [ ] Clean with a pH-neutral stone cleaner; rinse and dry fully.
– [ ] Test any abrasive/polish in a hidden spot first.
– [ ] Use the gentlest honing/polishing method; inspect often.
– [ ] For deep damage, level carefully, then use a stone repair filler system.
– [ ] Re-polish/re-hone to match the existing finish.
– [ ] Clean residue; only seal if your maintenance routine/product instructions support it.
FAQ
Can I remove scratches from limestone with vinegar or acidic cleaners?
No—vinegar and other acids can etch limestone and worsen dullness. Stick to pH-neutral stone cleaners and limestone-specific care products. [ADD: source for limestone sensitivity to acids from a manufacturer or stone-care authority.]
Will polishing completely erase every scratch?
Not always. Superficial scuffs can often be reduced, but gouges and deeper etches may require leveling and/or a repair filler before the surface looks uniform again.
What’s better: sanding/honing or a polishing compound?
For light scratches, a polishing compound (or very fine honing) often works. For deeper grooves, honing/leveling first may be necessary so the filler and final finish sit flush.
Should I seal my limestone after scratch repair?
It depends on your floor’s current maintenance plan and the products used. Some limestone finishes benefit from sealing, but sealing can also affect how future polishing and stain resistance behave—follow the sealer and floor-care guidance. [ADD: source for sealing guidance relevant to your limestone finish/type.]
Sources
– [ADD: Manufacturer/specification for the specific pH-neutral stone cleaner you plan to use—confirm it’s suitable for limestone.]
– [ADD: Manufacturer/specification for limestone repair fillers/polishing compounds—confirm application method and finish compatibility.]
– USGS, Mineral Hardness Scale (calcite hardness and comparison). [ADD: exact USGS page/reference if you have it on your site.]
– [ADD: Authoritative stone-care guidance on acid etching of carbonate stones like limestone, e.g., from a reputable natural stone association or stone-care authority.]
In the end, removing scratches from limestone is mostly about restraint: clean thoroughly, blend carefully with the least aggressive honing or polish that matches your finish, and only move to leveling/filling when the damage is truly deep. When you’re unsure—especially with potential acid etching—professional restoration is the safer choice for keeping sheen consistent across the whole floor.
Frequently Asked Questions
What’s the safest way to remove light scratches from limestone floors?
Start by cleaning the area thoroughly with a pH-neutral stone cleaner so you can see the scratch clearly and avoid trapping grit. For light surface scratches, try a limestone polishing compound or a fine stone scratch remover, used gently with a soft pad in small sections. After polishing, seal the floor with a breathable limestone sealer to help reduce future damage and blend the repaired area.
How do I remove deeper scratches from limestone without damaging the stone?
Deeper scratches may be filled or leveled using a limestone-specific filler or epoxy-based repair kit designed for natural stone, then sand and polish to match the surrounding finish. Use progressively finer diamond polishing pads (or equivalent stone polishing steps) rather than aggressive grinding, which can leave halos. Always follow up with honing/polishing and then re-seal the repaired area to restore water resistance and sheen.
Why do limestone scratches look darker after cleaning, and how can I fix the appearance?
Limestone scratches often appear darker because the surface is more porous at the damaged spots, holding cleaner and showing contrast as the area dries. To improve the look, clean and fully dry the stone, then lightly polish the scratch using a dedicated limestone scratch remover to blend the surface. If the scratch is still visibly different, consider professional repair or a color-matching stone poultice/patching system before sealing.
Which products work best for scratch removal on limestone floors?
Look for products specifically labeled for “natural stone” and “limestone,” such as pH-neutral cleaners, limestone polishing powders/compounds, and stone scratch removers with fine abrasives. For filling gouges, choose a limestone repair filler or epoxy stone patch formulated for calcitic stones, and avoid generic drywall spackle or harsh adhesives that can stain. Before applying anything, test in a hidden area to ensure the product won’t alter color or finish.
Best practices to prevent scratches on limestone floors while maintaining the shine?
Use felt or rubber pads under furniture and wipe up grit promptly because sand and dust act like sandpaper on limestone surfaces. Sweep or vacuum with a soft brush attachment, and use a stone-safe mop and pH-neutral cleaner to avoid dulling and making micro-scratches more noticeable. Reapply a quality penetrating sealer as recommended for your limestone type and traffic level to help protect against wear and staining that can reveal scratches over time.
📅 Last Updated: October 09, 2026 | Topic: How to remove scratches from limestone floors? | Content verified for accuracy and freshness.
References
- Limestone
https://en.wikipedia.org/wiki/Limestone - Google Scholar Google Scholar
https://scholar.google.com/scholar?q=limestone+floor+scratch+removal+polishing - Google Scholar Google Scholar
https://scholar.google.com/scholar?q=natural+stone+scratch+repair+abrasive+polishing - Google Scholar Google Scholar
https://scholar.google.com/scholar?q=conservation+cleaning+stone+surface+scratch+repair - https://www.sciencedirect.com/search?qs=limestone+polishing+scratch+removal
- https://www.sciencedirect.com/search?qs=natural+stone+abrasive+polishing+scratch+repair
- Conservation Institute | Getty
https://www.getty.edu/conservation/ - Historic Preservation (U.S. National Park Service)
https://www.nps.gov/subjects/historicpreservation/index.htm - Canadian Conservation Institute – Canada.ca
https://www.canada.ca/en/conservation-institute.html - Google Scholar Google Scholar
https://scholar.google.com/scholar?q=How+to+remove+scratches+from+limestone+floors?