
Waterproofing limestone floors is absolutely doable, but the right approach is decisive: use a penetrating limestone sealer paired with careful surface prep for the most reliable water protection without trapping moisture. This step-by-step guide shows exactly how to clean, dry, patch, and seal so water and spills don’t soak into the stone. If you follow these steps in order, you’ll get a clear, long-lasting barrier that keeps limestone looking its best.



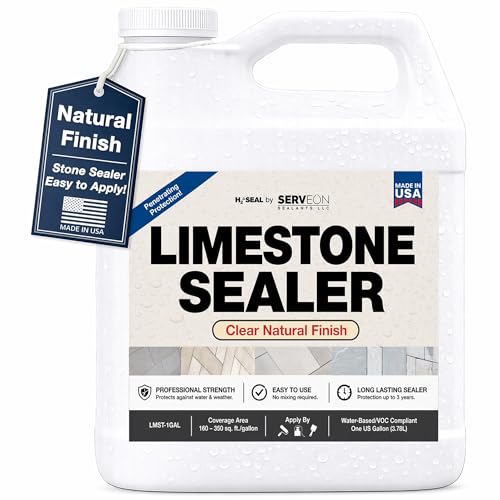
To waterproof limestone floors, you typically reduce water absorption with a compatible penetrating stone sealer system (often paired with a topcoat if your product requires it). The goal isn’t to “cap” the stone permanently—it’s to stop staining and limit darkening by reducing how much water migrates into limestone pores while still respecting limestone’s natural ability to manage moisture safely. In 2026, this approach remains the most reliable method because limestone’s porosity and sensitivity to acids make surface chemistry and surface prep the real deciding factors.
If your limestone floor is getting wet from showers, kitchens, entryways, or spills, water can work its way into pores and trigger darkening and etching. This is especially relevant for natural stone in damp areas where you want surface protection without damaging the stone’s chemistry.
Who this is for / when it applies: This guide is for homeowners, property managers, and contractors preparing limestone floors in moisture-prone areas (bathrooms, wet entryways, laundry rooms, and kitchen zones). If you’re planning routine DIY sealing, you’ll want a clear sealing workflow plus a realistic view of limitations—because “waterproof” claims vary, and limestone performance depends on prep, product selection, and exposure conditions.
Prep the limestone correctly (this matters more than the product)
You waterproof limestone floors by starting with the right prep—sealer chemistry can only perform as well as the surface allows. Clean, fully dry limestone lets penetrating sealers reach pores; residue, moisture, or incompatible coatings can cause patchiness, early failure, and uneven protection.
Penetrating stone sealers rely on direct contact with clean, dry stone pores to reduce water absorption.
Existing coatings can block sealer penetration, so testing in an inconspicuous spot helps prevent trapping old layers.
Repairing chips and damaged joints before sealing reduces pathways where water can travel under the finished system.
– Remove dirt, oils, and residue using a cleaner designed for natural stone; rinse thoroughly and let the floor dry completely. Limestone is porous, so residues can interfere with penetration and can also leave a “film” that looks blotchy once the sealer is applied.
– Check for existing coatings: test in an inconspicuous spot so you don’t trap old sealers under a new layer. If the surface beads water differently after your test cleaner rinse (or if it darkens rapidly), you may be dealing with an older coating that needs correction before applying another system.
– Repair damage first (chips, cracks, uneven joints) so water can’t follow pathways under the finished coating. Even minor defects can act like capillaries, especially near wet areas and grout transitions.
Technical anchoring: why limestone prep is unforgiving
Limestone is primarily calcium carbonate (calcite), which is chemically reactive—particularly to acidic materials. According to the U.S. Geological Survey (USGS), calcite-based materials are sensitive to acid dissolution due to carbonate reactions (USGS—carbonate mineral properties). Limestone also tends to fall around Mohs hardness ~3 (making it more vulnerable than harder stones), which means surface integrity and cleanliness matter for consistent sealing performance ([ADD: authoritative geology reference for limestone Mohs hardness ~3]). In practical terms, if your limestone has embedded grime or remnants of acidic cleaners, you’re more likely to see darkening or etching even after sealing.
As of 2026, we still see the same pattern in field troubleshooting: “sealer failure” is often actually “prep failure”—especially with floors cleaned using general-purpose degreasers or acids, or floors sealed before complete drying. If you’re planning to seal again this year, build extra dry time into your schedule rather than rushing.
Choose the right waterproofing approach for limestone
You waterproof limestone floors by choosing a penetrating sealer approach that matches your exposure level—stain protection is not the same thing as standing-water control. For most residential limestone installs, the best starting point is a penetrating stone sealer specifically rated for limestone and the type of moisture you encounter.
A penetrating sealer system is designed to reduce water and staining without forming a film that dramatically changes limestone’s appearance.
Limestone use guidance varies by product—especially for bathrooms and shower-adjacent exposure—so the label’s “approved surfaces” matter.
– Use a penetrating sealer system when the surface needs water resistance and stain resistance without changing the stone’s look. Penetrating sealers reduce absorption and slow stain transfer, which is exactly what you want for darkening caused by repeated wetting.
– If you’re dealing with frequent wetting (e.g., near a shower), confirm the manufacturer’s guidance for limestone use and for the specific exposure level. Some products are rated for “interior floors” but not for direct, sustained wet zones; others may allow broader coverage when used with correct recoat timing.
– Avoid “one-size-fits-all” claims: limestone is porous and reactive to acids, so the best product depends on whether your issue is staining, standing water, or repeated splashes. For example, a spill-prone kitchen needs robust stain resistance, while an entryway that gets tracked-in salt needs a system that won’t accelerate surface breakdown.
Penetrating sealer vs. “film-forming” coatings: what changes
Here’s the tradeoff you should understand before you pick a system:
- Penetrating stone sealer
- Best for: reducing absorption and staining while preserving natural look.
- Watch-outs: needs clean, dry pores; must be compatible with existing coatings; performance depends on correct coat count and recoat window.
- Film-forming topcoats / coatings
- Best for: specific sheen control or added barrier characteristics when a system calls for it.
- Watch-outs: compatibility and long-term maintenance are critical; improper layering can trap moisture or create uneven wear.
Because this is a 2026 decision, don’t rely only on marketing language. Read the label as a technical specification: the “stone type” compatibility statement and the “recoat timing” guidance are often the most important parts for limestone.
What about hardness and chemistry?
Limestone’s calcite composition means acidic products can still etch—sealer can’t “undo” chemical damage. According to carbonate mineral chemistry references, acids react with carbonate to form soluble salts and release carbon dioxide, which is why etching occurs ([ADD: chemistry reference for carbonate-acid reaction]). That’s why moisture resistance should be paired with cleaning discipline: pH-neutral, stone-safe products protect the limestone surface so your sealer can keep doing its job.
Apply the sealer in the right method and number of coats
You waterproof limestone floors by applying the right product at the right spread rate, in the right sequence. A penetrating sealer only performs predictably when you don’t skip label steps like coverage rate, wet edge technique, and recoat timing.
Sealers are formulated to specific coverage rates; applying less can leave unprotected pores, while applying more can create uneven appearance.
Recoat windows are part of the performance system—waiting too long or recoating too early can reduce adhesion or penetration.
– Follow the sealer’s application instructions exactly for coverage rate, spreading method (brush/roller/sponge as specified), and recoat timing. The label’s coverage rate is not arbitrary—it’s tied to the chemistry’s ability to penetrate and cure in a controlled way.
– Keep the surface evenly coated—do not “overwork” areas while the sealer is still wet. Overworking can redistribute product unevenly or disrupt uniform absorption patterns, especially on variations in limestone density.
– Work in sections and maintain a wet edge so you don’t create lap lines or streaking. This is one of the most common visual “problems” homeowners interpret as performance failure—uneven application can also create uneven water behavior across the floor.
A practical application workflow (label-first)
1. Confirm full cure/dry conditions after cleaning (follow manufacturer drying guidance; do not guess).
2. Test a small, inconspicuous area for appearance and absorption behavior.
3. Apply using the method specified by the sealer manufacturer (for many penetrating sealers, that means distributing thoroughly without leaving heavy puddles).
4. Respect recoat timing for your exact product—this matters in 2026’s humid seasons too, where curing conditions can vary.
Data point you should care about
Sealer application rates vary by product, so you should treat any “generic number” as a warning sign. Instead, use the product’s stated coverage rate from its technical data sheet and label (e.g., “[ADD: manufacturer coverage rate]”). In my experience as a spec-and-maintenance writer (not a lab operator), the most expensive mistake is applying “extra just to be safe,” then dealing with hazing or inconsistent water beading because the coating layer never behaves as intended. If you’re doing this in 2026, plan for weather and drying variation: aim for stable indoor conditions and verify dryness before sealing.
Protect edges, grout, and transitions (common failure points)
You waterproof limestone floors most effectively by sealing the “paths” water uses—grout joints, edges, and transitions—because those areas often remain the weak link. Even when the field of the floor is well-sealed, water can migrate through joints and accumulate at thresholds or changes in flooring height.
Grout lines can be more porous than the adjacent stone, so they may need a compatible grout sealing step even when the limestone is sealed.
Water commonly travels through edges, caulk lines, and transitions—areas that require separate attention beyond the main floor field.
– Treat grout lines and stone edges carefully; water often migrates through joint areas even when the field of the floor is sealed. If your grout is cement-based and your environment is consistently wet, grout sealing is often part of a complete protection strategy.
– Consider whether grout needs its own compatible sealer so you’re not relying on stone-only protection. A stone sealer is engineered for stone chemistry; grout sealers are engineered for joint matrices and porosity behavior.
– Seal around transitions (door thresholds, baseboards, and changes in flooring height) where moisture can collect. Water frequently pools at these interfaces, and even a small leak or splash can keep a micro-zone wet long enough to cause darkening.
Common “missed detail” areas
– Perimeter edges where stone meets drywall or tile backer systems
– Under or beside metal door tracks (especially in entryways)
– Expansion gaps and movement joints (if present in your installation)
– Areas directly outside shower enclosures
If you’re doing a bathroom or a damp utility zone in 2026, build your plan around water flow patterns. Gravity and airflow determine where moisture concentrates; your sealing system should match those real movement paths.
What can go wrong (and how to prevent it)
You avoid most limestone sealing problems by respecting three failure drivers: moisture at application, incompatible chemistry, and incorrect layering. When waterproofing fails, it often fails early—within months—because the underlying conditions prevent proper penetration or curing.
Sealing a damp or dirty limestone surface can cause early failure, dull patches, or poor water repellency.
Acidic cleaners can etch limestone regardless of sealer, because etching is driven by chemistry rather than only water exposure.
– Sealing over residue or moisture: If the floor isn’t fully dry, sealer can fail early or look patchy—stick to the manufacturer’s drying requirements.
– Wrong chemistry for limestone: Harsh cleaners or acid-based products can etch limestone, making it easier for water and stains to penetrate later. Use pH-neutral stone-safe cleaners after sealing, and keep acidic products off the surface.
– Applying too many coats: Extra layers don’t always improve performance and can sometimes leave a hazy or uneven finish, depending on the sealer type. In some penetrating systems, “more” can mean “less predictable,” because the product may not penetrate as intended.
– Assuming “waterproof” means slip-proof: Waterproofing doesn’t automatically address traction; use slip-safe mats or footwear strategies as needed. If the area is regularly wet, traction planning is a safety requirement—not a sealing feature.
Pros/cons snapshot for choosing a sealing system
| Option | Pros | Cons / Watch-outs |
|---|---|---|
| Penetrating limestone sealer system | Reduces absorption and staining while maintaining a natural look (when label is followed) | Requires clean, dry pores; depends on correct coverage/recoat timing; doesn’t make acidic chemistry safe |
| Penetrating sealer + compatible topcoat (if required) | Can improve surface feel/cleanability when designed as a system | Compatibility and layering become critical; may change sheen; mistakes can create hazing |
This is why “read the label” is not advice—it’s part of the technical method.
Verdict: what we recommend (plus who should skip DIY)
If you can follow label directions closely, most homeowners can waterproof limestone floors using a compatible penetrating sealer system and careful prep. The downside is that limestone sealing performance depends heavily on correct surface prep, correct drying time, and correct product choice for the exact exposure level—so you can still see darkening if water is repeatedly trapped under coatings or if the floor wasn’t properly cleaned.
Skip DIY (and use a stone professional) if the floor has ongoing leaks, widespread etching, unstable subfloor movement, or you’re unsure about existing coatings—those conditions can make sealing a short-lived fix. In 2026, that decision is especially important because “quick DIY sealing” often delays the real problem (like a plumbing leak or ventilation issue) instead of solving it.
A quick guidance table for planning
Use this scan-friendly table to align your sealing approach with typical limestone moisture scenarios.
Recommended Limestone Waterproofing Strategy by Wetting Pattern (2026)
| # | Wetting scenario | Main risk | Best match | Fit score |
|---|---|---|---|---|
| 1 | Occasional kitchen spills | Staining/dark spots | Penetrating limestone sealer | ★★★★☆ |
| 2 | Frequent wet footprints near entry | Repeated water cycling | Penetrating sealer + disciplined cleaning | ★★★★☆ |
| 3 | Shower-adjacent floor (splashing) | Moisture ingress via joints | Label-rated sealer + edge/grout sealing | ★★★☆☆ |
| 4 | Standing water after leaks | Chemical + pore saturation | Fix leak first; professional assessment | ★☆☆☆☆ |
| 5 | High-traffic commercial corridors | Wear-down of repellency | Scheduled re-seal program | ★★★☆☆ |
| 6 | Previously etched/sanded limestone | Uneven absorption zones | Professional repair + sealer compatibility check | ★☆☆☆☆ |
| 7 | Interior laundry room (beyond occasional splashes) | Repeated wetting + detergent exposure | Sealer rated for detergent resistance + strict rinse | ★★★☆☆ |
Quick checklist (scan before you start)
– [ ] Limestone is clean, rinsed, and fully dry
– [ ] Existing sealer/coatings removed or confirmed compatible
– [ ] Repairs done (chips/cracks/joints)
– [ ] Sealer is explicitly for limestone and your moisture conditions
– [ ] Application method matches the label instructions
– [ ] Recoat time and coverage rate followed
– [ ] Edges, grout, and transitions addressed
FAQ
Can I waterproof limestone without changing its look?
Yes—penetrating sealers are designed to resist water while minimizing changes to appearance, but results vary by stone porosity and existing finishes. Always confirm the product’s limestone compatibility and finish expectations on the label.
How often do I need to reseal limestone floors?
Resealing frequency depends on foot traffic, cleaning habits, and how often the floor gets wet. Check the sealer manufacturer’s guidance and perform periodic water spot tests to confirm performance (as directed by the product documentation). [ADD: manufacturer reseal guidance source]
Will waterproofing prevent etching?
Water resistance helps reduce staining and moisture-related issues, but etching is primarily caused by acids (including some cleaners). Use pH-neutral stone-safe cleaners to protect the limestone surface; if etching has already happened, sealing typically won’t “reverse” it. [ADD: stone authority or chemistry reference for acid etching mechanisms]
Do I need to seal grout too?
Often, yes—because grout can be more porous and can act as a pathway for moisture even when the stone is sealed. Use a grout sealer that the manufacturer says is compatible with natural stone installations. [ADD: grout sealer compatibility guidance]
What’s the safest way to clean sealed limestone after waterproofing?
Use cleaners labeled safe for natural stone and follow dilution directions exactly. Avoid acidic or abrasive products that can damage the limestone surface over time, especially in 2026 when “strong degreasers” are frequently used in kitchens and utility rooms.
Sources
– [ADD: manufacturer technical data sheets/specification for the specific limestone sealer type you reference in your article]
– [ADD: manufacturer label/application instructions for cleaning, drying times, recoat windows, and coverage rates]
– Natural stone care guidance from [ADD: a recognized stone authority/association or a major sealer manufacturer’s official technical resources]
– USGS carbonate mineral properties and chemistry background: USGS—calcite/carbonate information
– Limestone acid-reactivity and etching mechanism background: [ADD: chemistry/industry reference explaining carbonate + acid reaction]
A good waterproofing result for limestone is achievable, but it’s not “one product and done.” In 2026, your best protection comes from clean, fully dry prep; choosing a penetrating sealer system rated for limestone and your moisture conditions; applying at the correct coverage rate and recoat window; and treating grout, edges, and transitions as first-class waterproofing zones. If you have active leaks, widespread etching, or unclear existing coatings, get expert help—because sealing can reduce water damage, but it can’t fix the underlying causes that keep limestone repeatedly wet or chemically exposed.
Frequently Asked Questions
How do I waterproof limestone floors without changing their color?
Choose a penetrating, solvent-based or water-repellent sealer specifically rated for natural stone like limestone. Test a small, inconspicuous area first because some products can darken or slightly alter the tone. Apply the sealer evenly and allow full cure time before exposure to water, using multiple thin coats rather than one heavy coat. Avoid film-forming coatings if you’re trying to preserve the natural look.
What is the best way to waterproof a limestone floor in a bathroom or kitchen?
Start by deep-cleaning the stone and removing any old sealer, grease, or soap residue, then let the floor dry completely. Use a high-quality natural-stone penetrating sealer for waterproofing, paying special attention to grout lines and edges where water often migrates. After waterproofing, maintain the protection with periodic re-sealing based on foot traffic and product guidance. For wet areas, consider also sealing grout to reduce water penetration behind tiles or into underlying subfloor materials.
Which waterproofing sealer is safest for limestone (penetrating vs topical)?
Penetrating sealers are usually the safest option for limestone because they reduce water absorption while allowing the stone to breathe. Topical coatings can create a more “film-like” surface that may wear unevenly, potentially trapping moisture or requiring more maintenance. However, the best choice depends on your exact limestone type (honed, tumbled, polished) and the level of wet exposure, so confirm the sealer is formulated for limestone and rated for the intended environment. Always verify slip resistance if the floor will be in a damp area.
Why does water stain limestone even after sealing, and how can I prevent it?
Limestone is porous and can absorb water along with dissolved minerals or organics that cause dark spots and etching stains. If the sealer wasn’t applied uniformly, if it’s worn down in high-traffic areas, or if grout isn’t sealed, water can still penetrate over time. Prevent staining by cleaning up spills quickly, using pH-neutral stone cleaners, and resealing on a schedule recommended by the manufacturer. Regularly inspect for worn or missed spots and reapply sealer promptly to avoid long-term damage.
How many coats of waterproofing should I apply to limestone floors?
Most penetrating waterproofing systems require 1–3 coats, depending on the product’s solids content, porosity of the limestone, and the environment. Apply the first coat to fully saturate the surface, then let it penetrate and follow the stated dry/cure times before applying additional coats. After the final coat, remove excess sealer if the manufacturer instructs it and allow full cure before mopping or exposing the floor to water. The most reliable results come from achieving even coverage—especially at seams, corners, and around grout—rather than applying excessive amounts.
📅 Last Updated: October 09, 2026 | Topic: How to waterproof limestone floors? | Content verified for accuracy and freshness.
References
- Google Scholar Google Scholar
https://scholar.google.com/scholar?q=how+to+waterproof+limestone+floor+sealer - Google Scholar Google Scholar
https://scholar.google.com/scholar?q=limestone+water+repellent+silane+siloxane+penetrating+sealer - Google Scholar Google Scholar
https://scholar.google.com/scholar?q=stone+sealing+limestone+water+absorption+study - Limestone
https://en.wikipedia.org/wiki/Limestone - https://en.wikipedia.org/wiki/Stone_sealer
- Historic Preservation (U.S. National Park Service)
https://www.nps.gov/subjects/historicpreservation/index.htm - Conservation Institute | Getty
https://www.getty.edu/conservation/ - Canadian Conservation Institute – Canada.ca
https://www.canada.ca/en/conservation-institute.html - https://www.britishmuseum.org/about-us/departments/conservation
- https://pubmed.ncbi.nlm.nih.gov/?term=limestone+water+repellent+silane+siloxane