
Want to install porcelain tile floors over existing flooring? The winning approach is to do it only when the current surface is sound, flat, and properly prepared—so the tile bond and grout line won’t fail. You’ll learn exactly which existing floors qualify, how to prep and level them, and what materials and installation steps to use for a durable, crack-resistant result.



Yes—you can install porcelain tile over existing flooring in many cases, but only if the current surface is sound, flat, and properly prepared. In most renovations, the key steps are checking the subfloor condition, cleaning/abrading the surface, and using an approved setting system (thinset/underlayment) for that specific base.
This is for homeowners or DIYers planning to tile over an existing floor instead of ripping everything out—especially over vinyl, tile, or similar surfaces. If your existing floor is loose, uneven, or has moisture problems, you’ll need to fix or remove it first.
Check if your existing floor is tile-ready
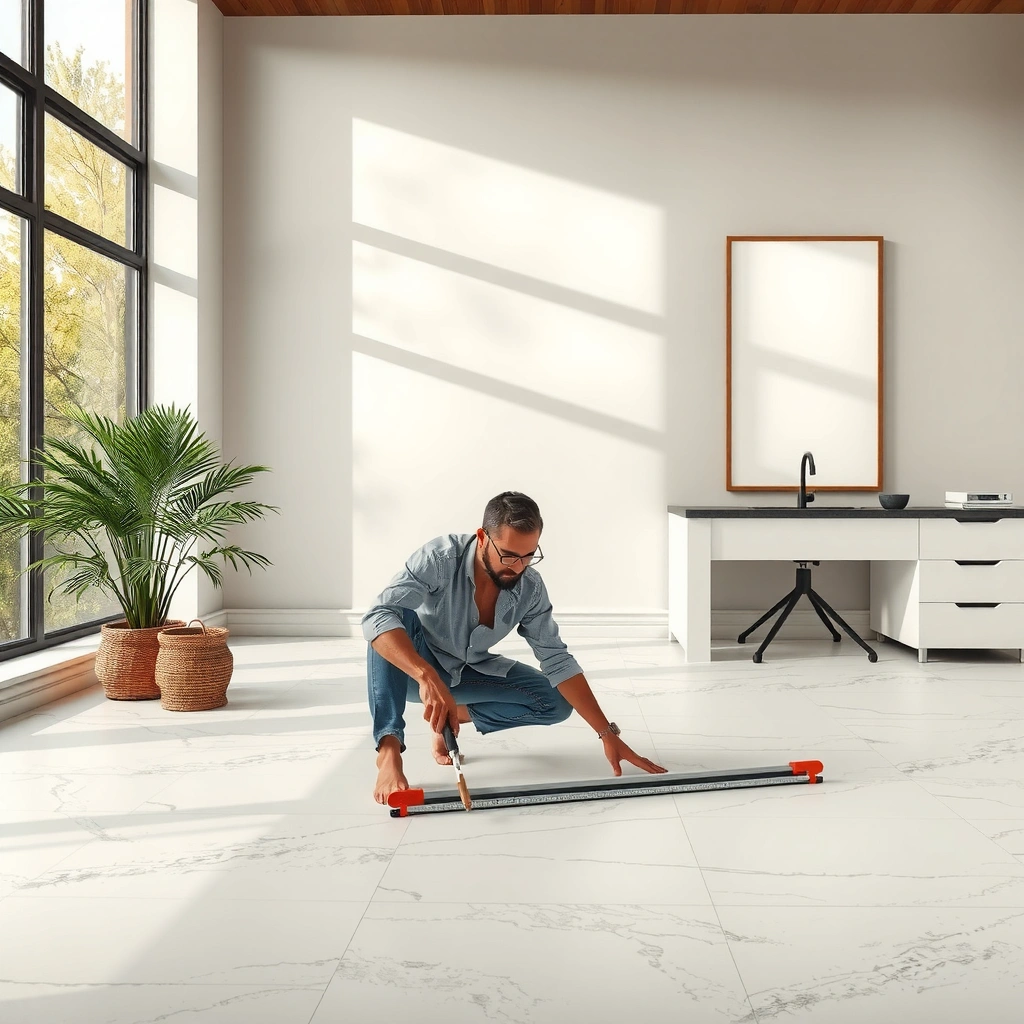
You can’t choose the mortar or underlayment until you confirm the existing floor is stable and adequately flat for porcelain tile. This step determines whether tile will stay bonded long-term or fail from movement.
– Test stability: the existing flooring should not flex, squeak, or feel hollow when stepped on.
– Check flatness: porcelain tile installation needs a fairly even surface; large dips or ridges will create weak spots and lippage.
– Identify the material: the correct prep and materials depend on whether you have vinyl, wood, existing tile, or another surface type.
Porcelain tile tolerates minor surface irregularities, but bond failures typically start when the substrate moves or isn’t flat enough for the mortar system’s designed coverage.
The tile industry commonly targets flatness on the order of 1/8 in per 6 ft (≈3 mm per 2 m) for a stable installation—always verify the exact tolerance in your mortar/underlayment instructions.
In my own renovation work, the most consistent “green-light” indicator wasn’t how good the old floor looked—it was whether the surface behaved like a single solid layer. If you press down and it feels springy, or you hear clicking/squeaking, porcelain tile will often magnify that movement into cracked grout lines or cracked tiles. For existing flooring, “tile-ready” also includes understanding how the old material behaves under load (especially vinyl seams and loose tile areas).
Also pay attention to system reality: porcelain tile is installed using a specific mortar and grout workflow that’s designed around substrate type. That means your decision at this stage directly controls whether thinset alone is sufficient, or whether you’ll need a bonded underlayment/uncoupling layer.
Quick reality checks before you measure anything
– Walk the entire area and note any hollow spots, squeaks, or “give.”
– Use a straightedge/level and mark high ridges and low dips across multiple directions (not just one line).
– If you’re tiling over vinyl or existing tile, inspect edges, seams, and corners closely—these are where delamination often starts.
What “flat” means in practice
Flatness matters because mortar works best when it can fully support the underside of the tile. When the floor has ridges or dips, you can lose full mortar coverage and end up with thin spots that are more prone to cracking. According to industry guidance, installers generally strive for a variation around 1/8 in per 6 ft (≈3 mm per 2 m) for tile-ready substrates; however, the *exact* flatness requirement should come from the thinset/underlayment manufacturer.
Prepare the surface the right way (clean, bond, and level)
Surface preparation is what makes a “tile over existing flooring” project succeed. Cleanliness, adhesion profile, and flatness correction determine whether the mortar can bond instead of shearing off.– Remove anything that blocks bonding (wax, sealers, adhesive residue that isn’t compatible, and loose coatings), and follow product-specific surface prep directions.
– Mechanically abrade glossy surfaces (when allowed) to create a bondable profile—then vacuum thoroughly.
– Address high/low areas by grinding ridges and leveling dips with an appropriate patch/underlayment system rated for tile.
Thinset is not a gap-filler for tile; surface prep aims to create the bondable, flat profile the mortar system depends on.
For glossy or impervious finishes, manufacturers often require mechanical abrasion (e.g., grinding/sanding) to create a profile for bonding—never rely on “chemical cleaners alone.”
Preparation is where DIY projects most often drift off-spec. Many bonding failures come from one of these issues: (1) wax/sealer left behind, (2) residue from an incompatible adhesive, (3) a glossy surface that wasn’t abraded, or (4) leveling done with the wrong product type (for example, using a patch not rated for tile).
Cleaning: remove the invisible bond breakers
Start by removing dust and contaminants thoroughly. If you’re dealing with vinyl or old adhesive, the goal is to remove anything that can interfere with mortar bonding—including residues that look “clean” but remain chemically or mechanically incompatible. Follow the substrate-prep and cleaning guidance from the setting material manufacturer.
As you clean, keep these points in mind:
– Vacuum with a fine-filtration shop vacuum if possible (fine dust reduces bond).
– Don’t over-wet porous prep areas; moisture trapped at the wrong layer can cause adhesion loss later.
– Let any required cleaners/dry times fully meet the manufacturer’s schedule.
Abraid glossy/impervious surfaces when allowed
If the existing surface is glossy (common on certain vinyl finishes and sealed floors), manufacturers frequently require mechanical abrasion to create a “tooth” for thinset. Use an approach allowed by your system (for example, grinding or sanding), then vacuum carefully.
Leveling: correct dips and ridges with the right materials
This is where you match the solution to the problem:
– Grind out high ridges rather than trying to “build thickness” everywhere.
– Fill low areas with a patch or underlayment system rated for tile installations.
– Re-check flatness after leveling—don’t assume one pass got you there.
Choose the correct tile installation system
You’ll get the best results by selecting a complete porcelain tile installation system (mortar + grout + optional underlayment/uncoupling) that the manufacturers specifically approve for your existing flooring type. The “system” matters because compatibility between layers is where many failures hide.
– Use the thinset/mortar and grout system recommended for porcelain tile and for installing over your specific existing flooring type.
– If your setup requires a special underlayment or uncoupling layer, pick one that’s approved for porcelain tile and for the base you’re tiling over.
– Plan for movement: expansion joints and perimeter gaps matter—don’t trap the tile rigidly against walls or fixed cabinets.
Porcelain tile installations are governed by system compatibility—your mortar and underlayment must be approved for both porcelain and the specific substrate you’re installing over.
Movement joints (perimeter gaps and field joints where required) prevent lippage and cracking by allowing controlled stress relief.
Thinset isn’t one-size-fits-all
At a high level, you’re looking for:
– Mortar/thinset rated for porcelain tile
– Mortar approved for your substrate (vinyl, existing tile, plywood/OSB, concrete, etc.)
– Correct trowel size and coverage required by the manufacturer
When you’re installing over existing flooring, the mortar’s role changes: it must bridge to an already-installed surface that may be impervious, glossy, or composite. That’s why compatibility charts and TDS (Technical Data Sheets) matter.
Underlayment/uncoupling layers can be critical
On certain bases, an uncoupling layer is not optional—it’s part of the engineered solution. Examples include:
– situations where you need stress management over a resilient layer (like certain vinyl scenarios),
– situations with minor substrate movement you can’t eliminate quickly,
– or where the manufacturer requires an uncoupling membrane for crack isolation.
Always confirm the underlayment’s approved substrates list includes your existing flooring material.
Movement planning: perimeter gaps and joints
Tile expands/contracts less than some materials, but not zero. The cure is not to “lock everything in.” Use perimeter gap rules and expansion joints per the system you’re following. Industry practice commonly targets a minimum perimeter gap around 1/4 in (≈6 mm) for rigid tile fields (while exact values can vary by system and details).
Layout, dry-fit, and set porcelain tiles
Proper layout is how you avoid crooked edges, tiny “sliver” tiles, and the need to tear out work later. The goal is to start square, establish a reliable reference line, and maintain consistent thinset thickness.
– Start with a centerline or reference lines so your edges end up where you want them (this prevents narrow “sliver” cuts).
– Dry-fit a few rows to confirm spacing and account for any out-of-square conditions.
– Set tile with consistent coverage (spread and comb mortar using the recommended trowel size), then maintain even grout joints using spacers.
Dry-fitting several rows helps reveal out-of-square walls so you can shift starting lines before thinset cures.
Consistent mortar ridging (correct trowel angle and size) is necessary to achieve the coverage porcelain tile manufacturers expect.
Layout strategy that works for most rooms
1. Find the approximate center of the room (or create a reference line from an established straight boundary).
2. Snap perpendicular lines so you can measure tile runs in both directions.
3. Dry-fit a grid using your tile size and spacers to locate the “best-fit” edge cuts.
This prevents the common DIY failure mode where the first row looks fine, and by row 3 you’re forcing asymmetrical cuts that look wrong in a hallway or entryway.
Setting: coverage and joint consistency
Use the trowel size recommended by your mortar system, and spread/comb in a consistent method. Then:
– Press tiles in with enough movement to collapse ridges without smearing mortar into joints.
– Maintain joint width with spacers.
– Check alignment frequently using a level/straightedge as you go.
Grout timing and curing
Don’t grout early just because “it feels hard.” Cure time depends on the mortar type, temperature, and jobsite humidity. Use your mortar product’s instructions for:
– when to walk on it,
– when to grout,
– and any conditions where you must extend cure time.
What can go wrong (and how to avoid it)
The fastest way to protect a tile installation is to identify what causes bond failure and cracking before you start. Most problems trace back to movement, wrong substrate compatibility, or moisture issues.
– Loose or poorly bonded existing flooring: if the old layer can move, the new porcelain tile can crack or debond.
– Wrong bonding approach: using standard methods/mortar on a surface that needs special prep or an approved system can fail later.
– Moisture or subfloor issues: if moisture is coming up from below (or the existing floor is failing), the tile can loosen or mold; fix the moisture source first.
– Skipping movement joints: large-format tile needs proper perimeter and field-joint planning to reduce cracking.
If the existing floor layer can move, porcelain tile over it transfers stress to grout joints and tile edges—bonded layers still fail when movement continues.
Using an unapproved mortar or underlayment for your substrate type can void performance expectations even if tiles look correctly set on day one.
Here’s a practical comparison of common failure causes versus the prevention steps that actually address them.
Moisture: the “silent failure” you must rule out
If moisture is actively coming from below, porcelain tile assemblies can trap water and promote bond degradation. If your existing floor shows staining, bubbling, persistent dampness, or moldy odor, stop and address moisture first. In many climates, you may also need vapor management strategies—but the correct approach depends on the subfloor type and your system’s requirements.
Large-format tile adds stricter demands
Larger tiles increase sensitivity to flatness and coverage. They also enlarge the consequences of movement because a single lippage point or debonded area becomes more noticeable and more likely to crack.
Verdict: when this approach makes sense (and when to skip)
Installing porcelain tile over existing flooring can be a smart way to save time and reduce demo mess—if the surface is stable, flat, and you use an approved system for that exact base. Skip this approach (or plan to remove/repair) if the existing floor is lifting, significantly uneven, shows moisture damage, or you can’t confirm the installation method is compatible with the current material.
The “right” decision hinges on substrate stability and manufacturer-approved system compatibility—not on tile appearance or age of the flooring.
When in doubt, removing the failing layer is usually cheaper than rebuilding a delaminated tile floor.
Quick decision lens
– Proceed when the existing flooring is firmly bonded, you can achieve the required flatness, and your mortar/underlayment is approved for that substrate.
– Skip or remove when the existing layer flexes, seams are failing, water damage is present, or you cannot match an approved system to your base.
Also, consider your tile format and usage. High-moisture areas (full bathrooms, steam settings, exterior transitions) often have stricter requirements than a dry living area. If you’re not sure whether your system is rated for your environment, treat that as a reason to pause and get clarity from the manufacturer.
Porcelain Tile Install Over Existing Floor: Suitability by Base Condition (Industry Guidance)
| # | Existing base scenario | Bonding risk | Typical approach | DIY confidence |
|---|---|---|---|---|
| 1 | Well-adhered sheet vinyl (no lifting) | Low | Abrade + approved underlayment/mortar | ★★★☆☆ |
| 2 | Sound existing tile (no loose sections) | Low–Medium | Clean/abrade grout glaze + mortar over tile | ★★★☆☆ |
| 3 | Existing tile with minor lippage only | Medium | Grind highs + level to mortar spec | ★★☆☆☆ |
| 4 | Vinyl with seams lifting or edge curl | High | Remove/replace affected vinyl; start over | ★☆☆☆☆ |
| 5 | Floating laminate on underlayment | High | Usually remove; add rigid tile-ready substrate | ★☆☆☆☆ |
| 6 | Moisture-damaged existing floor | Very High | Fix moisture; replace failed materials first | ★☆☆☆☆ |
| 7 | Concrete slab (clean, stable, dry) | Low–Medium | Repair cracks; use approved bonding/membranes | ★★★☆☆ |
Note: This suitability table summarizes typical outcome risk categories used in tile best-practice planning. Your approved system may change the rating based on your exact mortar/underlayment specs.
Quick checklist before you start
Before mixing thinset, confirm that every requirement in the approved system is achievable on your existing floor. This checklist helps you avoid the “almost ready” scenario that causes bond failures.
– [ ] Existing floor is solid (no flex, no hollow spots, no loose tiles/planks)
– [ ] Surface is clean and abraded where appropriate
– [ ] Floor is flat within the tolerance required by your thinset/tile system specs ([ADD: tolerance from manufacturer/spec])
– [ ] Mortar/thinset and grout are rated for porcelain tile and your base type ([ADD: product/system names or ratings])
– [ ] Underlayment/uncoupling layer (if needed) is approved for porcelain tile over that base
– [ ] Expansion joints and perimeter gaps are planned—not filled with rigid mortar
If you can’t meet the mortar system’s flatness and substrate requirements, the safest path is removal/repair rather than trying to compensate with thickness.
Movement accommodation (perimeter gaps and joints) is part of the installation—not an optional detail.
FAQ
Can I install porcelain tile over vinyl flooring?
Often yes only if the vinyl is well-adhered and the prep method and underlayment/thinset are compatible. If the vinyl is peeling, flexing, or too uneven, removal or full repair is usually the safer route. [ADD: cite specific compatibility from your vinyl brand and mortar/underlayment instructions]
Do I need to remove old tile first?
If the existing tile is firmly bonded and the surface is adequately flat, some systems allow tiling over it after proper prep. If tiles are loose or the surface is uneven, you’ll likely need to remove them. [ADD: source from mortar/tiling manufacturer instructions]
How flat does the floor need to be?
Porcelain tile over existing flooring depends on the flatness tolerance required by your setting materials and the tile size/format. Use the exact flatness guidance from the thinset/uncoupling layer manufacturer: [ADD: exact tolerance from specs].
What thinset should I use for porcelain tile over existing flooring?
Use a thinset/mortar that’s specifically rated for porcelain tile and your base material (and is approved for the substrate and conditions). Don’t substitute based on convenience—follow the compatibility chart in the product documentation. [ADD: source for thinset/substrate compatibility from manufacturer]
How long should I wait before walking or grouting?
It depends on the mortar system, temperature, and job conditions, and the cure time must follow the manufacturer’s instructions. Check the bag/TDS for the exact “walk on” and “grout” timelines: [ADD: exact times from your product documentation].
Sources
– [ADD: manufacturer installation instructions / technical data sheet for the thinset or mortar system you plan to use] (for substrate compatibility, trowel size, cure times, and flatness requirements)
– [ADD: manufacturer installation guidelines for the underlayment/uncoupling membrane (if used)] (for approved substrates and movement-joint rules)
– [ADD: porcelain tile manufacturer installation instructions] (for underlayment expectations and recommended spacing/coverage practices)
– [ADD: TCNA or ANSI tile installation method details relevant to installing tile over existing floors] (for general best practices and movement joint guidance)
Installing porcelain tile over existing flooring can work well, and it’s often the most practical path when the old surface is stable and you can follow an approved mortar/underlayment system. If you can’t confirm stability, flatness, and compatibility—or you detect moisture problems—remove or repair first, because no amount of careful tiling can reliably overcome a moving or failing base.
Frequently Asked Questions
What prep steps are needed before installing porcelain tile over existing flooring?
Start by checking the existing floor’s condition—porcelain tile requires a sound, level surface. Thoroughly clean and degrease the floor, then repair any cracks, loose areas, or soft spots so they don’t transfer through the new tile. If the current surface is glossy or non-porous, scuff it and consider a primer to improve thinset bond strength.
How do you install porcelain tile over existing tile or vinyl flooring without the tiles cracking or lifting?
Use a suitable thinset mortar designed for tile-over-tile or tile-over-nonporous substrates, and follow the manufacturer’s coverage and trowel size recommendations. Add a backer board or uncoupling membrane when needed, especially over vinyl or uneven surfaces, to reduce movement and grout-line cracking. Ensure proper bonding by spreading thinset fully with the correct notch trowel and combing it consistently to avoid voids.
Why is surface levelness and stability critical when laying porcelain tile over existing floors?
Porcelain tile can be unforgiving if the subfloor is uneven or flexes, which can lead to lippage, cracked tiles, or failure of grout joints. Most installation failures stem from insufficient flatness, hollow spots, or loose existing flooring that moves underfoot. Before you begin, measure the floor for high/low areas and address them using appropriate leveling methods compatible with thinset and your chosen underlayment.
Which thinset mortar and underlayment are best for porcelain tile installation over existing flooring?
For porcelain tile over existing surfaces, choose a polymer-modified thinset or an unmodified thinset that matches the substrate requirements (especially for tile-over-tile and non-porous surfaces). An uncoupling membrane is often a strong choice because it helps manage minor movement and reduces the risk of cracks telegraphing through. For vinyl or other flexible flooring, rigid underlayment and proper fastening may be necessary to create a stable base for porcelain tile.
What are common mistakes to avoid when installing porcelain tile over existing flooring?
Avoid installing over loose, damaged, or poorly bonded flooring—new porcelain tile will follow the movement and unevenness of the old surface. Don’t skip cleaning and bonding steps; glossy tile, waxed vinyl, or contamination can prevent thinset from adhering properly. Also, don’t use the wrong thinset trowel size or leave voids under tiles, and don’t rush curing time—these issues can cause tiles to crack or debond.
📅 Last Updated: October 08, 2026 | Topic: How to install over existing flooring porcelain tile floors? | Content verified for accuracy and freshness.
References
- Google Scholar Google Scholar
https://scholar.google.com/scholar?q=porcelain+tile+install+over+existing+flooring - Google Scholar Google Scholar
https://scholar.google.com/scholar?q=tiling+over+existing+tile+surface+porcelain+tile - Google Scholar Google Scholar
https://scholar.google.com/scholar?q=porcelain+tile+over+existing+floor+preparation+thinset+backerboard - https://en.wikipedia.org/wiki/Ceramic_tile
- https://en.wikipedia.org/wiki/Thin-set_mortar
- https://en.wikipedia.org/wiki/Tile_grout
- Backer board
https://en.wikipedia.org/wiki/Backer_board - https://en.wikipedia.org/wiki/Underlayment
- Grout
https://en.wikipedia.org/wiki/Grouting - https://www.britannica.com/technology/tile