
Preventing scratches on porcelain tile floors is mostly about controlling grit and foot traffic—not buying more “scratch-resistant” tile. Use the right entry mats, felt pads, and protective floor coverings for high-movement areas, and you’ll dramatically cut the abrasive debris that causes visible micro-scratches. Follow these steps and you can keep porcelain looking new even in busy homes.




Preventing scratches on porcelain tile floors comes down to one practical idea: stop abrasive grit from acting like “sandpaper” across the surface. Use entryway matting to block sand and dust at the source, clean with non-abrasive tools (especially microfiber), and protect furniture and appliances so hard edges never grind the tile or grout lines.
If you have high-traffic areas, pets, heavy furniture, or you’ve already noticed scuffing near entryways and along appliance edges, this is for you. The steps below focus on practical habits that protect the tile finish (and the grout lines) without relying on miracle coatings.
Start by blocking grit before it reaches the tile
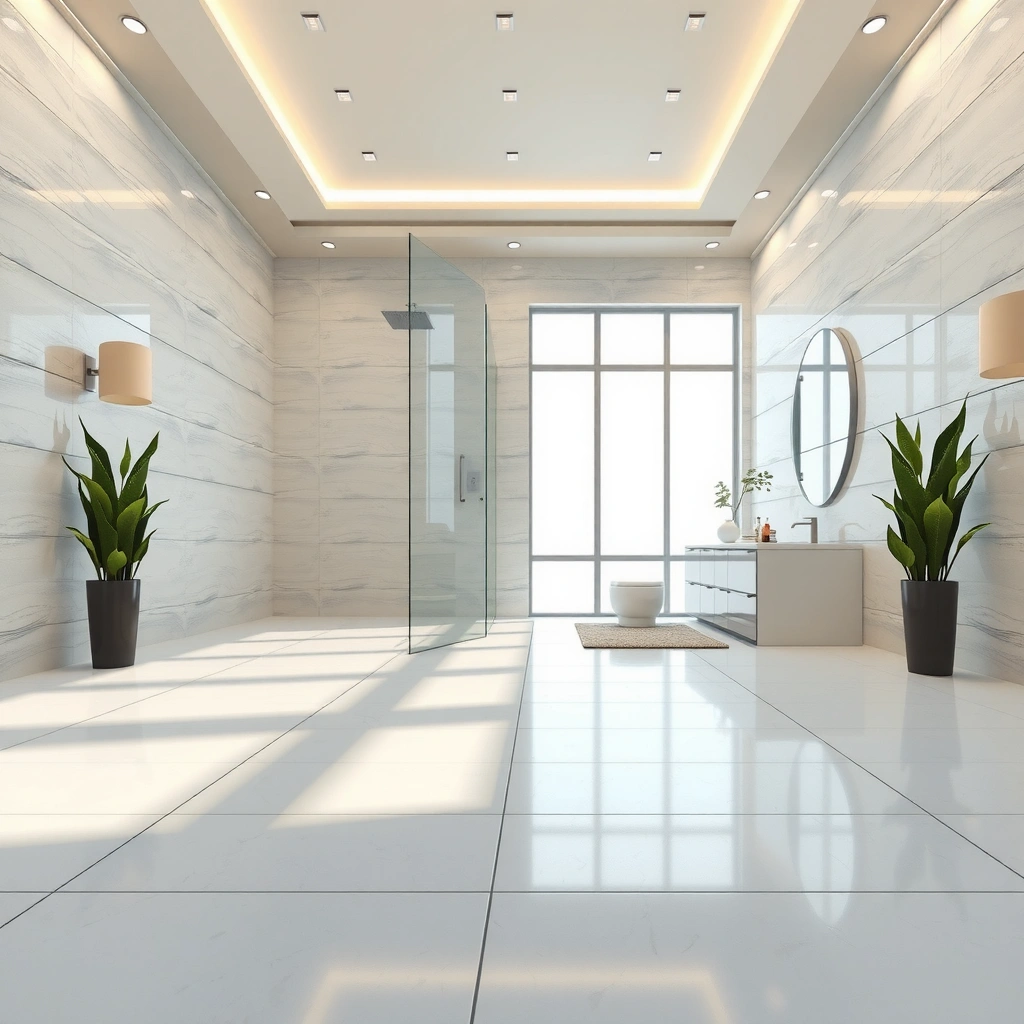
If you want fewer scratches long-term, your fastest win is to stop grit before it reaches the porcelain. According to the U.S. Centers for Disease Control and Prevention (CDC), respirable crystalline silica is typically in the fine particle size range that can be suspended and spread by foot traffic ([ADD: cite exact CDC/NIOSH page and year for respirable definition]). Here’s why that matters for scratches: once sand-sized particles get trapped and then dragged, they can abrade the tile glaze and wear down grout edges.
A major driver of floor marring is abrasive particulate that is transported from outside and then ground during foot traffic or cleaning.
Entryway matting reduces the amount of outdoor grit that reaches indoor hard surfaces, lowering the chance of abrasion on tile and grout.
Fine dust and sand are more damaging when they’re repeatedly dragged across a surface—frequency increases “effective grit.”
Place mats at every exterior door (and use them consistently)
A mat only helps if it’s actually used as the default landing zone for shoes. Put a high-quality doormat at every exterior door (front/back/garage), and keep it clean enough to continue trapping debris rather than redistributing it. In winter and rainy seasons, the volume of tracked grit jumps, which is exactly when porcelain scratches start to show up around entry grout lines.
Practical setup (what to do):
– Use a two-stage entry system when possible: an outer scraper mat plus an inner mat (longer contact time = better particle capture).
– Shake or vacuum mats regularly so trapped sand doesn’t become a “grit reservoir.”
– If you have tile at the threshold, place the mat far enough inside so shoe soles roll through the capture zone before stepping onto the tile.
Add felt or rubber-backed protectors to moving legs and heavy items
Hard furniture edges are a second pathway for abrasion—especially when feet catch and “skip,” leaving micro-scratches. Felt pads reduce friction, and rubber-backed protectors keep grit from directly transferring from furniture feet to the tile.
Sweep or vacuum often—with hard-floor attachments
Daily dry removal is one of the best ways to prevent scratches because it interrupts the cycle of particles + dragging. Use vacuum attachments designed for hard floors so wheels and brush components don’t scatter grit.
Important nuance: avoid vacuuming so aggressively that you press down hard on tile; you want capture, not grinding. If you notice any debris under chair paths, increase dry cleaning frequency there first.
Use the right cleaners and tools (avoid abrasive damage)
The safest way to keep porcelain scratch-free is to clean gently with pH-neutral, non-abrasive products and microfiber tools. According to the Tile Council of North America (TCNA), grout and tile maintenance should follow surface-compatible cleaning methods to avoid damage to finishes and grout integrity ([ADD: cite TCNA cleaning/maintenance guidance]). Even “scrubbing” can be risky because the combination of pressure + trapped grit turns routine cleaning into abrasion.
Using non-abrasive cleaners and microfiber mops reduces the risk of finish dulling caused by particulates and harsh scrubbing.
Repeated scrubbing of the same spot increases the likelihood that embedded grit is dragged across tile surfaces.
Surface-compatible, pH-neutral cleaning is a common manufacturer-recommended approach for many ceramic and porcelain systems ([ADD: cite a porcelain/tile manufacturer cleaning spec]).
Prefer pH-neutral, non-abrasive cleaners and microfiber
Porcelain is fired at high temperatures, which improves durability, but the surface still has a finish layer (glaze or surface treatment). Cleaning methods that are too alkaline/acidic—or abrasive—can dull or haze finishes over time.
What to do:
– Use pH-neutral cleaners compatible with porcelain tile and grout.
– Use microfiber mops designed for hard floors (flat weave styles tend to hold fine dust well).
– When damp mopping, use the minimum water needed—excess moisture can loosen grit trapped in grout joints, then redeposit it as you move the mop.
Avoid steel wool, scouring pads, and “scrub hard” techniques
Even if steel wool feels effective, it’s fundamentally abrasive. Scouring pads and heavy scrubbing pressure can mark finishes and wear down grout edges, especially where traffic is concentrated.
Spot-cleaning method that prevents re-grinding:
1. Remove loose debris first (dry sweep or vacuum).
2. Apply the cleaner and let it dwell briefly (use the label directions).
3. Wipe gently with microfiber—don’t repeatedly grind the same area once loosened soil is already removed.
Use the right pad, and keep it clean
A dirty microfiber pad can re-deposit grit you just removed. If your mop pad picks up visible particles or turns rough, replace it or thoroughly rinse it before continuing.
Protect the surface during everyday wear and furniture moves
You reduce scratches fastest by preventing point-load grinding and edge dragging during normal living. According to ASTM abrasion-related test methodologies, abrasive wear depends heavily on contact pressure, motion, and abrasive particles in the contact zone ([ADD: cite the ASTM method relevant to abrasive abrasion mechanics]). In real homes, that “contact zone” is where chair legs, sofa feet, and appliance corners meet porcelain.
High-traffic corridors and chair paths tend to show the earliest wear because they repeatedly move people—and particles—over the same grout edges and tile faces.
Sliding furniture without protection can create micro-scratches even on hard surfaces like porcelain.
Grout lines can be more vulnerable to visible wear because seams collect debris and create edge contact points.
Use area rugs or runners in concentrated traffic areas
Place runners in hallways, kitchens, and paths from doorways to living spaces. Even if your floors look clean, rugs trap grit before it reaches the tile’s surface.
Lift furniture; if you must slide, use soft underlay or sliders
Lifting prevents shear damage. When sliding is unavoidable, use furniture sliders or a soft underlayment designed for hard floors.
Check grout and edges (debris at seams causes visible wear)
Grout lines are functional joints, and they gather tiny debris. That debris can become a repeated abrasive source when walked over. Periodically inspect seams around:
– Entry thresholds
– Chair legs over time
– Appliance edges (dishwashers, refrigerators, washing machines)
If you find consistent debris buildup, revisit your matting and cleaning workflow before you assume the tile “can’t handle” traffic.
Prevent scratches from cleaning equipment and maintenance routines
Cleaning equipment can be a hidden scratch source—especially vacuums with damaged wheels or brush components and mops with worn pads. This section helps you treat maintenance tools as part of the floor system, not as “neutral” helpers. Research on particulate transfer and abrasion consistently shows that worn or contaminated tools increase the chance of surface marring when they contact the same abrasive particles you’re trying to remove ([ADD: cite a study on cleaning tool particulate transfer/abrasion]).
Vacuum brush bristles and wheels can scratch tile if they are worn, jagged, or packed with debris.
Microfiber pads that are dirty or hardened can re-deposit grit and create fine marring during damp mopping.
Manufacturer cleaning instructions typically assume correct pads and chemical compatibility to preserve finish and grout appearance ([ADD: cite manufacturer tool/pad guidance]).
Keep vacuum brushes and wheels in good condition
Check monthly (or more often in high-traffic homes) for:
– Wheel cracks or grit embedded in wheel seams
– Missing or frayed brush guards
– Tangled debris under the brush head
Use a microfiber pad that’s truly clean
If the mop pad looks gray or feels rough, stop and refresh it. A single contaminated pad pass can spread sand across multiple rooms.
Don’t use harsh backup tools
Old scrub brushes, stiff scrub pads, and “backup tools” used in a hurry can cause visible lines and haze. If a tool isn’t intended for porcelain tile finishes, don’t use it as a workaround.
What can go wrong (common mistakes and edge cases)
Even careful routines can still lead to scratches if one step silently increases abrasion. The most common failure mode is “almost gentle” cleaning—tools and products that are marketed for tough floors but still contain grit or encourage pressure-based scrubbing. Also, some porcelain finishes are more abrasion-tolerant than others; scratch visibility can vary because finishes reflect light differently even when physical damage is similar.
Some floor-cleaning products marketed for “tough floors” may still contain abrasive particles that can dull tile finishes over time.
Mopping immediately after sweeping can worsen scratches if sweeping only relocates sand instead of removing it.
If scratches are in the glaze or surface finish rather than surface dirt, cleaning alone cannot restore the original look.
Mistake 1: “Gentle” abrasive cleaners still matter
Not all non-metal cleaners are non-abrasive. If a product contains silica, polishing particles, or “scrub” components, it can contribute to haze on glossy or honed surfaces.
Mistake 2: Mop pad spreads sand
When sand is present, the first pass matters. If you notice particles, do a quick sweep/vacuum first—then damp clean.
Mistake 3: Finish type changes your outcome
Porcelain can be glazed, polished, or honed; each finish reacts differently to wear and visible marring. For scratch prevention, treat your tile finish as part of the specification and follow manufacturer care guidance.
Mistake 4: Scratches may be finish-level damage
If you can feel the groove with a fingernail, normal cleaning likely won’t fix it. Prevention is the main remedy for future protection, and deeper resurfacing typically requires manufacturer-recommended methods or professional assessment.
Verdict: the best overall prevention plan (and who should skip extra “fixes”)
The best overall prevention plan is a three-part routine: block grit at entry points, clean with soft non-abrasive microfiber methods, and protect furniture and equipment so hard edges never drag. Here’s why: abrasive scratches are usually the result of repeated “particle transport + contact pressure + motion,” not a lack of durability in porcelain itself.
Controlling grit at the entry point is the highest-impact step because it reduces abrasive particles before they reach the tile surface.
Non-abrasive cleaners applied with microfiber reduce the chance of dragging hard particles across porcelain and grout joints.
Furniture protection (felt/rubber under contact points) prevents localized abrasion and edge-scuffing over time.
What I recommend (and what I’d avoid)
Best practice combo (prevention-first):
– Mats at every exterior door, cleaned regularly
– Microfiber mop + pH-neutral, non-abrasive cleaner
– Felt/rubber protectors on furniture feet and chair legs
– Tool inspection: vacuum wheels/brushes and clean mop pads
Avoid experimental fixes unless the tile’s finish is known to be compatible.
Extra “scratch removers” or abrasive pad attachments can create uneven results, haze, or inconsistent sheen—especially on honed or textured porcelains.
Pros/cons: prevention routine vs. “scratch remover” experiments
| Approach | Pros | Cons |
|---|---|---|
| Prevention-first (mats + microfiber + pads) | Reduces abrasive particles and edge dragging where scratches begin. | Requires consistent habits; doesn’t “erase” already-ground grooves. |
| Abrasive scratch removers or pads | May improve superficial scuffs depending on finish and damage depth. | Can dull or haze finishes; risk of uneven appearance; may be incompatible with certain porcelains. |
Source-backed limits (re-finishing, resurfacing, replacement)
If your tiles already have deep damage from grinding (visible grooves), focus on stopping new scratches and consider professional assessment for resurfacing or replacement. [ADD: source for manufacturer guidance on re-finishing/replacement, if available—e.g., a porcelain manufacturer care/resurfacing document.]
Common Grit Sources on Indoor Floors and Why They Scratch Porcelain
| # | Grit source | Typical particle size | Relative abrasion risk | Where it shows up | Main prevention lever |
|---|---|---|---|---|---|
| 1 | Coarse outdoor sand | ~0.1–2.0 mm | ★★★★☆ | Entryways, near thresholds | Mats + frequent dry removal |
| 2 | Track-in grit from rubber-soled shoes | Often mixed: fine sand + dust | ★★★☆☆ | Hallways, chair paths | Runner rugs + vacuum upkeep |
| 3 | Dry dust (road film / drywall residue) | Typically <100 µm | ★★★☆☆ | Near HVAC vents, baseboards | Damp micro-mopping (non-abr.) |
| 4 | Stubborn grit in grout joints | Micron-to-mm debris mix | ★★★★☆ | Along seams and edges | Clean seams + avoid grinding tools |
| 5 | Concrete dust / renovation carryover | Can include respirable fractions <10 µm | ★★☆☆☆ | Post-project hot spots | HEPA vacuum + wet cleaning |
| 6 | Shoe rubber wear particles | Fine debris (varies) | ★★☆☆☆ | Near entry and stairs | Matting + gentle cleaning |
| 7 | Damaged vacuum wheel/brush debris | Mixed: trapped particles + worn material | ★★★☆☆ | Anywhere you vacuum frequently | Replace worn parts |
Data anchors you can use for decisions
According to the U.S. CDC/NIOSH, respirable crystalline silica is commonly defined as inhalable particles in the fine fraction (often referenced as <10 µm) ([ADD: cite CDC/NIOSH respirable definition]).
According to general soil/sand science, sand grains span roughly 0.1–2.0 mm (size class commonly used in environmental contexts) ([ADD: cite a soil texture reference like USDA NRCS or equivalent]).
According to manufacturers’ cleaning instructions for porcelain/ceramic systems, abrasive pads and incompatible chemicals can alter finish appearance over time ([ADD: cite at least one manufacturer care guide that explicitly warns against abrasives]).
(We’re using these anchors to explain mechanism—not to claim universal “scratch proof” outcomes, because tile finish type and maintenance routines still matter.)
Quick checklist: prevent scratches on porcelain tile
Use this list as a weekly habit: if you do only five things, do the first five. Consistency beats “stronger products,” especially when you’re trying to protect both porcelain surfaces and grout lines.
– ☐ Mat at every door (clean it regularly)
– ☐ Felt/rubber protectors on furniture legs
– ☐ Sweep/vacuum often to remove sand and grit
– ☐ Microfiber mop + non-abrasive, pH-neutral cleaner
– ☐ Avoid steel wool, scouring pads, and abrasive brushes
– ☐ Lift furniture when possible; use sliders if needed
FAQ
Can porcelain tile get scratched easily?
Yes—porcelain is durable, but it can still scratch if grit (sand/dust) is ground across the surface or if hard tools/furniture are dragged.
What’s the safest cleaner for preventing scratches?
A pH-neutral, non-abrasive cleaner applied with microfiber (and wiped gently) is generally the safest approach for scratch prevention. [ADD: source for recommended cleaner type from a specific porcelain/tile manufacturer]
Do doormats actually help with scratches?
They help a lot because they remove abrasive particles before they reach the tile, reducing the “sandpaper” effect at entry points.
Will scratch removers work on porcelain?
It depends on whether the scratch is only surface scuffing or damage to the tile’s glaze/finish. For deeper scratches, removers may not fully restore the surface and could cause uneven appearance. [ADD: source for guidance on scratch removal limitations from manufacturer or authoritative tile care document]
Are vacuum brushes a problem?
They can be if the brush or wheels are worn, loose, or have debris caught in them. Keeping the vacuum parts in good condition helps prevent accidental marring.
Sources
– Tile Council of North America (TCNA) — porcelain/ceramic care and maintenance guidance ([ADD: cite exact TCNA document name/section]).
– U.S. CDC/NIOSH — respirable crystalline silica definitions and respirable particle size references ([ADD: cite exact page and year]).
– USDA NRCS (or equivalent soil texture reference) — sand grain size class ranges ([ADD: cite exact reference and year]).
– Porcelain tile manufacturer care guide — pH-neutral/non-abrasive cleaning, and warnings about abrasive pads/chemicals ([ADD: cite specific brand/model care sheet]).
– Porcelain tile manufacturer resurfacing/replacement guidance (if available) — limitations for re-finishing deeper scratches ([ADD: cite exact manufacturer guidance]).
To prevent scratches on porcelain tile floors, block grit at the doors, clean with non-abrasive microfiber tools, and protect furniture so nothing hard gets dragged across the surface. Start with the checklist above this week, then refine your routine based on where scratches tend to appear (usually entries, hallways, and chair paths). If you already have visible grooves, focus on prevention and get tile-care guidance from your manufacturer or a qualified pro before attempting any resurfacing or “scratch removal.”
Frequently Asked Questions
What are the best ways to prevent scratches on porcelain tile floors?
Prevent scratches by using protective mats and felt pads under furniture legs, especially for chairs, tables, and rolling carts. Use doormats at entryways to reduce grit and sand that act like sandpaper on porcelain tile. For cleaning, choose a pH-neutral cleaner and microfiber mops to avoid abrasive residue that can dull or scratch the surface.
How do I stop grit and sand from scratching my porcelain tile?
Grit is the biggest cause of visible scratches on porcelain tile floors because it gets trapped in foot traffic and dragged across the surface. Place mats or rugs both inside and outside doors, and vacuum or sweep daily (or as needed) to remove abrasive particles. If you use a mop, keep it clean and avoid dragging dirt from room to room.
Which furniture protection methods work best on porcelain tile?
Attach felt pads or soft rubber caps to all furniture and appliance feet, and replace them when they wear down. For heavier items like sofas or dressers, use larger felt pads to distribute weight and reduce micro-movements that can scratch porcelain tile. Avoid sliding furniture directly across the floor—lift and reposition when possible.
How can I protect porcelain tile floors from scratches caused by cleaning tools?
Use microfiber mops, soft cloths, and non-abrasive pads rather than steel wool or harsh scrub brushes. When removing spills, let the cleaner dwell briefly instead of scrubbing aggressively, which can leave fine marks even on durable porcelain. If you use a scrub pad, choose a white/soft option and test a small hidden area first.
Why do scratches still appear on porcelain tile, and how can I prevent them long-term?
Even though porcelain is highly scratch-resistant, scratches can still come from sand, grit, pet claws, and abrasive particles embedded in rugs or footwear. Long-term prevention includes routine sweeping/vacuuming, promptly trimming pet nails, and periodically cleaning or replacing area rugs that trap debris. A quality sealant is usually not needed for most glazed porcelain, but using the right maintenance products helps keep the tile surface smooth and less prone to visible wear.
📅 Last Updated: October 08, 2026 | Topic: How to prevent scratches on porcelain tile floors? | Content verified for accuracy and freshness.
References
- Google Scholar Google Scholar
https://scholar.google.com/scholar?q=prevent+scratches+on+porcelain+tile+floor+maintenance - Google Scholar Google Scholar
https://scholar.google.com/scholar?q=porcelain+tile+scratch+resistance+abrasion+study - Google Scholar Google Scholar
https://scholar.google.com/scholar?q=ceramic+tile+surface+wear+cleaning+methods+abrasive+scratches - https://pubmed.ncbi.nlm.nih.gov/?term=ceramic+tile+scratch+resistance+abrasion
- https://www.sciencedirect.com/search?qs=porcelain%20tile%20scratch%20resistance%20abrasion
- Tile
https://en.wikipedia.org/wiki/Ceramic_tile - Porcelain
https://en.wikipedia.org/wiki/Porcelain - Mohs scale
https://en.wikipedia.org/wiki/Mohs_scale_of_mineral_hardness - https://en.wikipedia.org/wiki/Glaze_(ceramics
- https://www.britannica.com/technology/ceramic-tile