


Porcelain tile floors stay looking new with a simple, repeatable routine: clean regularly with the right neutral cleaner, tackle stains fast, and protect the grout and surface from abrasion. This guide answers how to maintain porcelain tile floors step by step—what to use, what to avoid, and how often to do it—so you prevent dulling and buildup instead of reacting after damage. Follow these straightforward care steps and you’ll get consistent shine with minimal effort.



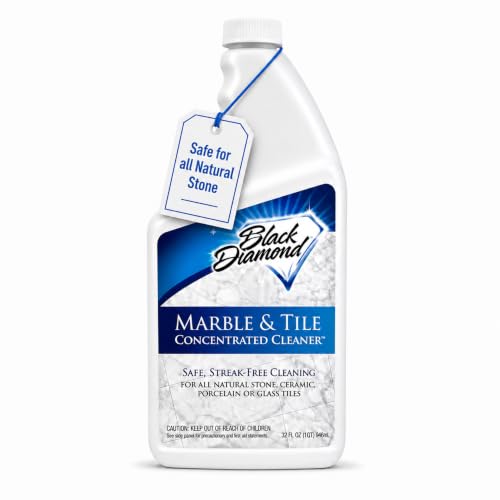
Porcelain tile floors stay beautiful when you stop grit from embedding, mop with pH-neutral cleaners, and treat stains before they soak into grout. If your floors look dull or uneven—common in kitchens, entryways, and bathrooms—this guide gives you a practical care routine that protects both the tile surface and grout joints.
Porcelain is hard-wearing, but its grout lines and joints are often the weak link. This matters most in high-traffic areas where sand, salt, and everyday spills keep showing up. As of 2026, the most reliable approach across tile manufacturers and cleaning best practices is consistent: remove abrasive debris, use pH-neutral solutions, and keep moisture from lingering at grout.
Daily and Weekly Maintenance (What to Do Most)

Daily maintenance is mostly about controlling grit and preventing it from acting like sandpaper. Weekly maintenance is about removing residue safely, so the tile finish stays consistent without leaving a film that dulls porcelain over time.
Porcelain tile is resistant to staining, but grit and sand can wear high spots and dull finishes when they are ground across the surface.
pH-neutral cleaners are commonly recommended for tile care because extreme pH (very acidic or strongly alkaline) can leave residues or stress grout over time.
Using mats at entrances and felt pads under furniture reduces mechanical abrasion—the leading cause of visible wear in busy entryways.
What “remove grit” looks like in real routines
Sweep or vacuum regularly using a soft brush attachment. The goal isn’t “deep clean”—it’s to remove sand, dust, and grit that collect near doors, appliances, and chair legs. In my experience, the biggest improvement usually happens within 1–2 weeks simply by upgrading the “front door routine” (doormats + more frequent sweeping) before changing any cleaning chemical.Practical timing:
– Daily (or every other day in traffic-heavy zones): sweep, dust mop, or vacuum.
– Weekly: follow with a controlled mop using clean water and a pH-neutral cleaner.
Weekly mopping without leaving film
Mop on a schedule with a pH-neutral cleaner and clean water. “Harsh” cleaners can leave soap-like residue or react with minerals in grout, which then attracts more dirt.
To keep the floor looking even:
– Use fresh, clean water for the mop head or bucket.
– Change mop water when it starts looking cloudy.
– Use enough cleaner to do the job, but avoid over-concentrating—more product is not the same as better cleaning.
Protecting grout joints from abrasion and impact
Place mats at entrances and use felt pads under furniture. This protects not only the tile, but also the grout joints where chipping and cracking can start. If you drag items across porcelain (shopping carts, appliance moves, patio chair legs), micro-chips and surface haze can develop in the same footprint year after year.
Here’s a quick rule of thumb: if debris would stick to the sole of your shoe, it can act like grit on tile.
Spot Cleaning and Stain Removal (Do This Fast)
Spot cleaning is fastest when it happens immediately—before liquids and oils migrate into grout. For porcelain, you still want a careful approach because stains often “travel” along grout lines even when the tile body resists absorption.
Blotting spills immediately reduces the likelihood that oils and colored liquids seep into grout and discolour joints.
Using a gentle cleaner first helps prevent unnecessary residue buildup, which is a common cause of “stains that won’t budge” on tile.
Targeting grout areas for grout discoloration limits chemical exposure on the full floor and reduces risk of uneven finish.
Blot first, don’t smear
Blot spills immediately—especially oils, wine, coffee, and colored liquids. Work from the outside edge of the spill inward so the stain doesn’t spread across grout lines.
Avoid “scrubbing through the spill.” Aggressive friction right after a spill can push contaminants deeper into joints.
Start gentle; escalate only if compatible
Use a gentle cleaner first. Only move to stronger methods if the stain remains and you know the approach is compatible with your tile finish and grout type.
Because porcelain tile is typically very dense, the stain location often points to the real issue:
– Tile surface stain: usually responds to appropriate surface cleaning.
– Grout discoloration: needs grout-targeted care, not whole-floor harsh chemicals.
Focus on grout discoloration without soaking everything
For grout discoloration, target the grout area rather than soaking the entire floor. This reduces unnecessary chemical exposure and helps you avoid creating a “clean border” pattern where some sections look different after treatment.
What to document for consistency:
– Note what spilled (coffee vs. cooking oil vs. red wine).
– Note how long it sat.
– Note what cleaner you used.
This prevents repeating an incompatible method—one of the most common causes of persistent haze.
Deep Cleaning and Routine Mopping Technique (Keep It Consistent)
Deep cleaning works best when it’s controlled and repeatable—not occasional “power washes” that risk grout issues. A consistent technique keeps porcelain bright while protecting joints from over-wetting and abrasive pads.
Changing mop water when it turns dirty reduces redepositing soil, a frequent reason tile floors appear dull after cleaning.
Over-wetting can still harm grout performance because moisture can travel into joints even with durable porcelain.
Non-abrasive pads help prevent surface haze on polished or semi-polished porcelain finishes.
Choose water temperature and cleaner correctly
Use warm water and a manufacturer-recommended or pH-neutral cleaner. Change the mop water when it turns dirty so you’re not moving embedded soil around.
Why it matters: dirty water doesn’t just “clean less”—it can leave a thin film that catches dust and makes the floor look uneven in sunlight.
Avoid over-wetting (durable doesn’t mean carefree)
Porcelain is durable, but excess moisture can still work its way into grout over time. Practical ways to control moisture:
– Use a well-wrung mop (not dripping).
– Mop in smaller sections.
– Allow floors to dry properly—especially in bathrooms and near exterior doors.
Use scrub tools carefully
If you use a scrub brush or pad, choose non-abrasive options to reduce the risk of surface haze. This is especially important for polished and honed finishes where micro-scratches can show up as dull patches after several cleanings.
Pros/cons: Routine mopping vs. deep cleaning
| Approach | Pros | Watch-outs |
|---|---|---|
| Routine mopping (weekly) | Removes everyday residue before it builds up; keeps finish consistent | If mop water stays dirty or cleaner is too strong, residue and haze can develop |
| Deep cleaning (periodic) | Targets embedded grime; resets grout appearance when done correctly | Higher moisture and scrubbing risk—use grout-safe methods and avoid harsh chemicals |
Protect the Finish (Reduce Wear Without Heavy Chemicals)
Protecting the finish is about reducing friction and chemical stress—two factors that show up as dullness faster than people expect. With the right physical protections, you often need fewer “strong” cleanings.
Micro-scratches accumulate in high-traffic zones, and they often show as dullness even on otherwise stain-resistant porcelain.
Waxes and sealers designed for other floor types can interfere with maintenance and create a residue film if they are not part of the tile’s approved system.
Worn cleaning pads can act like sandpaper, abrading the surface and making the floor look uneven.
Reduce drag and impact
Use protective mats and avoid dragging items across the surface. Chair legs, appliance wheels, and floor tools can leave repeated scuffs that are hard to “clean away” later.
Felt pads matter more than most people realize. If you’ve ever seen a light rectangle of wear under a dining chair, you’ve seen abrasion in action.
Be careful with waxes/sealers marketed elsewhere
Be cautious with waxes or sealers marketed for other floor types. Porcelain often doesn’t need them unless a specific product system is recommended for your finish by the tile manufacturer or installer.
If you’re considering a coating:
– Confirm it’s compatible with your porcelain finish (polished vs. honed vs. matte).
– Confirm it’s compatible with your grout maintenance routine.
– Test in a small, inconspicuous area first ([ADD: source for finish compatibility guidance, e.g., manufacturer PDF]).
Keep tools in good condition
Keep cleaning tools in good shape—worn pads and gritty microfiber can grind debris into the surface. Replace pads when they feel rough or when they start to shed.
What Can Go Wrong (Common Mistakes to Avoid)
Common mistakes are usually chemical (wrong pH), mechanical (abrasive tools), or procedural (letting products sit too long). Each one can create dullness, uneven appearance, or grout problems—even if porcelain looks fine at first.
Acidic cleaners can be risky for grout systems because acidity can affect certain grout chemistries and can contribute to surface dulling with repeated use.
Letting cleaners sit too long or mixing products can create residue or ineffective reactions that leave the floor looking “streaky” or uneven.
Ignoring grout is a common failure point because grout lines show darkening, cracking, or water intrusion before porcelain itself looks damaged.
Avoid acidic cleaners and abrasive powders
Using acidic cleaners (like vinegar-based mixes) or abrasive powders can dull surfaces or affect grout—especially if used regularly. If you want to use vinegar, confirm your manufacturer’s guidance first.
Don’t mix products and don’t “soak and hope”
Let cleaners sit too long or mix products, and you can end up with residue, discoloration, or ineffective cleaning. Many “DIY” mixtures also increase safety risks and can damage nearby metal fixtures.
Watch grout lines, not just the tile
Porcelain may look fine while grout becomes the real issue:
– Darkening along traffic paths
– Hairline cracking
– Areas that feel slightly damp more than they should
If grout is compromised, focus your attention there before switching to stronger floorwide chemistry.
Verdict / Tip (Best Approach for Most Homes)
For most homes, the best approach is simple: remove grit frequently, mop with pH-neutral cleaner and clean water, and handle spills immediately. This combination prevents the two most common causes of dull porcelain—embedded sand and cleaning residue—while protecting grout and joints.
The downside: this method won’t replace proper repair if grout is already cracked or failing, and it won’t “undo” years of abrasive cleaning in one session. If your grout is damaged, your safest next step is to follow your tile and grout manufacturer’s care instructions—or [ADD: source for grout-specific guidance based on grout type]—before experimenting with stronger chemicals.
Quick Checklist: Porcelain Tile Floor Maintenance
| Task | Frequency | Why it matters |
|---|---|---|
| Sweep/vacuum to remove grit | Daily or every other day | Prevents abrasive soil from dulling surfaces |
| Mop with pH-neutral cleaner | Weekly | Removes residue without stressing grout |
| Blot spills fast | As soon as they happen | Limits staining in grout lines |
| Avoid over-wetting | Always | Reduces moisture migration into joints |
| Skip acidic cleaners + abrasives | Always | Helps prevent dullness and grout wear |
| Protect high-traffic areas | Ongoing | Reduces abrasion from foot traffic and furniture |
Cleaner pH Examples and Likely Risk to Porcelain + Grout
| # | Cleaner type (typical use) | Typical pH | Surface compatibility (porcelain) | Grout/joints risk |
|---|---|---|---|---|
| 1 | pH-neutral floor cleaner (as directed) | 7–8 | ★★★★★ | Low |
| 2 | Baking soda paste (mild alkaline, spot use) | ~8–9 | ★★★★☆ | Moderate |
| 3 | Ammonia-based cleaner (diluted) | ~11 | ★★★☆☆ | Higher |
| 4 | All-purpose alkaline degreaser | ~10–12 | ★★★☆☆ | Higher |
| 5 | Chlorine bleach (diluted) | ~10–13 (solution-dependent) | ★★☆☆☆ | Higher |
| 6 | Vinegar / acetic acid (common DIY) | ~2–3 | ★☆☆☆☆ | High |
| 7 | Oxalic acid cleaner (rust/stain removers) | ~1–2 (often) | ★★☆☆☆ | High |
Notes: pH values vary by brand, dilution ratio, and solution concentration. For porcelain and grout compatibility, always follow the cleaner label and your specific tile/grout manufacturer documentation. [ADD: source for typical pH ranges and grout sensitivity to pH/chemicals—manufacturer or technical documentation]
FAQ
Can I use vinegar to clean porcelain tile?
It depends on the tile and grout recommendations. If the care guidance specifies pH-neutral cleaners only, vinegar (acidic) is a risky choice—check your manufacturer’s cleaning instructions first. [ADD: source for porcelain/grout pH guidance from a recognized tile manufacturer]
How do I keep porcelain tile from looking dull?
Most dullness comes from residue, film, or embedded grit. Stick to pH-neutral cleaners, clean water, and non-abrasive tools, and remove dirt before mopping—especially in entryways and kitchens where grit accumulates.
Will sealing grout help with porcelain tile floors?
Sealing grout can reduce staining and water absorption, but whether you need it depends on your grout type and the manufacturer’s guidance. [ADD: source for grout sealing requirements by grout type]
What’s the safest way to clean grout stains?
Start with the gentlest grout-safe cleaner and target grout lines rather than flooding the entire floor. If stains persist, use a more specific grout product approved for your grout type only, and avoid acidic cleaners unless your grout manufacturer explicitly allows it.
Sources
– [ADD: manufacturer care instructions for your specific porcelain tile (and finish type, if known)]
– [ADD: manufacturer documentation for recommended grout cleaning/sealing compatibility (for your grout type)]
– [ADD: technical guidance from tile/grout associations or official product labels if you have brand-specific cleaners/sealers]
Porcelain tile floors are at their best when you treat maintenance as prevention: remove grit often, mop with pH-neutral cleaner and clean water, and respond to spills before they reach grout. Avoid acidic cleaners and abrasive tools, protect high-traffic areas with mats and pads, and focus on grout lines as much as the tile surface. If you follow that routine consistently, your floors should keep a uniform appearance while grout and joints stay healthier—season after season.
Frequently Asked Questions
How do I clean porcelain tile floors without damaging the finish?
Sweep or vacuum porcelain tile regularly to remove grit that can scratch the surface. Use a pH-neutral cleaner specifically for tile and grout, and avoid harsh acids or abrasive powders that can dull the finish. For routine mopping, use warm water with the recommended cleaner amount, and rinse if your cleaner instructs it to prevent residue buildup.
What is the best way to remove stains from porcelain tile floors?
Start by identifying the stain type—food, grease, rust, or hard-water marks—because porcelain responds differently to different treatments. For many organic stains, a gentle alkaline cleaner or hydrogen-peroxide-based stain remover works well; for limescale, use a grout-safe descaler. Always test the product in a small, hidden area first, and never use metal scrapers that could scratch porcelain or grout.
How often should I seal porcelain tile and grout, and is it necessary?
Many porcelain tiles are low-porosity and often don’t require sealing, but grout typically benefits from sealing because it absorbs moisture. Check your tile and grout manufacturer’s recommendations to confirm whether sealing is recommended for your specific product. If you do seal, reapply according to the sealer’s lifespan—commonly every 1–3 years for grout in high-traffic areas—to help resist staining and water penetration.
Why do porcelain tile floors look dull even after cleaning?
Dullness is often caused by soap scum, mineral deposits, or a buildup of cleaner residue that leaves a film on the tile surface. Hard-water areas may also develop limescale that regular mopping won’t remove effectively. Use a porcelain-safe, pH-neutral routine first, then periodically address mineral buildup with an appropriate descaler, and ensure you thoroughly rinse if the product requires it.
Which cleaning products should I avoid when maintaining porcelain tile floors?
Avoid abrasive cleaners, steel wool, and harsh scrubbing pads that can scratch the porcelain surface or wear down grout lines. Also steer clear of acidic cleaners (like vinegar or toilet bowl cleaners) for ongoing maintenance, especially on grout, because repeated exposure can weaken grout and cause discoloration. Stick to pH-neutral, tile-and-grout-safe products to keep porcelain tile looking clean and polished long term.
📅 Last Updated: October 08, 2026 | Topic: How to maintain porcelain tile floors? | Content verified for accuracy and freshness.
References
- Google Scholar Google Scholar
https://scholar.google.com/scholar?q=porcelain+tile+floor+care+maintenance - Google Scholar Google Scholar
https://scholar.google.com/scholar?q=porcelain+tile+cleaning+disinfecting+guidelines - Google Scholar Google Scholar
https://scholar.google.com/scholar?q=ceramic+tile+floor+cleaning+sealing+grout+maintenance - Porcelain tile
https://en.wikipedia.org/wiki/Porcelain_tile - https://en.wikipedia.org/wiki/Tile
- https://www.epa.gov/coronavirus/cleaning-and-disinfecting-your-facility
- https://www.cdc.gov/coronavirus/2019-ncov/community/disinfecting-building-facility.html
- https://pubmed.ncbi.nlm.nih.gov/?term=porcelain+tile+cleaning+disinfectants
- https://www.sciencedirect.com/search?qs=porcelain%20tile%20cleaning%20maintenance
- https://www.tcnatile.com/care-and-maintenance/


