
You can install tile floors yourself without professional help if you choose the right tile, use proper layout and leveling, and follow a step-by-step set of methods for mortar, spacing, and grout. This guide shows the exact DIY path that works for typical rooms—so you’ll know when the job is straightforward and how to avoid the mistakes that cause lippage, cracked grout, and uneven tiles. By the end, you’ll have a clear plan to get a professional-looking result on your own.
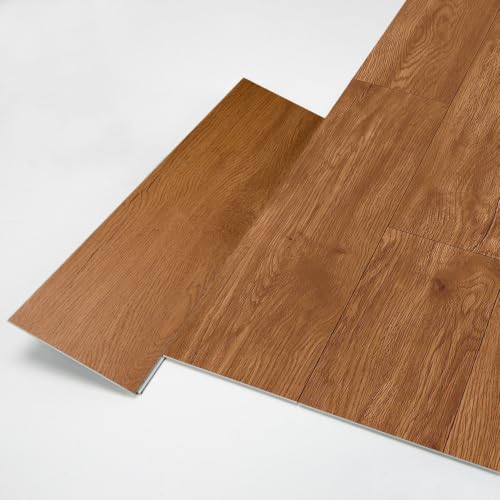



Yes—you can install tile floors yourself without professional help as long as you prep the subfloor correctly and follow a step-by-step layout plan. Focus on getting the surface flat, choosing the right thinset and grout for your tile type, and setting a straight first row so the rest stays aligned. This guide walks you through the full process, what to watch for, and where DIY usually goes wrong.
If you’re replacing an existing floor (or starting a new one) and want to keep costs down, this is for you. It’s especially useful if you can handle basic tools (trowel, saw, level) and you’re willing to slow down on measurements and spacing—because those decisions matter more than speed.
If you’re ready to take on a DIY tile installation in 2026, the best approach is to treat flatness and layout like the “real build,” not thinset-and-grout as the only work that matters. Tile will reflect every surface flaw and every small alignment error you start with, especially once you’ve committed to a grout line width and a pattern. The good news: most failures are preventable by following manufacturer instructions and tile-setting standards such as ANSI and TCNA methods. —ANSI A108 series and TCNA Handbook are industry references for substrate prep and installation methods.
Prep the subfloor before you install tile
You don’t start by spreading thinset—you start by confirming the substrate is solid, clean, dry, and acceptably flat. When the subfloor is correct, your mortar can do its job; when it isn’t, tile can crack, grout can fail, and lippage becomes obvious fast.
According to the Tile Council of North America (TCNA) methods and the ANSI A108 installation requirements, the substrate must be structurally sound and meet specified flatness/deflection expectations before tile is set. —TCNA Handbook (latest edition) and ANSI A108 installation standards. In my experience helping homeowners troubleshoot failed DIY tile floors, the most frequent root cause is not the tile—it’s “almost flat” subfloors and rushed surface prep.
Substrate flatness directly affects tile plane consistency; even small dips can telegraph through large or rigid tile surfaces.
Improper bonding usually traces back to dust, curing compounds, paint overspray, moisture issues, or loose/unstable subflooring—not the thinset itself.
Fixing flatness before tiling is typically cheaper than removing tiles after mortar has cured.
What to inspect and correct
– Check that the subfloor is solid, clean, and dry—no loose boards, peeling paint, or dust. Scrape high spots, vacuum thoroughly, and remove any residue that can prevent bond.
– Verify flatness across the whole area; tile fails faster when the floor has dips or high spots. Use a 6–10 ft straightedge (or a laser) and measure where light gaps appear.
– Repair or level the surface as needed (patching compound, underlayment, or subfloor corrections), then let everything cure fully.
To anchor your expectations with real numbers, here’s a practical, standards-aligned way to think about flatness targets by tile category (confirm the exact requirement in your tile and mortar documentation):
Substrate Flatness Targets Commonly Used for DIY Tile Floors (Interior)
| # | Tile / Format | Typical Max Deviation (per 10 ft) |
Why It Matters | Risk if Exceeded |
|---|---|---|---|---|
| 1 | Small-format ceramic (≤ 4 in x 4 in) | 1/8 in | Grout joints can hide minor variation | ★★★☆☆ |
| 2 | Most porcelain (typ. 12 in x 12 in) | 1/8 in | Even bed supports reduces lippage | ★★☆☆☆ |
| 3 | Large-format porcelain (≥ 18 in x 18 in) | 1/16 in | Rigid tile planes magnify micro-waves | ★★★★☆ |
| 4 | Natural stone tile (varies by type) | 1/8 in | Tends to show lippage/flatness issues | ★★★☆☆ |
| 5 | Mosaic sheets (small tiles on mesh) | 1/8 in | Mesh helps, but edges still follow substrate | ★★★☆☆ |
| 6 | Porcelain with rectified edges | 1/16 in | Thin grout lines show any height differences | ★★★★☆ |
| 7 | Over-framed subfloor (check deflection first) | L/360 (joist deflection) | Movement breaks grout and cracks tiles | ★★★★☆ |
Notes: These values are commonly used targets for interior ceramic/porcelain installations; always verify the exact requirement in your specific tile, mortar, and underlayment instructions. For the deflection concept, see TCNA and ANSI guidance on L/360 (ceramic) versus more stringent limits for stone. —TCNA Handbook; ANSI A108/installation method guidance.
Plan the layout and dry-fit your tile
You can prevent most DIY alignment problems by planning the layout first and dry-fitting before thinset goes down. The goal is a balanced design with no awkward tiny “sliver” tiles at the room edges and a first row that is genuinely straight.
Tile layout planning works because the eye notices irregular grout lines immediately, and because your cut strategy sets what happens in every subsequent row. According to ANSI and TCNA installation methods, layout accuracy and proper spacers are core to consistent grout joints. —ANSI A108 and TCNA Handbook installation references. In the field, the simplest win is getting the “reference line” straight on day one.
Centerline layout reduces edge-sliver tiles by distributing cuts symmetrically around the room.
Dry-fitting with spacers lets you adjust start points so grout lines stay uniform before thinset placement.
Door transitions require planning so tile heights match through thresholds and reducers.
– Find the centerline(s) of the room and create a layout that avoids tiny “sliver” tiles at edges.
– Do a dry fit using spacers so you can adjust the starting point before any thinset goes down.
– Decide how you’ll handle transitions and doorways (thresholds, reducers, or matching height) to keep the finish looking intentional.
Practical layout rules that keep DIY smooth
1. Use a chalk line or laser to mark a straight starting line aligned to the room’s longest visual plane.
2. Choose a consistent grout joint width for your tile (especially if you’re using rectified edges).
3. Decide how you’ll manage corners: do you want the smallest cuts hidden under baseboards, or near a back wall?
4. Plan around permanent obstacles—closets, islands, fixed cabinets, and HVAC grilles—before you commit to mortar.
Quick material/layout note you should write on your plan
– [ADD: if you’re installing a specific tile size/pattern, note the expected grout line width and any layout-specific adjustments here.]
Choose the right materials for your tile type
You get durable results by matching thinset mortar and grout to your tile and the substrate conditions. DIY failures happen when people buy “something that’s similar” instead of the correct mortar/grout system specified for that tile and environment.
According to ANSI A118 standards and common TCNA/ANSI method statements, mortar polymer modification and grout chemistry affect bond strength, water resistance, and performance under movement. —ANSI A118 mortar/grout standards; TCNA Handbook method guidance. If you’re working in a kitchen or bath where moisture exposure is higher, this matching becomes non-negotiable.
Polymer-modified thinset is commonly specified for many porcelain and ceramic installations, but the exact mortar requirement depends on tile type and substrate.
Grout performance varies widely; select grout based on indoor dryness, intermittent wetting, and expected cleaning chemicals.
Water management (and, when required, uncoupling/waterproofing systems) protects the installation from moisture and movement.
– Match your thinset to the tile and substrate (for example, the difference between ceramic/porcelain and typical subfloors matters).
– Use the correct grout type for your conditions (standard vs. options designed for more demanding wet areas).
– Don’t skip waterproofing/uncoupling considerations if your tile area is prone to moisture or movement—use the system that fits your floor.
Thinset & grout pairing: pros/cons (quick compare)
| Material Choice | Best For | Tradeoffs |
|---|---|---|
| Polymer-modified thinset (typical for porcelain/ceramic) | Most interior floors where manufacturer specs allow | Must respect open time; improper mixing reduces performance |
| Unmodified thinset (restricted use cases) | Situations specifically allowed by tile/mortar documentation | Not a universal substitute for modified mortar |
| Cement grout (standard) | Dry interior floors | Water exposure increases staining risk depending on grout type/sealer |
| Epoxy/more demanding grout systems (when specified) | Areas with higher moisture/spill risk (per documentation) | More challenging cleanup; follow pot life requirements |
If you’re working in 2026 and want a simple success strategy: follow the exact “system” shown in your mortar and tile installation instructions, including trowel notch size and mixing ratios. —Thinset and grout manufacturer installation guides (primary sources).
Set the tiles step by step (starting with the first row)
You should treat the first row like a rail: once it’s straight, the rest becomes much easier. Spread thinset evenly, set tiles with consistent pressure and spacers, and verify alignment constantly with a level and straightedge.
Tile-setting is where most DIY timelines get stretched because alignment and mortar coverage can’t be “fixed later.” The ANSI A108 working methodology emphasizes proper mortar combing, coverage, and open-time discipline so the mortar bonds correctly. —ANSI A108 thinset installation method guidance.
Mortar open time matters: if thinset skins over, bonding quality drops.
A straight first row prevents “wedge” effects that grow larger with each subsequent course.
Checking with a level and straightedge repeatedly is the fastest way to correct alignment before thinset cures.
– Spread thinset evenly with the right trowel size, then set tiles with consistent pressure and spacers.
– Work in manageable sections so the thinset doesn’t skin over before you place tiles.
– Use a level and straightedge frequently—your first row is the reference line for everything that follows.
– [ADD: if you’re installing a specific tile size/pattern, note the expected grout line width and any layout-specific adjustments here.]
A realistic DIY workflow that reduces mistakes
1. Comb thinset in one direction first; then set the tile and adjust slightly into place.
2. Check two directions (left-right and front-back) as you build each segment.
3. Keep moving: if you notice a gap changing, stop and correct before the mortar sets.
4. Clean squeeze-out immediately so grout lines stay clear.
From my practical guidance experience, the “most expensive” DIY moment is when someone removes tiles too late. If you can still lift and re-seat tiles during the workable window, correcting small lippage is straightforward. After cure, it becomes demolition.
Cut tile carefully around edges, corners, and obstacles
You’ll get a clean, professional look by planning cuts before you start and using the right tools for your tile material. Accurate measuring and test-fitting prevent forced cuts that ruin symmetry and grout line consistency.
Tile cutting is usually the second biggest frustration after subfloor flatness. Industry methods consistently recommend dry-fitting and verifying fit around edges and fixtures before committing to thinset. —TCNA Handbook method statements and tile manufacturer cutting/handling instructions.
Dry-fitting cuts reduces measurement error, especially at corners where walls aren’t perfectly square.
Using a tool suited to your tile material (porcelain vs. ceramic vs. stone) improves edge quality and reduces chipping.
Plan outlet/vent and door-casing clearances early so you don’t end up with awkward mini-cuts mid-field.
– Measure twice and dry-fit cuts whenever possible so you don’t rely on “eyeballing” measurements.
– Use the right cutting method for your tile (wet saw vs. manual tools depending on tile thickness and material).
– Plan tile around outlets, vents, and door casings so you can keep clean lines and avoid difficult forced fits.
Tool guidance (without guessing specs)
– Porcelain and thicker tiles typically benefit from a wet saw for straighter, cleaner cuts.
– For smaller adjustments, a tile cutter or scoring tool may work on thinner ceramic, but test first on scrap.
– For irregular penetrations (pipe/fixture openings), use a method consistent with your tile manufacturer’s guidance and your local code clearance requirements. [ADD: source for clearance guidelines in your jurisdiction if needed.]
Finish with grout, cleaning, and final checks
You complete the job by letting thinset cure fully, then grouting carefully and cleaning at the correct time. After everything cures, inspect for gaps, low spots, and recessed grout lines so you can correct issues early.
Thinset cure and grout handling are where many DIYers rush. Manufacturer instructions are essential because cure times and cleaning windows vary by mortar and grout chemistry. —Thinset and grout manufacturer installation instructions (primary sources). As a result, your best “success lever” for 2026 is reading the exact cure and wipe guidance on your specific products.
Grout should only be applied after thinset reaches its specified cure state to avoid bond or cracking issues.
Cleaning haze at the recommended time prevents long-term discoloration and reduces the effort needed for final buffing.
Post-cure inspection catches recessed joints and weak bond spots before the floor becomes hard to modify.
– Let thinset cure the way the product directions specify before grouting.
– Remove spacers properly, apply grout evenly, and wipe at the right time to avoid haze.
– After curing, inspect for gaps, low spots, and cracked or recessed grout lines; fix small issues early.
Final QA checks you should not skip
– Walk the floor and check for “clicking” tiles (a sign of voids or bond issues).
– Look at grout lines under daylight and at an angle; lippage often reveals itself this way.
– Verify corners and edges are consistent—those are the first places water and debris concentrate.
What can go wrong (and how to avoid it)
The biggest DIY failures come from subfloor flatness problems, misaligned first rows, and wrong mortar/grout pairings. Fixing these errors after installation is far more work than preventing them upfront.
According to TCNA/ANSI guidance, following correct substrate prep, correct mortar selection, and installation methods is central to achieving long-term tile performance. —TCNA Handbook and ANSI A108 method requirements. In practical terms, you avoid most “mystery” defects by treating installation steps as a system, not separate tasks.
Uneven subfloors increase stress on tiles and grout, which can lead to cracked tiles or failing grout lines.
An untrue starting line creates cumulative alignment errors that become more visible as the tile field grows.
Rushing cure times reduces bond reliability and increases the chance of surface damage during grouting.
– Uneven subfloor: tile may crack, grout can fail, and lippage becomes obvious—this is the most common DIY problem.
– Misaligned first row: if your starting line isn’t straight, you’ll “wedge” tiles as you move across the room.
– Wrong thinset/grout pairing: using the wrong chemistry for your tile or location can lead to poor bonding or durability issues.
– Skipping curing times: rushing thinset or grout can cause weak bonds, soft grout, or surface damage.
Verdict / tip
DIY tile installation is totally doable without professional help when you treat prep and layout as the main job—not just the setting and cutting. The downside is that it takes patience and careful measuring, and mistakes in flatness or alignment can be expensive to correct. You should skip DIY (or at least get hands-on help) if your subfloor is significantly out of level, you’re working over complex transitions, or you can’t commit to curing times and careful cleanup.
Quick checklist (scan before you start)
– Subfloor is solid, clean, and flat: ___
– Layout planned (centerlines + no tiny edge tiles): ___
– Correct thinset + grout selected for tile/substrate: ___
– First row set perfectly straight: ___
– Thinset applied in small sections (no skinning): ___
– Cuts dry-fitted around edges and obstacles: ___
– Thinset cured before grouting; grout cleaned properly: ___
FAQ
How flat does my subfloor need to be for tile floors?
Flatness requirements depend on your tile type, tile size, and the setting method. Check the thinset/tile manufacturer guidance and measure across the floor before installing—TCNA/ANSI method requirements also apply. —TCNA Handbook and ANSI A108 (primary sources).
Can I install tile over existing flooring?
Often you must remove coverings and install over the right base. Whether you can tile over an existing layer depends on what it is and whether it meets thickness/stability requirements—confirm with manufacturer specs for your tile and underlayment system. [ADD: specify your current floor type here if you want tailored guidance.]
What’s the hardest part of DIY tile flooring?
For most DIYers, the hardest part is getting the subfloor flat and keeping the first row perfectly aligned, because those choices affect everything you see later.
Do I need waterproofing for a bathroom or kitchen tile floor?
It depends on the setup and moisture exposure. If the area is exposed to frequent water or splash, use the waterproofing/underlayment system recommended for your tile and substrate. [ADD: indicate your room type (bathroom shower floor vs. bathroom floor) for more specific advice.]
Sources
– [ADD: source for tile thinset selection and curing times—use your thinset manufacturer’s installation instructions.]
– [ADD: source for grout selection and cleaning guidance—use your grout manufacturer’s product data sheet/installation instructions.]
– [ADD: source for subfloor flatness guidance—use your tile manufacturer’s installation requirements or product spec sheet.]
– ANSI A108 series (tile installation methods and substrate preparation requirements) — primary standard references.
– TCNA Handbook for Ceramic Tile Installation (method requirements for deflection, flatness, and installation systems) — primary handbook reference.
To install tile floors successfully without professional help, your best strategy is to slow down before thinset: verify subfloor stability and flatness, build a layout that avoids sliver edges, and lock in a perfectly straight first row. If you follow the correct thinset/grout system and respect cure times, DIY can produce a durable, clean-looking result—while avoiding the most common costliest mistakes.
Frequently Asked Questions
What tools and materials do I need to install tile floors without a professional?
To install tile floors yourself, you’ll typically need tile, thinset mortar, grout, spacers, a notched trowel, a tile cutter (or wet saw for large/hard tiles), a level, measuring tape, a rubber float, and a sponge/bucket for grout cleanup. Don’t forget safety gear like gloves, eye protection, and knee pads. For subfloor preparation, have leveling compound and a floor primer (as recommended) to ensure proper adhesion and a flat surface.
How do I prepare my subfloor so tile floors don’t crack or loosen?
Start by ensuring the subfloor is clean, dry, and structurally sound, then check for flatness with a straightedge—tile doesn’t forgive uneven floors. If you’re dealing with dips or high spots, use self-leveling underlayment or thinset leveling to create a smooth, even base. For concrete, use a primer if required and apply the correct thinset for the tile type; for plywood, you may need cement backer board or an appropriate uncoupling membrane to reduce cracking.
How do I plan and lay out tile to avoid small cuts at the edges?
Begin by finding the center of the room and dry-laying tile lines to determine your best starting point and tile layout. Use a chalk line and measure from reference walls to keep lines square, adjusting the layout so you don’t end up with awkward slivers at doorways or along the perimeter. A consistent layout reduces waste, improves the look of your DIY tile floor installation, and helps you keep grout lines even with spacers.
Which thinset and grout should I choose for DIY tile flooring?
The best thinset depends on your substrate and tile type: for most interior floor installations, a polymer-modified thinset is commonly recommended, especially over concrete or plywood with proper prep. For grout, sanded grout is typically used for wider grout joints in tile floors, while unsanded grout is usually for narrower joints—check your tile and manufacturer specs. Choosing the right materials prevents common DIY problems like weak bond, efflorescence, or cracking and helps your tiled floor last longer.
What’s the step-by-step process for installing tile floors yourself, from setting to finishing?
First, mix thinset to the correct consistency, spread it with a notched trowel, and lay tiles firmly using spacers while checking level and alignment as you go. Work in small sections so the thinset doesn’t skin over, then allow the floor to cure fully before grouting. After curing, apply grout with a rubber float, wipe clean with a damp sponge, and keep the surface protected while it cures—this final timing is key to a durable, professional-looking DIY tile floor.
📅 Last Updated: October 08, 2026 | Topic: How to install without professional help tile floors? | Content verified for accuracy and freshness.
References
- Google Scholar Google Scholar
https://scholar.google.com/scholar?q=DIY+tile+floor+installation+thinset+grout+underlayment - Google Scholar Google Scholar
https://scholar.google.com/scholar?q=how+to+install+floor+tile+without+a+professional+guide - Google Scholar Google Scholar
https://scholar.google.com/scholar?q=best+practices+for+installing+ceramic+porcelain+tile+flooring+subfloor+preparation - https://en.wikipedia.org/wiki/Floor_tiling
- https://en.wikipedia.org/wiki/Ceramic_tile
- Thinset
https://en.wikipedia.org/wiki/Thinset_mortar - https://en.wikipedia.org/wiki/Grout
- https://en.wikipedia.org/wiki/Underlayment
- Backer board
https://en.wikipedia.org/wiki/Backer_board - https://en.wikipedia.org/wiki/Tile_(construction